


Creating Standard Automatic Discounts
In this article
- Creating standard automatic discounts
- Video tutorial
- FAQs
Important:
Automatic discounts are currently available for Wix Stores, Wix Restaurant Orders (New), and Wix Bookings.
Create automatic discounts so customers can get price reductions without having to enter a coupon code. When customers buy items or services that qualify for discounts, the discounts are automatically applied.
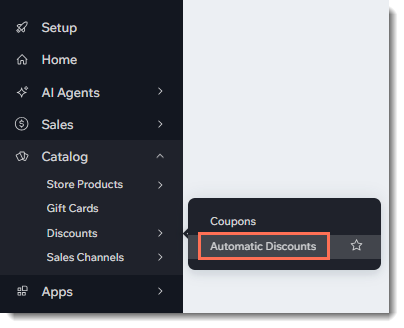
Show me how to access automatic discounts
Creating standard automatic discounts
You can create an automatic discount that applies to all your items, to specific items, or to a group of items. You can then decide what the discount is, when it's active, and which customers are entitled to it.
Tips:
- To keep things simple for both you and your customers, it's best not to create more than one automatic discount that applies to the same item.
- You can also create 'Buy X get Y' automatic discounts.
To create standard automatic discounts:
- Go to Automatic Discounts in your site's dashboard.
- Click Create Discount.
- Select Standard discount and click Continue.
- Enter the discount name.
Tip: Customers see this name. - Select the discount type from the What is the discount? drop-down and enter the required details.
Note: If you offer an Amount off discount (e.g. $10 off), it's applied to each relevant item in an order. - Select the items that the discount applies to.
- (Optional) Create minimum requirements for the discount to apply:
- Minimum quantity (e.g. buy 3 hats get $10 off):
- Select the Minimum quantity of items checkbox.
- Enter the number of items.
- Minimum amount (e.g. spend $50 on hats and get $10 off):
- Select the Minimum order subtotal checkbox.
- Enter the minimum amount.
- Custom requirement:
- Choose a preset requirement from the dropdown or click Create New.
- If prompted, enter the requirement details.
- Click Activate.
- Minimum quantity (e.g. buy 3 hats get $10 off):
- Select which customers are entitled to the discount:
- All customers: Any customer can enjoy the discount.
- Specific segments: Select one or more segments.
Note: Learn how to create contact segments. - Specific members: Select one or more members.
Note: For POS sales, see the FAQ below. - Specific contacts with label: Select one or more labels.
Note: Learn how to create and apply contact labels.
- Select the date and time when the discount starts.
- (Optional) Select the dates when the discount ends:
Note: By default, the discount starts immediately and doesn't have an end.- Select the Set an end date and time checkbox.
- Select the date and time when the discount ends.
- (Optional) Set a recurring schedule (e.g. 15% off all items every Sunday):
- Select the days.
- If you chose multiple days, select an option:
- Same time each day: Select what time the discount starts and stops on the relevant day(s).
- Different times each day: Select what time the discount starts and stops on each day.
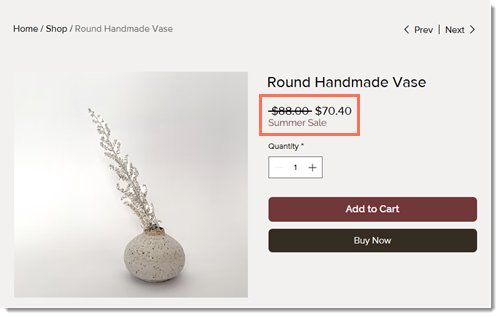
- Select where customers see the sale name and details.
Note: Learn more about displaying automatic discounts on your site. - Click Save.
Video tutorial
Watch the video tutorial, or scroll down to read the FAQs.
FAQs
Click a question below to learn more about automatic discounts.
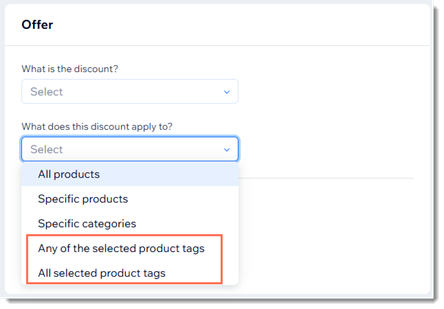
How can I apply an automatic discount to a group of store products?
What limitations are there when applying automatic discounts to Wix Bookings services?
How do discounts apply to Wix Bookings services that have add-ons or varied pricing?
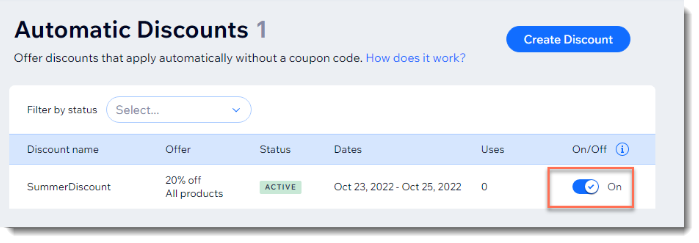
How can I manually enable or disable an automatic discount?
If I sell items at a point of sale, do the automatic discounts apply?
How can I edit, duplicate, promote, or delete an automatic discount I created?
 next to the relevant discount.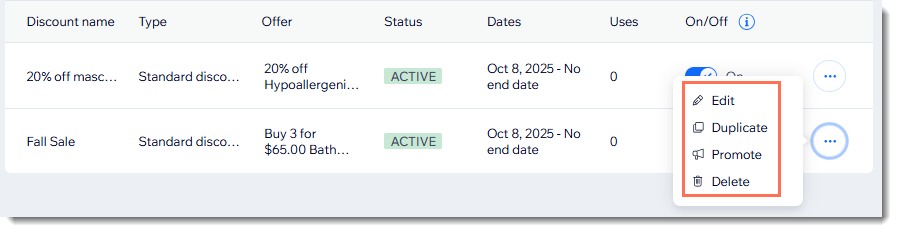
Why do I only see the discount name next to an item, but not the discounted price?
What are the best ways to let customers know about my store discounts?
How can my customers know that a discount is limited?
Does limiting the number of discounted items per order stop customers from purchasing multiple orders?
Can I apply an automatic discount to a store product subscription?
Do automatic discounts apply when selling through a sales channel?
How do 'amount off' standard discounts ($10 off) apply to a group of items?
If I set a minimum quantity or minimum subtotal, what counts towards the minimum?
What happens if I create a coupon in addition to the automatic discount?
What happens if more than one automatic discount applies to an order?
What time zone is used to set when a discount begins and ends?
My site has only automatic discounts, not coupons. Can I hide the promo code option?

What limitations are there to quantity discounts?
Can I access automatic discounts on the Wix mobile app?
 at the bottom, and going to Automatic Discounts under Catalog.