

CMS: Creating a Custom Form with Input Elements that Submit to Your Collection
20 min
In this article
- Step 1 | Create a collection and set the permissions
- Step 2 | Add input elements to your site
- Step 3 | Connect the input elements to your collection
- Step 4 | Create a submit button
- Step 5 | Customize the input elements
- FAQs
Create a custom CMS form that allows visitors to use input elements to submit their info directly to your collection. Input elements include text boxes, dropdown selectors, date & time pickers and more. This article walks you through creating a collection to store the submissions, adding input elements and a submit button, and using datasets to connect it all.
Need a simpler, prebuilt custom form?
Check out Wix Forms to view template forms that require less setup such as contact forms, order forms, registration forms and more.
Before you begin:
- Make sure to add the CMS to your site if you haven't already.
- For an overview of this process, check out our Ultimate CMS Guide video.
Step 1 | Create a collection and set the permissions
Create a collection where you will store the custom form submissions and set the collection permissions. You can choose the Collect content permission settings, then choose who should be allowed to add or view the content from your live site. Or, you can choose Advanced to specify who can view, add, update, and delete content for each role (everyone, members, item's creator, and collaborators).
You can add fields to the collection at this point but we recommend adding them later (step 3) when you connect the input elements. That way you can be sure that you're only adding the types of fields that can connect to each type of input element.
To create a collection for storing form submissions:
- Go to CMS in your site's dashboard.
- Click Create Collection.
- Click Start from scratch.
Tip: Alternatively, click Create with AI to let AI (Artificial Intelligence) create a collection for you. - Click Next.
- Enter a name for your collection. Let's refer to this collection as your 'Submissions' collection.
- (Coding only) Enter a collection ID to use in your code.
- Leave Multiple item collection (Default) selected and click Create.
- Click More Actions and select Permissions & privacy.
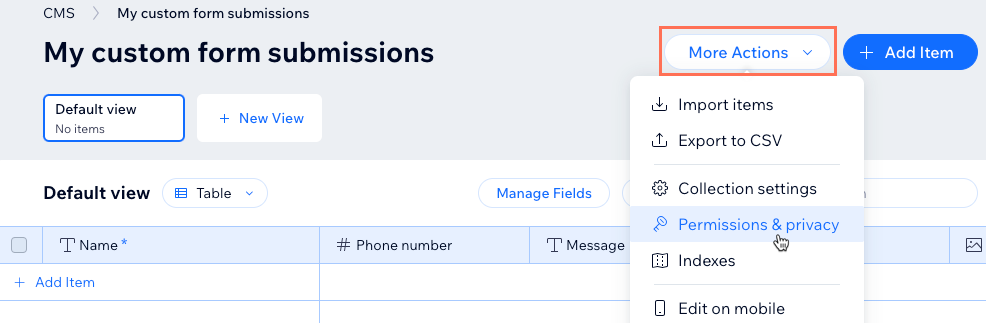
- Choose which permissions to use for the collection:
Collect content
Advanced


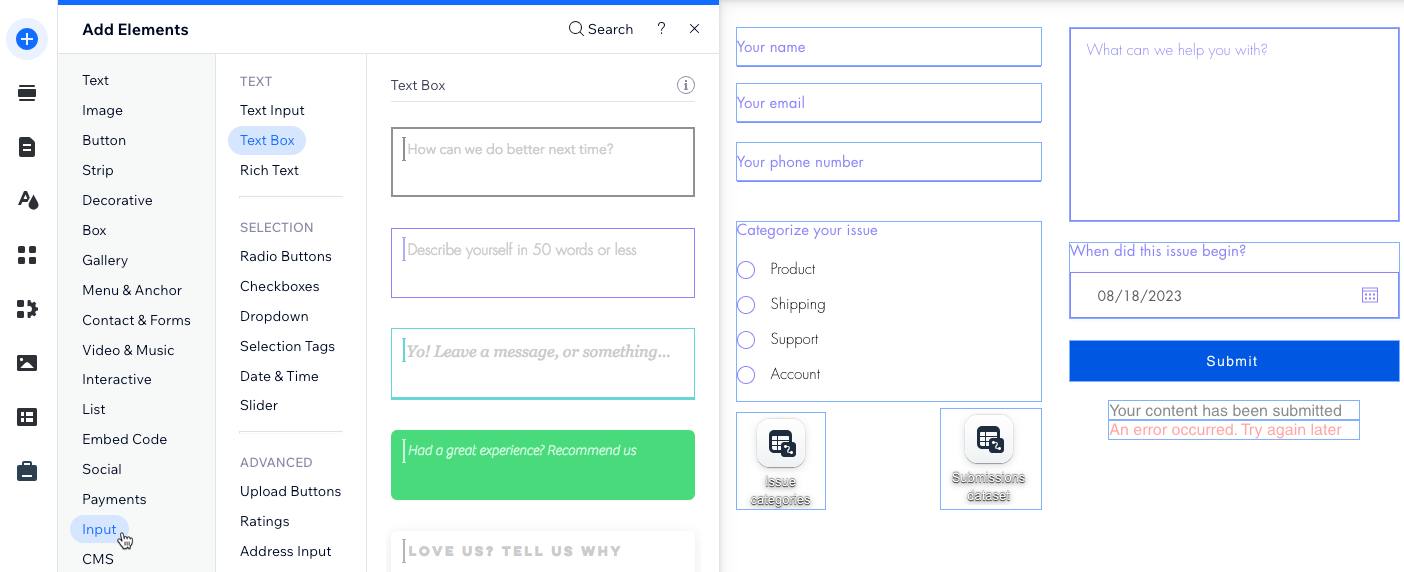
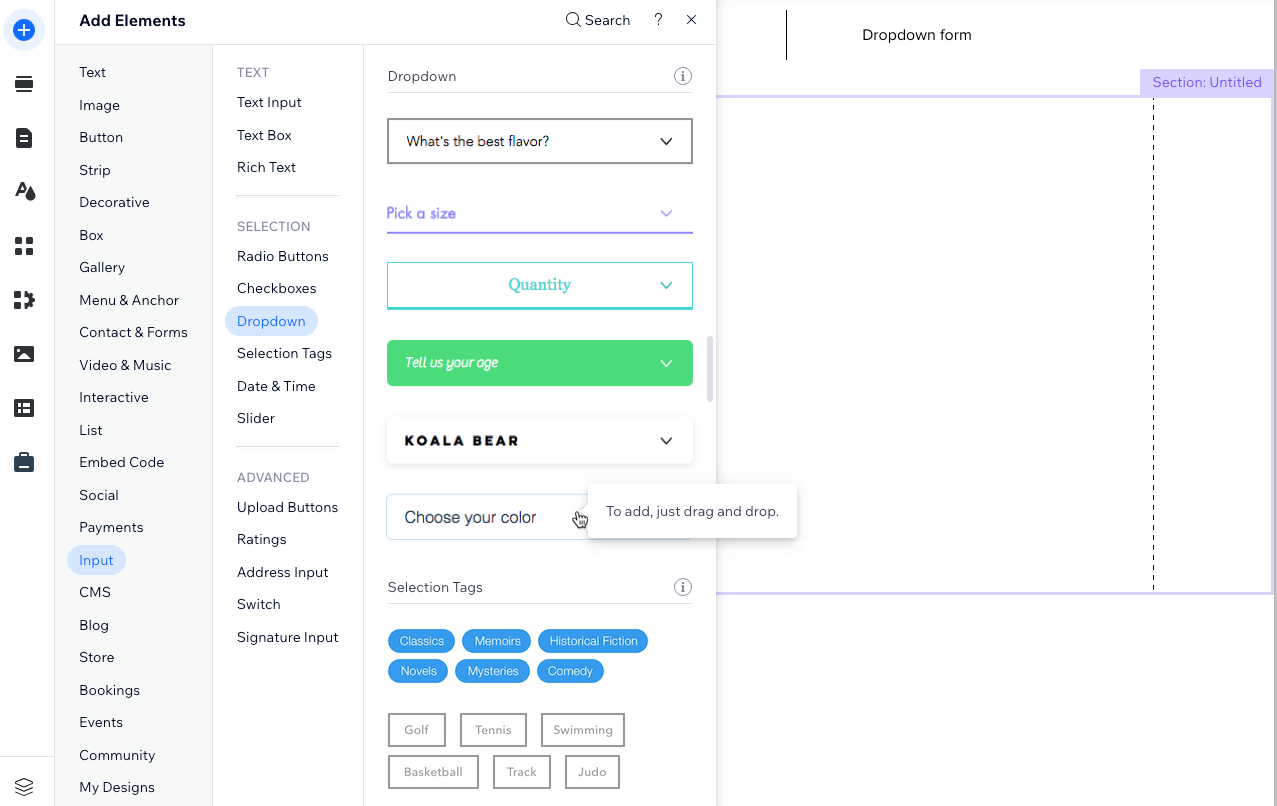
Step 2 | Add input elements to your site
Go to the page or section in your editor where you want to create the custom form. Then add all the input elements that visitors will use to submit their responses. Keep in mind that each input element has limitations to the types of data it can collect and the field types it can connect to.
Which input elements can be set to collect content?
You can choose from the following input elements that allow you to collect content: text input, text box, rich text, radio buttons, multi-checkboxes, single checkbox, dropdown, selection tags, date picker, time picker, slider, upload button, ratings input, address input, switch, and signature input.
Wix Editor
Studio Editor
- Go to your editor.
- Go to the page or section where you want to create a custom form.
- Click Add Elements
 on the left side of the editor.
 - Click Input.
- Click the type of input element you want to add.
- Click and drag the relevant input element onto the page.
- Repeat steps 3-6 above to add as many input elements as your form needs.
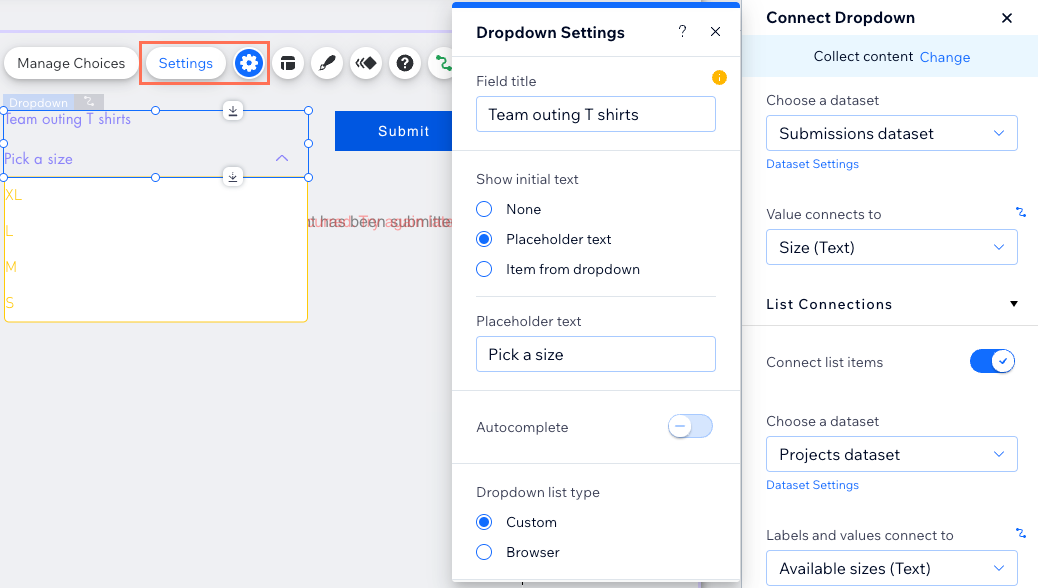
Step 3 | Connect the input elements to your collection
Connect each of your input elements to a dataset that connects to your 'Submissions' collection. Then connect the input values to new collection fields that match the type of data you want to collect.
You can connect the options that visitors select in dropdown and selection tag elements to items from another CMS collection. To do so, connect their list options to a different dataset that connects to a field in another collection. This dataset should be in the 'Read' or 'Read & Write' mode.
Wix Editor
Studio Editor
- In your editor, add a dataset that connects to your 'Submissions' collection:
- Click CMS
 on the left.
 - Click Add Content Elements.
- Click Form dataset.
- Click the Choose a collection drop-down and select the 'Submissions' collection.
- Give the dataset a name (e.g. 'Submissions').
- Click Create.
- Click CMS
- Click any of the input elements you added.
- Click the Connect to CMS icon
 .
. - Click the Choose a dataset drop-down and select your 'Submissions' dataset.
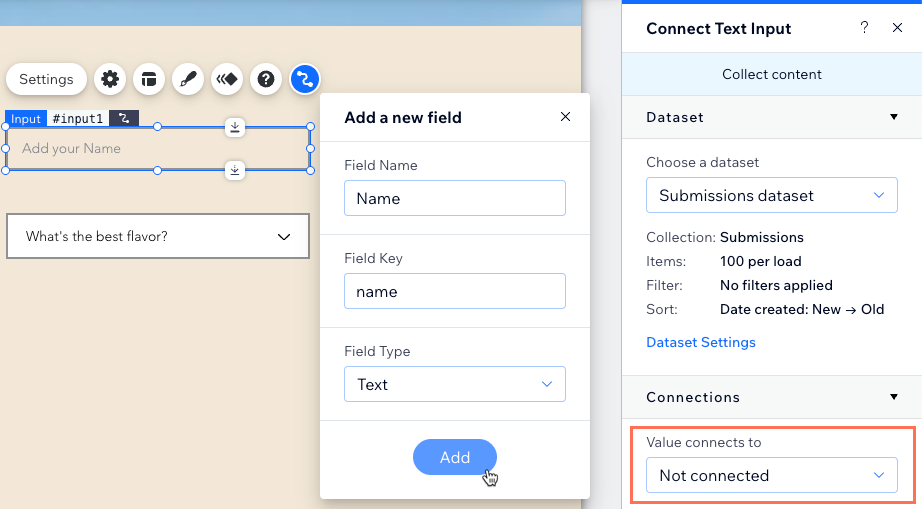
Tip: First click Collect content if prompted to choose between 'Filter content' and 'Collect content'. - Connect the input element to a new collection field:
- Click the Value connects to drop-down and select + Add:
- Enter the Field Name for the new collection field.
- (Coding only) Enter the Field Key that identifies this field in your site's code. This cannot be changed later.
- Select the Field Type from the drop-down. The field type determines what kind of data you can store in the field.
- Click Add.
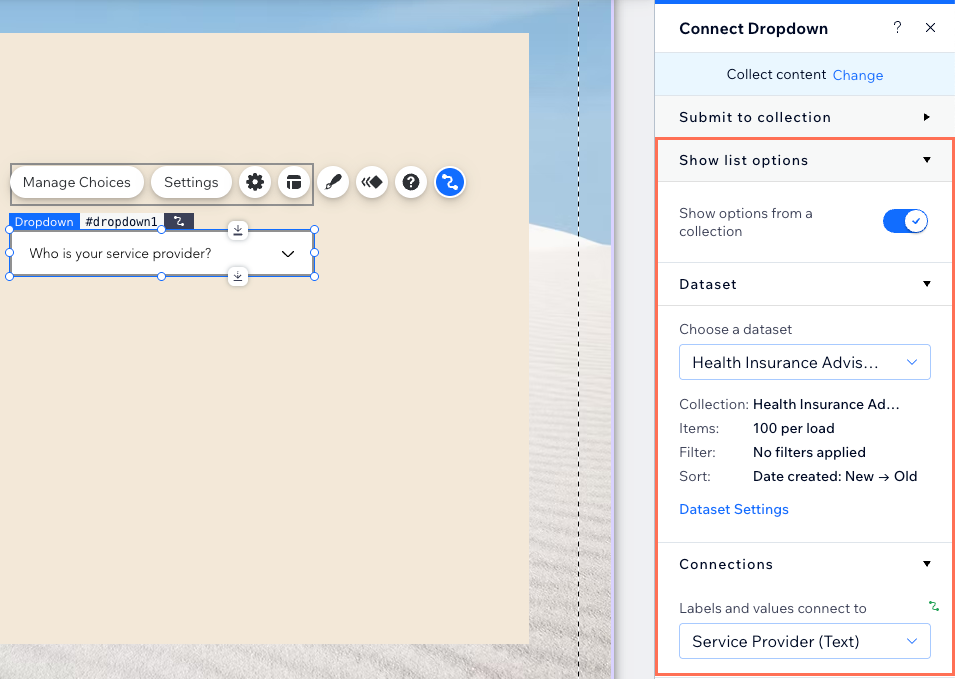
- (If connecting the list of items in certain input elements) Click the Show options from a collection toggle to choose where to manage the element's choices:
- Enabled: Use a field from another CMS collection for the choices. Connect the relevant dataset and choose the fields to use from the Labels and values connect to drop-down.
- Disabled: Click Manage Choices to create static choices for the element separate from the CMS.
- Repeat these steps for each of your custom CMS form's input elements.
What about the dataset modes?
- If you added a 'Form dataset', it's already set correctly to the 'Write' mode. This mode allows the dataset to add new items to the collection based on the input element submissions.
- If you connected the options that visitors select in dropdown and selection tag elements, make sure that separate dataset is in 'Read' or 'Read & Write' mode.
- If you need your CMS form to update existing collection items, set the 'Submissions' dataset to 'Read & Write' mode. Make sure the collection permissions also allow people with the relevant roles to update content.
Step 4 | Create a submit button
You need to create a way for visitors to submit the input element responses they entered or selected. Create a 'Submit' button by adding a regular button or image and connecting it to the dataset's 'Submit' click action. When visitors click the 'Submit' button, the values from all the input elements that connect to your 'Submissions' dataset are saved to your collection. Depending on the dataset mode and your collection permissions, the values are either added as new items or used to update existing items.
You can also create separate buttons for the following dataset actions:
- New: Add or update the collection items (depending on the dataset mode) and reset the inputs to accept new values.
- Revert: Reset the values in the input elements that have not yet been submitted.
- Delete: Remove selected items from your collection ('Read & Write' mode only).
- Next page/ Previous page: If you are displaying the items that visitors are editing in a gallery or repeater, you can add these buttons to let visitors navigate through "pages" of items. If you created your form on a dynamic item page, use the Next dynamic page / Previous dynamic page click action instead.
Wix Editor
Studio Editor
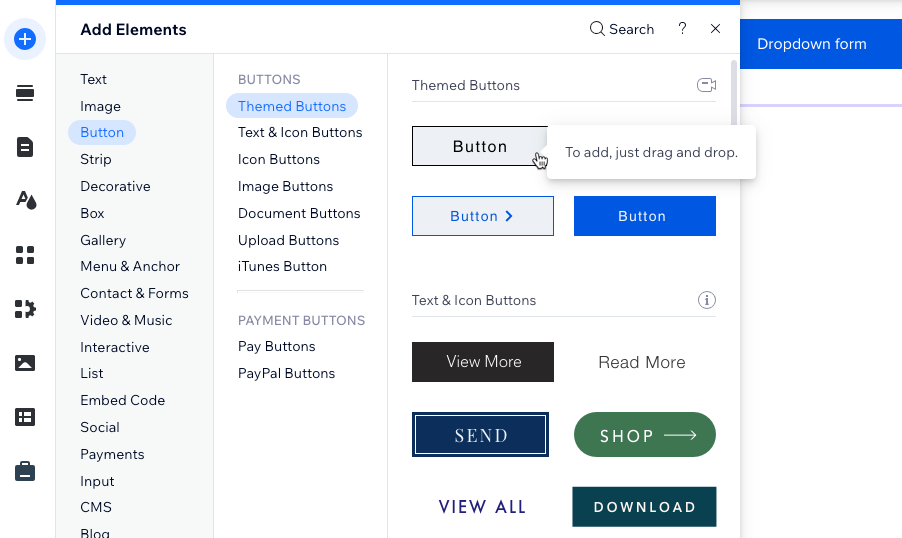
- Click Add Elements on the left side of the editor.
- Click Button.
- Click and drag the button you want to use as your submit button onto the page. You can use any of the following button types: Themed Buttons, Text & Icon Buttons, Icon Buttons, or Image Buttons.
Tip: Alternatively, you can add an image and use it as your submit button.
- Click Change Text & Icon and enter the text you want to display on the button (e.g. "Submit").
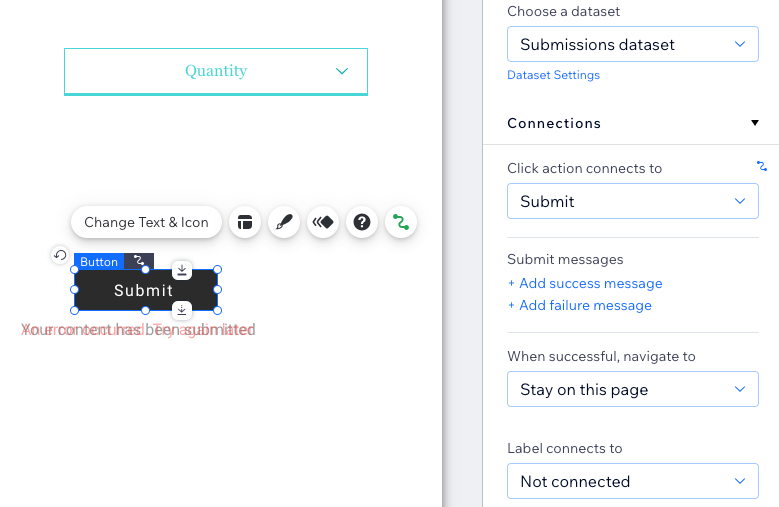
- Click the Connect to CMS icon .
- Click the Choose a dataset drop-down and select the dataset connected to your submissions collection.
- Click the Click action connects to drop-down and select Submit.
- (Optional) Add success and failure messages that appear when submissions are submitted successfully or unsuccessfully:
- Click + Add success message then click + Add failure message.
- Click and drag both messages to the place where you want them to appear. They can overlap because the messages do not display at the same time.
- Click Edit Text on each message to edit the messages.
- Select the button and click the Connect to CMS icon . Then click the When successful, navigate to drop-down, and select an option:
- Stay on this page: The visitor stays on the same page after submitting the form.
- A link: The visitor is redirected to another page after submitting the form. Click Choose under Choose a link and set up the link.
- Click the button and select the Design icon
 to customize the appearance of your submit button.
Step 5 | Customize the input elements
You can customize each of your input elements to create a cohesive looking form that matches your site's look and feel.
Wix Editor
Studio Editor
- In your editor, click any of the input elements that you want to customize.
- Click Settings to enter the field title, set the field as required, or adjust various settings depending on the input type.
- Click the Layout icon
 to adjust the text alignment and other layout options.
 - Click the Design icon
 to choose a preset design, then select Customize Design to further adjust the appearance of the element.
 - Repeat these steps for each input element you want to customize.
Ready to go live?
Click Preview at the top right of your editor to test out your new custom form. When everything looks great and works perfectly, click Publish to make the changes go live.
If you've enabled Sandbox, sync your Sandbox collection to the live collection to make the database changes go live.
FAQs
Click a question below for answers to the most common questions about creating custom forms using input elements.
How do I find my 'Submit' button's success/failure messages in the editor?
Can I automate what happens when I receive form submissions?
Can I export the submissions that get saved to my collection?
Can site visitors use input elements to filter the content that appears on my site?
Where do the list options come from if I connect dropdown or selection tag lists to reference fields?
Can I set up my collection fields first before adding input elements?
Can I display form submissions in a table, gallery, or repeater?
How can I allow members to update their own submissions?
How can I troubleshoot if my upload button is not working?
How do I connect multiple forms to a single CMS collection?
Are the success/failure messages accessible-friendly?
Can I save responses at each step in a multi-step form?
