


CMS: Creating Custom Roles and Permissions
5 min
In this article
- Creating custom roles that allow CMS access
- FAQs
Set up precise access controls for your teammates and collaborators in your CMS (Content Management System) by creating custom roles. Define what actions collaborators can take in the CMS, such as managing content and collections. These roles can also include permissions from other areas, such as the Editor, Sites, or Stores, to match collaborators' site-wide responsibilities.
You can create as many custom roles as you need, assigning different collaborators varying access levels to your CMS collections. Once roles are assigned, use each collection's advanced permission settings to set permissions for specific roles and fine-tune their access.
Creating custom roles that allow CMS access
Choose the 'Manage Content' permission to allow collaborators with the role to access your CMS collections. Without this permission, collaborators cannot access the backend CMS or its collections. You can set an individual collection's advanced permissions to specify access levels or roles that have CMS access.
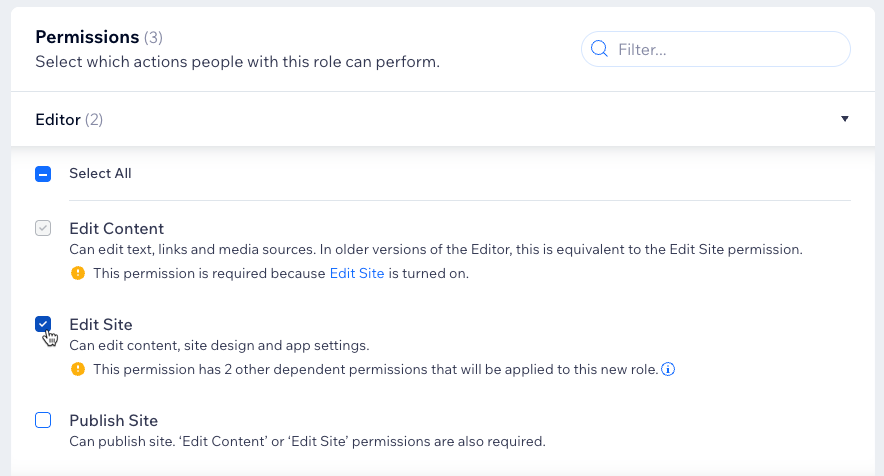
If you select certain permissions, such as 'Editor > Edit Site', the role automatically becomes an admin role. This gives collaborators with the role unrestricted, full access to the CMS.
To create a custom CMS role:
- Go to Roles & Permissions in your site's dashboard.
- Click Manage Roles at the top.
- Click + Create New Role.
- Enter the Role Title and Description in the relevant fields.
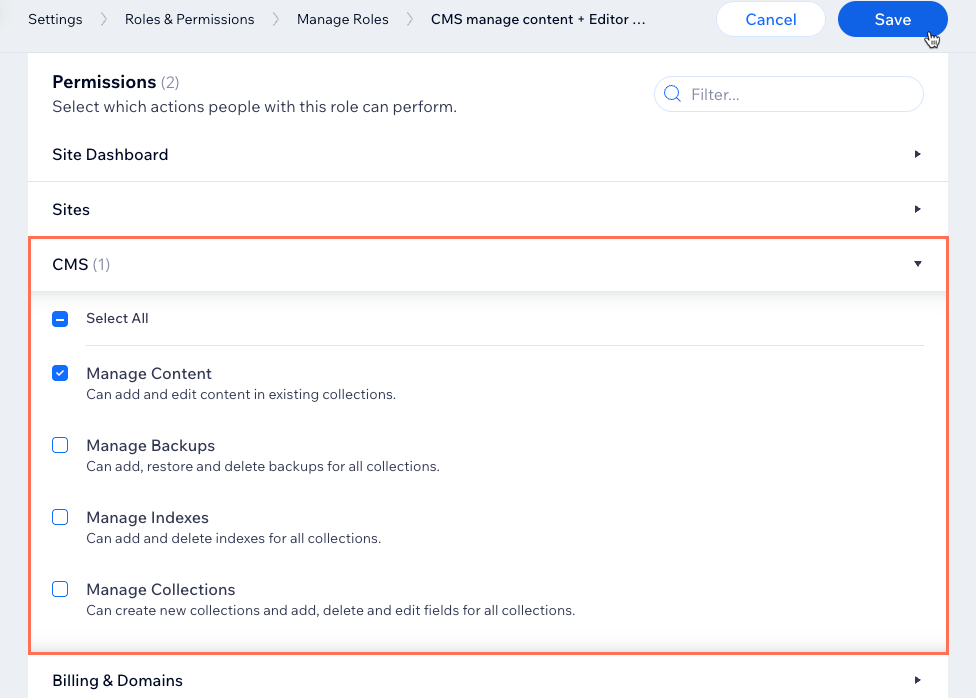
- Click CMS in the Permissions section.
- Select the checkboxes next to the permissions you want to assign to the role:
- Manage Content: Can view, add, and edit content in existing collections.
- Manage Backups: Can add, restore and delete backups for all collections.
Note: Make sure to also select Manage Content to grant access to the CMS so collaborators with the role can access the CMS and use backups. - Manage Indexes: Can add and delete indexes for all collections.
Note: Make sure to also select Manage Content to grant access to the CMS so collaborators with the role can access the CMS and use indexes. - Manage Collections: Can create new collections, delete collections, and add, delete, or edit fields in all collections. Selecting this permission also selects the Manage Content permission.
Make sure to set the collection permissions:
If you want collaborators with the Manage Content or Manage Collections permissions to be able to add and update items in CMS collections, make sure to set Advanced collection permissions, then select the Add and Update checkboxes next to Collaborators or next to a specific collaborator role. Learn more about advanced collection permissions.
- (Optional) Add permissions from other areas such as Editor, Sites, or Stores:
- Click the relevant drop-down (e.g. Editor, Sites, Stores).
- Select the permissions you want to assign to the role.
Important:
Admin roles grant collaborators full access to the CMS and access to other areas of managing your site. You cannot restrict admins from having full access to the CMS. The following permissions automatically make the role an 'admin' role:
- Editor: Edit Site
- Studio Editor: Edit Code
- Studio Editor: Edit Site Structure
- Velo: Access developer tools
- Click Save.
FAQs
Click below for answers to common questions about custom CMS roles.
Can I duplicate a preset role to edit its permissions and make it a custom role?
Does selecting 'Manage Collections' automatically make a role admin?
What is the difference between custom roles and admin roles?
What makes a collaborator an admin?

How do my site's collaborator roles and permissions work with collection permissions?
Can I restrict admin roles from accessing the CMS?
Can I change a custom role’s permissions after it’s created?
