


CMS: Importing Content into a Collection
In this article
- Preparing your CSV file for upload
- Importing collection content from your CSV file
- Using sandbox collections when updating existing items
Save time and effort by importing content to your CMS (Content Management System) collection from a CSV (comma-separated value) file.
This feature can be particularly helpful if you already have all your information stored in a spreadsheet, or if you want to
export your content, make changes to it in a spreadsheet application, and then import it back into your collection.
Important:
You cannot import a CSV file directly into a new
catalog collection. To bulk-add items, import your CSV file into a regular content collection first, then convert that collection to a catalog collection. After the collection is converted, CSV imports into that catalog collection work normally.
Preparing your CSV file for upload
When importing to an existing collection, make sure to include every field and value that you want your collection to have after the import. If you do not map an existing collection field to a column in your file, every value in the existing field is erased. This does not apply to system fields such as the ID, Created Date, Updated Date, Owner, or dynamic page links.
You can
export your existing collection first, to make sure that the data you want to work with and import later contains all the relevant fields and values.
Prepare your CSV file according to the following guidelines:
- The first row of your file represents the header. Each column of the first row is imported as a field in your collection.
- The remaining rows are imported as items in your collection. Each cell value is imported as content within your collection fields.
- The file must use commas as the delimiter between fields.
- The file size cannot be larger than 1 GB.
- The file cannot have more than 50,000 items. If you need to import more items, save them in separate CSV files and import them one by one.
- The file cannot have more than 1,000 total fields.
Other factors to consider when preparing your file:
- Your CSV file's name doesn't necessarily need to match your collection's name.
- If your collection includes non-Latin characters, ensure that your CSV file is encoded in UTF-8.
- If Sandbox mode is enabled, syncing your Sandbox collection with Live will copy the content to your Live collection. Learn more about syncing Sandbox and Live collections.
Rules and limitations of different field types:
Your CMS collection can store different types of content in each field type. The content is not validated when you import, so make sure to match the content to the correct field types.
ID

Boolean fields

Date and Time fields


Reference fields
Exceptions
Importing collection content from your CSV file
Now that your CSV file is prepared, go to the relevant collection to import it. For each column, you can choose whether to import it as a new field or to replace an existing field. By default, columns that have the same names or keys as existing fields in your collection are mapped together.
Importing a CSV file overrides the values in your existing collection:
- If you do not map a column to an existing field, all the values in the field will be erased when the import is complete. This does not apply to system fields such as the ID, Created Date, Updated Date, Owner, or dynamic page links.
- If you uncheck a column to prevent it from being imported, and your collection has a field with the same name, the values in the existing field will be erased unless you map another column to the existing field. This behavior does not apply to system fields.
To upload your CSV file:
- Go to CMS in your site's dashboard.
- Click the More Actions icon
 on the relevant collection and select Import items to collection.
Note: If you haven't created a CMS collection yet, click Create Collection, select Import from CSV, then click Next.
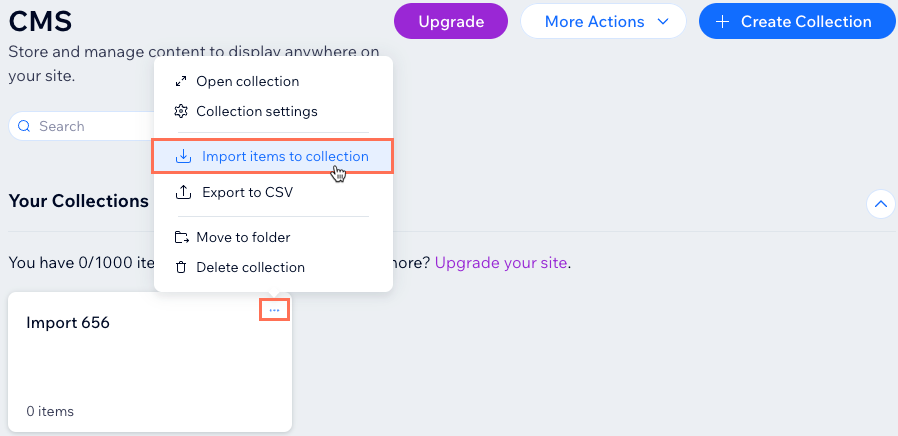
- Click Choose a File.
- Select the CSV file from your computer and click Open.
- Map each imported column on the left to new or existing fields in your collection. For each column, choose what you want to do:
- Select the checkbox if you want to import the column to a new or existing field. Uncheck the checkbox if you do not want to import the column.
- Click the Configure Column drop-down and choose an option:
Existing field


New field


Make a mistake?
When importing a file to your collection, a backup is created in the background. This process does not overwrite the automatic backup of your collections. Instead, it creates a manual backup you can use to
restore your collection to its pre-import version.
Using sandbox collections when updating existing items
If you're using the Sandbox feature, remember to
sync the content from your Sandbox to your Live collection after importing your CSV file.
When Sandbox is enabled, you can import content directly into your Sandbox collection in your editor. During this import, you can also add new fields to your
collection structure. This means you can include columns in your CSV file that aren't already in your collection.
