

Wix Smart Chat: Adding and Setting Up Wix Smart Chat
7 min
In this article
- Step 1 | Add Wix Smart Chat to your site
- Step 2 | Configure your Smart Chat's settings
- Step 3 | (Optional) Train and test the AI
- Step 4 | Publish your site to activate Smart Chat
- FAQs
Wix Smart Chat is a customizable on-site chat interface that supports your site visitors in the way that best fits your business, with AI-powered answers, direct replies from your team, or a mix of both. Learn how to get started and set yourself up for success.
Step 1 | Add Wix Smart Chat to your site
Add Wix Smart Chat to your site via the Wix App Market and add the chat widget in your editor. Then, choose how the Smart Chat engages with visitors - in a manual or AI mode.
To add Wix Smart Chat to your site:
Dashboard
Wix Editor
Studio Editor
Harmony Editor
- Go to the Wix Smart Chat app in the Wix App Market.
- Click Add to Site.
Note: You'll be redirected to the editor where the chat widget is added to your site. You can stay in the editor to customize the chat or continue with the steps in this article to complete the dashboard setup first. - Choose how to reply to your visitors in the window that pops up:
- I'll reply myself (Using Manual Chat): Visitors send you messages and you reply from your Inbox when you're available. Click Start with Manual Chat to continue.
- Let AI reply for me (Using AI Chat 24/7): Your AI assistant answers visitors using your site's content and captures leads automatically. Click Start with AI Chat to continue.
Tip: Selecting this option takes you to the Smart Chat's testing environment where you can check how the AI answers questions.
Note:
If you don't select a chat mode, the Smart Chat stays in Manual Chat by default. It will continue indexing your site in the background, so you can switch to the AI chat at any time.
Step 2 | Configure your Smart Chat's settings
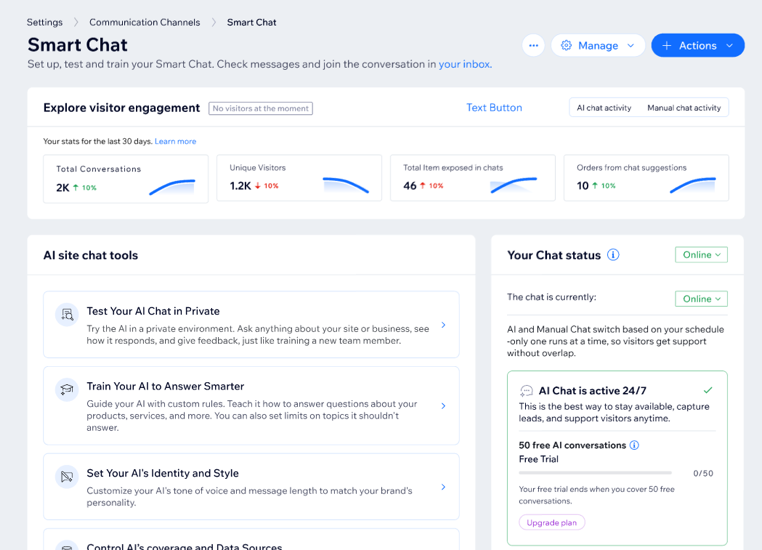
To continue setting up Wix Smart Chat, head over to your dashboard. The Wix Smart Chat dashboard provides you with useful tools such as:
- Visitor engagement stats: View data about AI and manual conversations, such as chat volume and engagement trends.
- AI chat tools: Open shortcuts to various chat tools that help shape the AI chat experience.
- Your chat status: See if the chat is online, offline, inactive, or needs your attention, based on your availability settings.
- Business setup recommendations: Review AI-generated insights from your conversations and suggested next steps to help you get more value from Wix Smart Chat.
Configure how Wix Smart Chat supports your site visitors by setting up its behavior, specifying the content sources, and fine-tuning how the AI should interact in a way that aligns with your brand.
To configure your Smart Chat's settings:
- Go to Smart Chat in your site's dashboard.
- Choose what you want to set up:
- The chat's general settings: Control how the chat works on your site by setting the availability mode, offline behavior, contact form options, and avatars.
- Exclude site pages: Prevent specific pages from being used in AI answers (e.g. outdated pages or legal information).
- Identity & style: Set the AI's tone and response style to match and sound like your brand.
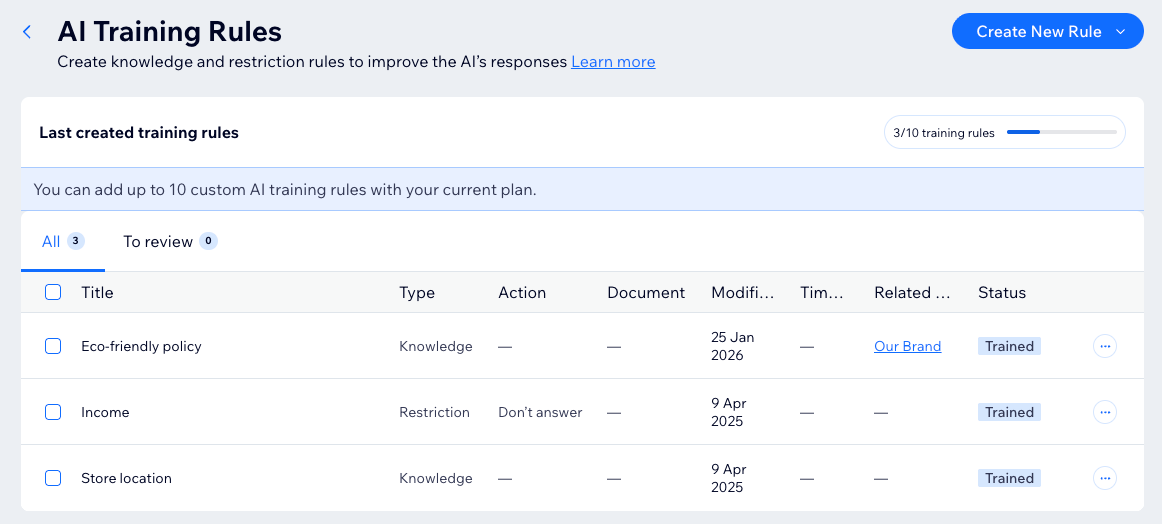
Step 3 | (Optional) Train and test the AI
Training and testing the AI helps improve the answers it gives your site visitors. By adding training rules, you can teach it about your products, policies, and services, or restrict it from answering topics you do not want it to cover.
Test the AI in your dashboard by asking the kinds of questions visitors might ask about your business. Then give feedback to improve its answers over time.
Tips:
- Regularly update and test the Smart Chat to keep it aligned with any changes in your products, services, or business strategies.
- You can test the AI any time you want, even if the Smart Chat is set to Manual Chat mode.
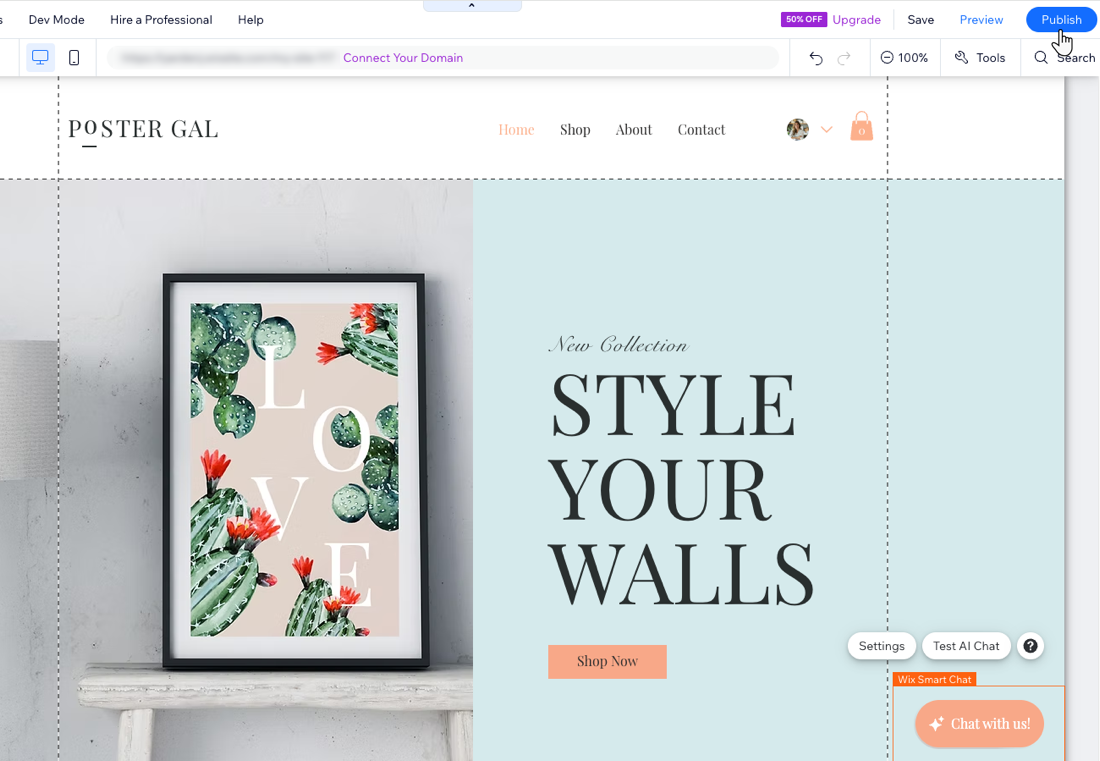
Step 4 | Publish your site to activate Smart Chat
When you're ready, publish your site to make the Smart Chat available to site visitors. The chat widget, and any changes you make to the widget's design, only goes live after publishing. Any changes you make in the dashboard settings don't require publishing to take effect.
What's next?
- Customize the chat widget's design to reflect your brand's style.
- Check viewer engagement stats to understand the AI and manual chat performance.
FAQs
Click a question below to learn more.
Can I see the interactions between the AI and my site visitors?
Can I send site visitors payment requests, coupons, or links through Wix Smart Chat?

How do I delete the chat from my site?
