

Studio Editor: Saving, Previewing and Publishing Your Site
6 min
In this article
- Saving a site
- Accessing your site's saved versions
- Previewing a site
- Previewing test sites
- Publishing a site
- FAQs
In the Studio Editor, sites are automatically saved so you never have to worry about losing your changes. However, you can always manually save the site you're working on.
Finished working on a design? Use the preview mode to see how it looks on each breakpoint. You can then decide whether to publish or continue editing.
Saving a site
Studio Editor sites are saved automatically, after every change you make. However, you can save a site manually, whenever you wish.
To manually save a site:
- Go to your editor.
- Click the Wix Studio icon
 at the top left.
 - Hover over Site.
- Click Save.

What's next?

Once you save a site, an indication appears at the top left of the Editor. It also appears every time the site is auto-saved.
Accessing your site's saved versions
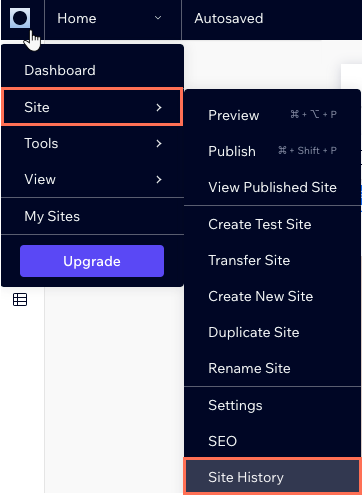
Your site history is a record of every time that you (or someone working on the site) has saved or published. Access the site history to check when a change was made, who performed the change or to restore a previous version.
To access previous site versions:
- Go to your editor.
- Click the Wix Studio icon
 at the top left.
 - Hover over Site.
- Click Site History.
Previewing a site
As you're working on a site in the Studio Editor, you can see how it will look live across all breakpoints. The preview shows the site on your current screen size, but you can change it to test the responsiveness of your design.
To preview a site on desktop:
- Go to your editor.
- Click the Preview icon
 at the top right.
 - View the site on different screen sizes by doing one of the following:
- Click the screen size drop-down at the top to select a different device.
- Define the width and height of the screen in pixels.
- Drag the handles to increase or decrease the width.
- Click Preview on mobile device
to directly access a test site on your mobile.
- Click Edit Site to continue editing, or Publish to make your changes live.
Good to know:
If you want to preview a different site page, select the page from the drop-down at the top left.
Previewing test sites
Created a test site? You can check how it looks on both desktop and mobile devices from your editor. Test sites are a great way to ensure the site looks great on all screen sizes, and get feedback from collaborators and clients.
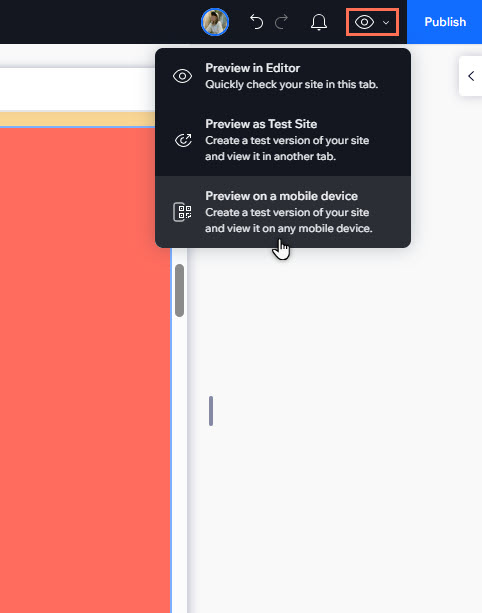
To preview a test site:
- Go to your editor.
- Click Preview
at the top right to open the drop-down.
- Choose where you want to preview the site from:
- Desktop: Click Preview as Test Site.
- Mobile:
- Click Preview on a mobile device.
- Scan the QR code on your mobile device.
Note:
- If you haven't created a test site before, you can do so by following the steps above and selecting to create a test site in the pop-up.
- In order to create a test site, the site needs to have been published at least once.
Publishing a site
Click Publish at the top right of the editor to make your changes live.

If you're publishing a site for the first time, it gets a URL that makes it officially live on the web. The web address depends on whether it's a free site or a site that was upgraded:
- Free site: https://accountname.wixstudio.io/site-name
- Premium: The site can get its own domain (e.g. mystunningwebsite.com), whether it's purchased from Wix or connected from another host.
You can also schedule your client's site to publish automatically with Wix Automations. Choose the exact date and time, and skip the stress of doing it manually. It's perfect for big launches or updates.
Publishing a site with code?
We automatically analyze your code and validate the syntax. If errors were found, you'll be able to either continue with the publish or return to the editor and look into the matter.
FAQs
Click a question below to learn more.
Why does the site look different on preview?
Can I send my client a preview of the site?
 at the top left.