

CMS: Creating a Collection
8 min
In this article
- Creating a CMS content collection
- FAQs
In the CMS (Content Management System), collections are databases where you store content that can connect to your page elements. Collections consist of fields that determine the type of content you can store for each item in the collection.
When you create a new collection, choose from the following types:
- Content collection: Store and manage any type of content to use across your site, such as team members, blog posts, testimonials, or project portfolios. Content collections can hold multiple items in a table layout, or a single item in a form layout. Learn more about single item collections.
- Catalog collection: Store items you want to sell directly from your site with cart and checkout pages. Learn more about selling items from catalog collections.
- Category collection: Store categories for organizing and grouping items in other collections. Learn more about using category collections to organize your content.
You can set each collection's permissions and privacy to determine who can view, add, and manage the content.
Before you begin:
Make sure to add the CMS to your site to start creating collections.
Creating a CMS content collection
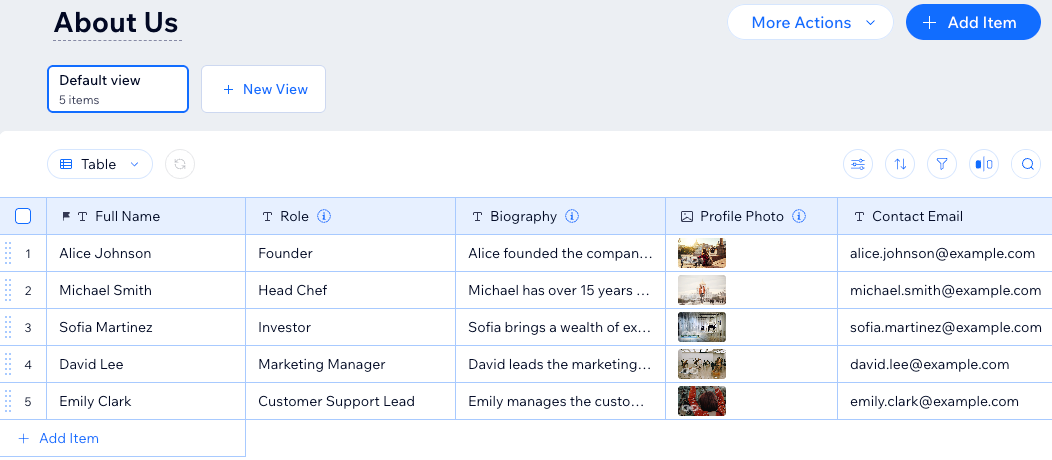
Create a new content collection to store and manage items you want to display on your site. Content collections use a table layout where each row contains content about an individual item and the columns represent fields where you store content about each item.
Need a preset collection template?
You can add a preset collection that already includes items and fields and is connected to dynamic pages.
To create a new collection:
- Go to CMS in your site's dashboard. Alternatively, you can click CMS
 in your editor.
 - Click Create Collection.
- Select Content collection and click Next.
Alternative collection types:
- To create a collection for selling items, select Catalog collection instead. Learn more about selling items from catalog collections.
- To create a collection for organizing items by category, select Category collection instead. Learn more about using category collections to organize your content.
- Select Start from scratch and click Next.
Alternative ways to create a content collection:
- To let AI set up collection fields and add sample content for you, select Create with AI instead. Learn more about creating a collection using AI.
- To add content and fields from an existing CSV file, select Import from CSV instead. Learn more about importing content into a collection.
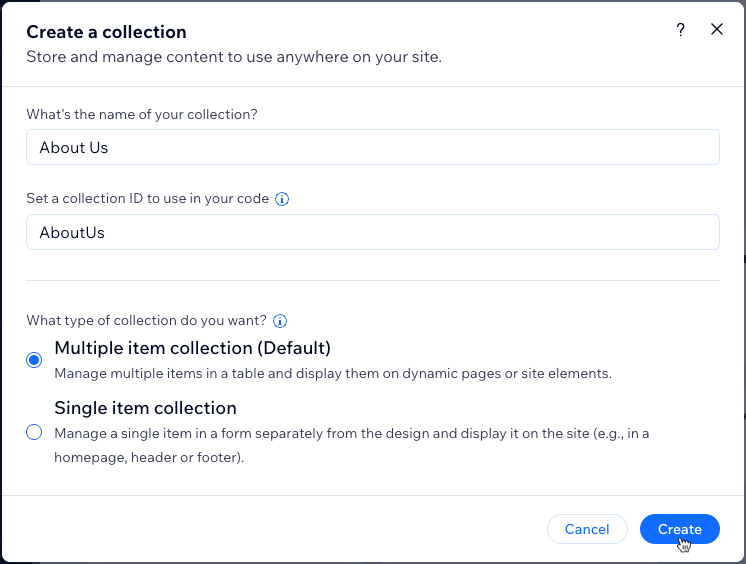
- Enter a name for your collection.
- (Coding only) Enter a collection ID to use in your code.
- Select Multiple item collection (Default) and click Create.
- Click + Add Field to begin adding fields to your collection manually.
- Add items to your collection:
Tip: Skip this step if you plan to use the collection to store user submissions.- Click + Add Item at the top right.
- Enter details about the item in all the relevant fields and click Save.
- Repeat these steps to add more items to the collection.
Next, learn how to:
- Manage your CMS collection content.
- Create a dynamic list page to showcase your collection items in one place.
- Create a custom view with saved filters and sorts for future use.
- Sort and filter the items in your collection view.
- Mirror the order of your collection items to your live site.
- Add field validations to create mandatory, required fields.
- Set items as hidden or visible on your live site, directly from your collection.
- Add default values that automatically populate in fields when a new item is added.
- Duplicate your collection to create a copy of its field structure and settings.
FAQs
Click below for answers to the most frequently asked questions about CMS collections.
Can I restore my collections to previous versions?
What content can I store in each field type?
Can I choose field types when importing a CSV file to a collection?
What's the difference between content, catalog, and category collections?
What's a preset?
What's a dynamic page?
Can I create a copy of a CMS collection?
