CMS: Setting Field Validations in Your Collections
6 min
In this article
- About field validations
- Making required fields in your collections
- Setting character count limits for text fields
- Setting text fields to accept specific values only
- Hiding the table layout to prevent empty required fields
- FAQs
Add field validations in your CMS (Content Management System) collection to make certain fields required, limit their characters, or set them to accept specific values only.
About field validations
You can add validations to fields in your collection to help ensure the fields contain content and are not left blank. By setting a field as 'required' you can prevent new items from being saved if the field is left blank. With text fields, you can limit the character count or accept only predefined values.
Field validations apply to both collection content that visitors submit and collection content that you and your team edit. When using input elements to submit content to your collection, visitors get an error message if they leave a 'required' field blank.
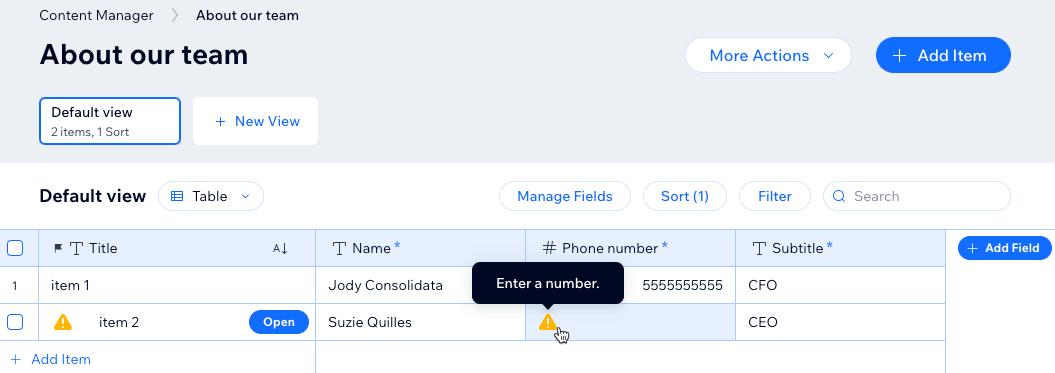
In your collection's table layout, changes you make are automatically saved, so it is possible to add blank required fields. Validations also do not apply when adding content from the Wix app or Wix Studio app. However, a warning will appear in your collection to let you know when required fields are missing content. You can disable the table layout to help prevent blank required fields in the collection.
Tip:
Another way to help prevent empty collection fields is to set default values for the fields that automatically populate when new items are added.
Making required fields in your collections
You can set a collection field to be required so that new items cannot be saved if the field is blank. To do so, edit the relevant field and enable the toggle in the Validations tab. After setting a field as 'required', an asterisk (*) appears next to the field name in your collection. If any of the fields you set as required are blank, a warning lets you know to fill them out.
Keep in mind that the table layout saves automatically, making it possible to create new items with blank required fields. You can disable the table layout to prevent this from happening.
To make a field 'required' in your collection:
- Go to CMS in your site's dashboard.
- Click the relevant collection.
- Click Manage Fields.
- Click the field that you want to make a required field.
- Click the Validations tab.
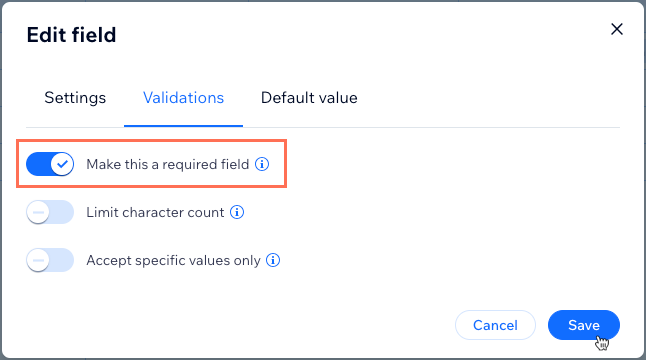
- Enable the Make this a required field toggle.
- Click Save.
Setting character count limits for text fields
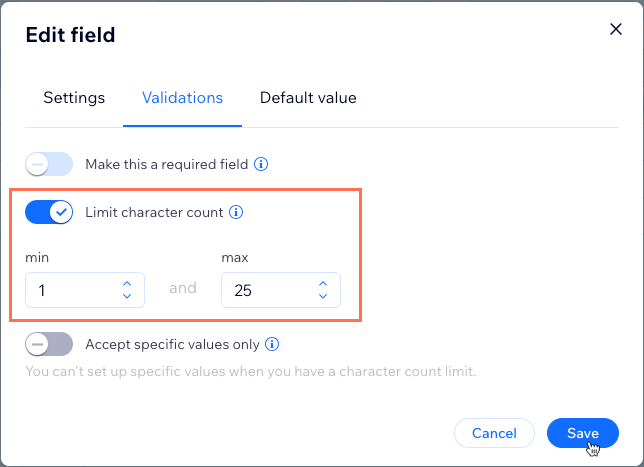
Ensure the total characters in your text fields are within a set range you define. When setting the character limit, spaces count as characters, while line breaks do not count.
To limit the character count for a text field in your collection:
- Go to CMS in your site's dashboard.
- Click the relevant collection.
- Click Manage Fields.
- Click the text field in which you want to limit the character count.
- Click the Validations tab.
- Enable the Limit character count toggle.
- Enter the minimum and maximum character limits for the field.
- Click Save.
Setting text fields to accept specific values only
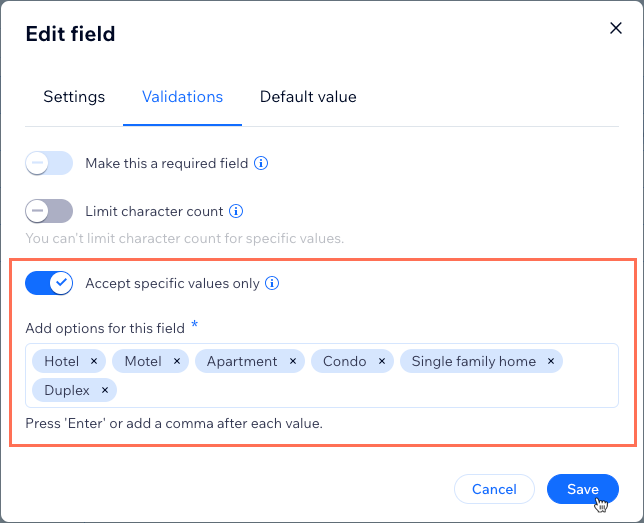
Ensure that text fields in your collection can only accept specific values that you define. After creating the value options, you can either type in the field to search for the relevant values or select them from a drop-down menu.
To set text fields to accept specific values only:
- Go to CMS in your site's dashboard.
- Click the relevant collection.
- Click Manage Fields.
- Click the text field in which you want to only accept specific values.
- Click the Validations tab.
- Enable the Accept specific values only toggle.
- Enter the values that you want to make available for this field. Press Enter or add a comma (,) after each value.
- Click Save.
Hiding the table layout to prevent empty required fields
When editing in the table layout, every change you make to items or fields is automatically saved. This makes it possible for you to add empty fields, even if the fields are set to 'required'. If you add a new item without filling out a required field, a Warning icon  appears in the fields to let you know to fill them out.
 appears in the fields to let you know to fill them out.
 You can completely avoid this issue of blank required fields by disabling the table layout and using other layouts. In the list and gallery layouts, if you try to save an item without filling in a required field, you are prevented from saving. Instead, a warning message lets you know which fields need values before you can save them.
Tip:
When you hide the table layout from a collection, you also hide the layout for collaborators who have permissions to edit your collections. This is a great way to prevent your entire team from accidentally adding empty fields that are required.
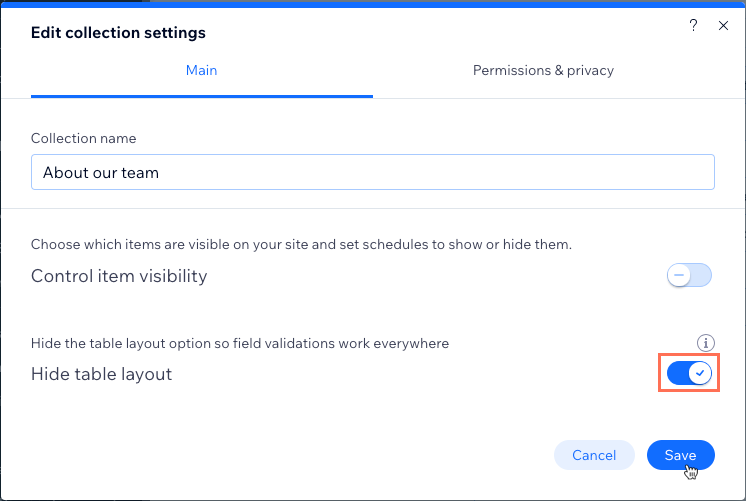
To hide the table layout in your collection:
- Go to CMS in your site's dashboard.
- Click the relevant collection.
- Click More Actions and select Collection settings.
- Enable the toggle next to Hide table layout.
- Click Save.
FAQs
Click below for answers to the most frequently asked questions about field validations.
Can my fields have default values that automatically appear for new items?
Can I add field validations to any field type?
Why can't I enable both the "Limit character count" and "Accept specific values only" validations?
If I restore a collection from a backup, does it also restore the field validations?
What are the Roles & Permissions requirements for setting field validations?


