

CMS: Adding and Setting Up a Dynamic List Page
22 min
In this article
- Step 1 | Add a dynamic list page
- Step 2 | (Optional) Modify the URL slug structure
- Step 3 | Connect the repeater to the CMS
- Step 4 | (Optional) Manage the dataset settings
- Step 5 | (Optional) Create 'Load More' or navigational buttons
- Step 6 | (Optional) Let visitors filter items
- FAQs
Dynamic list pages allow you to showcase various items from your CMS collection in an organized index. Each item, displayed in a repeater, gallery, or table, links to the collections' dynamic item page where visitors read more about the specific item.
A dataset controls the connections between the page elements and your collection fields. In the dataset settings, you can control the number of items that appear at a time. You can add filters to only include certain items or add sort conditions that control the order in which they appear.
Add 'Load More' or navigational buttons to improve your page loading performance if you have a lot of items to show. You can also give visitors the ability to filter the items they see on the page by using input elements like dropdowns, radio buttons, or checkboxes.
Before you begin:
- Create a CMS collection that includes the items you want to display on your dynamic list page.
- Create a dynamic item page for your collection. You will link items on your dynamic list page to your collection's dynamic item page. Alternatively, you can add the dynamic item page at the same time as your dynamic list page. See step 1 below for directions.
Step 1 | Add a dynamic list page
From your editor's CMS panel, create a dynamic list page for your collection. This adds a new page that displays different items from your collection in a repeater that you will customize later.
Wix Editor
Studio Editor
- Go to your editor.
- Click CMS
 on the left side of the editor.
 - Click Your Collections.
- Click the collection that you want to create your dynamic list page from.
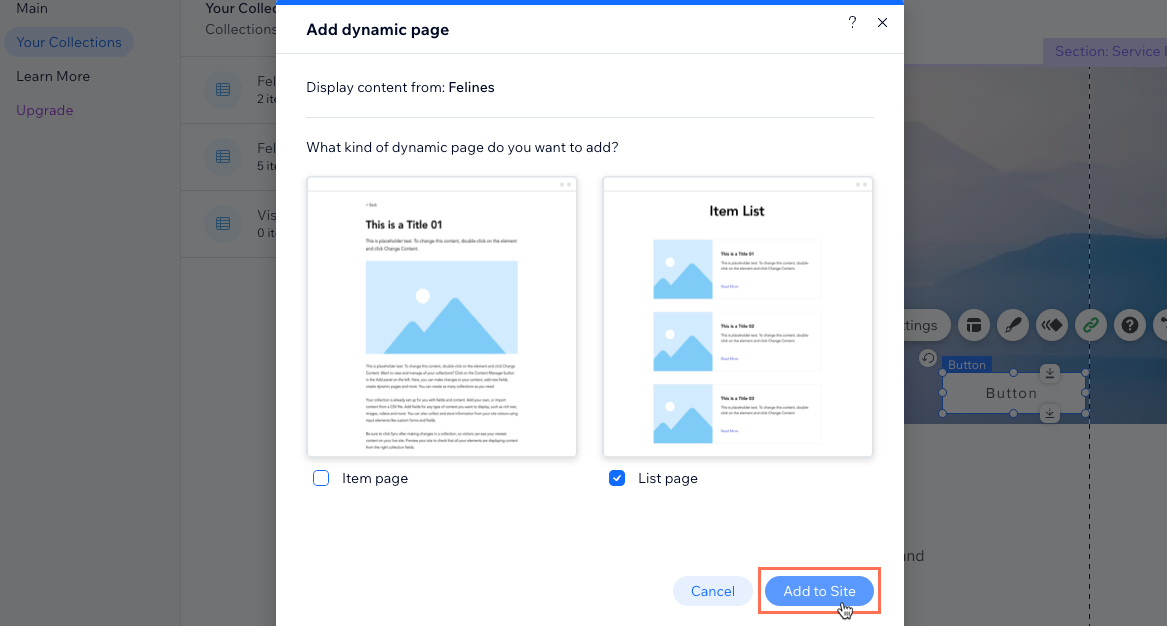
- Click More Actions and select Add dynamic page.
- Select List page and click Add to Site.
Tip: Select Item page as well to add a dynamic item page for the collection at the same time.
Step 2 | (Optional) Modify the URL slug structure
You may want to edit the URL slug structure of your dynamic list page to keep the web addresses of your dynamic pages organized.
For example, you could create the following URL slug structures for your dynamic pages:
- Dynamic list page: https://www.{your-domain.com}/{collection-name}
- Dynamic category page: https://www.{your-domain.com}/{collection-name}/{category}
- Dynamic item page: https://www.{your-domain.com}/{collection-name}/{category}/{primary-field}
When editing the URL slug structure, the structure cannot already be used by other existing pages on your site. To be unique, the URL slug structure cannot have the same prefix (e.g. {Collection name}) and the same number of variables as another page on your site, even if the variables are different.
Show me an example of conflicting URL slug structures that cannot be used

Important:
If you want the old dynamic URLs to automatically redirect to the new URLs you create, make sure your site first has a connected domain. If your site does not have a domain connected, the old URLs will no longer work and instead, will load 404 error pages.
To edit the URL slug structure of your dynamic list page:
Wix Editor
Studio Editor
- Go to your editor.
- Click Pages & Menu
 on the left side of the editor.
 - Click Dynamic Pages.
- Hover over the dynamic list page you just created and click the More Actions icon
 on the right.
Tip: By default, the dynamic list page you created is titled: {Collection Name} (List) - Click SEO.
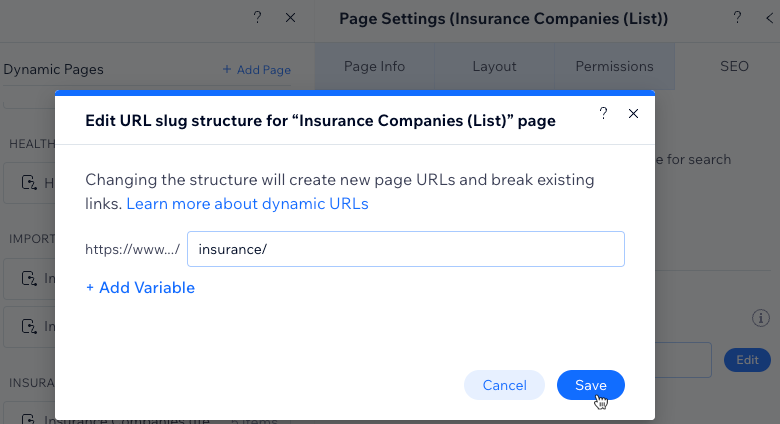
- Edit the URL slug structure field:
- Click Edit next to the URL slug structure field and choose what you want to do:
- Add Variable: Click + Add Variable and choose a 'Text' or 'Number' field to use its values in the URL slug structure.
- Add static values: Click the field and enter the static values you want to use in the URL slug structure. Use only English letters, numbers or dashes.
- Click Save.
- Click Edit next to the URL slug structure field and choose what you want to do:
- Click Replace URLs to confirm the changes. The dynamic page's previous URLs will be deleted and will no longer work. Instead, the new URLs will be generated for the dynamic page.
Step 3 | Connect the repeater to the CMS
You now have a dynamic list page with a repeater that includes 2 text elements, an image, and a button in each container. Each of your repeater's containers displays a different item from your collection.
Connect each part of the elements to the relevant collection fields to ensure they display the info you want them to. We recommend connecting the button to your collection's dynamic item page so visitors can click to go to the relevant item's dedicated page.
To provide more info about each item, you can attach more supported elements to the repeater. Then connect these elements to your collection fields in the dataset where you manage all the CMS connections.
Want to use a gallery or table instead of a repeater?
Wix Editor
Studio Editor
- (Optional) Add elements to your repeater (e.g. buttons, text, images) or remove elements you do not need. You can adjust the size of the repeater so it can contain all the elements.
- Click the repeater element and select the Connect to CMS icon
 .
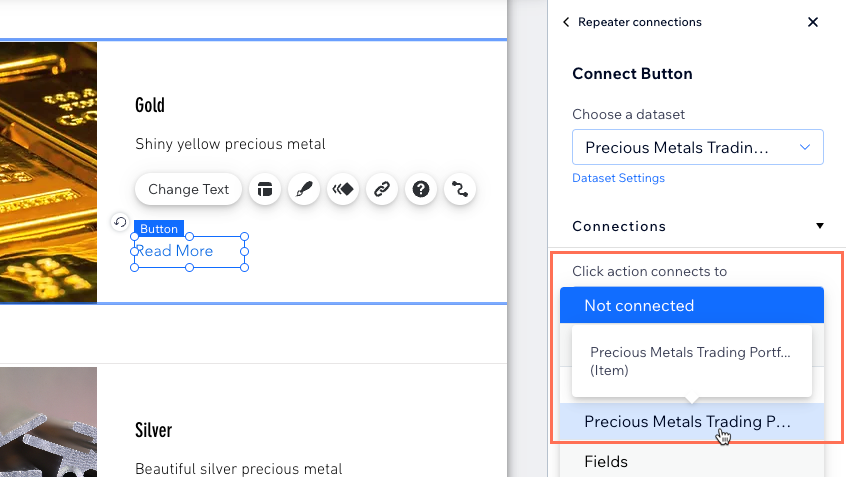
. - In the Connect Repeater panel on the right, click the element you want to connect.
- Under Connections, click the relevant drop-downs to connect the element to the relevant collection field or dataset action. The options vary depending on the element type.
Tips:
- To link the button element to the dynamic item page, click the Click action connects to field and select the collection's dynamic item page that ends with (Item).
- To link an image element to the dynamic item page, click the Link connects to drop-down and select the collection's dynamic item page that ends with (Item).
- Click Repeater connections at the top of the panel on the right.
- Repeat steps 3-5 above to connect the elements to collection fields or dataset actions.

- Click to adjust your repeater elements as needed.
Tip: You can add or remove elements from your repeater at any time. Disconnect elements if you want to use static content that doesn't change. - Click Preview to test your dynamic list page.
- Click Publish if you are ready to make the changes go live.
Step 4 | (Optional) Manage the dataset settings
By default, your dynamic page dataset allows up to 100 items to initially display in your repeater or gallery. You can adjust the items per load to allow up to 1000 items to load at a time. You can also add filters to include only certain items, or add sorts to control the order in which the items display.
Wix Editor
Studio Editor
- Go to the repeater's connected dataset settings:
- Click the repeater.
- Click the Connect to CMS icon .
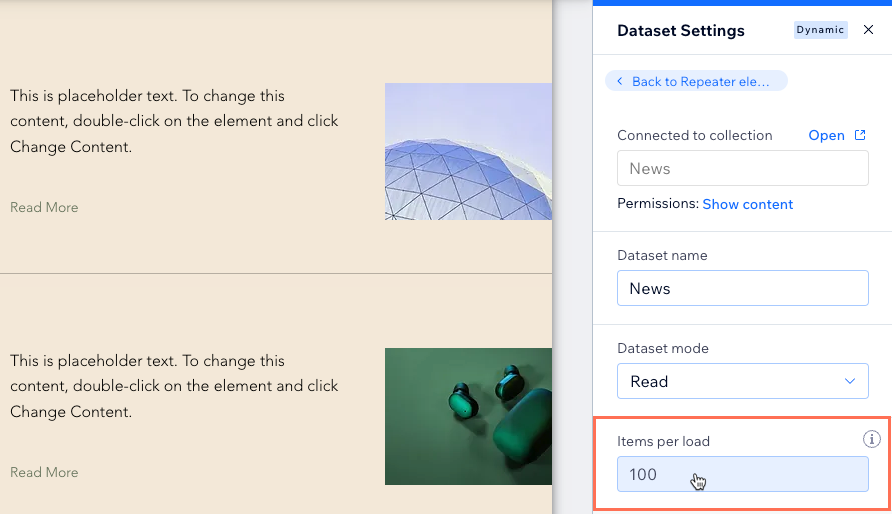
- Click Dataset Settings in the Connect Repeater panel on the right.
- (Optional) Click the permission type next to Permissions to determine who can view, add, update, or delete collection content on your live site.
- (Optional) Click the Dataset name field if you need to edit the name of the dataset.
- (Velo only) Click the Dataset ID field to edit the ID used to identify the dataset in your page's code.
- Click the Dataset mode drop-down and select the relevant option:
- Read: Connected elements can read and display content from your collection. The elements cannot modify the collection content.
- Read & Write: Connected elements can display content from your collection. Input elements can add or edit content in your collection.
- Edit the Items per load field to set the maximum number of items that can load at a time. This is also the maximum number of items that can load when visitors click 'Load More' buttons, 'Next/Previous page' buttons, or pagination bars. See the next section for steps.
Note: This field does not apply to tables. If using a table to display your items, limit the number of items displayed by clicking the table's Layout icon , then setting a custom table height and enabling pagination.
- (Optional) Click + Add Filter to only show specific items in the repeater.
- (Optional) Click + Add new sort to choose the order in which the items appear in the repeater.
- Click Preview to test your dynamic list page.
- Click Publish if you are ready to make the changes go live.
Step 5 | (Optional) Create 'Load More' or navigational buttons
If you plan on displaying many items on this page, consider adding a 'Load More' button to improve the page's loading performance. The dataset's Items per load field determines how many items can initially load on the page and how many additional items can load when visitors click your 'Load More' button.
You can also add 'Next/Previous Page' buttons or a pagination bar (Wix Editor only) that cause the page's connected repeater or gallery to display the next or previous 'page' of items. The Items per load field determines the maximum items that appear in each 'page' of items.
Wix Editor
Studio Editor
Choose what you want to do:
Create a 'Load More' button
 on the left side of the editor.
 to customize the appearance of your 'Load More' button.
Create 'Next Page' and 'Previous Page' buttons


Tip:
In the Wix Editor, you can also connect a pagination bar that allows visitors to cycle through 'pages' of items. The Items per load field determines how many items can appear in each 'page' of the pagination bar. If you would like to see pagination bars in the Studio Editor, vote for this feature here.
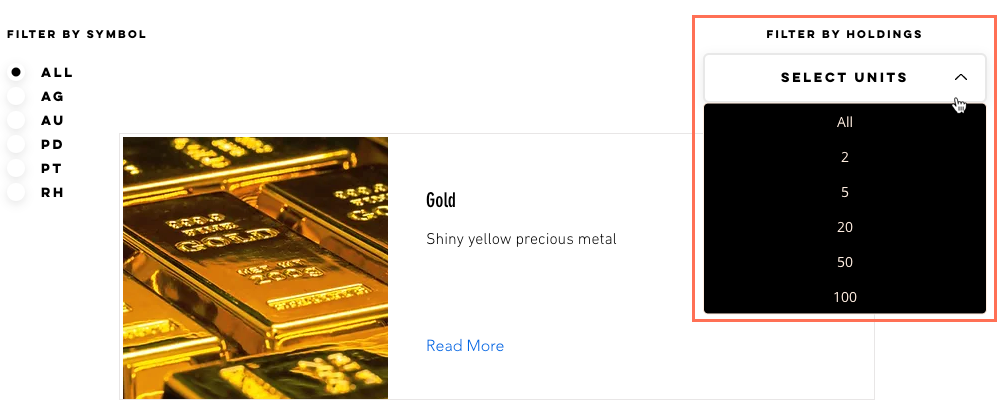
Step 6 | (Optional) Let visitors filter items
Give visitors ways to filter the items that appear on your dynamic list page with input elements. Choose from any of the following input elements that allow filtering: Radio Buttons, Checkboxes, Dropdown, Selection Tags, or Slider (Range Sliders only).
Learn how to set up input elements that allow visitors to filter collection content.
FAQs
Click the questions below for answers to common questions about setting up dynamic list pages.
How do visitors get to my dynamic list page?
Can I create dynamic pages that list items by category?
Why doesn't my page show the items I connected?
How do I link the items to their dynamic item page?

Why can't I attach some elements to the repeater?
Can I see how a pre-connected repeater works before setting up my own?
