

Wix Stores: Migrating to the New Category Page Experience
12 min
In this article
- Step 1 | Add the new Category page to your site
- Step 2 | Hide "internal" categories from your site
- Step 3 | Customize the category menu in the Category page
- Step 4 | Edit active categories
- Step 5 | Customize the Category page
- Step 6 | Update the site menu
- Step 7 | Redirect old store pages
- Step 8 | Delete old store pages
- FAQs
The new Category page experience makes it easier to add new categories, while improving your site’s SEO.
This article will walk you step-by-step through the process of updating your site to the new Category page experience. Before you migrate, you can learn more about the new Category page and the new version of categories in your site's dashboard.
Important info for merchants with active stores:
- To migrate without negatively impacting current SEO ranking, make sure you read and follow the steps below, especially Step 7 | Redirect old store pages and Step 8 | Delete old store pages.
- Once you migrate to the new Category page, you cannot switch back.
Test before you migrate:
To test the new Category page before you make a permanent switch, you can duplicate your site and make changes to the unpublished copy. Note that once you migrate your actual site, you cannot revert to the old version.
Step 1 | Add the new Category page to your site
If you haven't yet started the process, the first step is to actually migrate over to the new version of categories, which comes with the new Category page.
To add the new Category page
- Click Pages and Menu
 on the left side of your editor.
 - Click Store Pages.
- Click the Settings icon
 .
. - Select Migrate to Category Page.
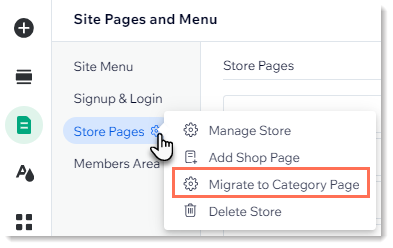
- Click Migrate to Category Page.
- Click I Understand, Install Now.
Step 2 | Hide "internal" categories from your site
When you migrate to the new experience, all your existing store categories become active. This means they'll become visible to customers who visit the Category page (after you publish).
Make sure to deactivate the categories you want to hide from your site.
Learn more about active and inactive categories

Tip:
You can also hide an active category from the Category page settings (See step 3 below).
To deactivate (hide) categories:
- Go to Categories in your site's dashboard.
- Select a category you want to deactivate.
- Disable the Active on your site toggle.
- Repeat steps 2-3 for any other categories you want to deactivate.

Tip:
To learn more about what happens to category when you deactivate it, check out the FAQ below.
Step 3 | Customize the category menu in the Category page
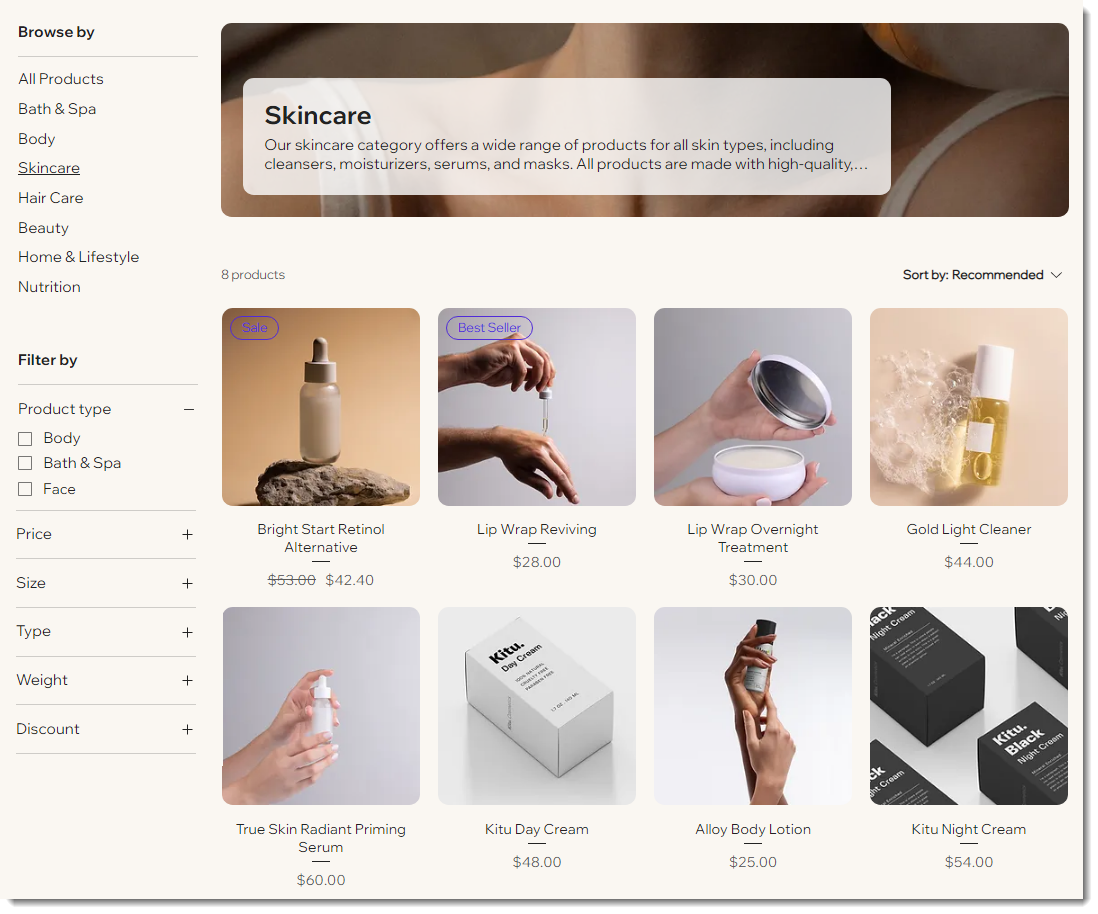
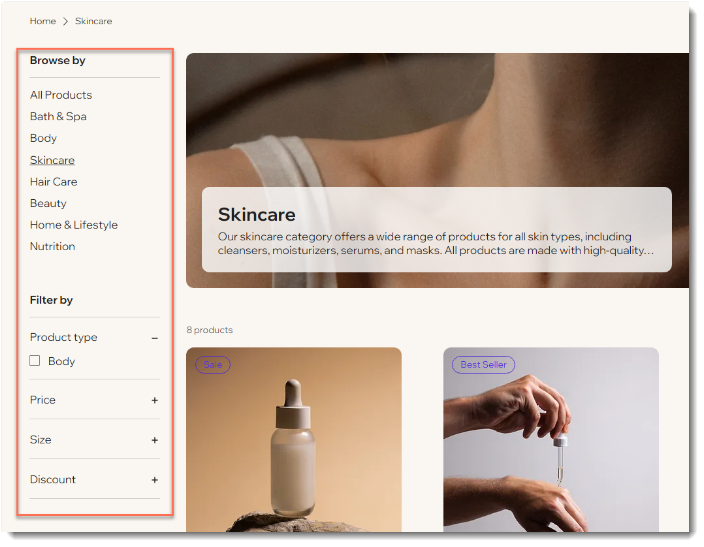
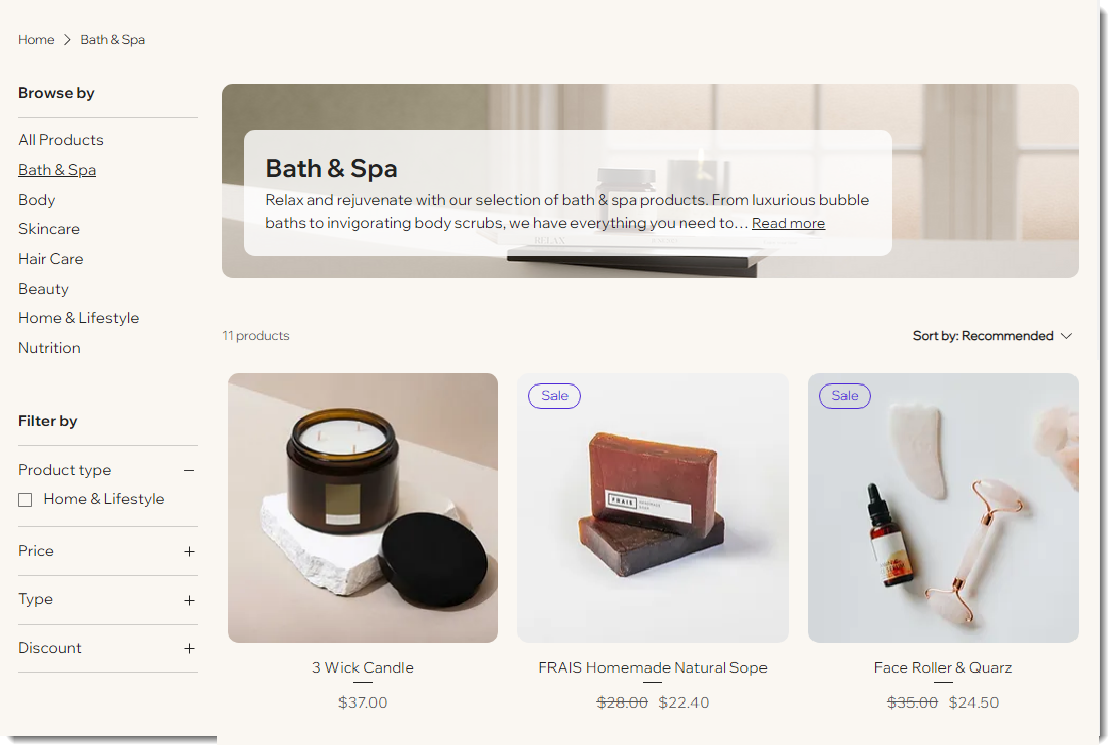
Now that you've deactivated categories you don't want to display anywhere, all your active categories appear in the Category menu, either in a vertical or horizonal menu.
Go to your editor to select the categories you want customers to display. You can also reorganize the categories into an order that makes sense for your store.
To select and reorder categories:
- Click Pages and Menu
 on the left side of your editor.
 - Click Store Pages.
- Click Category Page.
- Select the Category page in your editor.
- Click Settings.
- Select what you want to hide:
- Hide the entire category menu:
- Click the Display tab.
- Deselect the checkbox next to Category menu.
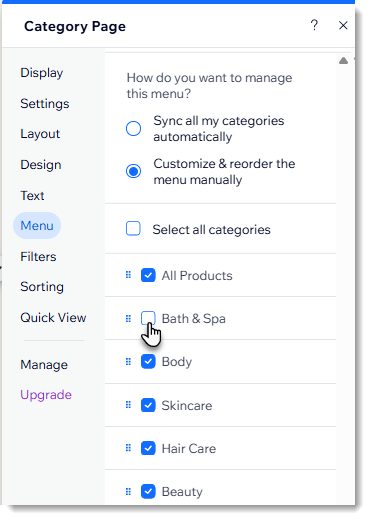
- Hide individual categories:
- Select the Menu tab.
- Select Customize & reorder the menu manually.
- Deselect the checkbox next to the category you want to hide.
- Hide the entire category menu:
- (Optional) Reorder categories by dragging and dropping them.
Tip:
To switch from a vertical to a horizontal category menu, go to the Layout top.
Step 4 | Edit active categories
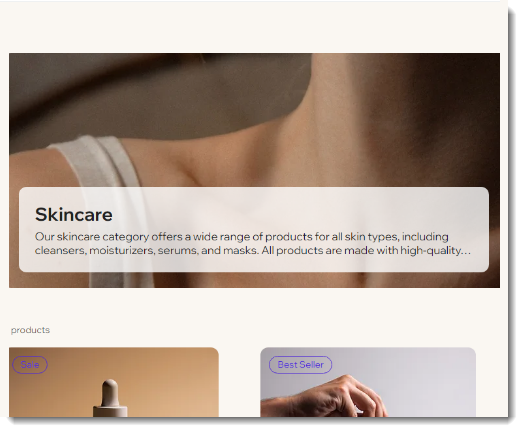
Make sure your active categories are all set to go live. The new version of product categories allows you to display a category image and a category description in the header. Additionally, category pages now have advanced SEO settings.
To edit categories:
- Go to Categories in your site's dashboard.
- Select the first category you want to edit.
- Enter a category description.
- Add a category image.
- Update any of the SEO category settings.
- Repeat steps 2-5 for any other categories that will be active.
Notes:
- Descriptions: Besides (optionally) appearing in the header, the first 160 characters of the category description are by default displayed in search engine results. You can override this by entering a separate description in the SEO settings.
- Images: If you plan to display a header image on your site's category pages, make sure to upload good quality photos. The recommended aspect ratio is 16:9.
Step 5 | Customize the Category page
Now you can head over to your editor to customize the look and function of your Category page. This includes customizing or hiding the header, choosing colors and fonts, and much more.
Learn how to customize the Category page.
Step 6 | Update the site menu
It's important to update your site menu, so that you're directing customers to the new categories in the Category page, and not to pages that you'll soon hide or delete.
Note that the menu may look unchanged to site visitors, but it will connect differently behind the scenes.
Read an example of how a site owner updated their site menu


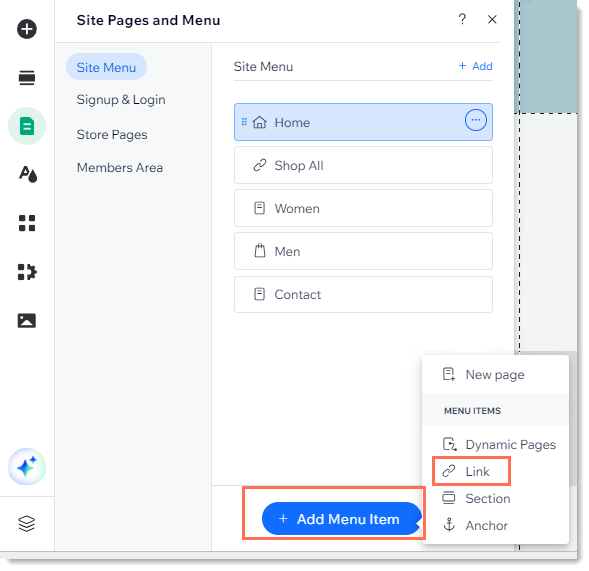
To update the site menu:
- (Optional) Add individual categories to the site menu:
- Click Pages and Menu
 on the left side of your editor.
 - Select Site Menu.
- Click Add Menu Item.
- Select Link.
- Click Pages and Menu
- Click Page on the left.
- Select Category Page from the Which Page? drop-down.
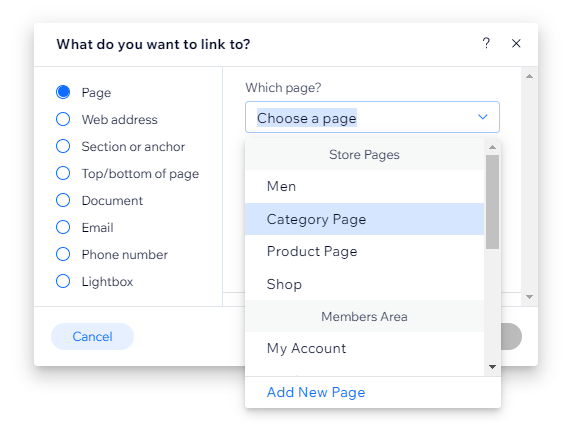
- Select the category you want to display from the Which item? drop-down.
- Enter a name for the menu item.
- Click Done.
- (Optional) Create submenus.
- (Optional) Create sub-sub-menus.
Step 7 | Redirect old store pages
The new Category page gives your store a professional appearance, but you want to make sure you don't lose the ranking that your store's existing pages already have when you migrate. 301 redirects prevent your links from breaking.
For search engines to understand that the new category pages replace the old ones, and for the old links and bookmarks to redirect visitors to the new ones, you need to do a 301 redirect for each relevant shop page.
Why is it important to do 301 redirects?
- If you have an active site and customers are finding your store through Google and other search engines, 301 redirects help reduce potential negative impact to your SEO ranking.
- With 301 redirects, existing links to your store pages will still work after you migrate.
Before you start:
- It's helpful to make a list of the URLs of all the pages you'll want to redirect.
- If you have a lot of categories, you can import a CSV file with a list of pages to redirect.
To redirect existing store pages to new category links:
- Publish your site.
Note: You can only redirect to published pages. - Go to your SEO dashboard.
- Select URL Redirect Manager.
- Click + New Redirect.
- Select Single redirect.
- Enter the URL of the first page.
- Enter the category URL for the same page (e.g. mystunningwebsite/category/nutrition).
Note: To locate the URL, go to the Category page on your live site, click the category from the category menu, and copy the URL. - Repeat steps 4 - 7 for each relevant category.
Important:
Once you complete the 301 redirects, make sure you delete unnecessary pages, so your site won't have duplicate content.
Step 8 | Delete old store pages
In your original shop, before you added the Category page, product galleries could be displayed in 2 ways:
- Shop pages: Shop pages are pages with a built-in product gallery. They have a shopping cart icon beside their name. You should delete or hide these pages.

- Regular site pages: Store products may be displayed on any regular page to which you added a gallery. You may want to leave these live if the page contains other content along with a gallery. Alternatively, you can remove the product gallery from the page.
To delete site pages:
- Delete all but one of your shop pages to remove them from the site menu.
Important:
Do not delete the last shop page as this will delete Wix Stores. You can hide the last old shop page instead of deleting it.
- Hide the last shop page (so it won't be visible, but Wix Stores won't be deleted).
- (Optional) Remove product galleries from other site pages:
- Remove product galleries from pages you want to keep:
- Click the product gallery to select it.
- Press Delete on your keyboard.
- Delete pages that have product galleries on them.
- Remove product galleries from pages you want to keep:
FAQs
Click a question below to learn more.
What happens if I don't delete old pages or do 301 redirects?
Can I leave a page with a product gallery live if I don't display it in the Category page?
What SEO benefits does the new Category page have?
What happens when a category is active?
What happens when a category is inactive?

How can customers viewing my site on mobile see the category menu?

What happens if I deleted Wix Stores by accident?
