Wix Editor: Managing Advanced Menus
5 min
In this article
- Adding items to menu
- Changing the order of menu items
- Renaming your menu items
- Setting up a dropdown menu
- Setting up sub dropdown items
- Removing and hiding menu items
Manage items in your advanced menu to direct visitors to relevant content, in the order you choose. You can rename items, use sub-navigation to organize them or remove items that are no longer needed.
Adding items to menu
Add items to your menu to display what you want on your site. You can add pages and links, and create dropdown menus to streamline content for your visitors.
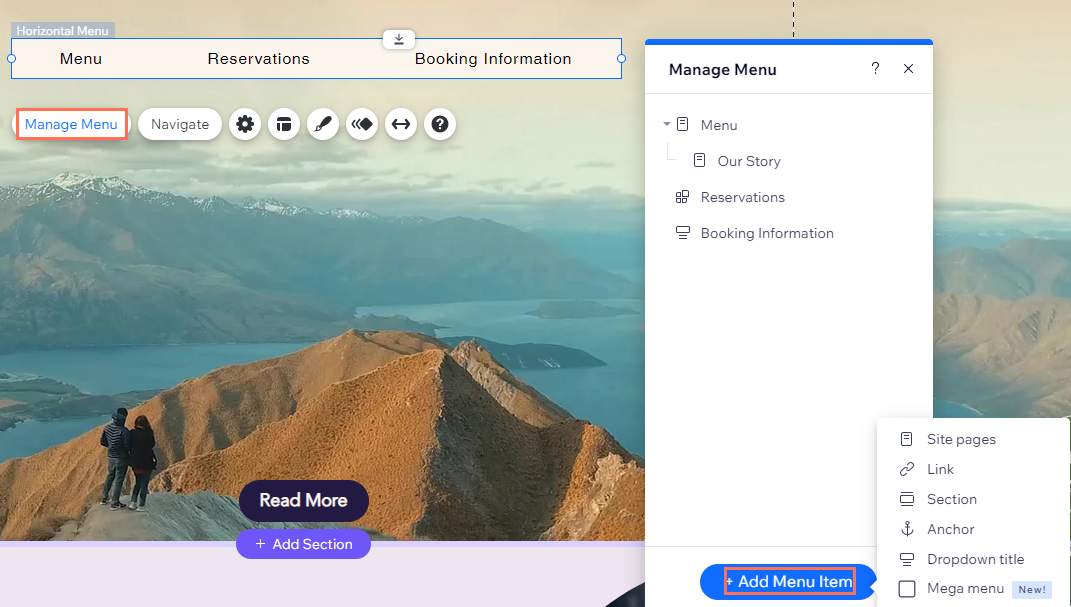
To add new items to the menu
- Click the advanced menu in your editor.
- Click Manage Menu.
- Click + Add Menu Item at the bottom.
- Choose the item type you want to add to your menu:
- Site Pages: Add site pages as menu items.
- Link: Add a link to your menu. You can link to external sites, documents, and more.
- Section: Add a page section as an item to your menu. When visitors click it, they're brought to the section.
- Anchor: Display a link to a page anchor on your menu. Clicking it brings the visitors to the relevant anchor.
- Dropdown title: Add a dropdown menu to organize your items. Once you add the title, you can drag and drop menu items below the dropdown.
- Mega menu: Add a container that's displayed when visitors hover over the item in the menu. You can change the layout and design of the container, and add elements. Learn more about mega menus.
Changing the order of menu items
You can decide on the order of your menu items, and change it at any point. For example, use the order to show items alphabetically, by order of importance, or even to tell a story.
To reorder menu items:
- Click the advanced menu in your editor.
- Click Manage Menu.
- Click and drag the menu items to your desired order.
Renaming your menu items
Rename menu items to give your visitors a clear indication of the content they lead to. Some popular examples of item names include "Contact Us", and "About".
Note:
If you change the name of a page in the menu panel, the name is automatically changed across your entire site.
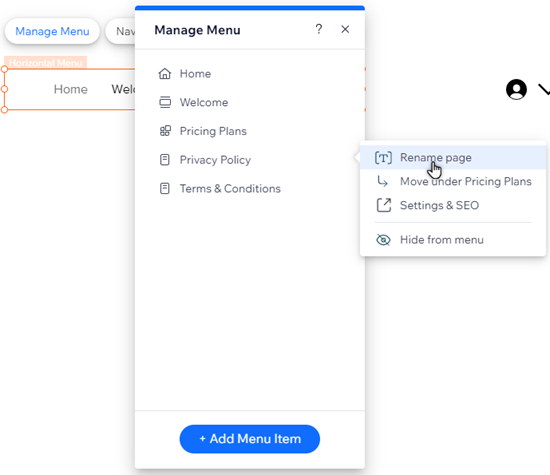
To rename a menu item:
- Click the advanced menu in your editor.
- Click Manage Menu.
- Click the More Actions icon
next to the relevant item.
- Click Rename / Rename page.
- Enter the new name into the field.
- Click Done.
Setting up a dropdown menu
Create a dropdown menu to categorize and display your items in a list when visitors hover over it. For example, you can create a dropdown menu named "Services", then add the relevant items / pages below (e.g. "Consultations", "Appointments" etc).
To add and set up a dropdown menu:
- Click the advanced menu in your editor.
- Click Manage Menu.
- Click + Add Menu Item at the bottom of the panel.
- Select Dropdown title.
- Enter the name of the dropdown into the field.
- Click Done.
- Click and drag the pages you want over the dropdown title to add them.
Setting up sub dropdown items
If you set up a dropdown menu, you can further organize it by adding sub dropdown items. When visitors hover over the item in the dropdown menu, another dropdown opens. This is a great way to categorize information the way you want, and make it even easier for visitors to find what they need.
Important:
- Sub dropdown items are only available on horizontal menus that you have manually added from the Add Elements panel. They are not available on menus that come with your chosen site template, or on vertical menus.
- Before you begin, make sure you create a dropdown menu in order to add all of the relevant sub dropdown items to it.
To create a sub dropdown menu:
- Click the advanced menu in your editor.
- Click Manage Menu.
- Click and drag the sub dropdown items directly below the relevant dropdown menu item.
- Click the More Actions icon
- Click Move under (item name).
- Repeat steps 4-5 for every sub dropdown pages.
Did you know?
You can add any type of menu item to your sub dropdown menus (e.g. pages, links, anchors, etc.)
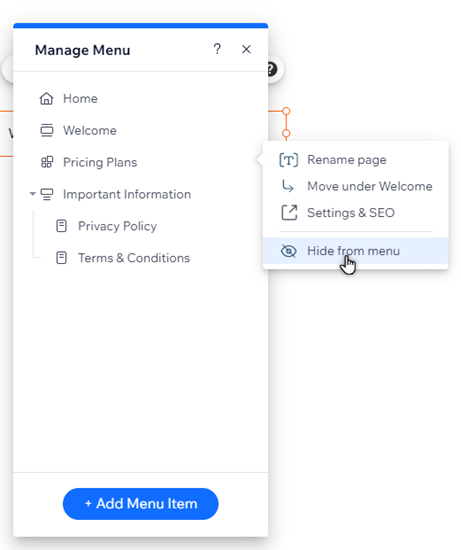
Removing and hiding menu items
Update the advanced menu to keep your information fresh and relevant. You can remove or hide menu items to prevent visitors from seeing certain pages or dropdown menus.
To remove an item from a menu:
- Click the advanced menu in your editor.
- Click Manage Menu.
- Click the More Actions icon
- Click Hide from menu / Remove from menu.
Note:
You can only hide site pages from your menu – this doesn't delete the page from your site. If you remove a dropdown title, it's only deleted from the menu.