Wix Editor: Adding and Setting Up a Mega Menu
8 min
In this article
- Step 1 | Add and set up an advanced horizontal menu
- Step 2 | Add a mega menu to your advanced menu
- Step 3 | Create a structured menu
- Step 4 | Add content to the container
- Step 5 | Adjust the layout of your mega menu container
- Step 5 | Customize the design of the mega menu
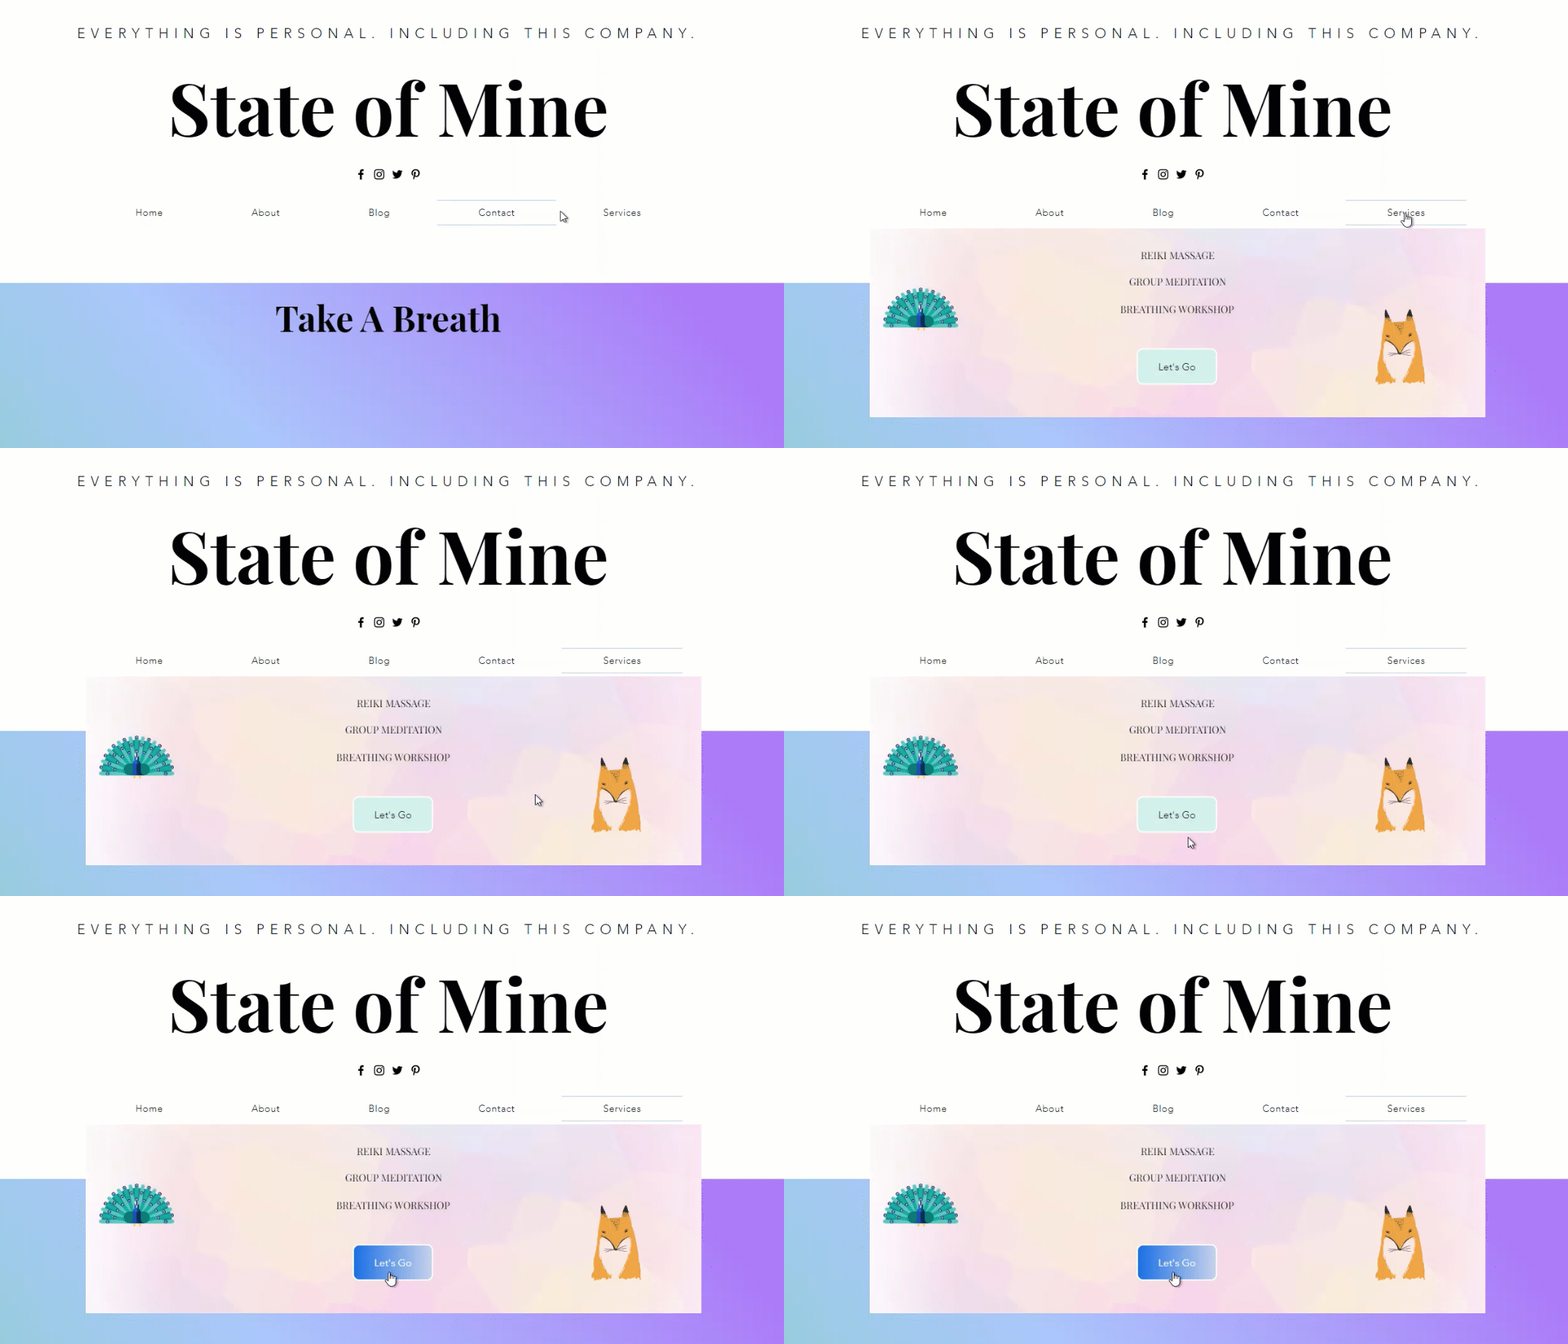
Mega menus are containers that you can add as items to your advanced horizontal menu. When visitors hover over the menu item on your live site, the container opens.
Attach elements to the container to display important and relevant content. You can also customize their look to provide a unique navigational experience for your visitors.
Step 1 | Add and set up an advanced horizontal menu
To get started, add a horizontal menu to your page and set it as advanced. Advanced menus help you create a custom, organized browsing experience for your visitors, with multiple item and navigation options.
You should know:
It is only possible to add a mega menu container to a horizontal menu that you set as advanced. Mega menu containers are not supported on regular site menus, themed menus, or vertical menus.
To add and set up a horizontal advanced menu:
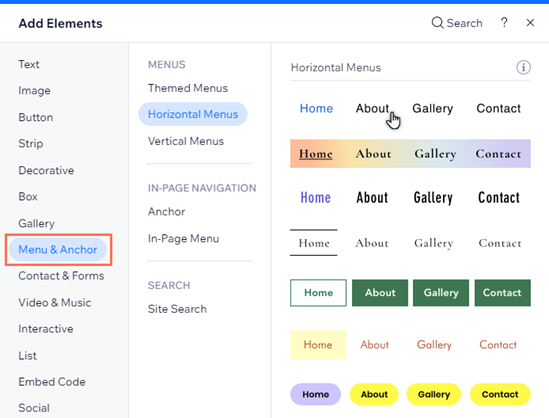
- Click Add Elements
on the left side of the editor.
- Select Menu & Anchor.
- Click Horizontal Menus.
- Click and drag your chosen menu design to wherever you want on the page.
- Set the menu as advanced:
- Select the new menu in the editor.
- Click the Settings icon
.
- Select Set as Advanced.
- Click Set as Advanced in the pop-up.
Step 2 | Add a mega menu to your advanced menu
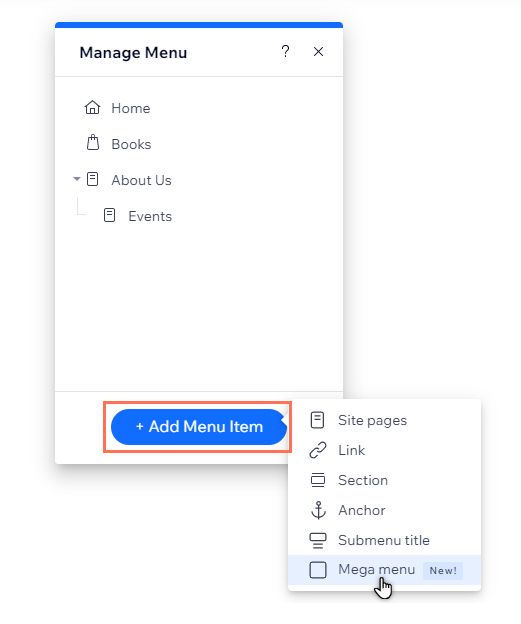
Once you have an advanced horizontal menu, add your mega menu container as an item and name it what you want. We recommend using a title that reflects your intended content, such as "Services", and "Our Story".
To add a mega menu:
- Select the advanced menu in your editor.
- Click Manage Menu.
- Click + Add Menu Item at the bottom of the panel.
- Select Mega Menu.
- Enter the title of the container into the field.
- Click Done.
Step 3 | Create a structured menu
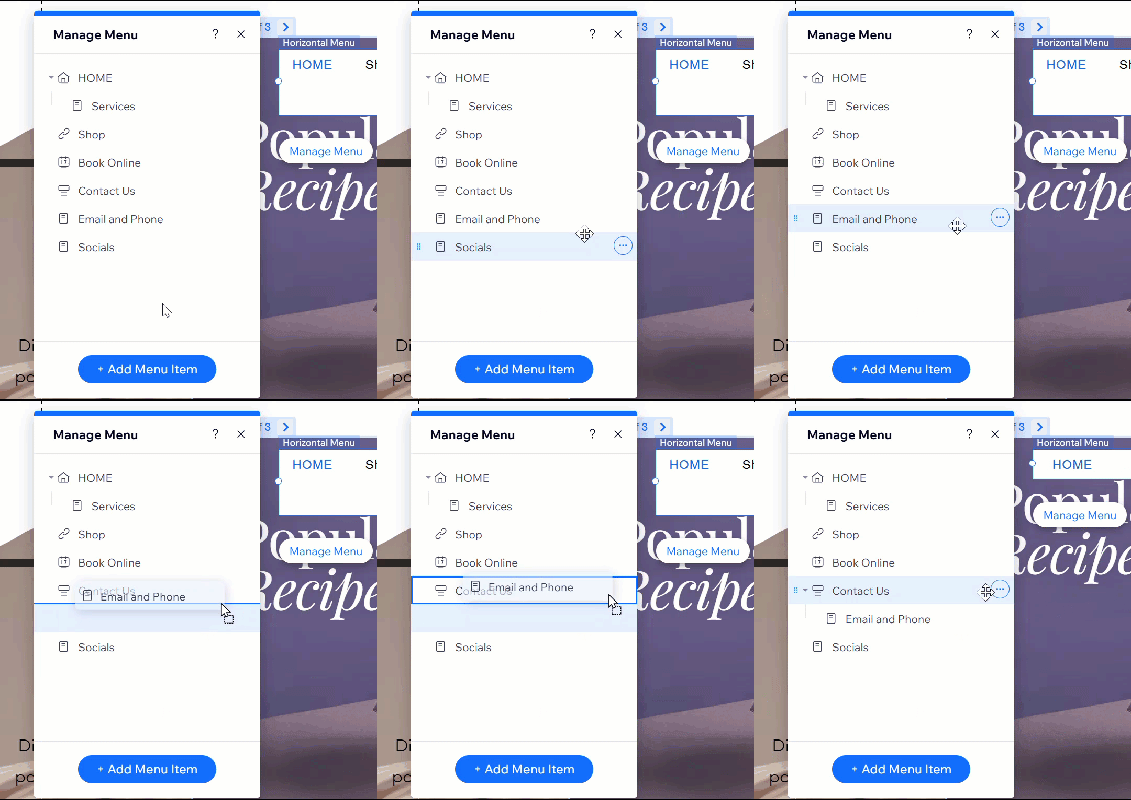
A structured menu lets you show a full menu inside your mega menu, so when someone clicks a mega menu item, they see a clear list of related pages or links. It helps organize your site and makes navigation easier. To create one, open the Manage Menu panel and drag items under a main menu item to nest them. This builds your structured menu automatically.
To create a structured menu:
- Select the relevant advanced menu in your editor.
- Click Manage Menu.
- Click + Add Menu Item and set up the menu item you want.
- Nest the relevant menu item(s) under the mega menu:
- Select the item in the Manage Menu panel.
- Drag and drop the item under the mega menu.
Step 4 | Add content to the container
Once you've added and named your container, add elements such as buttons, shapes, and text to build the content you want.
To add elements:
- Hover over the mega menu container in the Manage Menu panel.
- Click Edit.
- Click Add Elements
on the left side of the editor.
- Choose the element you want to add.
- Click and drag the element to your chosen position in the container.

Step 5 | Adjust the layout of your mega menu container
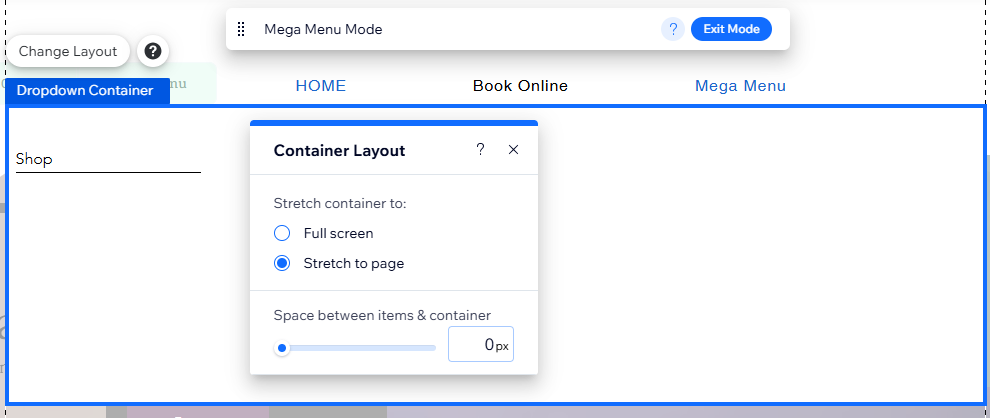
After adding the elements you want, change the layout of the mega menu container to match your page structure. You can adjust the spacing, and choose how much the container stretches.
To change the layout:
- Click the mega menu container.
- Click the Layout icon
 .
. - Click Mega Menu.
- Use the options to adjust the container:
- Choose a layout: Select whether you want the container to stretch to the full width of your visitors' screens, or the width of your site page (within the gridlines).
- Spacing between items & container: Make the space between your menu and the mega menu container bigger or smaller by dragging the slider.
Step 5 | Customize the design of the mega menu
Once you've adjusted the layout of the container, design its borders, background, and more. To maintain a consistent look, changes you make to the mega menu also apply to any dropdown menus you've added.
To customize the container's design:
- Click Exit Mode on the Mega Menu Mode bar.

- Click your advanced menu.
- Click the Design icon
.
- Click Customize Design.
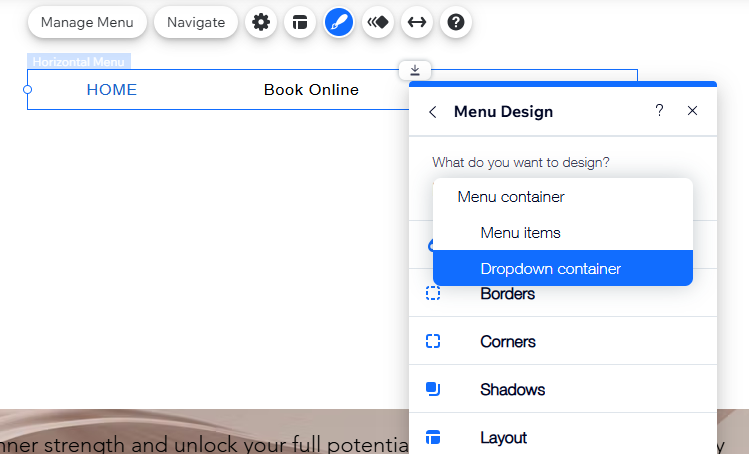
- Select Dropdown container from the What do you want to design? drop-down menu.
- Use the options to design the container.
Show me design options
Note:
Only design options that are made to the dropdown menu container are applied to a mega menu. Changes that your make to dropdown items are not applied to elements you've added to the mega menu container.
What's next?
There are a range of options available with an advanced horizontal menu. You can:
- Manage the advanced menu to display the items you want.
- Customize the design to complement your site's theme.
- Adjust the menu's layout to set the alignment, spacing, and more.


