

Wix Editor: Adding and Setting Up Advanced Menus
3 min
In this article
- Step 1 | Add a menu to your page
- Step 2 | Set the menu as an advanced menu
- Step 3 | Add menu items
Upgrade your menus to an advanced menu to display items the way you want. Advanced menus allow you to create custom menus for different areas of your site, deciding where your visitors should go next.
Step 1 | Add a menu to your page
Get started by adding a menu to your site. There are lots of different designs to match your site's look and theme.
To add a menu:
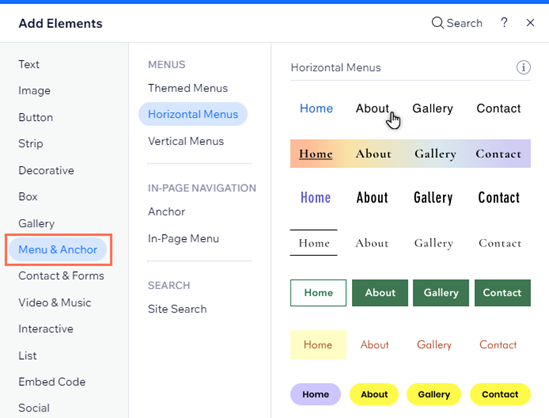
- Click Add Elements
 on the left side of the editor.
 - Click Menu & Anchor.
- Choose a menu type under Menus.
- Click and drag your chosen menu to the page.
- Repeat steps 1-4 for any more menus you want to add.
Want the full range of features that advanced menus have to offer?
We recommend adding a horizontal menu so you can have advanced design features, as well as the option to create sub-dropdown-items.
Step 2 | Set the menu as an advanced menu
After you add your chosen menu to your site, update it to an advanced menu to separate it from your site pages and unlock new features.
To set a menu as an advanced menu:
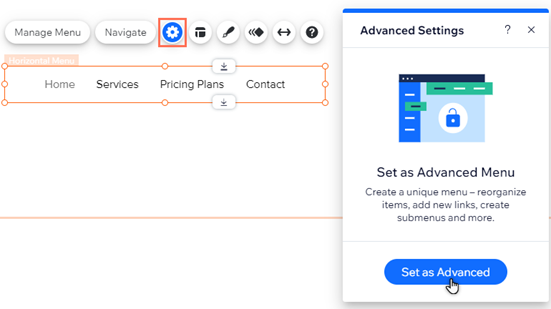
- Click the menu in your editor.
- Click the Settings icon
.
- Click Set as Advanced.
- Click Set as Advanced in the pop-up.
- Repeat steps 1-4 for any menus you want to set as advanced.
Step 3 | Add menu items
Choose what you want to display in your advanced menu. You can add pages, links, anchors, and drop-down menu titles to organize and display content the way you want.
To add items to the menu:
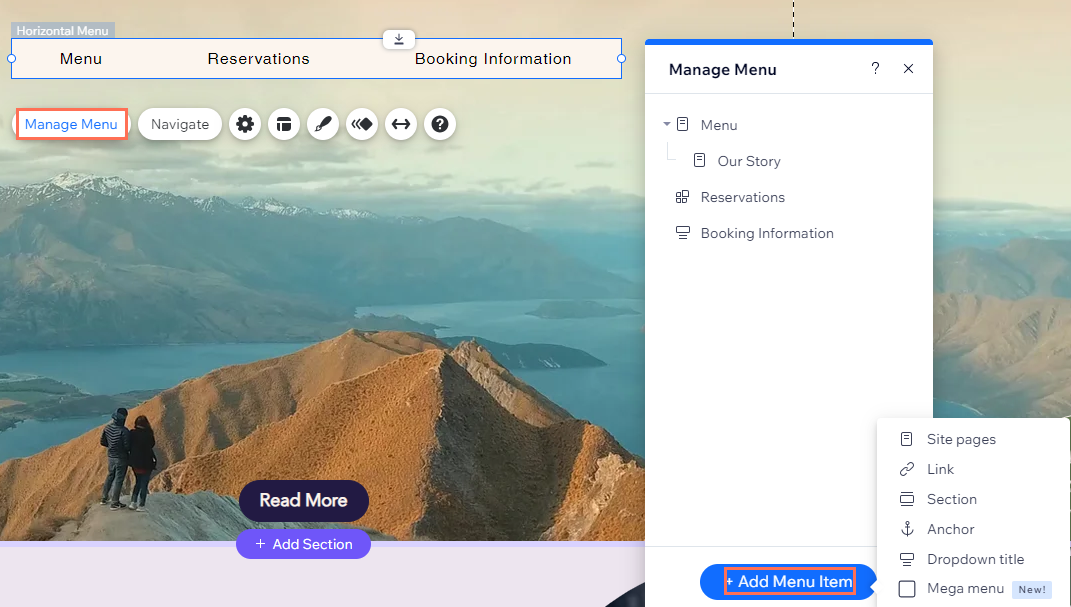
- Click the menu in your editor.
- Click Manage Menu.
- Click + Add Menu Item at the bottom of the panel.
- Choose the item type you want to add to your menu:
- Site Pages: Add site pages as menu items.
- Link: Add a link to your menu. You can link to external sites, documents, and more.
- Section: Add a page section as an item to your menu. When visitors click it, they're brought to the section.
- Anchor: Display a link to a page anchor on your menu. Clicking it brings the visitors to the relevant anchor.
- Dropdown title: Add a dropdown to your menu. Once you add the title, you can drag and drop menu items to be displayed in the dropdown.
- Mega menu: Add a container that's displayed when visitors hover over the item in the menu. You can change the layout and design of the container, and add elements. Learn more about mega menus
What's next?
- Tailor your advanced menu by adding, removing, and renaming items. You can also set up dropdown menus and sub-dropdown menus to streamline your content. Learn more about managing menu items
- Depending on the menu type (horizontal or vertical), you can customize the layout and design of your advanced menu to make it look how you want.
