

Wix Blog: Adding and Setting Up Your Blog
8 min
In this article
- Step 1 | Add Wix Blog to your site
- Step 2 | Change the display settings
- Step 3 | Change the layout
- Step 4 | Customize the design
- Step 5 | Create post categories
- Step 6 | Create your first blog post
- FAQs
Wix Blog allows you to share your stories, insights, and updates directly on your website. By adding a blog to your site, you can improve your site's SEO, and engage with your site visitors.
For example, if you're a small business owner, you can use your blog to share industry news, offer tips related to your products or services, and build a loyal community around your brand.
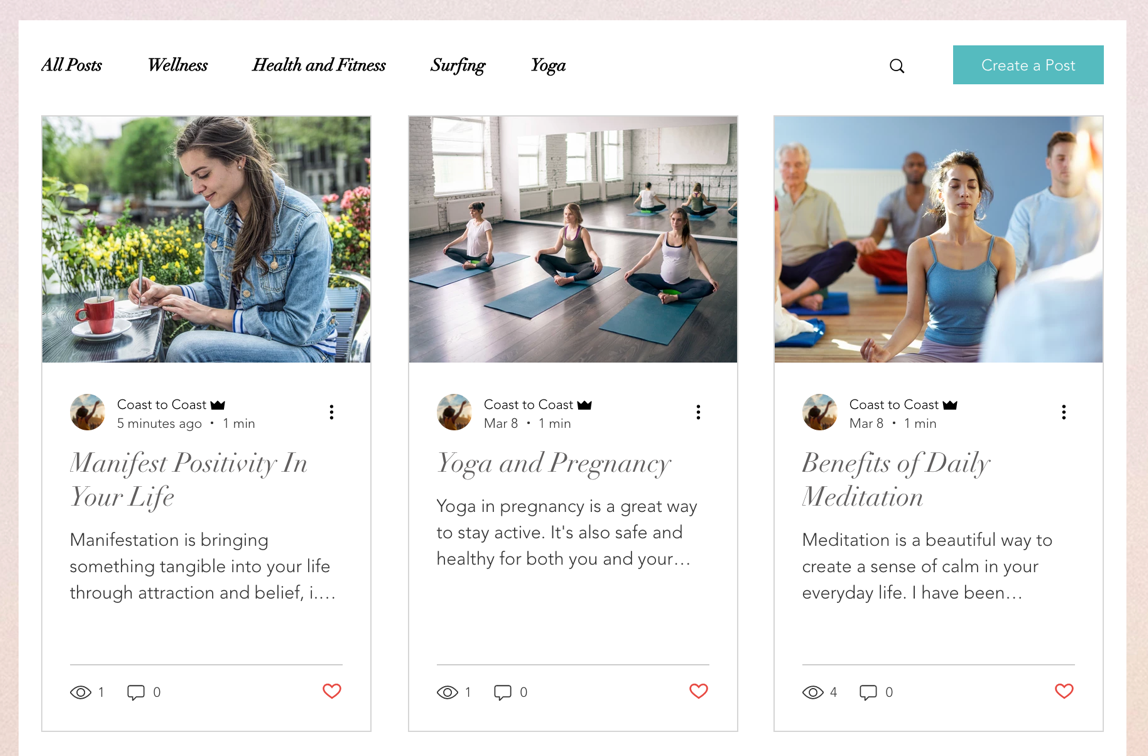
When you add Wix Blog, 2 new pages are added to your site automatically. These pages are your Blog Feed and your Blog Post page.
Tips:
- Before you get started, check out our complete step-by-step guide to blogging and our About Wix Blog article.
- You can also start with one of our Blog website templates that already include a built-in blog, then customize the design, layout and content to match your brand.
Step 1 | Add Wix Blog to your site
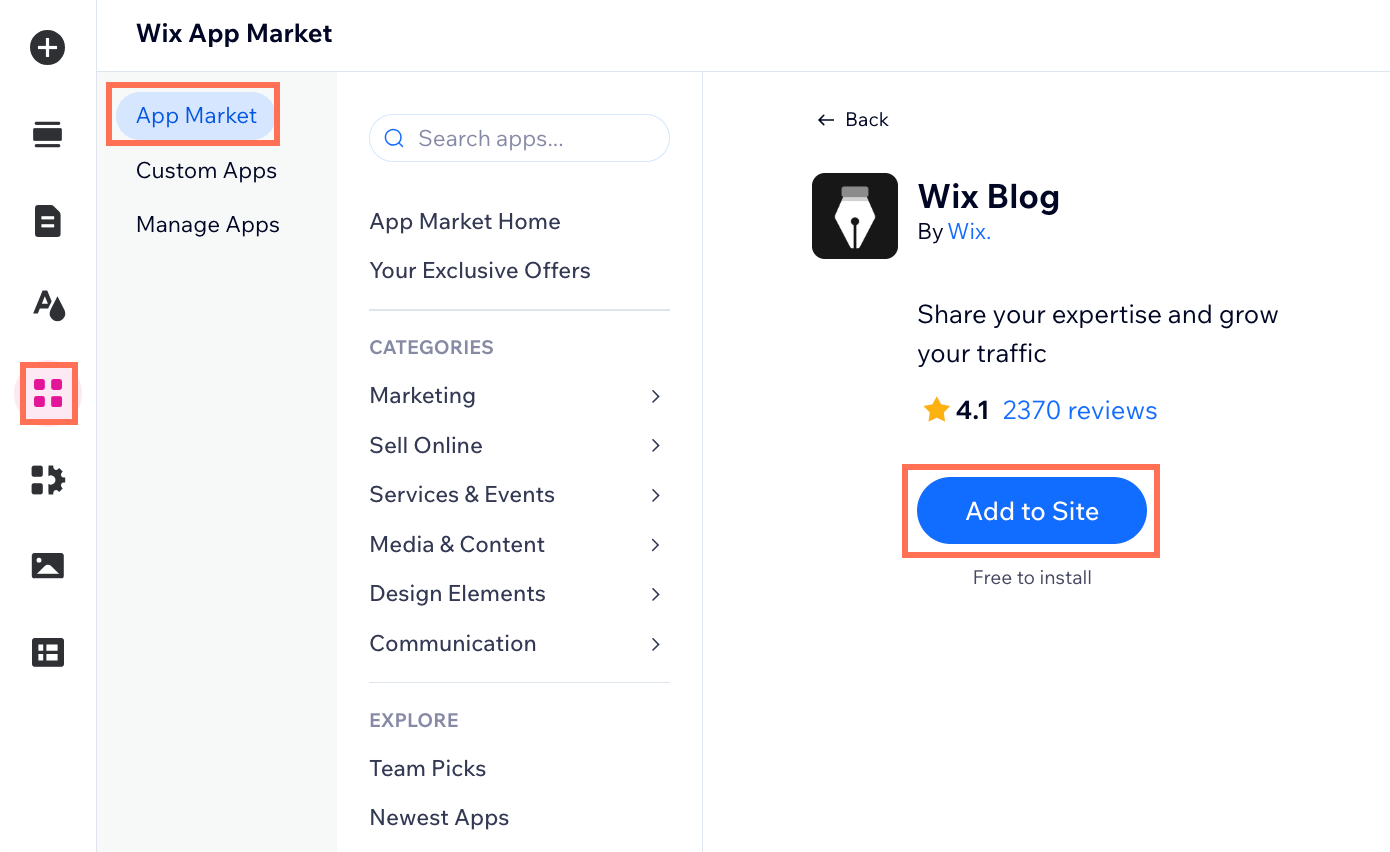
Some templates come with Wix Blog already pre-installed. If you do not have Wix Blog in your list of pages, you can add it from your editor, or directly from the Wix App Market.
Wix Editor
Wix Studio
Dashboard
Harmony Editor
- Go to your editor.
- Click Add Apps
 on the left side of the editor.
 - Search for the Wix Blog app in the search bar then select the app.
- Click Add to Site.
Note:
When you add Wix Blog, you are asked if you would like to install a members area. This gives members access to several features including the ability to log in, create a public profile and comment on blog posts.
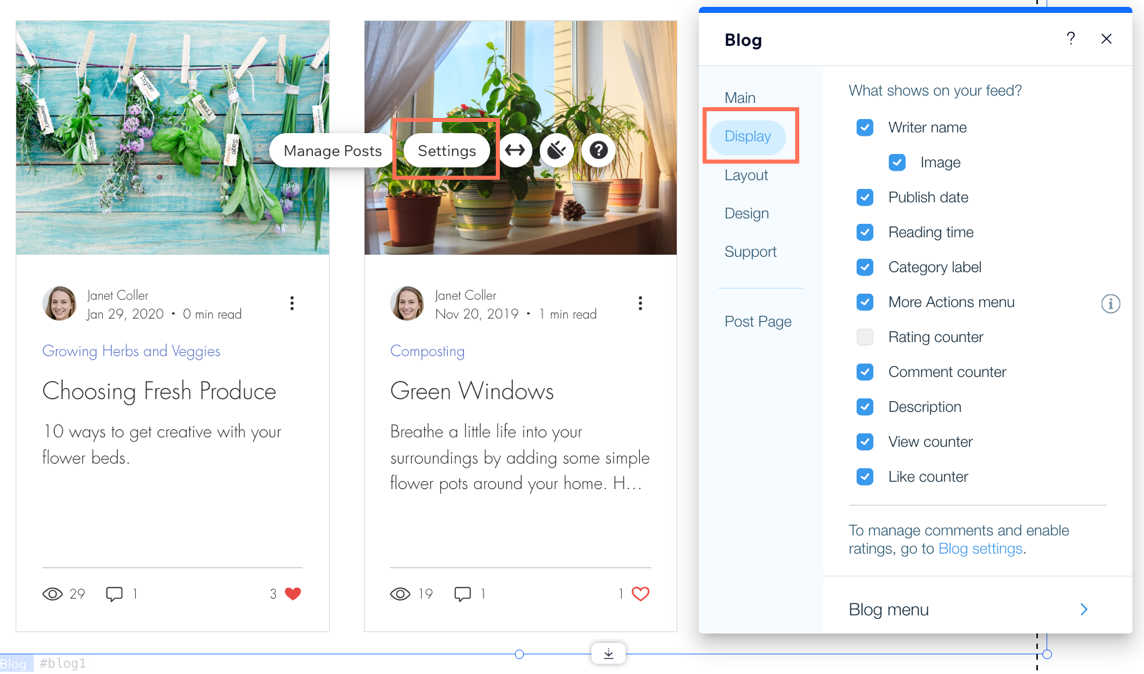
Step 2 | Change the display settings
Inside your editor, you can customize your blog's display settings to include the features you want to show on your Blog Feed and Post page. Select the information that you want to show on your feed and Post page, choose whether to display a menu on your blog, and add social share icons.
Note:
You may see different display options depending on the layout you choose. For example, the Side by Side layout lets you display descriptions of posts on your blog, but the Magazine layout does not.
To change the display settings:
- Click the blog feed element on your page.
- Click Settings.
- Customize what displays on your blog feed and post page.
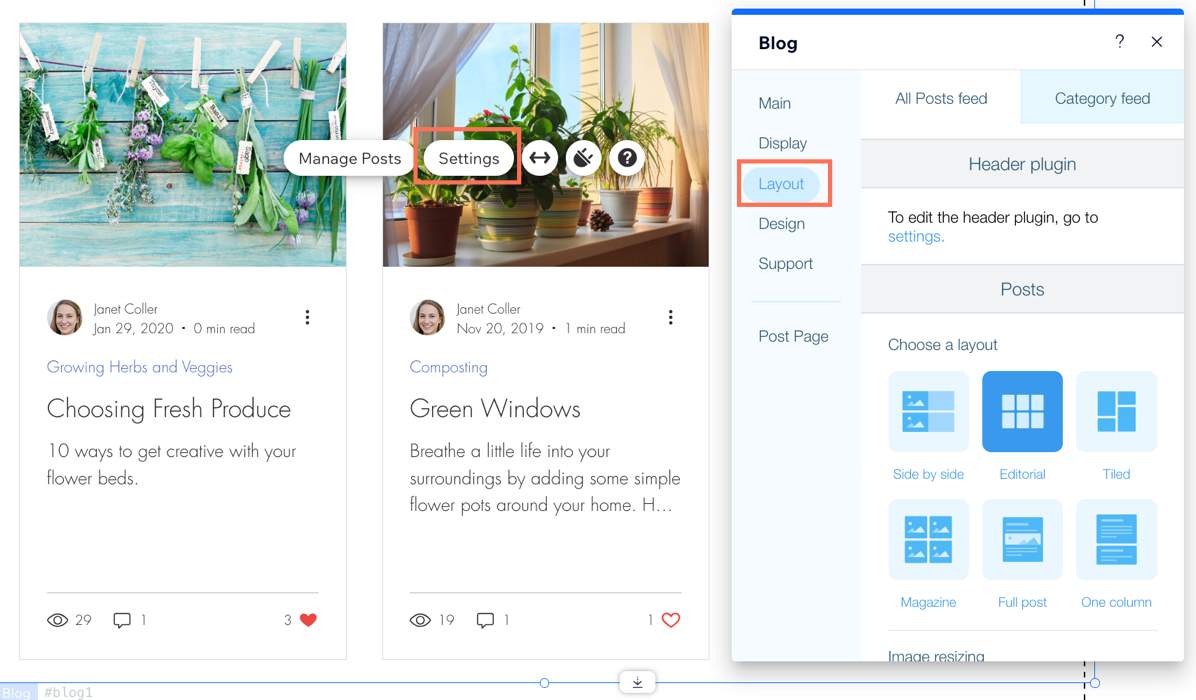
Step 3 | Change the layout
From your editor, try different layouts to see which best suits your site's style. You can choose a different layout for the All Posts Feed - the main feed of your blog where all of your posts appear, and for the Category Feed - which displays the posts per category.
Note:
We are using the Editorial layout in this article, other layouts may have different options than what is shown here.
To change the layout:
- Click the blog feed element on your page.
- Click Settings.
- Click the Layout tab.
- Choose a layout for the All Posts feed as well as the Category feed.
- Customize the layout using the options available.
Step 4 | Customize the design
From your editor, you can change the look and feel of your blog feed by customizing the colors and fonts, and button designs. You can also customize the design of your Post page.
To customize the design:
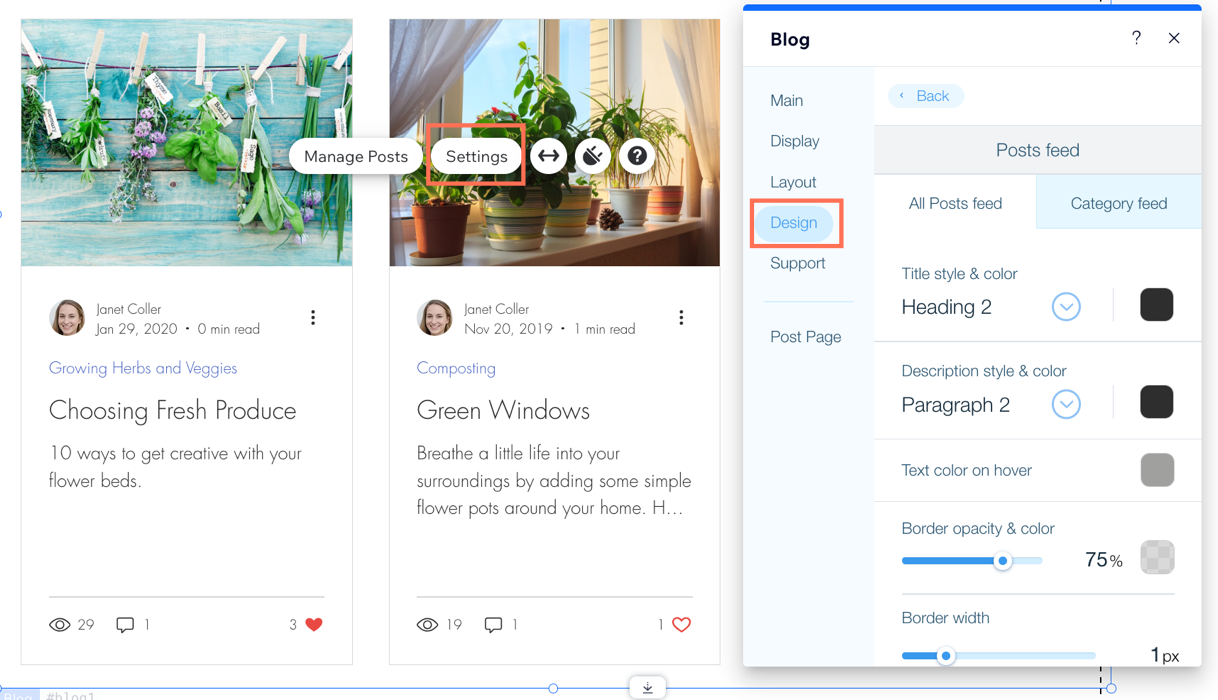
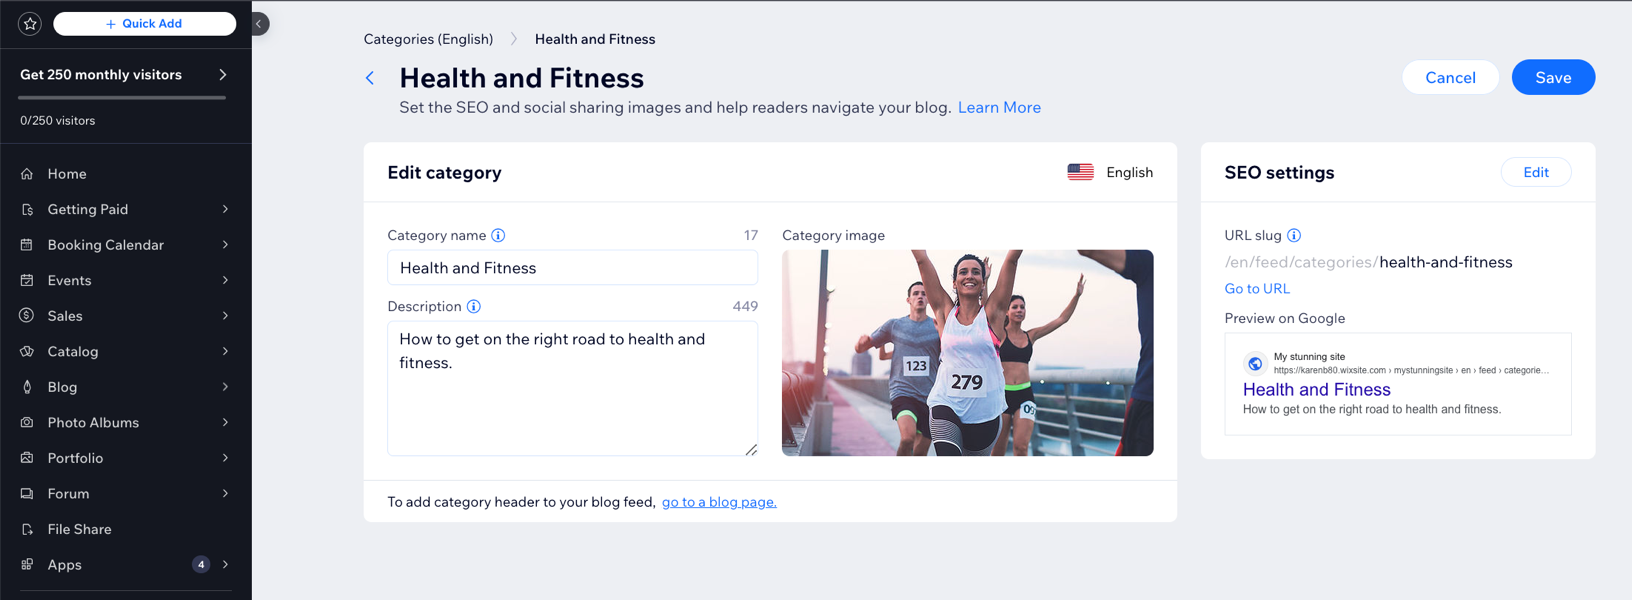
Step 5 | Create post categories
Once you've customized your blog feed, you can then create some categories to help structure and organize your blog, which is very useful once it grows bigger.
To create post categories:
- Click the blog feed element on your page.
- Click Manage Posts.
- Click the Categories tab on the left.
- Create categories for your blog posts.
Tip:
After creating your categories, you can click and drag the categories to reorder them.
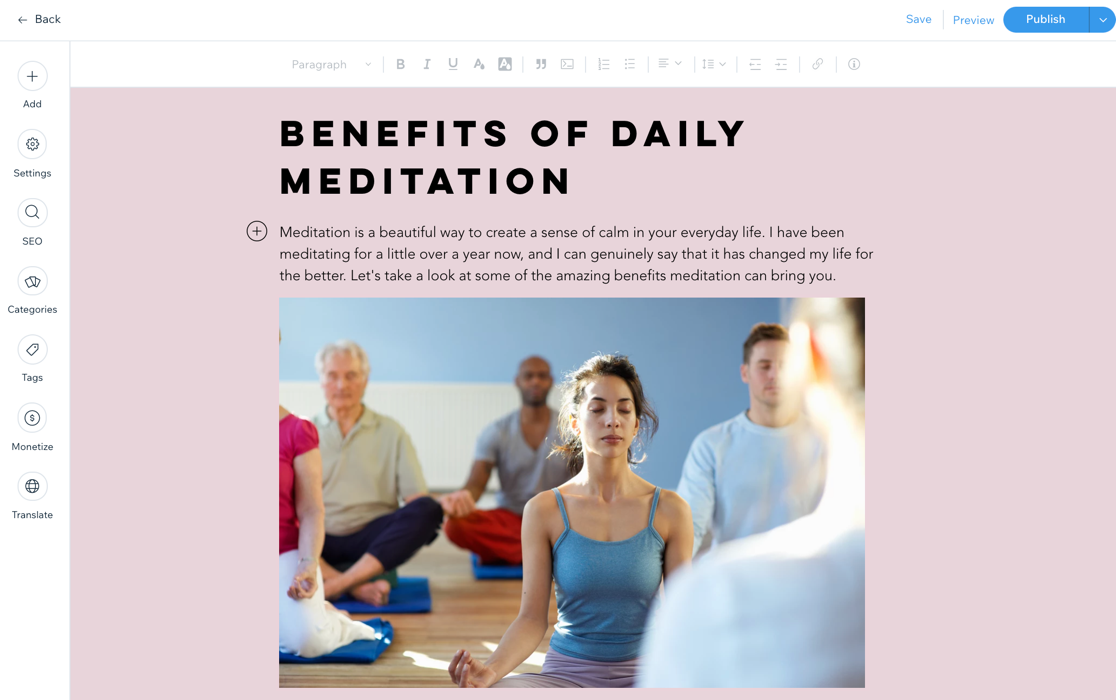
Step 6 | Create your first blog post
Once you've completed your setup, you're ready to start writing posts. You can do this from your site's dashboard, or from your live site. Your blog comes with default content that is full of helpful tips and tricks. Be sure to delete these posts before you publish your blog.
To create your first blog post:
- Click the blog feed element on your page and click Manage Posts.
- Click Create New Post and start writing. Learn how to write blog posts.
Tip:
To write posts from your live site, just log in to your live site using the email address associated with your Wix account.
FAQs
Click a question below to learn more about adding and setting up your blog.
I've added Wix Blog to my site, but I don't see it, what should I do?
Can I display blog posts on different pages other than the dedicated Blog pages?
Can I earn money from my blog content?
Can I translate my blog content to other languages?
If I customize my Blog Feed, will the settings change for my Blog Post page?
What is SEO and how can it help my blog?
How can I incorporate hashtags into my blog content?

Can I use Google AdSense to place ads on my blog?
Can I create a blog for members only?
Hire a Professional WriterGet the content you need for your website. Hire a writer from the Wix Marketplace to create text that fits your message and brand.
