

Wix Blog: Creating Blog Post Subscriptions
4 min
Adding a paywall is a great way to separate your public and premium content. By adding that extra layer to your blog content, you can enhance engagement and boost your monetization efforts.
Before you begin:
You need to have payment method set up in order to set up a subscription. Learn more.
Step 1 | Choose which posts to monetize
The first step is to choose which posts you want to monetize. When choosing posts, consider their value and uniqueness. Highlight in-depth, insightful, or exclusive content that receives high engagement from your followers. Ensure a balance of monetized and freely accessible content for a mutually beneficial arrangement.
Note:
In the following steps, we'll be choosing a single blog post to start from, however, you can add as many posts as you like to the plan you're about to create.
To choose a blog post:
- Go to the Blog tab in your site's dashboard.
- Click Create New Post.
- Click Monetize in the toolbar on the left.
- Click Get Started.
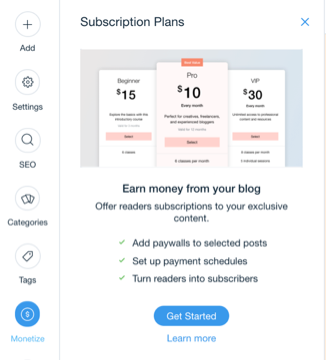
Step 2 | Create a pricing plan for your post
Wix Blog works with Pricing Plans to allow you to create a subscription paywall to your readers. After clicking Get Started in step 1, you'll be directed to create your first plan.
To create a plan:
- Click Create Plan in the popup.
- Enter the plan details:
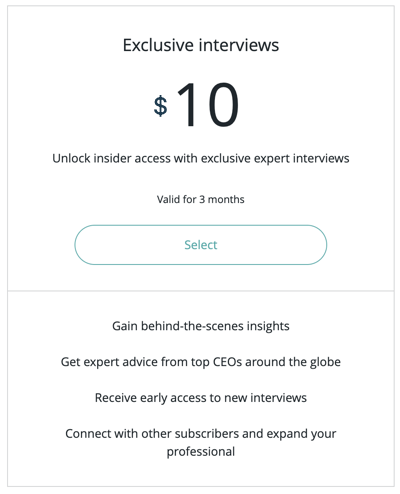
- Plan name: Choose a descriptive name for your plan.
- Tagline: Write a concise and appealing tagline that summarizes the plan's benefits.
- List of benefits: Detail the benefits that subscribers receive as part of the plan.
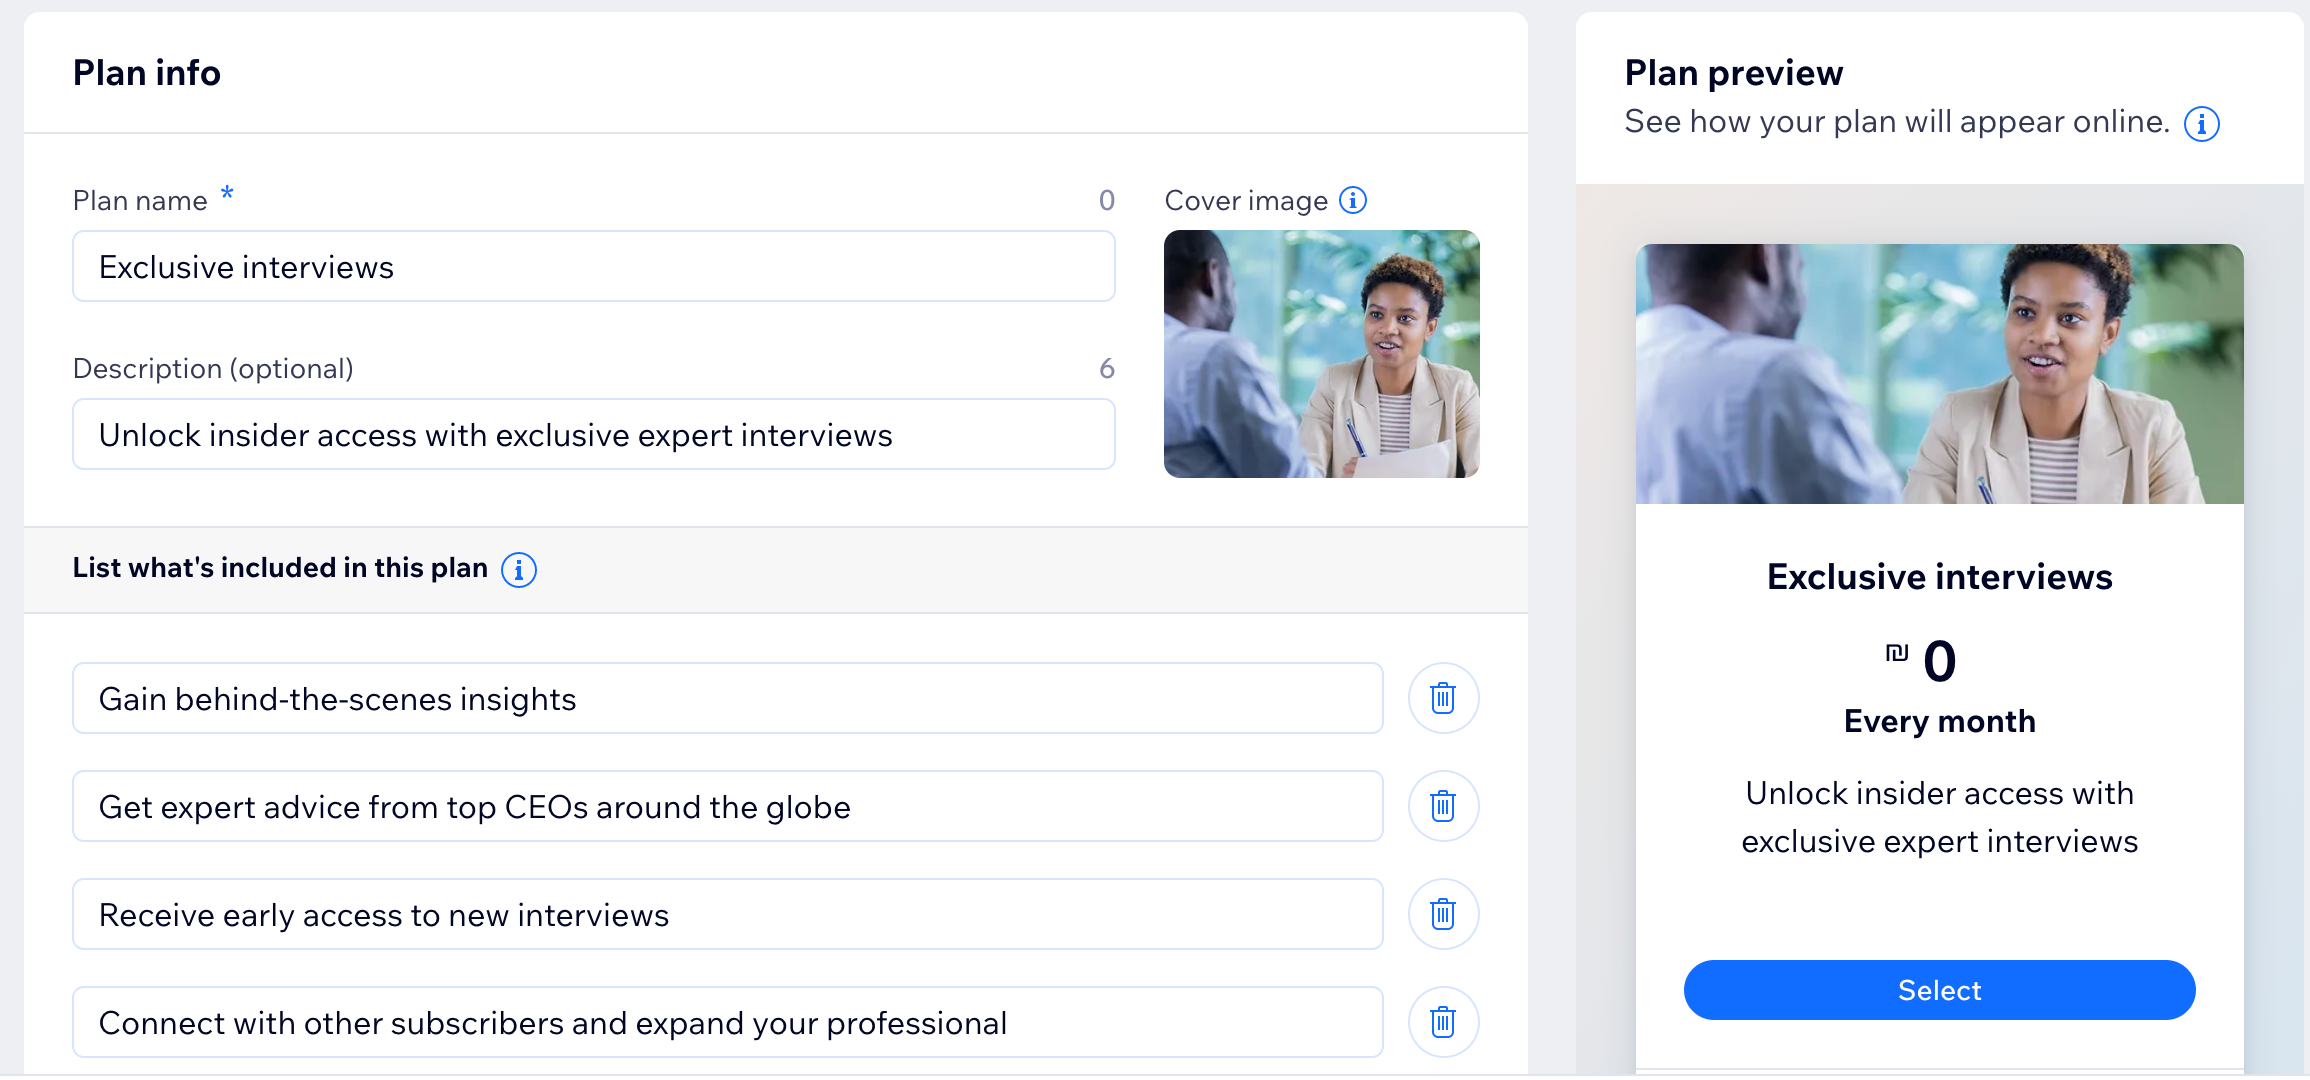
- Under Other Benefits, choose which posts you want to include:
- Click Choose Posts under Posts included.
- Select the posts you want to include.
- Click Done.
- Under Pricing Options, set the pricing and duration of the subscription. You can choose from the following options:
- Free Plan: Offer your blog readers access to your subscription content for free. Click the drop-down to select the duration.
- One Time Payment: Offer your readers access to your subscription content for a one time payment. Enter the price and select the length of the plan.
- Recurring Payments: Offer your readers access to your subscription content when they set up a recurring payment plan. Enter the payment frequency and the price of each payment.
- (Optional) Under Settings, provide details of the plan policy:
- Click the One purchase per person toggle to choose how you want to allow visitors to purchase this plan:
- Enabled: Visitors can only purchase this plan once.
- Disabled: Visitors can purchase this plan more than once.
- Provide any important information about the plan, e.g., renewals, cancellations and refunds.
- Click the One purchase per person toggle to choose how you want to allow visitors to purchase this plan:
- When you're ready to create your plan, click Save.
FAQs
How do I add more posts to a specific subscription plan?

Can I create more than 1 subscription plan?

How do I remove a post from a plan?
Can I change the position of the subscription box on my post?

Want to learn more?
Check out our complete step-by-step guide to blogging.
