


Wix Blog: Customizing Your Blog Feed
In this article
- Choosing what info to show on your feed
- Changing the layout of your feed
- Customizing the design of your feed
- FAQs
Welcome your readers to a captivating blog feed where they can scan through your latest posts and select the ones they want to read. Offer them the convenience of choosing by category, allowing them to zero in on their preferred topics.
Customize both the blog and category feeds to match your site's design, providing a consistent and appealing visitor experience.
Note:
This article is about customizing your blog feed. You can also
customize the post page the readers see when they open a specific post.
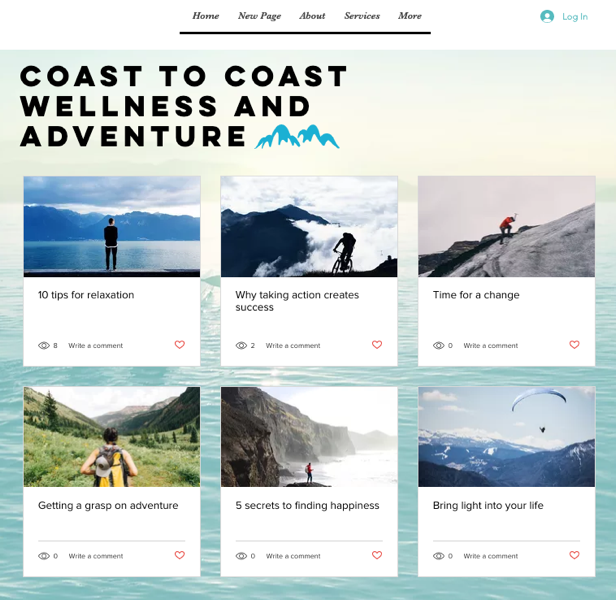
Choosing what info to show on your feed
Customize the information your readers see in the blog or category feeds. Decide whether to provide more context, such as estimated reading time or author name, or opt for a more streamlined look by hiding any extra details. The settings you choose here will be applied to both your blog feed and your category feed.
Wix Editor
Studio Editor
Wix Harmony Editor
- Go to your editor.
- Go to your Blog page:
- Click Pages & Menu
 on the left side of the editor.
 - Click Blog Pages.
- Click your Blog page.
- Click Pages & Menu
- Click the blog element on your page.
- Click Settings.
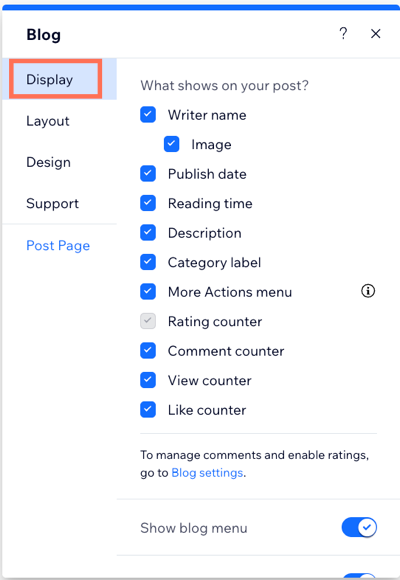
- Click the Display tab.
- Customize the following settings using the options available:
- What shows on your post?: Select the checkboxes to choose what social icons display on your posts.
- Show blog menu: Enable/disable the toggle to show or hide the blog menu at the top of your feed.
- Category labels: Enable/disable the toggle to show or hide category labels on blog posts.
- Search box: Enable/disable the toggle to show or hide a search tool on your blog feed.
- Social sharing: Click Social sharing and enable/disable the Enable social sharing toggle to show or hide the social icons.
Changing the layout of your feed
Customize the arrangement of your posts in the feed to perfectly suit your vision. Choose from a variety of options, including post and image size, placement, and loading style, to create a visually stunning and cohesive blog.
The available design settings depend on the layout you choose. Additionally, the design settings may differ between your All Posts feed and Category feed.
Tip:
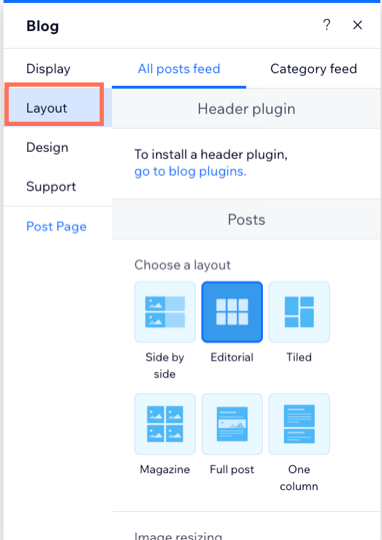
You can have a different layout for each of your feeds. For example, you might choose a Side-by-Side style for your All Posts feed and the Editorial layout for your Category feed.
Wix Editor
Studio Editor
Wix Harmony Editor
- Go to your editor.
- Go to your Blog page:
- Click Pages & Menu on the left side of the editor.
- Click Blog Pages.
- Click your Blog page.
- Click Pages & Menu
- Click the blog element on your page.
- Click Settings.
- Click the Layout tab.
- Click the tabs at the top to choose which feed you want to customize:
- All Posts Feed: This is your main blog feed which displays all of your posts.
- Category Feed: This feed displays your blog categories so visitors can choose a specific topic.
- Choose what you want to customize:
- Posts: Select a layout for your post, such as Side-by-side or Magazine. Resize your image (crop or fit), adjust the image ratio (e.g., 16:9, 4:3), and choose how your text is aligned (left, center, or right) to suit your design.
- Layout settings: Choose how posts are displayed by setting the number of cards per row and adjusting the post size, margins, spacing, and height. Customize the text side padding, and select the number of visible lines for the titles and descriptions to refine your design.
- Post loading: Decide how posts load on your feed by selecting infinite scroll or pagination (up to 100 pages) and adjust the number of posts loaded per scroll to suit your needs.
Customizing the design of your feed
Tailor the colors and fonts on your feed to align with your site and brand. The design options vary based on the selected layout, so take the time to review the available options and select the one that best suits your needs.
Wix Editor
Studio Editor
Wix Harmony Editor
- Go to your editor.
- Go to your Blog page:
- Click Pages & Menu on the left side of the editor.
- Click Blog Pages.
- Click your Blog page.
- Click Pages & Menu
- Click the blog element on your page.
- Click Settings.
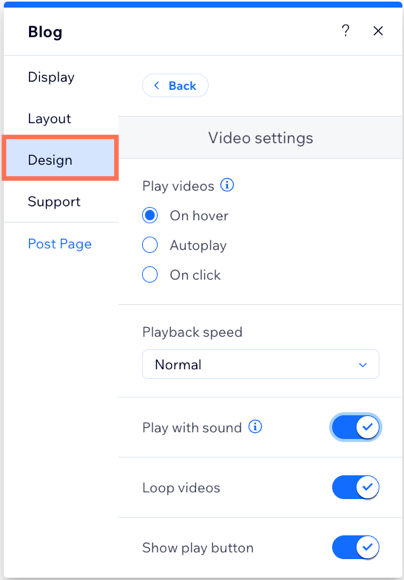
- Click the Design tab.
- Choose which element you want to design and customize it using the options available:
- Navigation: Select the colors and fonts for navigation options, including pagination, infinite scroll, category filters, and next/previous post links.
- Posts: Choose the colors and fonts for posts in the All Posts feed and Category feed.
- Category Labels: Customize the colors, fonts, and style of the category label displayed on blog posts. These labels show which category each post belongs to.
Note: This option is only available if you enable the Category Label toggle in the Display settings. - Buttons: Customize the colors for buttons (e.g., the Login button) as well as the background area of the blog feed.
- Ratings: Customize the filled and unfilled stars for the All Posts feed and Category feed by selecting their colors and opacity.
- Video Settings: Adjust how videos in your blog feed play. Choose when they start, whether they play with or without sound, and set the playback speed.
FAQs
Click a question below to learn more about customizing your blog feed.
How can I make my blog posts more visually appealing?
Can I hide specific blog posts from view?
Why is my blog feed not displaying correctly?
