

Wix Blog: Adding a Cover Image to a Blog Post
4 min
In this article
- Adding a cover image to a blog post
- FAQs
Adding a striking cover image to your blog post is a simple way to captivate your readers' attention. Each post displays its own cover image in your blog feed, your Post List, and when you share a post on social media.
Adding a cover image to a blog post
Enhance your blog post by adding a brand-new cover image or updating the existing one. You can upload an image from your computer, select one from your site files, or choose from stock images, such as, Media from Wix.
Dashboard
Wix app
- Go to Blog in your site's dashboard.
- Select the post that you want to add a cover image to.
- Click Settings.
- Enable the Featured image toggle.
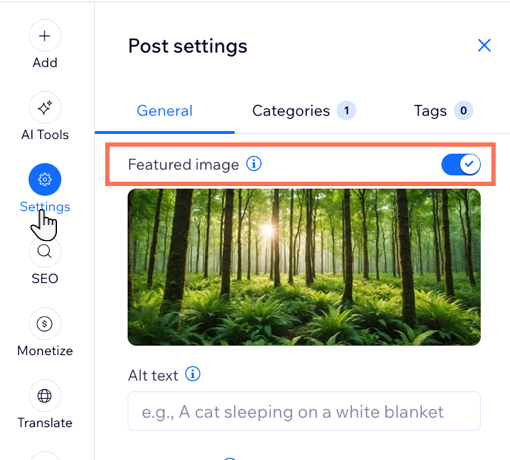
- Add a cover image:
- Choose to upload a new image if your post doesn't have one yet or replace an existing image:
- Upload a new image: Click the Add icon
 .
. - Replace existing image: Hover over the existing image and click the Update icon
 .
.
- Upload a new image: Click the Add icon
- Click +Upload Media to add an image from your computer, or select an image from your site files or one of the stock image options such as Media from Wix.
- Click Add to Page.
- Choose to upload a new image if your post doesn't have one yet or replace an existing image:
- (Optional): Enter alt text in the field provided under the cover image in the post composer.
- Click Publish.
FAQs
Click a question below to learn more about adding cover images.
Why is my blog post cover image different from the image inside the blog post?
If I change my featured image, does it affect the images in my blog post?
My images are not displaying correctly on my live site. What can I do?
Hire a Professional WriterGet the content you need for your website. Hire a writer from the Wix Marketplace to create text that fits your message and brand.
