


Wix Blog: Displaying Different Blog Posts on Different Site Pages
In this article
- Step 1 | Set up your category
- Step 2 | Assign blog posts to your category
- Step 3 | Add a Post List to your site
- Step 4 | Select the category to display
The Post List element lets you display different blog posts on different site pages. You can add a Post List element to any page and choose which blog categories to show on that page. For example, if you have a recipe blog, you might want to show your salad recipe blog posts on one page, and your dessert recipe blog posts on another.
This is a great way to drive traffic to your blog from other areas of your site and also highlight some new and interesting posts.
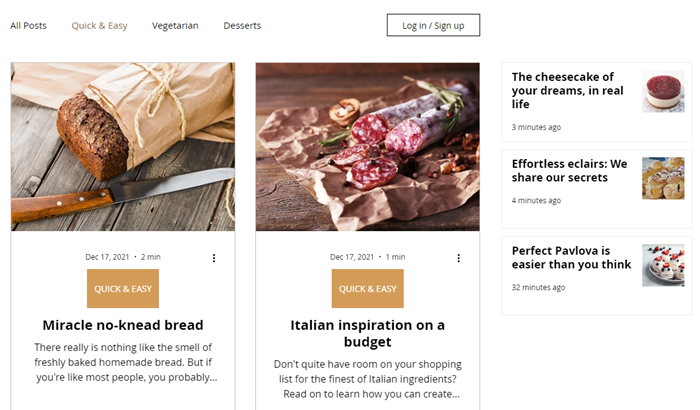
Step 1 | Set up your category
First, you need to set up your categories in your blog. Categories are a great way to add structure to your blog by grouping similar posts together.
To set up your category:
- Go to Categories in your site's dashboard.
- Click New Category.
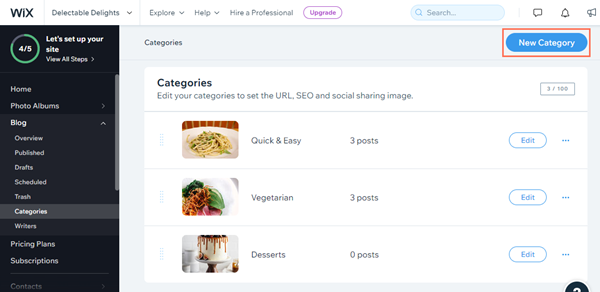
- Enter the label for your category under Category label. This label appears in your posts and blog menu.
- (Optional) Edit the last part of the category's URL under Category URL slug. Learn more about updating the category URL slug.
- Enter a title under Category title. This title also appears in search engine results and when you share the category page on social media.
- Enter a description under Category description. This description also appears in search engine results and when you share the category page on social media.
- (Optional) Click the Add icon + under Category image to choose an image for the category. This image also appears when you share the category page on social media.
- Click Save.
Step 2 | Assign blog posts to your category
Once you've set up a new category, you can start assigning your blog posts to the category in your dashboard.
To assign posts to a category:
- Go to Published in your site's dashboard.
- Click Edit next to the post that you want to assign to a category.
- Click Categories.
- Select the categories you want to add the post to under Assign a category.
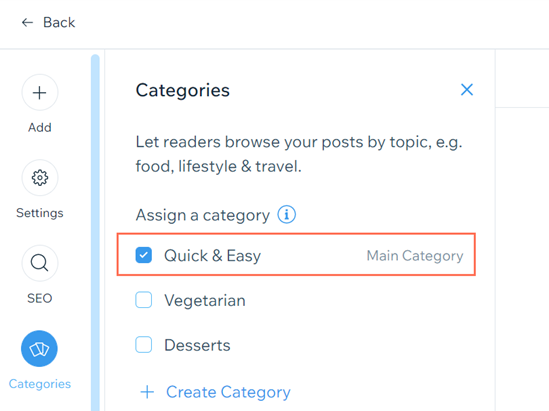
- Click Publish.
Step 3 | Add a Post List to your site
Next, you need to add a Post List to your site. Adding a Post List allows you to showcase posts from anywhere on your site.
To add a Post List:
Wix Editor
Studio Editor
Wix Harmony Editor
- Go to your editor.
- Select the page that you want the Post List to appear on.
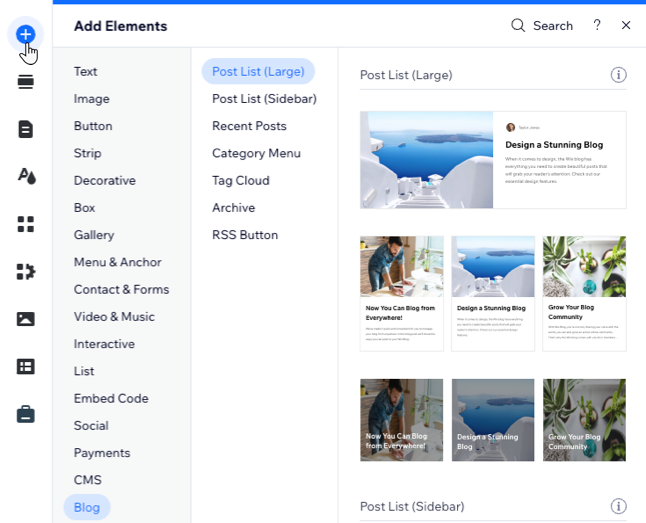
- Click Add Elements
 on the left side of the editor.
 - Click Blog.
- Click Post List.
- Select the Post List you want to use, or drag it to position it on the page.
Step 4 | Select the category to display
Finally, select the category that you want to display posts from in your Post List.
To select a category:
- Click the Post List in your editor.
- Click Settings.
- Click the Settings tab.
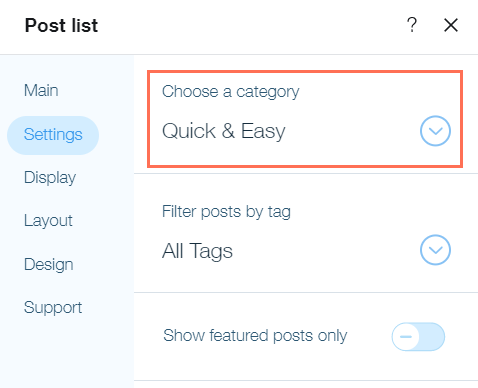
- Select the category that you want to use under Choose a category.
- Click Publish.
Tip:
You can also customize the design and layout of your Post List to match your site.
Learn how to customize your Post List
Hire a partner to add this feature to your siteGet help switching to the new Wix Blog, customizing the layout and more.
