

Wix Editor: Viewing and Selecting Overlapping Elements
2 min
In this article
- Selecting elements using the Layers panel
- Selecting elements using the right-click menu
If you are having trouble selecting an element while editing your site, it is possible that it is placed behind another element. You can select these elements to mange, adjust, or customize them with both the Layers panel, and the right-click menu.
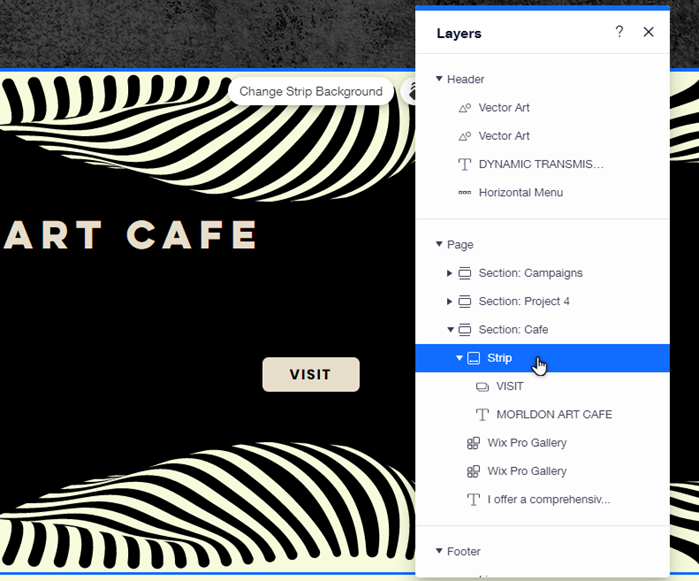
Selecting elements using the Layers panel
The Layers panel is a clear, organized way to view and select elements on your page. Depending on your page layout, the panel is divided into the header, main page, and footer, so you can quickly locate the element you want.
To select elements from the Layers panel:
- Go to your editor.
- Click Layers
 on the bottom left of the editor.
 - Click Header, Page or Footer.
- Click the relevant element from the list.
Did you know?
- Once you've selected an element in the panel, you can customize and adjust it as needed.
- You can use the Layers panel with Dev mode to temporarily hide, and focus on, specific elements. Learn more about working with the Layers panel
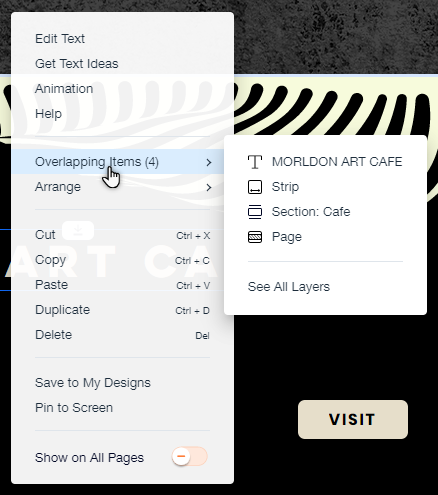
Selecting elements using the right-click menu
Depending on the element type, the right-click menu displays a number of actions for adjusting and managing your elements. You can also use it to view and select overlapping items (elements) on an area of your page, and adjust them as needed.
To select elements with right-click:
- Go to your editor.
- Right-click an element in the editor.
- Hover over Overlapping Items.
- Click the relevant element from the list.
Notes:
- Once you have selected an item, you can move it around or bring it forward or send it backward. Learn more about arranging elements using the right-click menu
- Mac users should press Ctrl and click the mouse button to open the menu.
Tip:
You can also press Ctrl + Shift + M to toggle through the elements on the page until you reach the correct one, and Ctrl + M to toggle backwards through the elements.
