

Wix Blog: Working with Drafts and Scheduling Posts
5 min
In this article
- Creating a draft blog post
- Publishing a draft blog post
- Scheduling a blog post
- FAQs
Not ready to push publish? No problem. The Save to Draft feature allows you to develop your content securely without publishing right away. When you’re ready, you can publish your draft or schedule your post to go live at a specific time.
These tools help you manage your blog more efficiently, as they allow you to polish your content over time, while also maintaining a consistent posting schedule.
Note:
We recommend that you keep your draft content on one browser tab when working on your computer. Writing across multiple tabs can lead to multiple versions of your draft and content being overwritten.
Creating a draft blog post
Create draft blog posts to work on your content at your own pace before publishing. Whether you’re using your site dashboard or the Wix app, you can save, access, and edit your drafts whenever you need.
Dashboard
Wix app
- Go to Blog in your site's dashboard.
- Click +Create New Post.
- Add the relevant content.
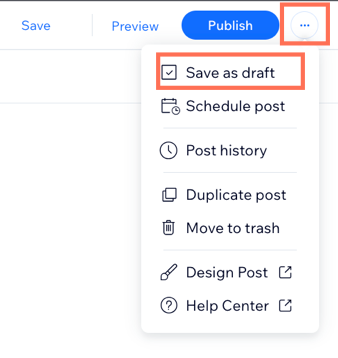
- Click the More Actions icon
 and select Save as draft.
Publishing a draft blog post
When your draft is ready to share, you can publish it directly from your site dashboard or the Wix app. Once you publish your draft post, it is added to your blog where your site visitors can read it.
Dashboard
Wix app
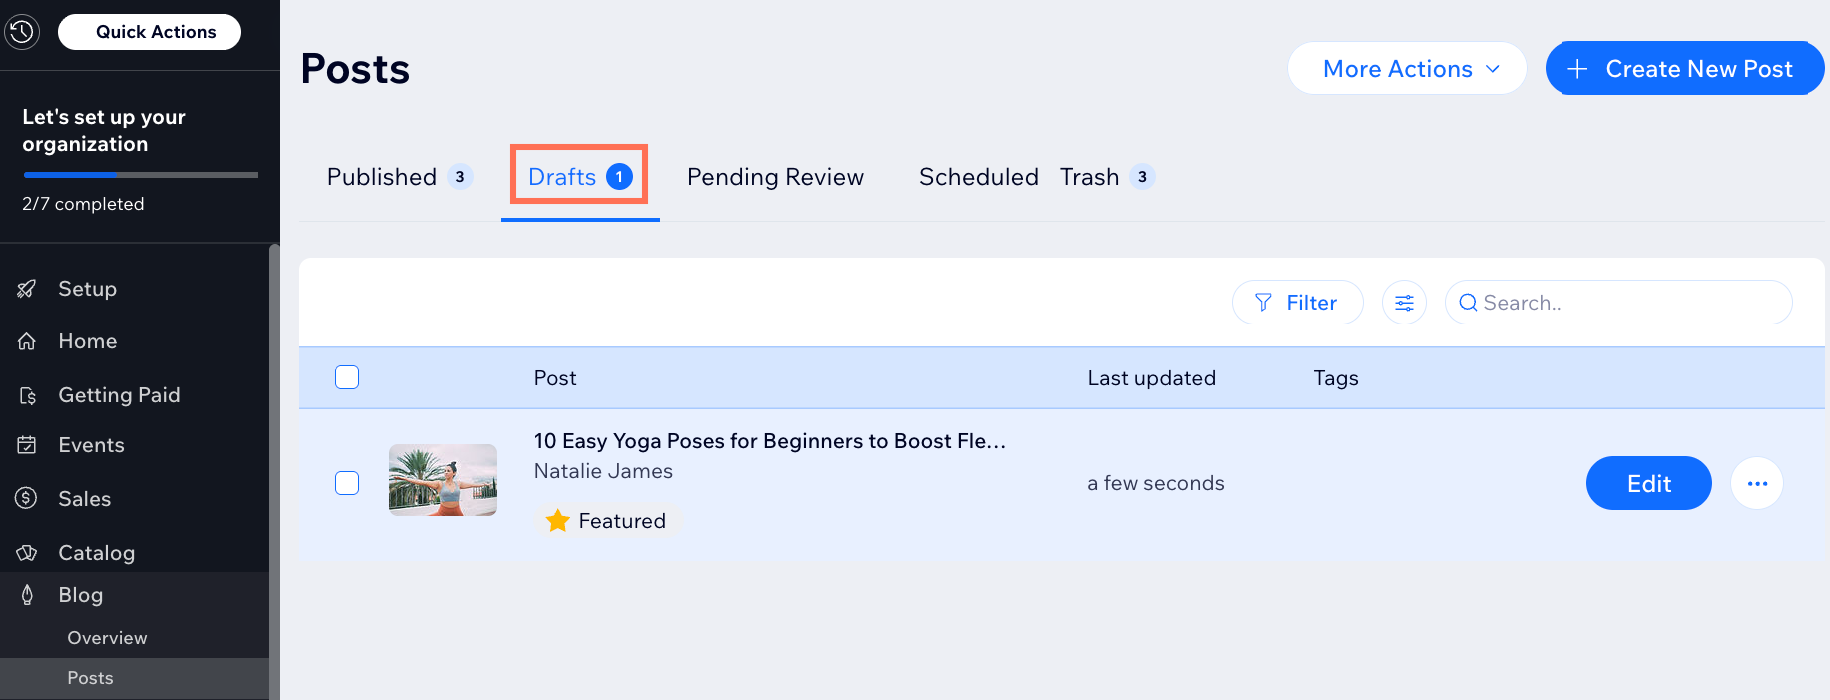
- Go to Posts in your site's dashboard.
- Click the Drafts tab at the top.
- Click Edit next to the relevant post.
- Review the post and make any changes required.
- Click Publish.
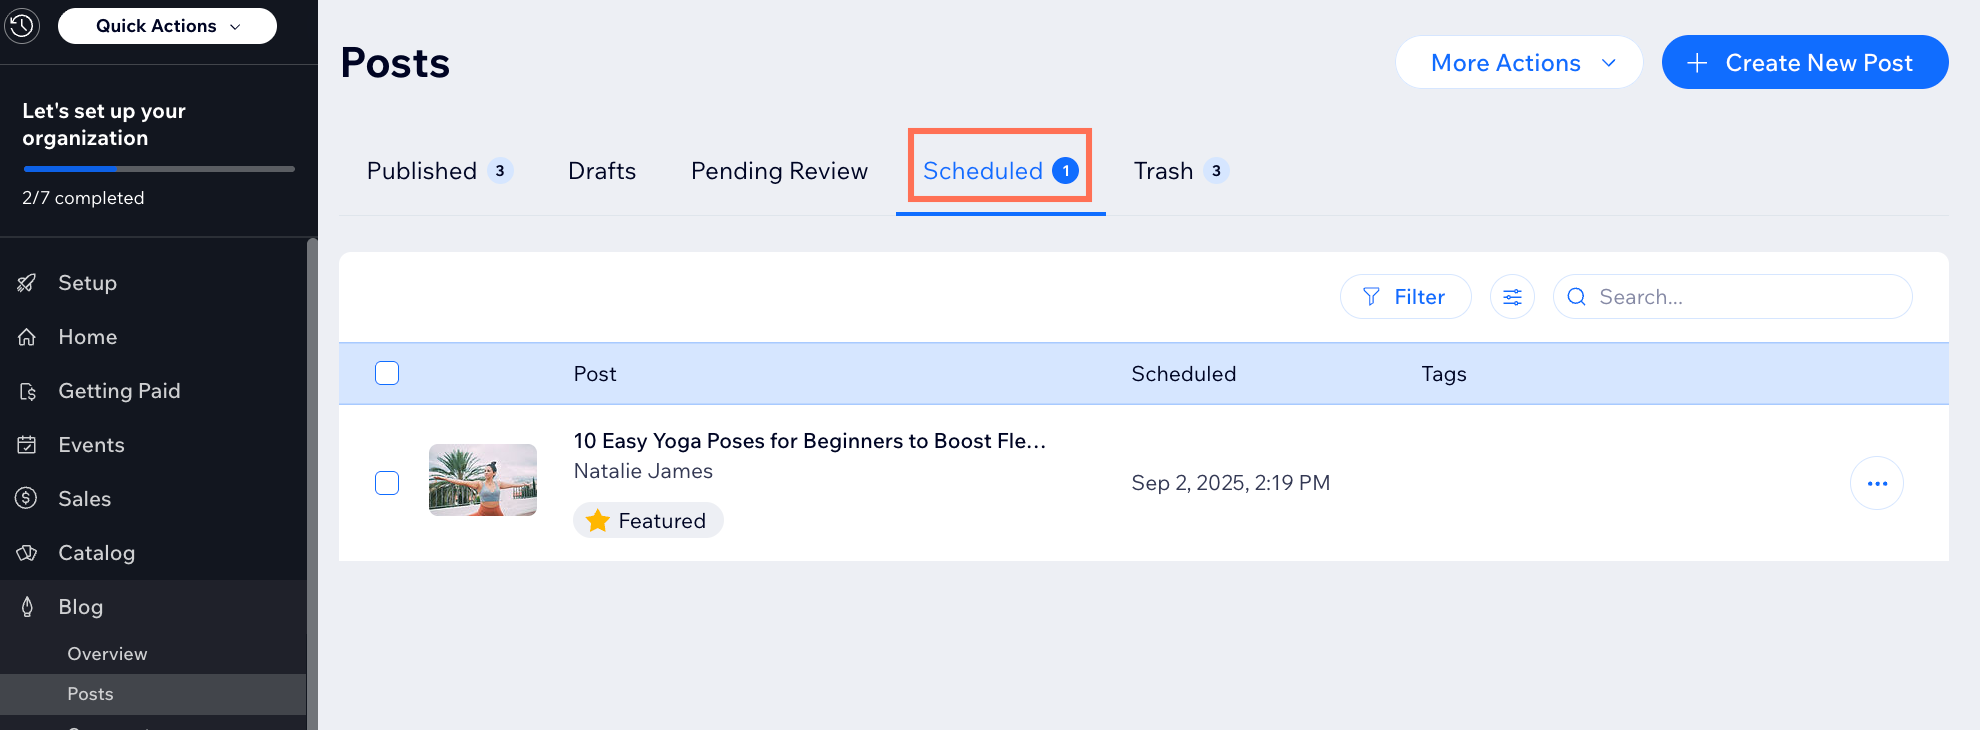
Scheduling a blog post
Maximize your readership by publishing blog posts at a time when you are likely to get more engagement. With scheduling, you can write blog posts when it's most convenient and set them to go live when you choose.
Dashboard
Wix app
- Go to Blog in your site's dashboard.
- Click +Create New Post.
- Add in the relevant content.
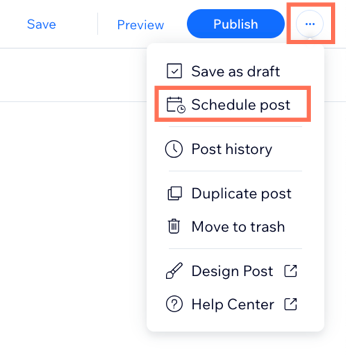
- Click the More Actions icon and select Schedule Post.
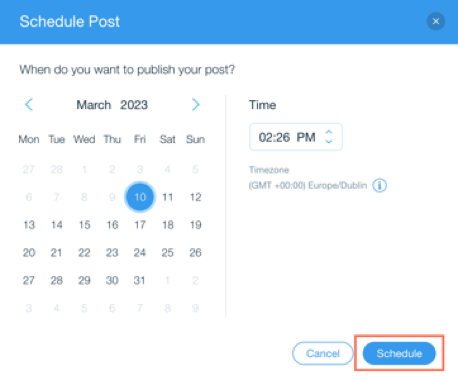
- Select the date and time you want publish your post.
- Click Schedule.
FAQs
Click a question below to learn more about working with drafts and scheduling blog posts.
Will my site visitors see my draft posts?
What happens to my post once it's scheduled?
Can I edit a post after I schedule it?
Will I receive a notification when a scheduled post is published?
Hire a Professional WriterGet the content you need for your website. Hire a writer from the Wix Marketplace to create text that fits your message and brand.
