


Wix Blog: Creating and Managing Blog Categories
In this article
- Creating blog categories
- Assigning posts to categories
- Reordering your categories
- Deleting a category
- Viewing category pages on your live site
- FAQs
Categories help you organize your blog posts by topic, making it easier for readers to discover content that interests them. You can create and manage categories from your site dashboard, or the Wix app. Once you've set up your categories, you'll be able to display them on your blog pages as a category menu on your main blog feed.
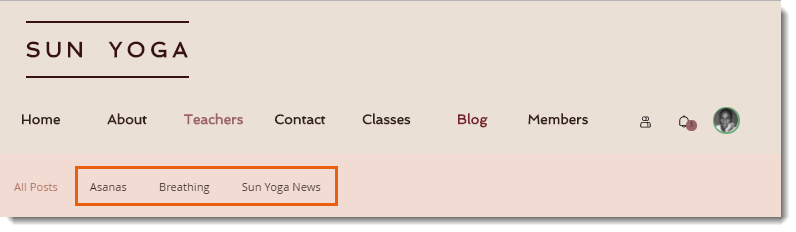
Creating blog categories
Create categories for each topic your blog covers. You can assign posts to more than one category (up to 10 per post), giving you the freedom to organize your posts however you choose. Use clear titles and descriptions for your categories, so readers know what to expect.
Dashboard
Wix app
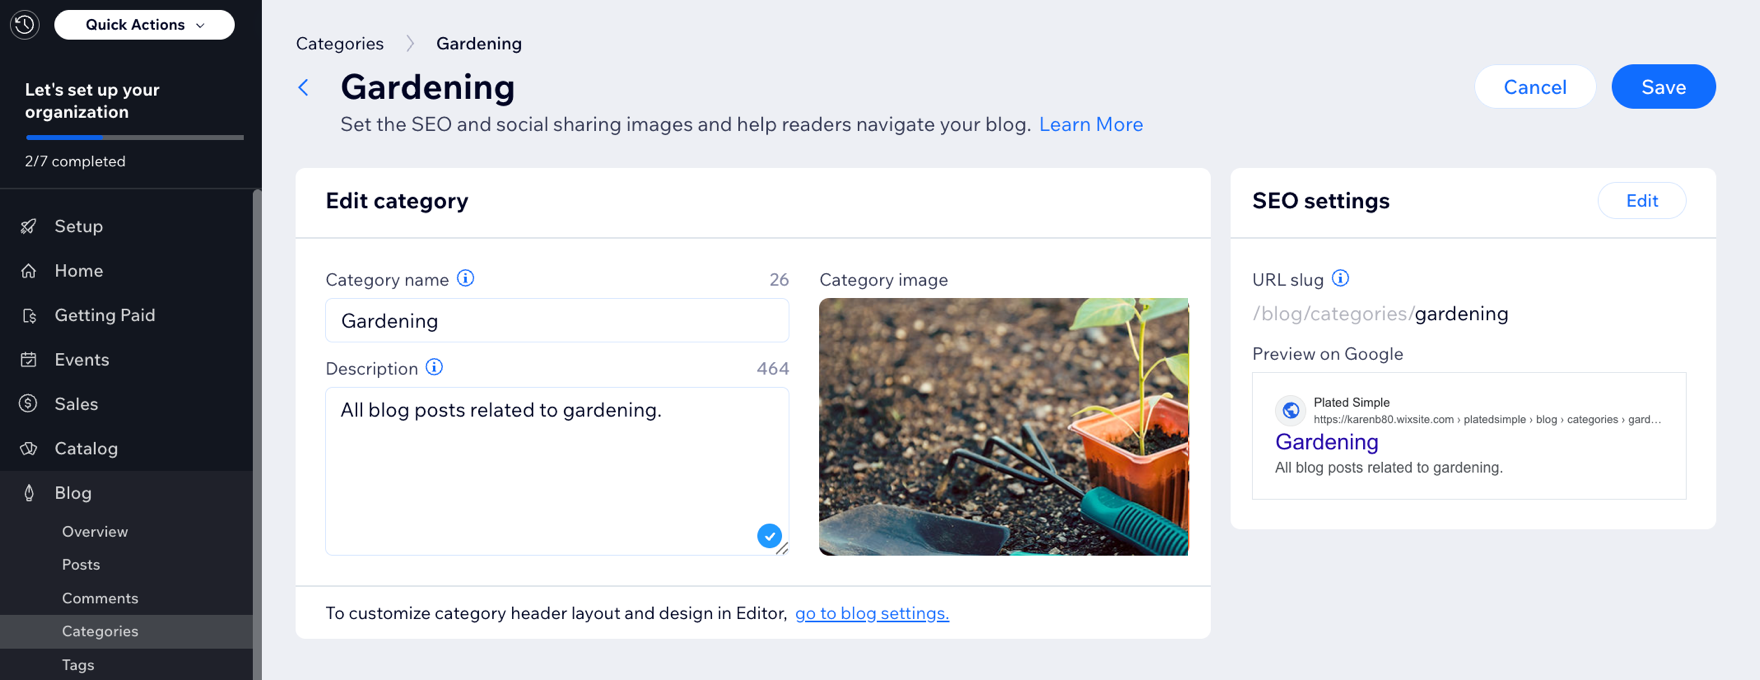
- Go to Categories in your site's dashboard.
- Click + Create Category.
- Enter the Category name in the field provided.
- Describe what the category is about in the Description field.
- Click the Add icon
 under Category image to add an image for your category.
 - (Optional) Click Edit next to SEO settings to customize the category SEO settings.
- Click Save.
Tip:
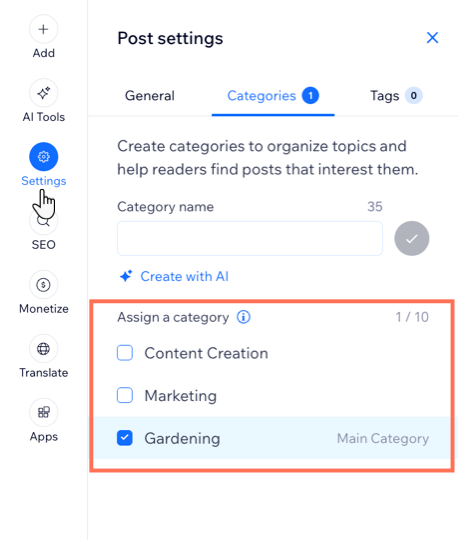
You can also create a new category as you're creating your blog post. Click the
Categories tab on the left of any blog post to assign and create new categories.
Assigning posts to categories
Assigning posts to categories helps readers find related content and lets you keep your blog organized as it grows.
Dashboard
Wix app
- Go to Blog in your site's dashboard.
- Choose what you want to do:
- Create a new post:
- Click + Create New Post.
- Add the title of your post.
- Add the relevant content to the main body of the post.
- Edit an existing post:
- Hover over an existing post and click Edit.
- Create a new post:
- Click the Settings tab.
- Click the Categories tab.
- Select the categories you want to assign the post to. (Up to 10 categories).
- Click Publish.
Reordering your categories
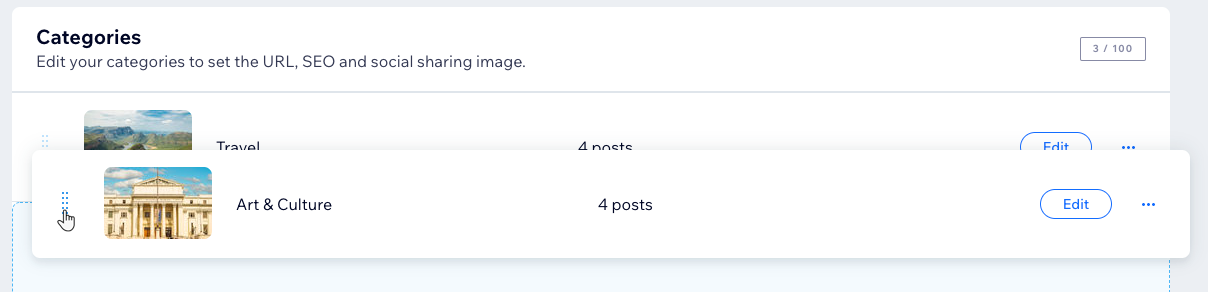
Your categories appear in the Category Menu and category feed in the order that you create them. You can change this order by dragging them up and down the list on the Categories tab.
Dashboard
Wix app
- Go to Categories in your site's dashboard.
- Click and drag the Reorder icon
 to move the categories up or down.
Deleting a category
You can delete categories if you no longer need them. Deleting a category does not delete the posts inside it. The posts still appear under
All Posts and any other categories they were assigned to.
Dashboard
Wix app
- Go to Categories in your site's dashboard.
- Hover over a category and click the More Actions icon
 .
. - Click Delete.
- Click Delete to confirm.

Viewing category pages on your live site
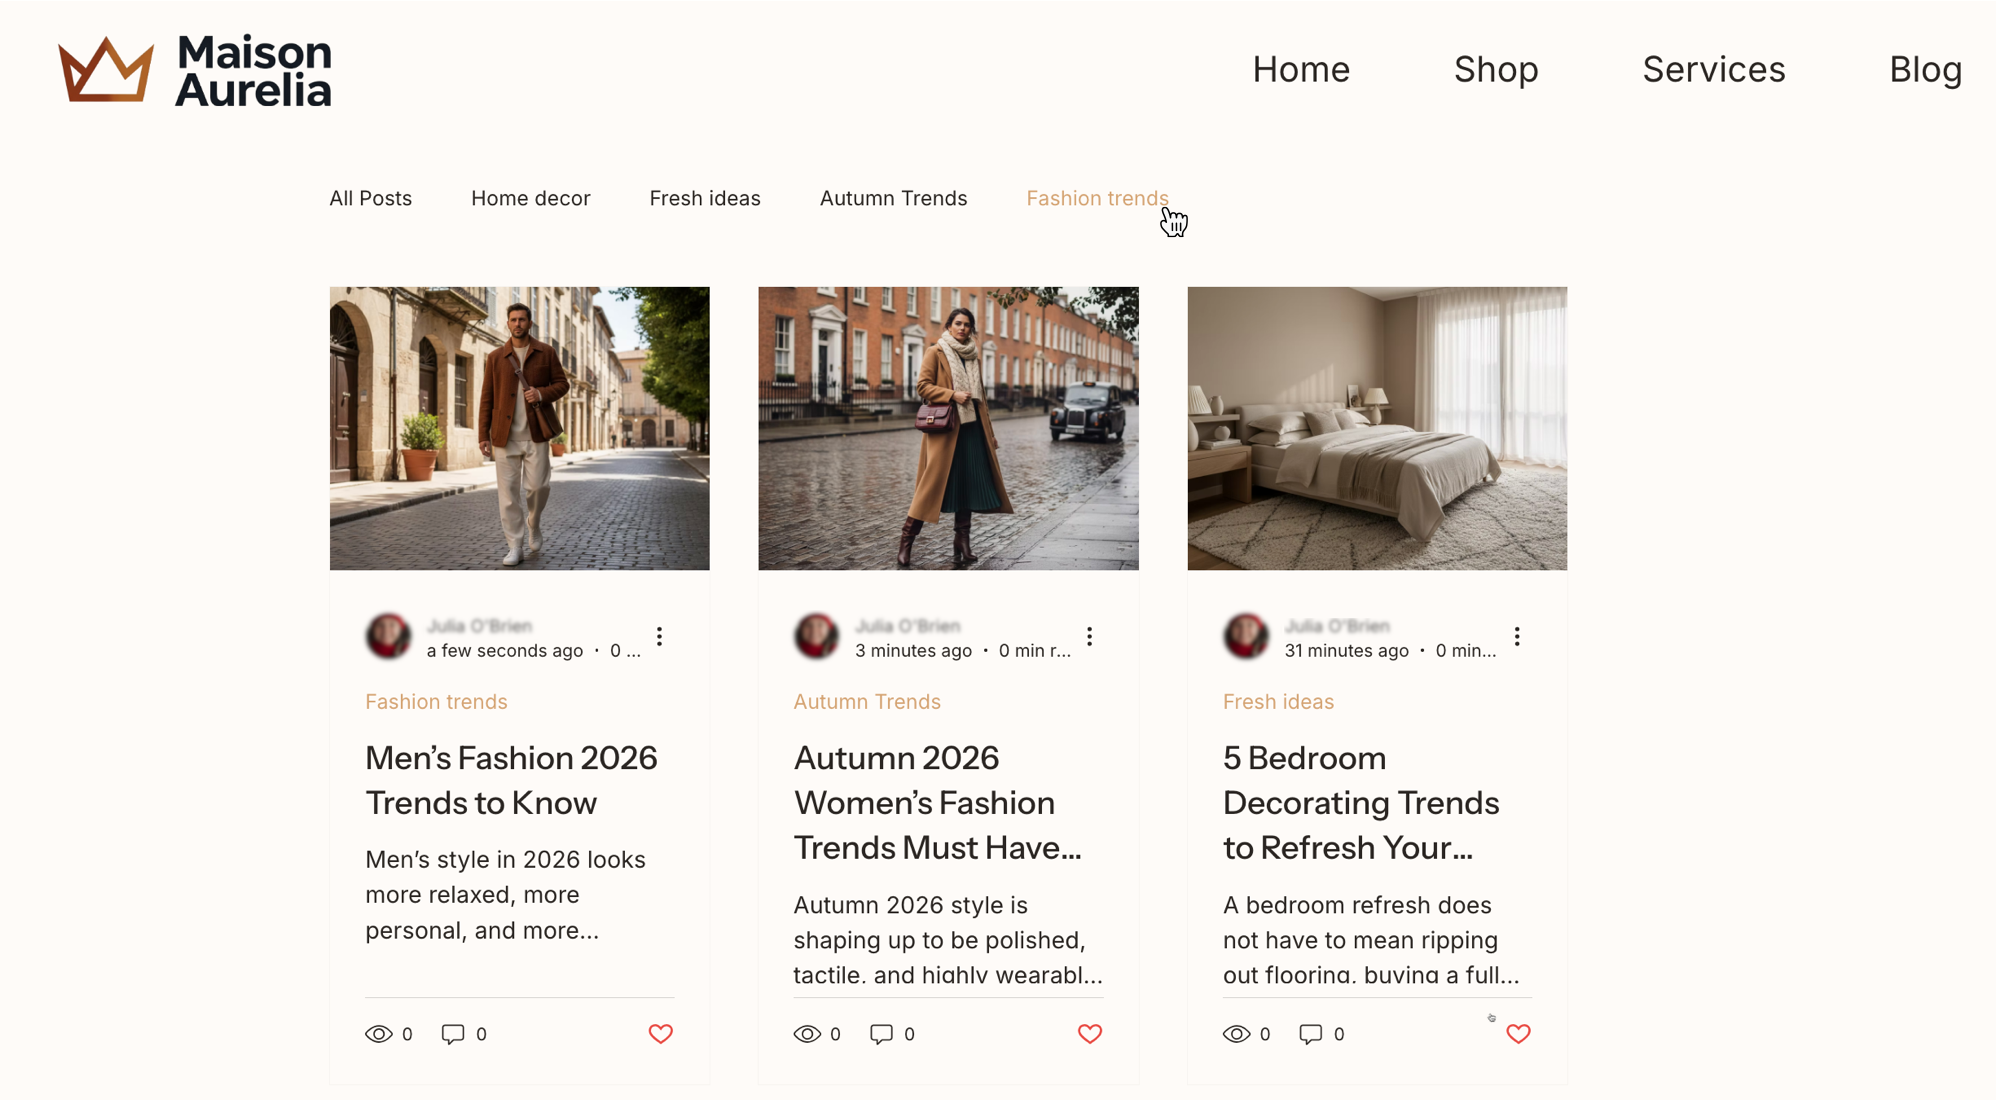
When a visitor selects a category on your live site, a category page opens and lists every post in that category. You can also change the layout of your category feed.
Visitors can reach a category page from 3 places on your live site:
The Blog Menu
A category label on a post
The Category Menu element
To view a category page:
Go to your live site.
Click Blog.
Click a category in the Blog Menu.
Note:
Tag pages and archive pages share the same feed layout as your category pages. When you change the category feed layout, the same changes apply to your tag and archive pages.
FAQs
Click a question below to learn more about creating and managing blog categories.
How do I rename the "All Posts" category?
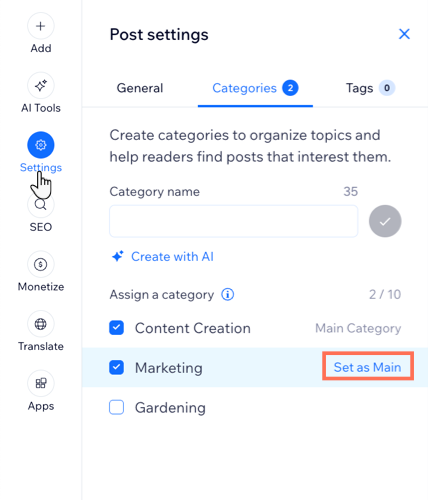
How do I change my "main" category from my dashboard?
How do I change my "main" category from the Wix app?
 at the bottom.
 next to the relevant post.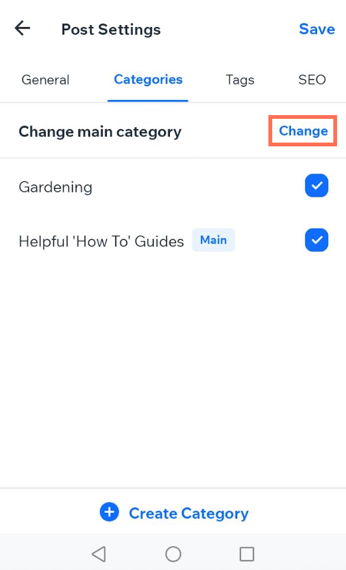
Some of my categories are missing, why can't I see them?
Can I create subcategories?
Can I create categories using AI?
What is the web address of a category page?