Wix Automations: Customizing Automated Emails
10 min
In this article
- Customizing the sender details attached to your email
- Editing your email template
- Setting your email type
- Selecting the email recipients
- FAQs
When creating an automation that sends an email, you can customize the email being sent. Write and design your email, send it from your preferred address so recipients know who to reply to, set your email type to determine how or when your recipients can mute or unsubscribe from your emails, and select all who will receive your email.
Customizing the sender details attached to your email
Who do you want recipients to see as the sender of your emails? Use your business name so your message is recognized at first glance. Include a reply-to email that will route straight to the right inbox, so your customers can easily get in touch.
To set your sender details:
- Go to Automations in your site's dashboard.
- Create a new automation or edit an existing one.
- Make sure Send an email is selected as the Action.
- Click the Send an email action in your flow to open the panel.
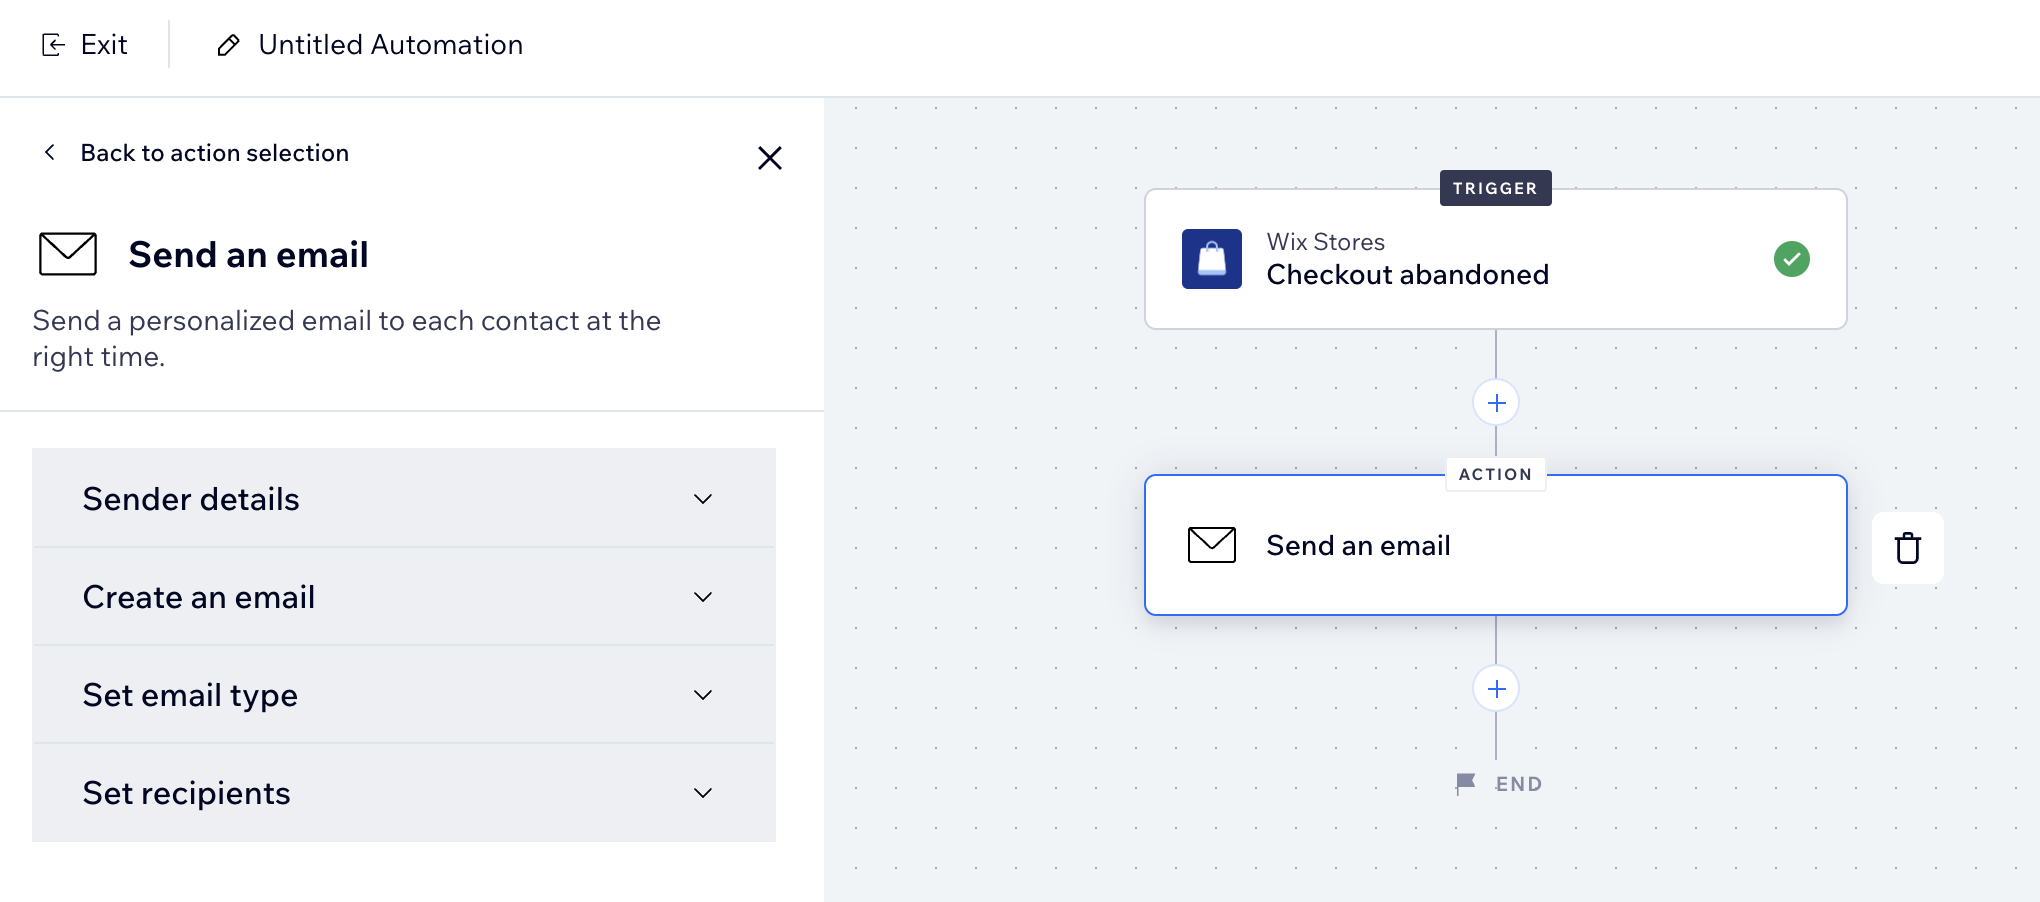
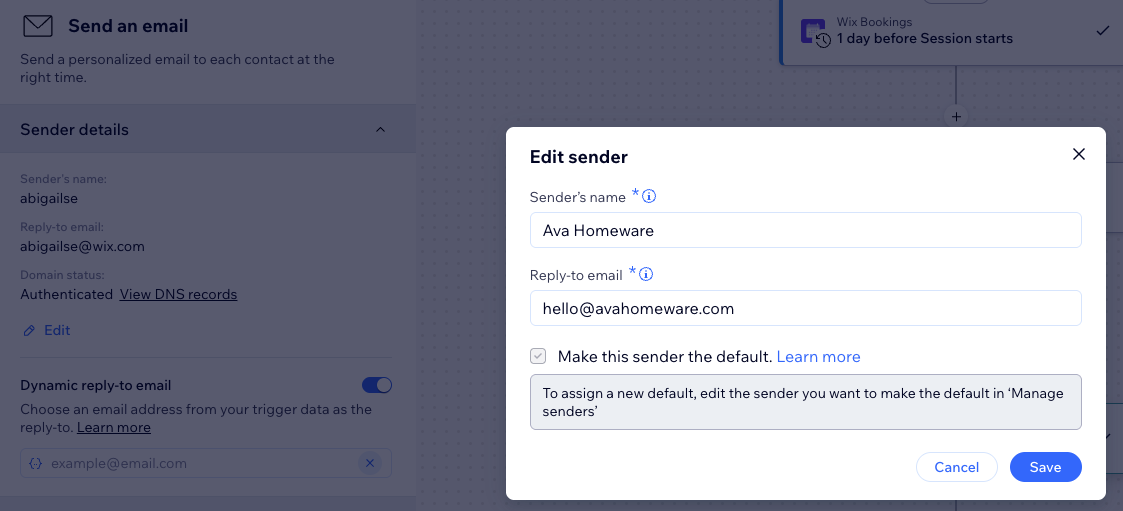
- Click Edit under Sender details:
- Sender's name: Edit the name that appears in the recipient's inbox. Then, click Save.
- Reply-to email: Edit the email address people reach when they hit reply. Then, click Save.
Note: If you enable dynamic reply-to email option, the address you entered will appear as 'From' to the recipients.
- (Optional) Click the Dynamic reply-to email toggle to change the email address people reach when they hit reply.
- Enabled: The reply-to email address will be dynamic based on the value you select. Click the drop-down to select a dynamic value from the property picker (e.g. contact email from the trigger data).
- Disabled: Recipient will see the reply-to email when they hit reply.
- Click Activate or Save at the top right.
Important information about the reply-to address:
- Automated emails sent from a public email service like Gmail or Yahoo tend to land in the spam or promotions category. It's better to use an authenticated address (e.g. you@yourbusiness.com).
- If you use a public domain address, Wix redirects your email through our own authenticated address. Don't worry, only your name and subject line appear in the inbox and readers' replies will go straight to your inbox.
- You may be asked to confirm your reply-to address. If so, you'll receive an email in your inbox with instructions.
Editing your email template
Make your automated email your own. Add text, images, videos and more to make it eye-catching and reflective of your brand. Add personalized content for a personal touch (e.g. "Hi David, we noticed you left something in your cart").
To edit your email template:
- Go to Automations in your site's dashboard.
- Create a new automation or edit an existing one.
- Make sure Send an email is selected as the Action.
- Click the Send an email action in your flow to open the panel.

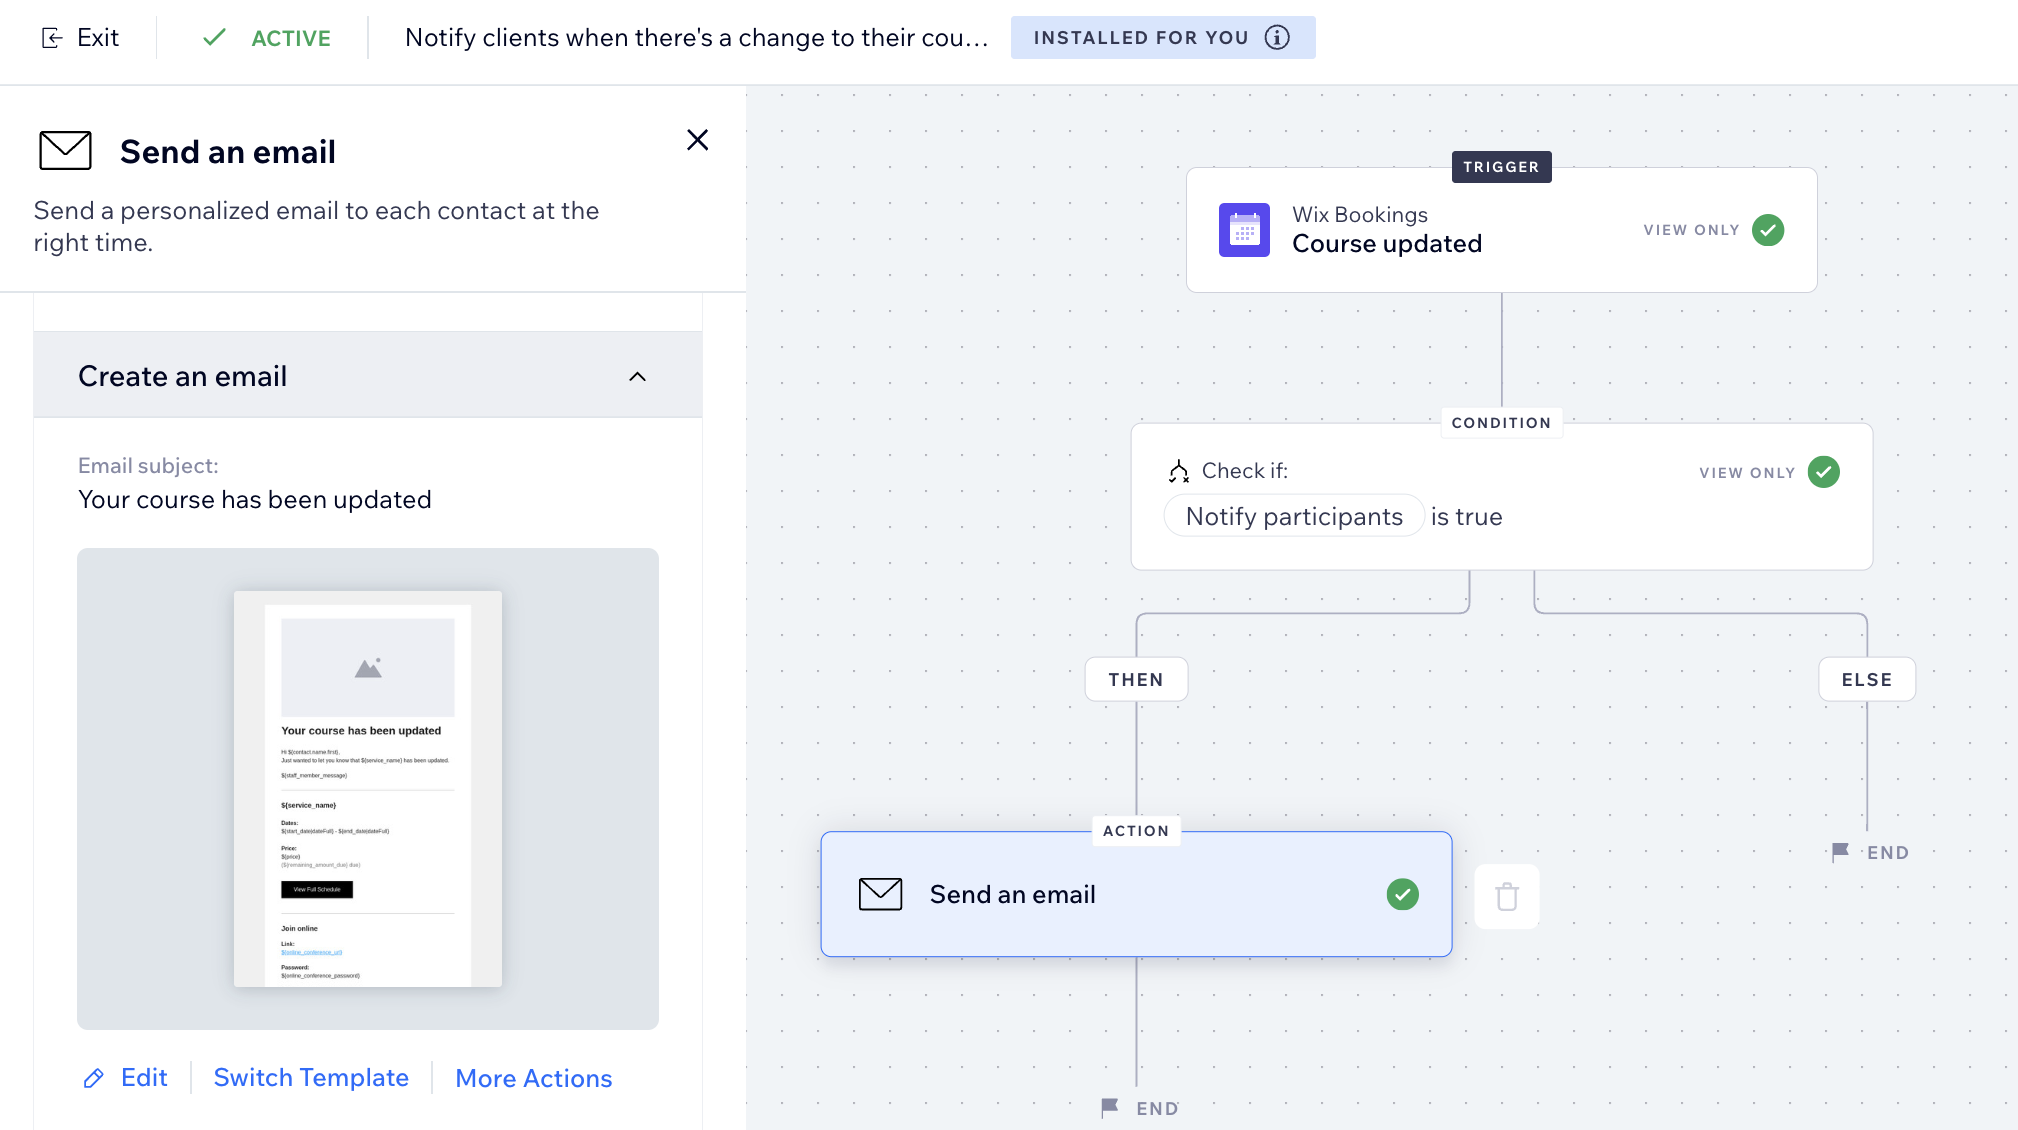
- Under Create an email, choose what you want to do:
- Edit:
- Edit your chosen email template:
- Customize existing elements in the email.
Note: Some pre-installed automations offer the ability to edit the elements attached to multiple states in the email. Learn more in the FAQ section below. - Add more elements to the email.
Tip: You can add repeated content to elements that connect to a datalist gathered from the trigger data. Learn more in the FAQ section below. - Add personalized content to the email.
- Customize existing elements in the email.
- When ready, click Save & Continue/Publish at the top right.
- Edit your chosen email template:
- Switch template: Use a different email template from a different automation or email marketing campaign.
- More Actions: Click Preview & test to see and test the email, or Reset to default template to reset the edits you made to the original email template.
- Edit:
- Click Activate or Save to activate or save your automation.
Tip:
When editing an email, you can generate a preview and send yourself a test version of your email. Keep in mind that personalized content doesn't appear in test email campaigns. Your recipients will still see them when you send the campaign.
Setting your email type
Selecting an email type will help to determine how or when your recipients can mute or unsubscribe from your emails. Based on the purpose of your email, you can choose between 3 different types:
- Promotional: Non-essential business information or marketing content. Recipients who have unsubscribed or muted the selected notification topic will not receive this email.
- Business transactional: Essential information to your customers, directly related to their activity on your site. Recipients who have muted the selected email notification topic will not receive this email.
- Business critical: Only meant for critical cases. Recipients cannot mute these emails and they will be sent regardless of any unsubscribe preferences.
Note:
The email type you select determines whether or not it affects your monthly balance.
To set your email type:
- Go to Automations in your site's dashboard.
- Create a new automation or edit an existing one.
- Make sure Send an email is selected as the Action.
- Click the Send an email action in your flow to open the panel.

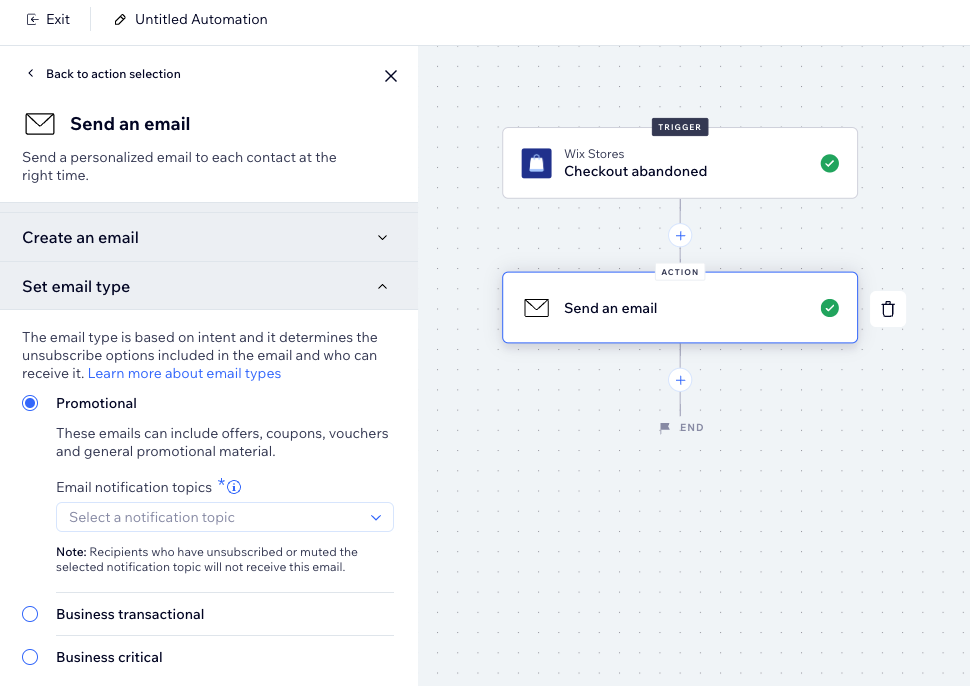
- Under Set email type, select a type for your email:
- Promotional: Non-essential business information or marketing content. Select from the drop-down which email notification topic a recipient can choose to unsubscribe from.
- Business transactional: Essential information to your customers, directly related to their activity on your site. Select from the drop-down which email notification topic a recipient can choose to unsubscribe from.
- Business critical: Only meant for critical cases. Recipients cannot mute these emails and they will be sent regardless of any unsubscribe preferences.
Note: The content of these emails differs depending on the jurisdiction, so if you are not sure, seek legal advice when creating your emails.
- Click Activate or Save to activate or save your automation.
Selecting the email recipients
Decide who you want to receive your automated email. You can choose to have your email sent to the recipient who triggered this automation, or add more recipients.
Take a look at the automation and think if an additional recipient could benefit from getting this email (e.g. you want to notify your yoga instructor each time someone registers for her class.)
To set your recipients:
- Go to Automations in your site's dashboard.
- Create a new automation or edit an existing one.
- Make sure Send an email is selected as the Action.
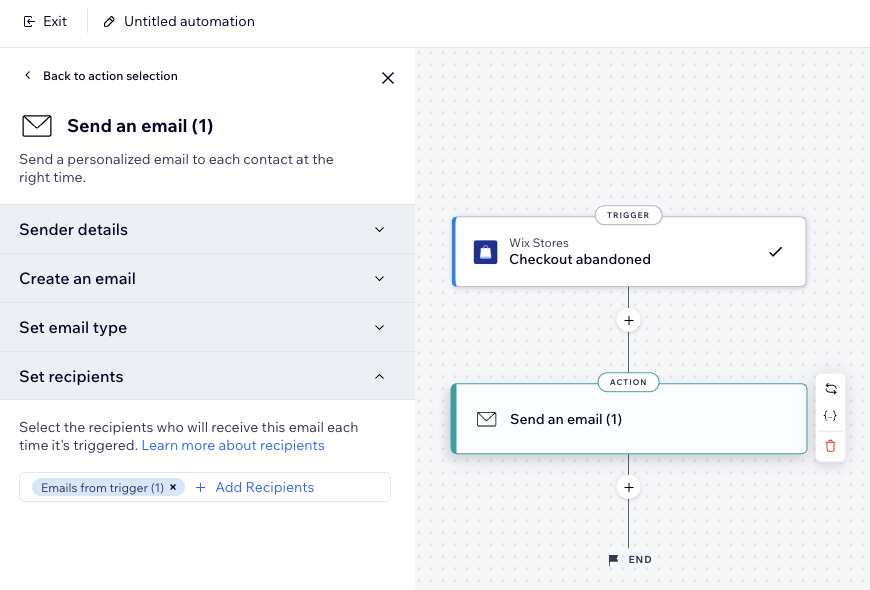
- Click the Send an email action in your flow to open the panel.

- Under Set recipients, click + Add Recipients.
- Click a recipient group who will receive this automated email when it's triggered (e.g. contacts, contact segments, collaborator roles etc).
- Select the relevant recipients.
- Click to confirm your selection.
- Click Activate or Save to activate or save your automation.
FAQs
Here are some common questions about customizing automated emails:
How can I send a new automated email to myself or a collaborator on my site?
Can I send automated emails from different email addresses?
Can I see if people have received and opened my automated emails?
What is personalized content?
What are multiple states and how do they appear?
Why are my automations sending duplicate emails?
What should I do if my automation emails are not being sent?
Can I revert my updated sender details back to the Wix default email address?
What is repeated content in automated emails and when should I use it?


