


Site Members: Add and Set Up a Members Area
In this article
- Step 1 | Set up the My Account page
- Step 2 | Set up the Member Profile Card
- Step 3 | Set up the Members Menu
- (Optional) Step 4 | Customize your Members Area further
This article refers to the previous version of the Members Area app. If you're using the new version, click
here.
Click here to check which version you're using.
Add a
Members Area so visitors can create their own account on your site. Once members sign up, they can access exclusive pages and services. This tool works great for both business solutions (e.g. Wix Stores, Wix Bookings) or any social apps you're using (e.g. Wix Groups, Wix Blog).
Using other Wix Apps?
When you add certain Wix Apps (e.g. Wix Stores, Wix Bookings, Wix Blog), a Members Area is also added automatically. In this case, you can skip step 1 of this article.
Step 1 | Set up the My Account page
Once the Editor is done installing the app, you can see the
My Account page was added to your site. This page is included in every Members Area. It allows each of your members to access and updates their personal info and the information that appears publicly, to other members.
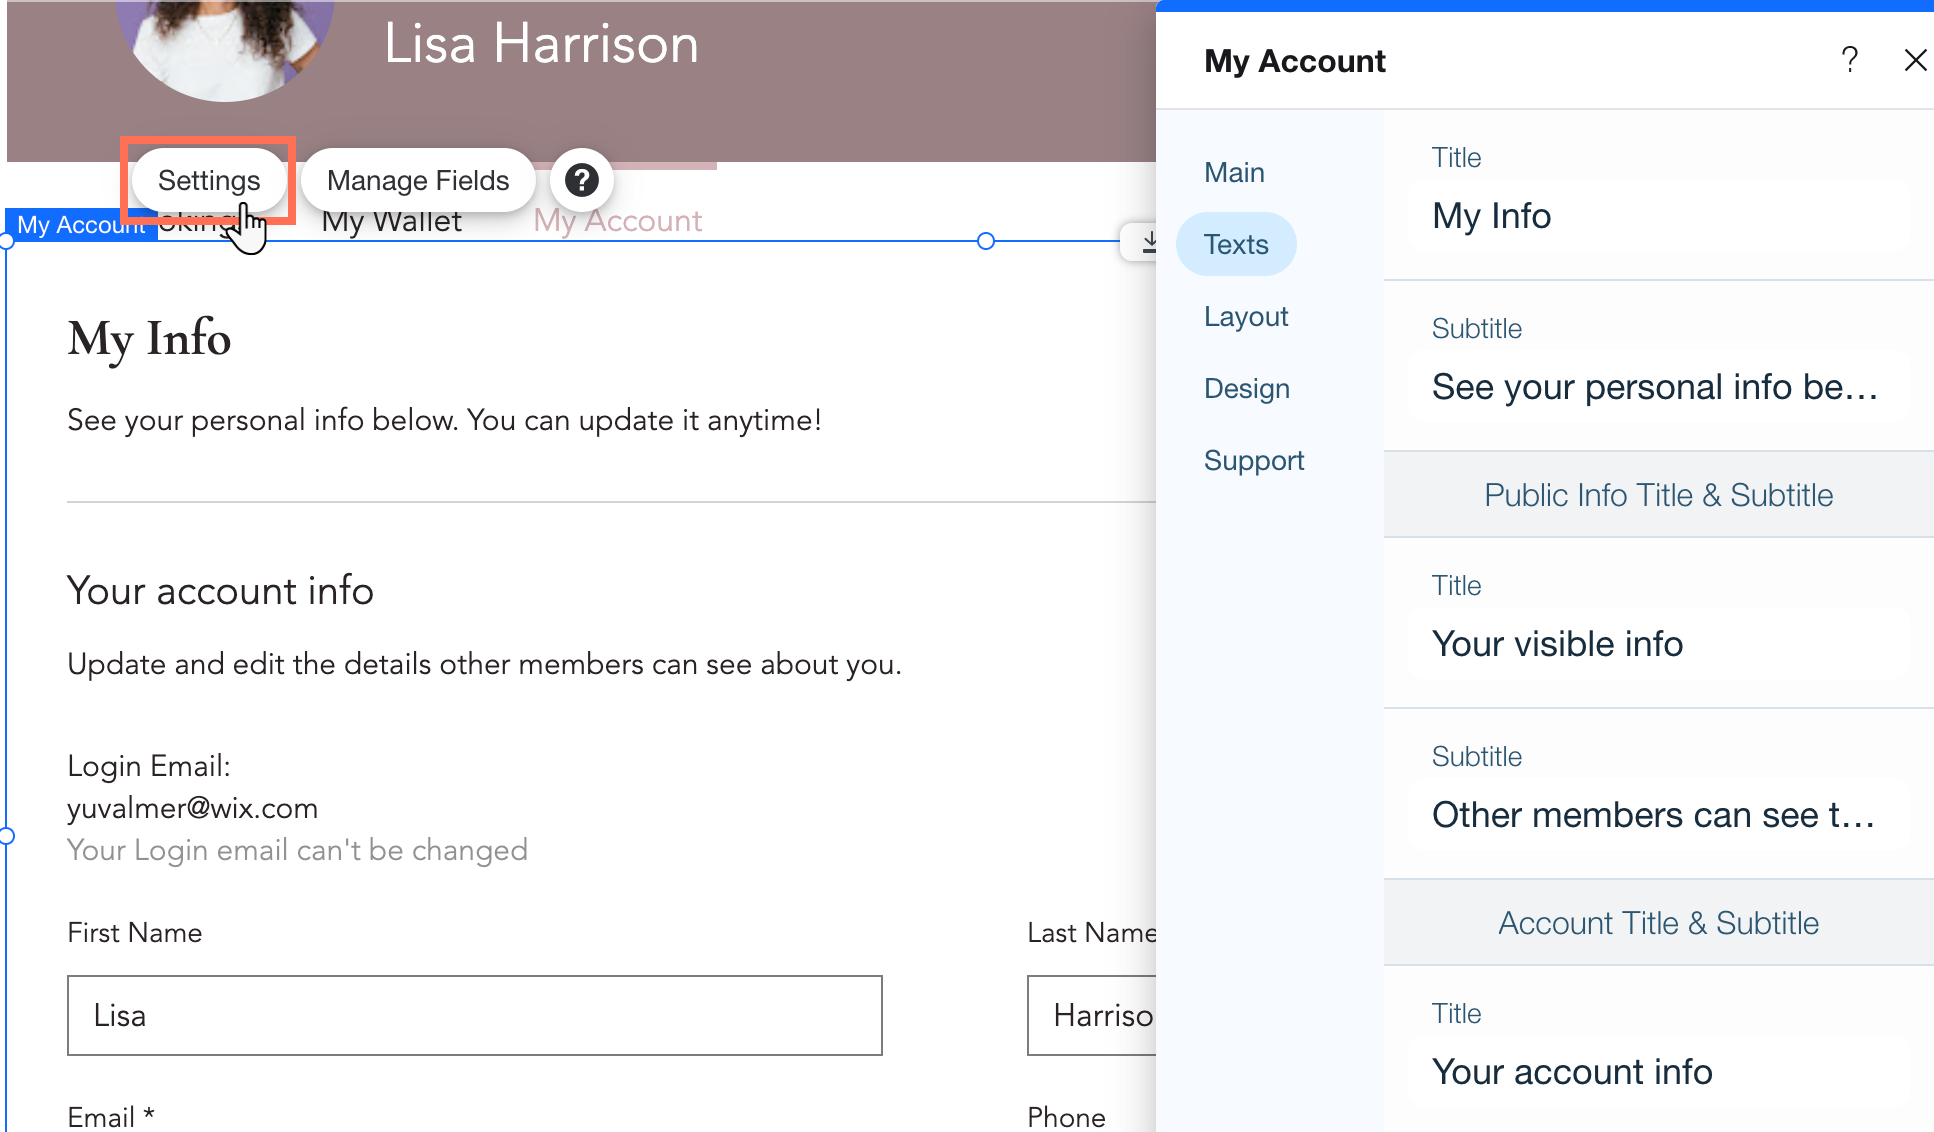
To set up the My Account page:
- Go to the My Account page in your Editor.
- Click the My Account element on the page.
- Customize the page to your liking:
- Settings: Change the texts appearing on this page, as well as its layout and design.
- Manage Fields: Change the information you collect from members. You can add new fields, edit existing ones and decide which ones are public to other members.
Step 2 | Set up the Member Profile Card
Still in the My Account page, scroll up to the Member Profile Card to adjust its look. This element is the header of your Members Area, appearing on each and every page.
How do members use their profile card?

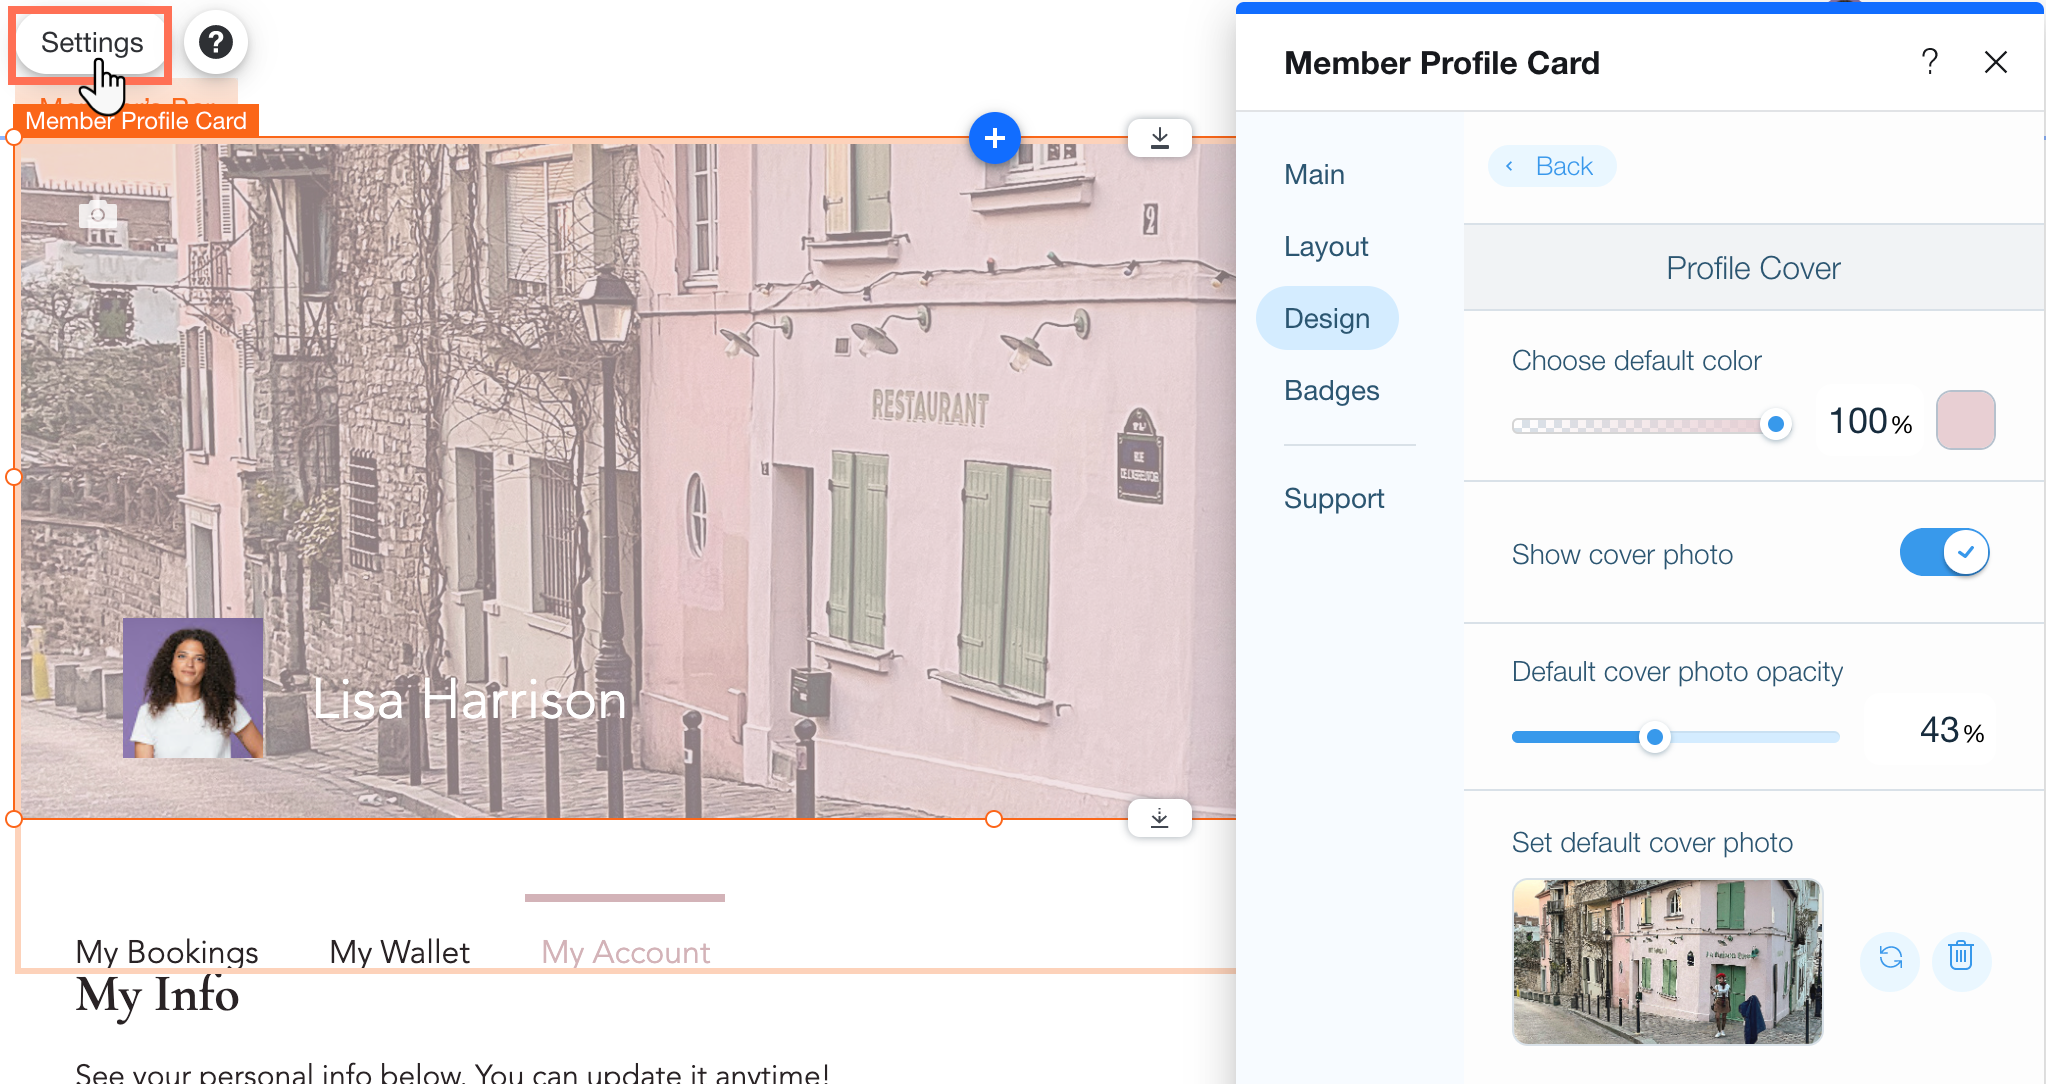
To set up the Member Profile Card:
- Click the Member Profile Card in your Editor.
- Click Settings.
- Customize the Member Profile Card to your liking:
- Layout: Choose a layout for the entire page - full-width or square - and adjust it accordingly.
- Design: Choose a color and a cover photo to decorate this card.
- If you have a Profile page, you can decide whether or not to show the number of people they follow and those who follow them.
- Badges: If you created badges, you can design the way they appear on this card.
Step 3 | Set up the Members Menu
Another element that appears on every page of your Members Area is the menu, allowing members to navigate between pages with ease. You can decide which pages appear on this menu and control its layout and design.
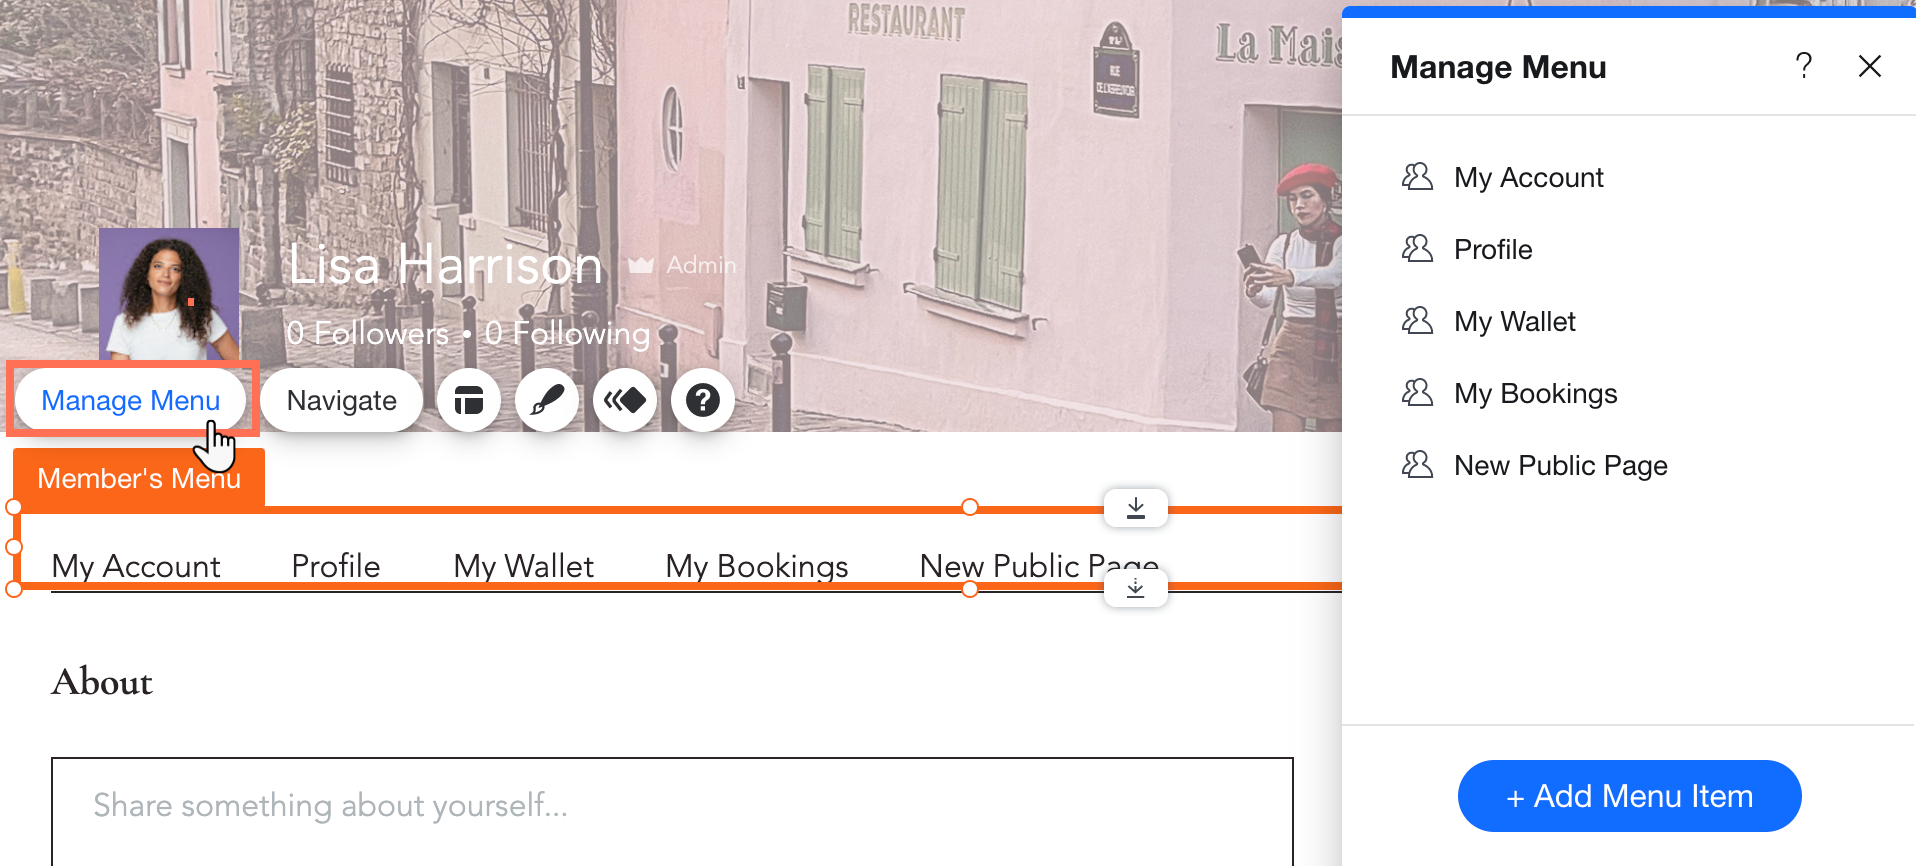
To set up the Members Menu:
- Click the Members Menu in your Editor.
- Customize the menu by doing any of the following:
- Add or remove member pages: Click Manage Menu to add or remove member pages, change their order or add a submenu to keep your menu neat and minimal.
- Adjust the menu's layout: Click the Layout icon
 to change the alignment, size, direction of the menu items, and more.
 - Design the menu: Click the Design icon
 to customize the look of this menu, choosing the preset, colors, font and other settings.
(Optional) Step 4 | Customize your Members Area further
From here on out, there are many things you can do to continue growing your Members Area:
- Create custom signup and login forms that match your site's look and feel.
- Add private or public pages with exclusive member content.
- Access and customize member pages (e.g. Profile, My Wallet, Notifications, etc.)
- Manage members, roles, badges and permissions from your site's dashboard.