

Site Members: Adding and Setting Up the Members Area
12 min
In this article
- Step 1 | Add the members area app
- Step 2 | Set up the Account Settings page
- Step 3 | Customize your login bar
- Step 4 | View and set up every page
- FAQs
Add a members area so visitors can create an account on your site. After they sign up, they can log in to access exclusive pages and services. The members area works with your business apps (such as Wix Stores and Wix Bookings) and your social apps (such as Wix Groups and Wix Blog).
Step 1 | Add the members area app
To get started add the members area app. This automatically installs pages like Account Settings and some basic elements like the login bar, which you can customize in the next steps.
Using other Wix Apps?
When you add certain Wix apps (such as Wix Online Programs), a members area is added automatically. If that is your case, you can skip to Step 2.
Wix Editor
Studio Editor
Harmony Editor
Dashboard
- Go to your editor.
- Click Add Apps
 on the left side of the editor.
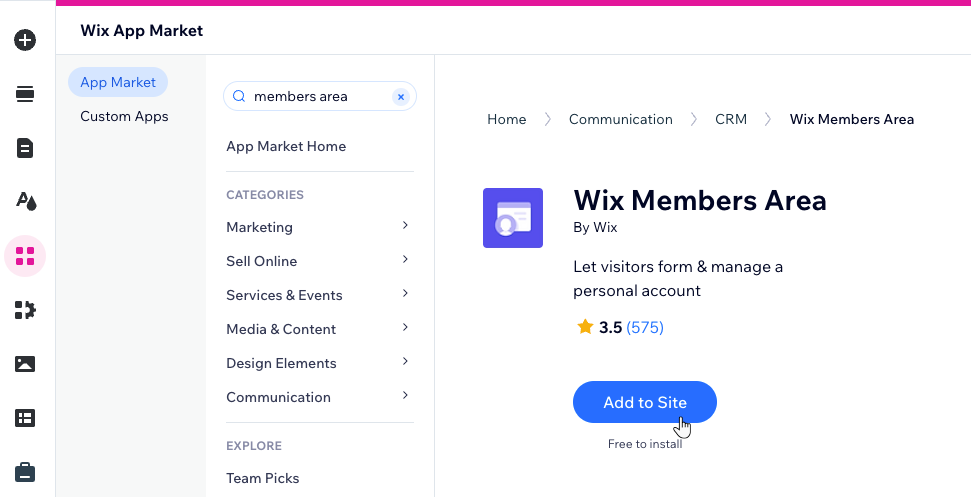
 - Search for the Wix Members Area app in the search bar then select the app.
- Click Add to Site.
Step 2 | Set up the Account Settings page
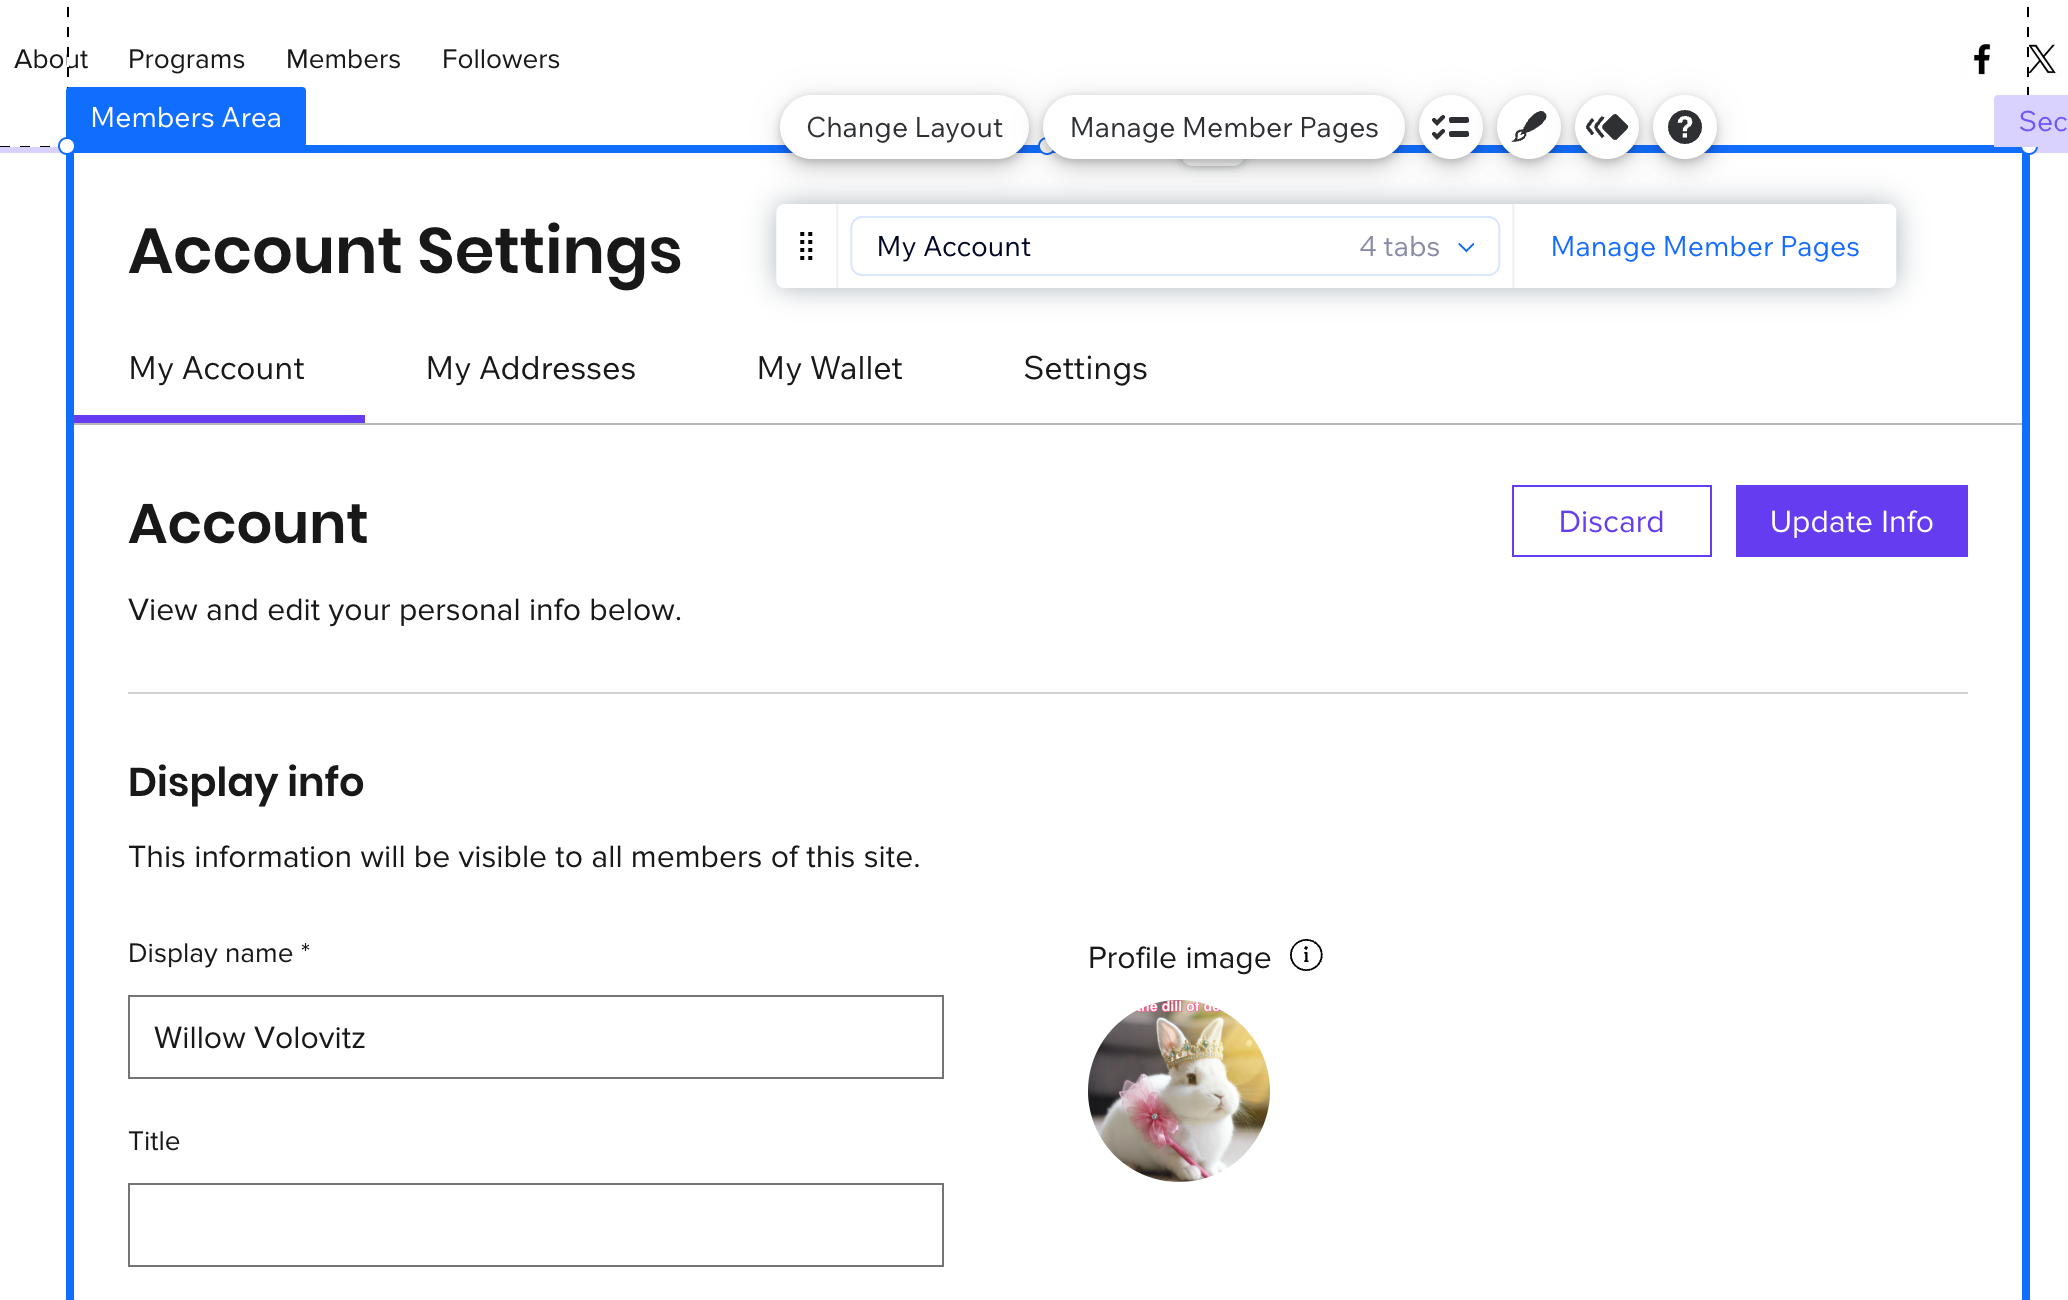
After the app finishes installing in the editor, the Account Settings page is added to your site – this is usually the first place members go to manage their details, update their personal info and change account settings. Choose a layout that suits your site and decide which inner tabs and elements to display.
Tip:
Some Wix apps automatically add pages to your members area. For example, Wix Stores can add a My Orders page, and Wix Bookings can add a My Bookings page so members can track their purchases and appointments.
Wix Editor
Studio Editor
Wix Harmony Editor
- Go to the Account Settings page in your editor.
- Select the Members Area element.
- Choose what you want to update:
Members Area element (whole page)
 . Select or clear the checkboxes next to Page Title and Settings Menu to show or hide these elements.
 to adjust the fill color, border, corners and shadows.
Page title text
Horizontal menu
 icon to change the look of your menu from wrap to scroll, add dropdown items, or change your menu to mega menu.
 and select what you want to design: The menu's container or items using the available design settings.
 My Account element
Step 3 | Customize your login bar
Customize the login bar members use to sign in to your members area, along with the menu it opens. You can choose which tabs and links appear in the menu, adjust the layout, and design the element so it matches your site’s style.

Using the Studio editor?
There's an additional form of navigation in the Studio Editor – members can also use the Member Menu on the Member Page. Learn more about customizing the member menu in Studio.
Step 4 | View and set up every page
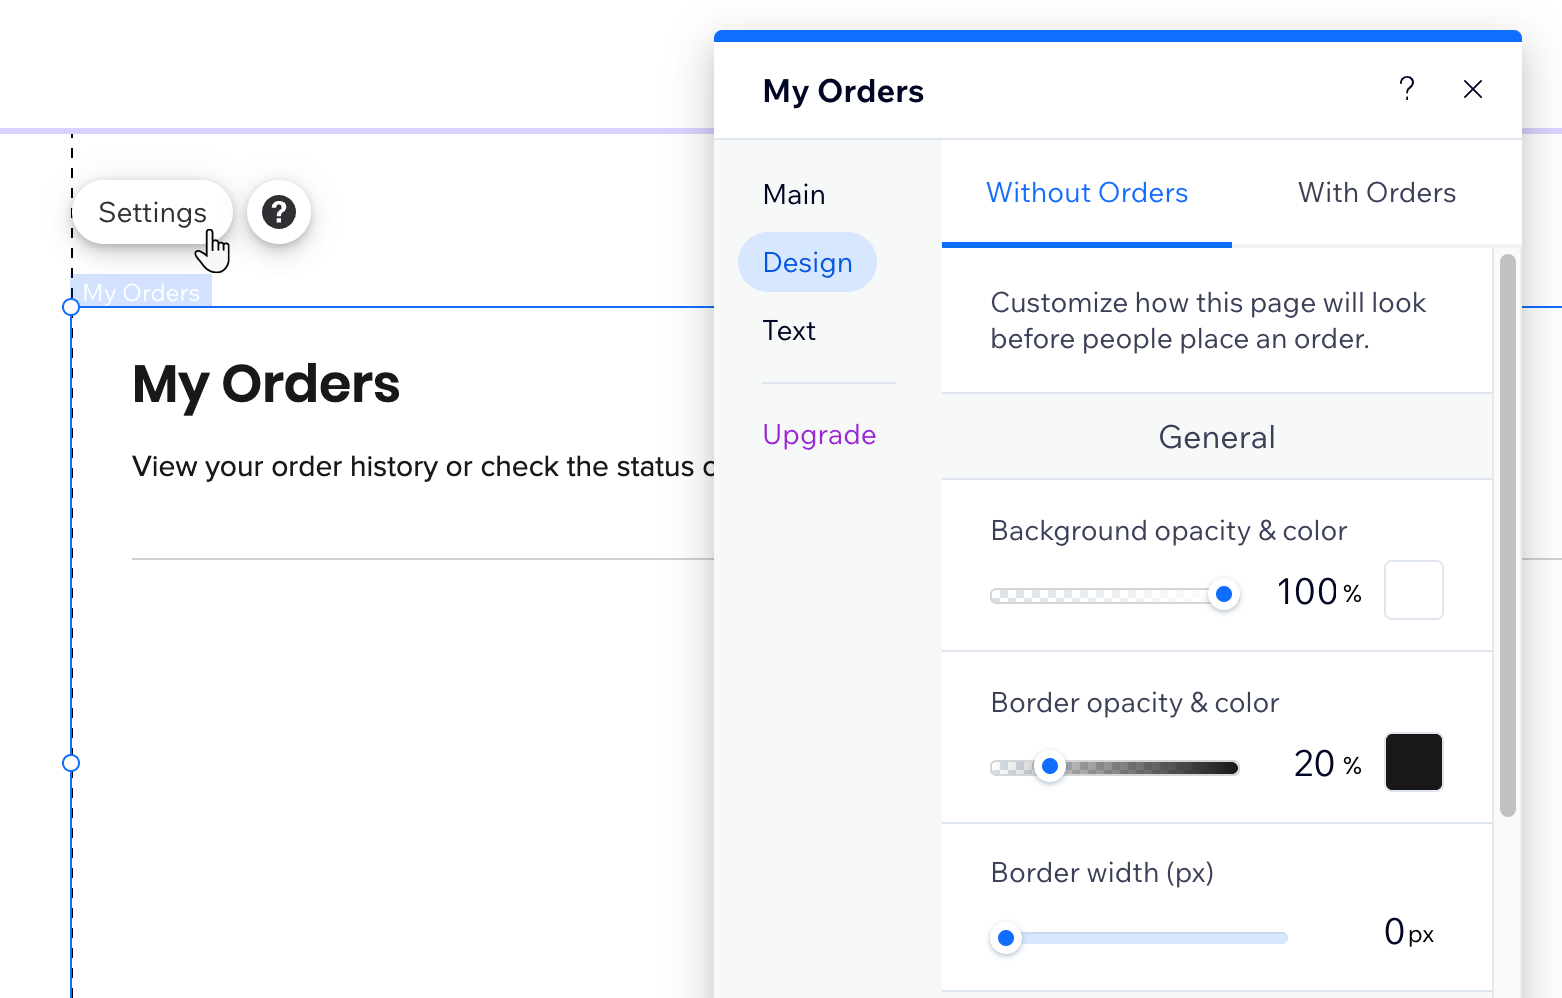
View and set up every member page, including any pages that were added automatically based on the Wix apps you installed. In addition to the Account Settings page, you may see pages like My Orders or My Bookings in your members area. You can adjust each page’s design and text so they fit your site and content.
Wix Editor
Studio Editor
Wix Harmony Editor
- Click Pages & Menu
 on the left side of the editor.
 - (In the Site Pages panel) Select the relevant page under the Members Area section.
- Select the members element on your page.
- Click Settings.
- Choose what you want to change:
- Design: Customize your background, borders, text font and color.
- Text: Update the text and links on your page.
FAQs
Click a question below to learn more.
What types of pages can my Members Area include, and can I make them members-only?
Where can I manage member privacy, roles, and the information I collect at signup?
Can I customize the member pages that apps like Wix Bookings or Wix Events add?
