

Customizing the Checkout Settings
6 min
In this article
- Customize your checkout
- Checkout fields
- Subscription opt-in checkbox
- Customize the checkout header
- Policies
- Payments
- Gift cards
- Save customers’ cards on file
- Authorize payment and capture funds later
- Receipt automation
- Checkout requirements
- Email notifications
Your Checkout Page is where customers complete their orders. Make sure you customize the settings to suit the needs of your business.
Tips:
- The settings you'll see vary depending on which business solutions you use (Wix Stores, Wix Bookings, or Wix Restaurant Orders (New).
- Additional settings relevant only for Wix Stores can be found in Store products & inventory. Go to Store products & inventory in your site's dashboard.
Customize your checkout
In this section, you can customize the fields that customers fill out when completing checkout. In addition, you can add a Subscription opt-in checkbox.
Checkout fields
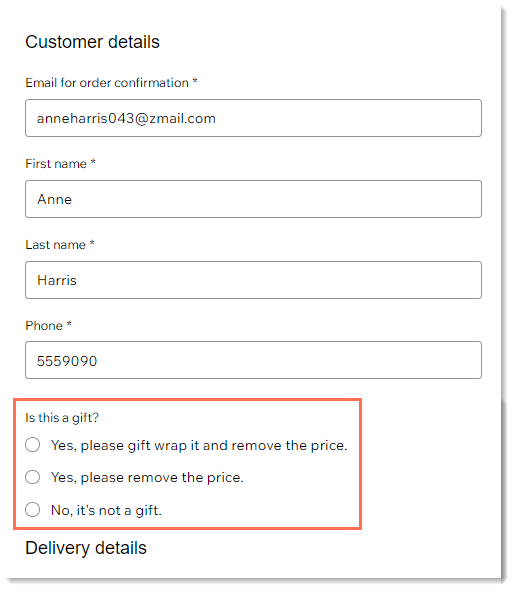
You may need extra information from your customers so you can cater to their needs and fulfill the order. This could range from questions about store product customizations, asking whether the item is a gift, getting consent before a treatment booked through Wix Bookings, and so on.
You can add as many custom fields as you need. Start by choosing the type of field you want to add (e.g. multiple choice, text, checkbox) and then customize it. Custom fields appear below the customer details and above the delivery details.
Note:
You can't make any changes to the name and email fields, but you can make the phone field optional.
- Learn how to add and customize checkout fields.
- Learn how to add additional fees at checkout.
Subscription opt-in checkbox
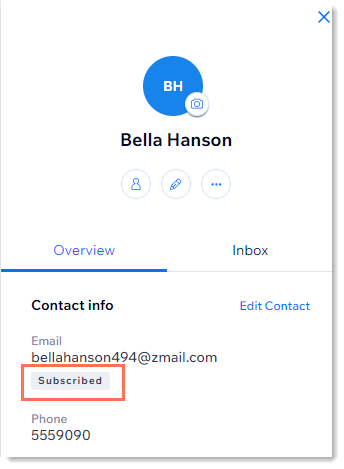
You can invite customers to subscribe to your marketing communications or blog email list during checkout.
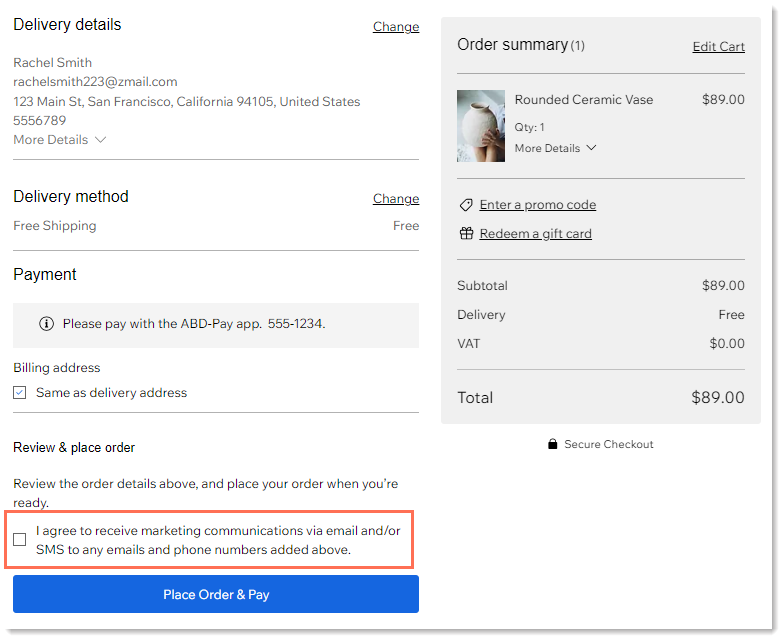
When a customer subscribes, a 'Subscribed' label is added to the customer in your Contact List.
To add it, enable the Subscription opt-in checkbox and choose whether you want it checked by default.
Customize the checkout header
Decide what to display at the top of the Checkout Page, your business name or your company's logo. Learn how to customize the Checkout Page header.
Policies
In the Policies section, you can create policies that will appear in the footer of the Checkout Page as clickable links. You can also display those same policies with an agreement checkbox that customers need to select to complete checkout.
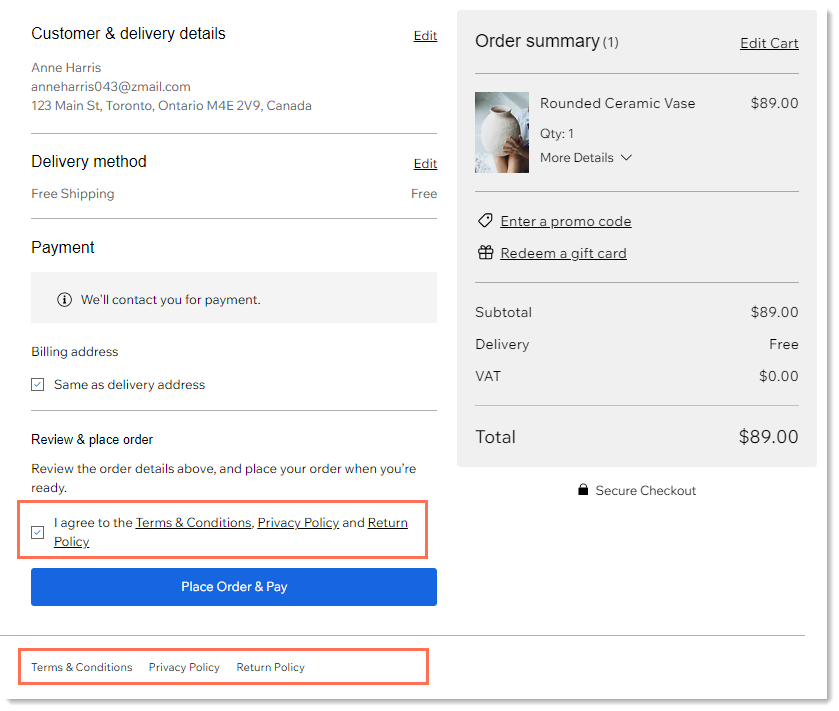
Learn more about creating checkout policies.
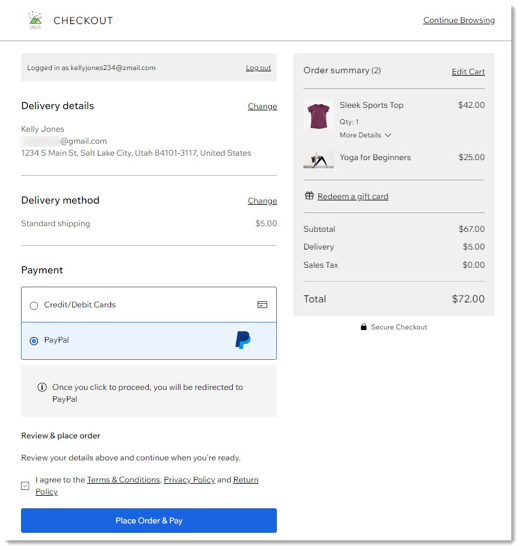
Payments
In the payments section, you can enable the display of the 'Redeem a gift card' link, enable the ability to let customers give you permission to directly charge their saved cards for future purchases, and more.
Gift cards
You can create Wix Gift Cards and sell them on your site. However, in order to display a "Redeem a gift card" option, you need to enable the Gift Cards toggle in your settings.
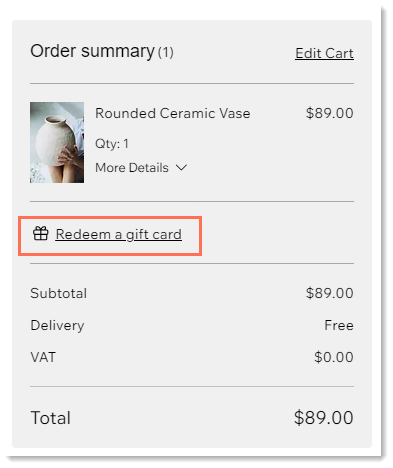
Learn more about setting up Wix Gift Cards.
Save customers’ cards on file
Having a customers’ credit or debit card details on file allows you to charge a customer without them needing to be present.
Important:
- While card-on-file transactions can make it easier to complete transactions, you must remember to use this payment method correctly to avoid charging customers unexpectedly.
- Make sure you read this article to learn how to save cards responsibly.
When you enable the Save customers’ cards on file toggle, a checkbox is added to the credit/debit payment part of your checkout.
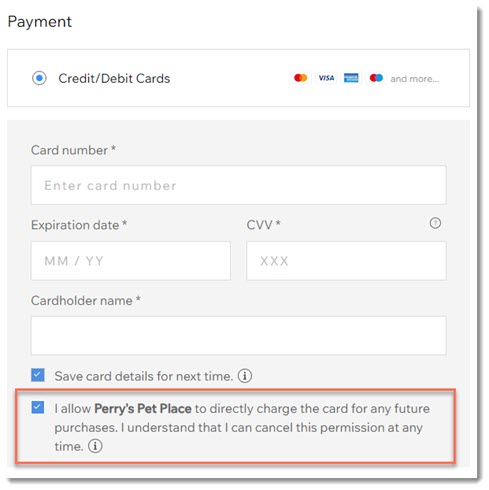
Customers can also select the Save card details for next time. This is a different option. When selected a customer's card is saved to their personal "My Wallet" part of their Members Area.
Learn more about saving and charging a customer's credit card.
Authorize payment and capture funds later
By enabling the toggle, you can authorize payments first and then capture (collect) the actual payments later. If there's an order you choose not to fulfil, you can void the payment without needing to process a refund.
Important:
- Authorization and capture is available only through Wix Payments.
- Authorization and capture can only be applied to orders paid for through a credit card payment. This means that additional payment methods, such as PayPal, Apple Pay, Google Pay, and the manual payment method will be hidden from your website.
- It's not currently possible to collect partial captures.
Payment is then held for up to 7 days. When you're ready to collect or void the payment, you can access the order in the dashboard, click the Collect Payment button, and select Capture payment or Void payment.
Learn more about authorizing payment and capturing funds later.
Receipt automation
You can enable the ability to automatically send receipts sent to your customers every time you receive payment for an order. If an order is paid with multiple methods, like two credit cards, a separate receipt will be sent for each payment.
Learn more about automatically issuing receipts for payments.
Checkout requirements
Notes:
- This option is available only with Wix Stores.
- To get started and view this section, go to the Wix App Market and add the Checkout requirements app.
You can set certain requirements to checkout to avoid orders with too few or too many items. For example:
- Set an upper limit on the number of specific sale items a customer can purchase.
- Sell limited-edition products as exclusive one-per-customer items.
- Add a minimum checkout requirement to avoid unprofitable sales.
You can block orders that don't fulfill the requirement (with a message explaining why), or just add a message stating the requirement, but allowing orders to go through.
Email notifications
Notes:
- This section is relevant only with Wix Stores and Wix Bookings.
- For Wix Bookings, only the order confirmation email appears here.
There are a number of emails sent automatically to stores customers, some of which are always sent and others that can be disabled. These include:
- Emails sent after an order is completed
Tip: The text of these emails varies depending on the purchase (e.g. physical products, digital (downloadable) products, Wix Bookings services, and how a store order is shipped). - Emails sent when a store order is fulfilled
- Emails sent when an order is ready to be picked up by the customer.
You can make certain customizations to these emails.
These email notification settings are only relevant for Wix Stores. Customization for notifications sent to Wix Bookings clients and Wix Restaurant customers are managed elsewhere in the dashboard.
Learn more about emails sent to:
- Wix Stores customers
- Wix Bookings clients (other than the order confirmation email)
- Wix Restaurants customers
