

Wix Restaurants: Adding and Setting Up Wix Restaurants Orders
12 min
In this article
- Step 1 | Add the Wix Restaurants Orders app
- Step 2 | Set your order scheduling and availability
- Step 3 | Set up fulfillment preferences
- Step 4 | Set up tax
- Step 5 | Select additional checkout settings
- Step 6 | (Optional) Add another online ordering page
- FAQs
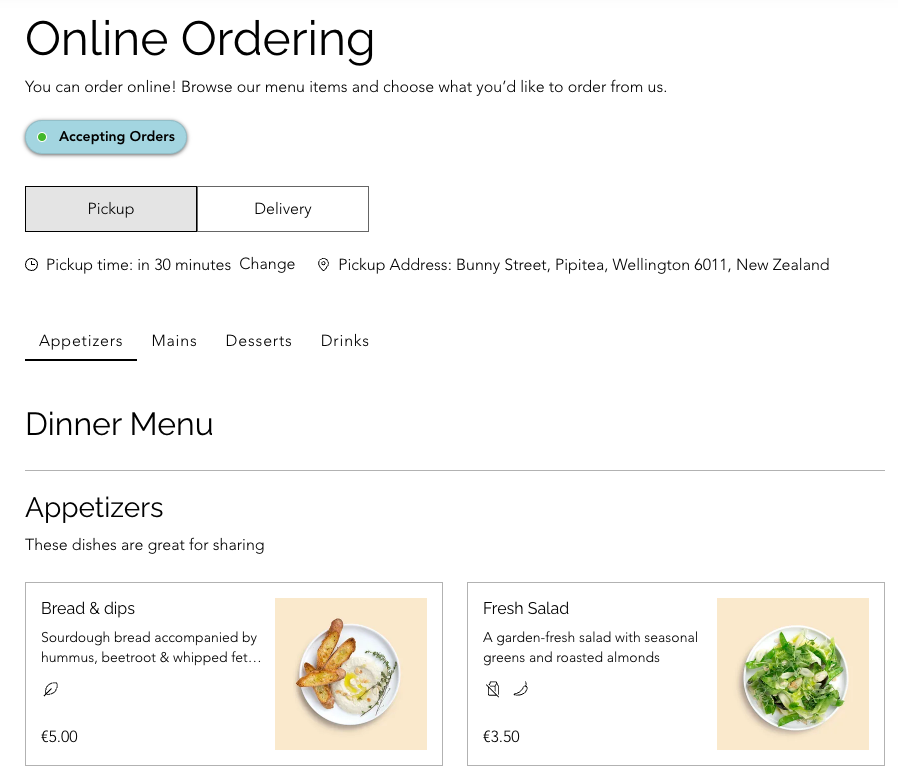
Wix Restaurants Orders is an online ordering app designed to help you manage your restaurant, catering service, or meal prep business efficiently.
Important:
The Wix Restaurant Orders app works together with the Wix Restaurant Menus app. Make sure to set up your menus.
Step 1 | Add the Wix Restaurants Orders app
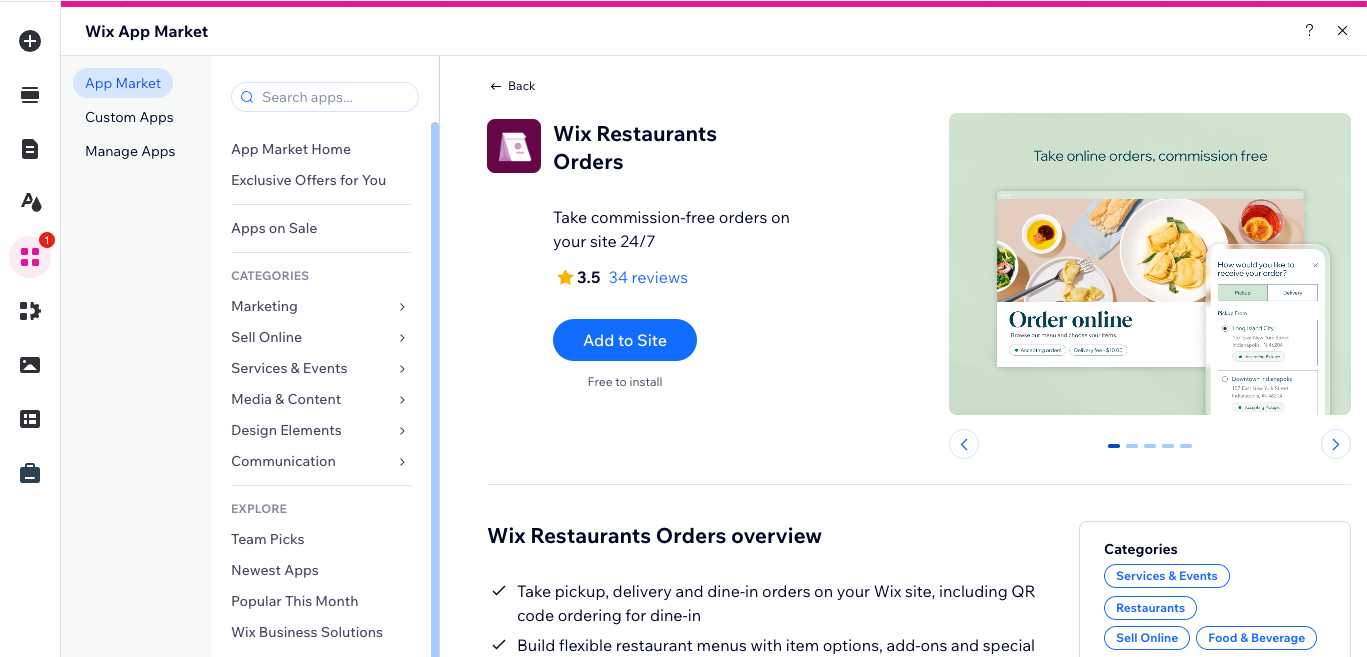
Start by adding the Wix Restaurants Orders app from the App Market. This automatically adds relevant pages to your site so customers are able to place online orders (e.g. the order tracking page).
Wix Editor
Studio Editor
Dashboard
- Go to your editor.
- Click Add Apps
 on the left side of the editor.
 - Use the search bar to find Wix Restaurants Orders.
- Click Add to Site.
Note:
Currently, the Wix Restaurant Orders app is not yet available in the Wix Harmony Editor.
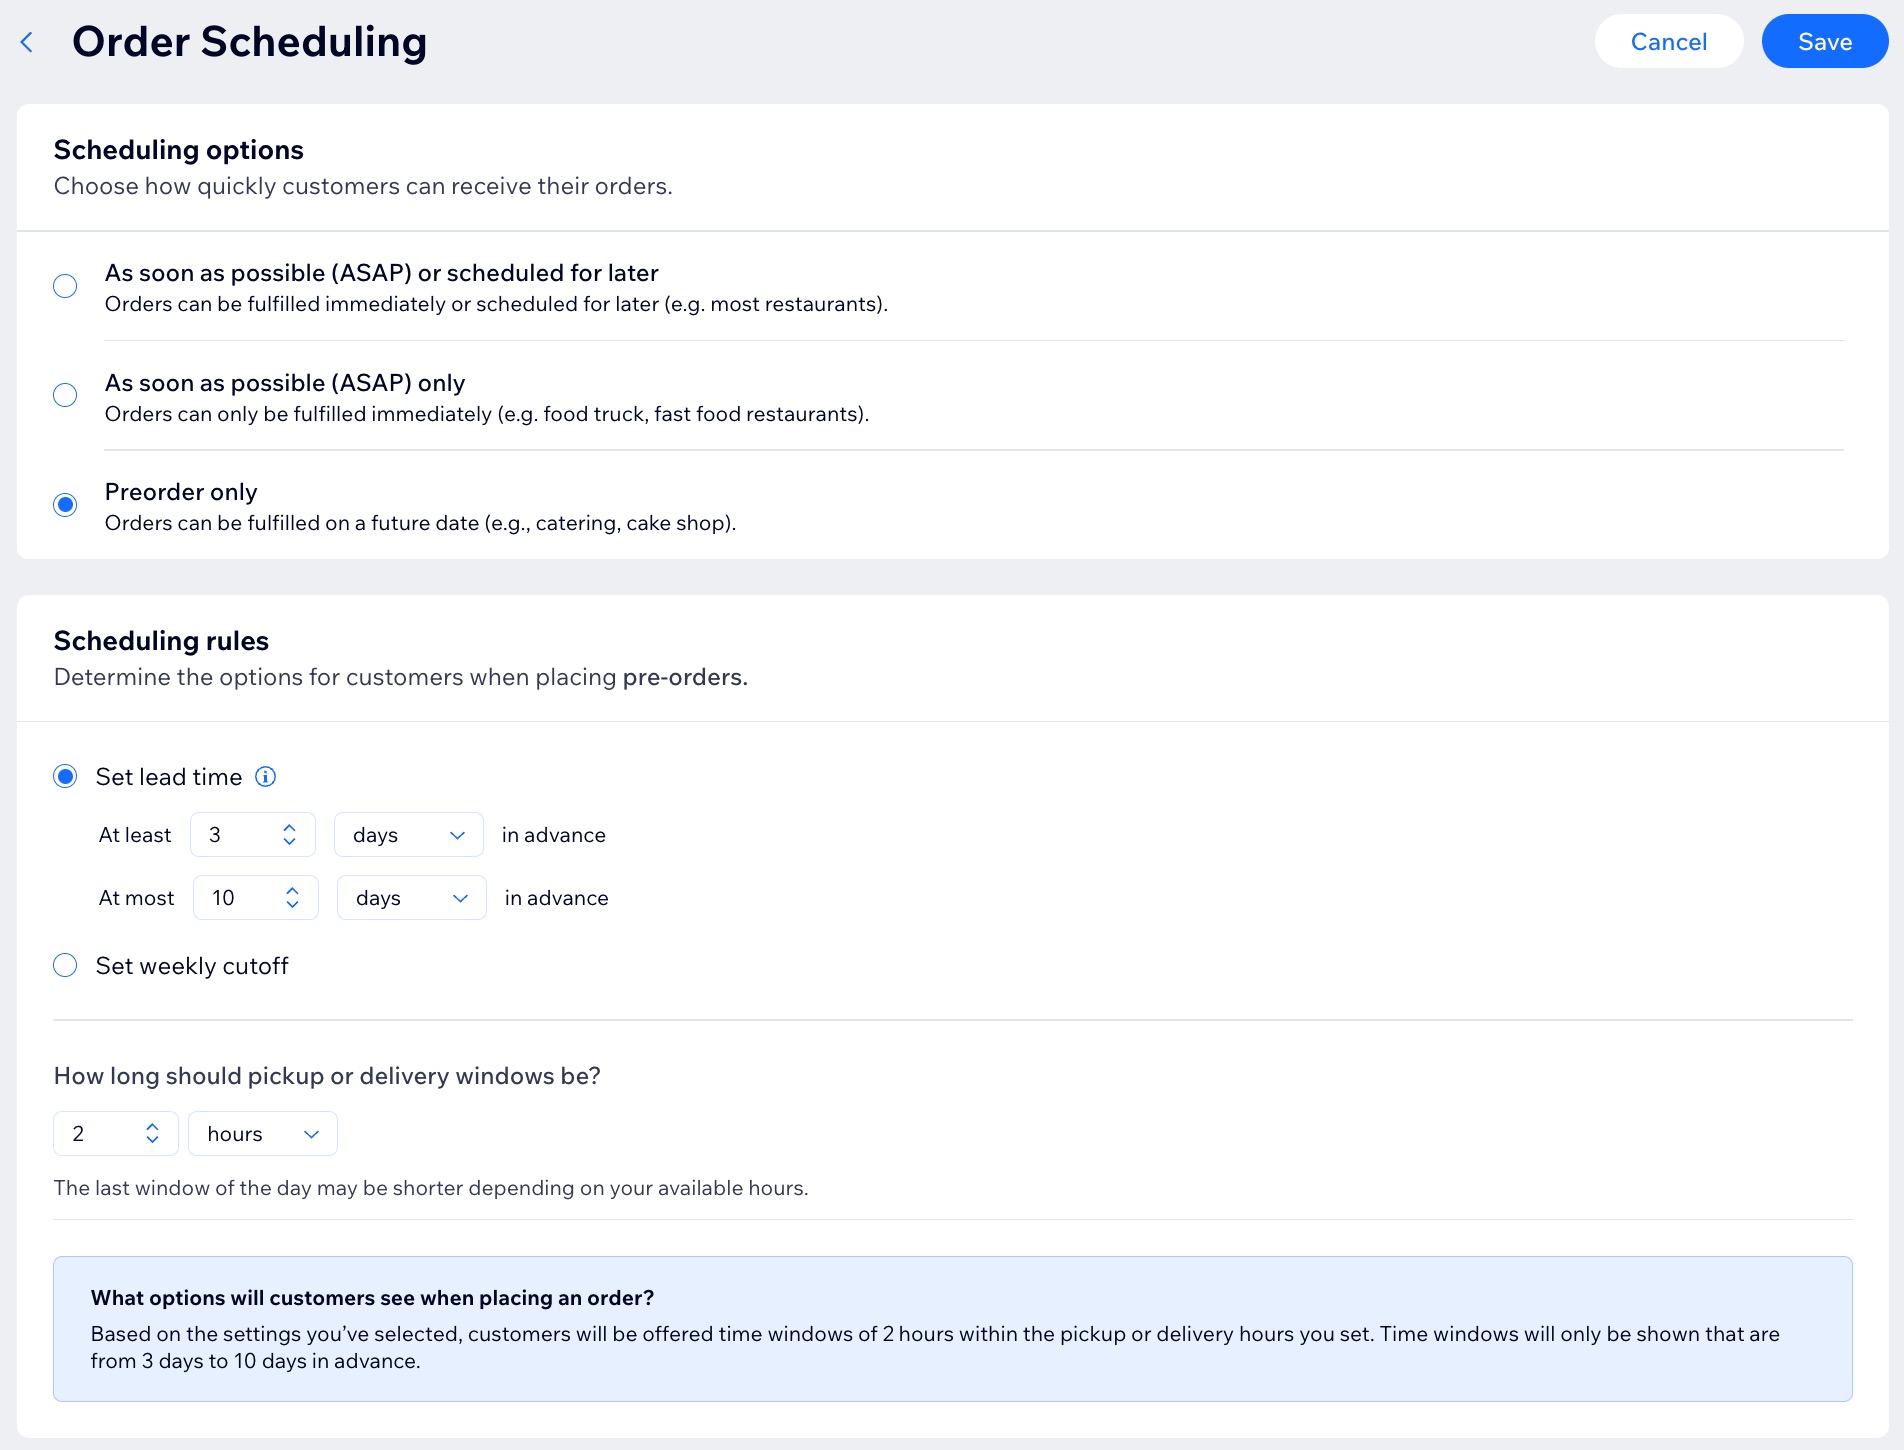
Step 2 | Set your order scheduling and availability
Set your order scheduling to ensure timely preparation. For example, a restaurant may allow customers to place immediate or scheduled orders, while a catering service may require orders to be placed in advance for adequate preparation.
To set up scheduling and availability:
- Go to Restaurant Orders Settings in your site's dashboard.
- Click Order Scheduling next to Scheduling and Availability.
- Choose how quickly customers can receive their orders:
Immediately / scheduled for later

Immediately
Fulfilled on a future date

Step 3 | Set up fulfillment preferences
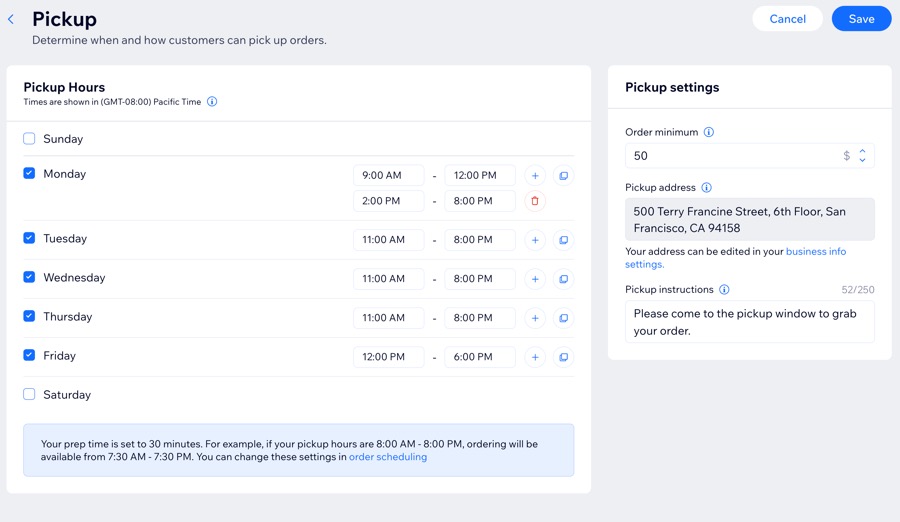
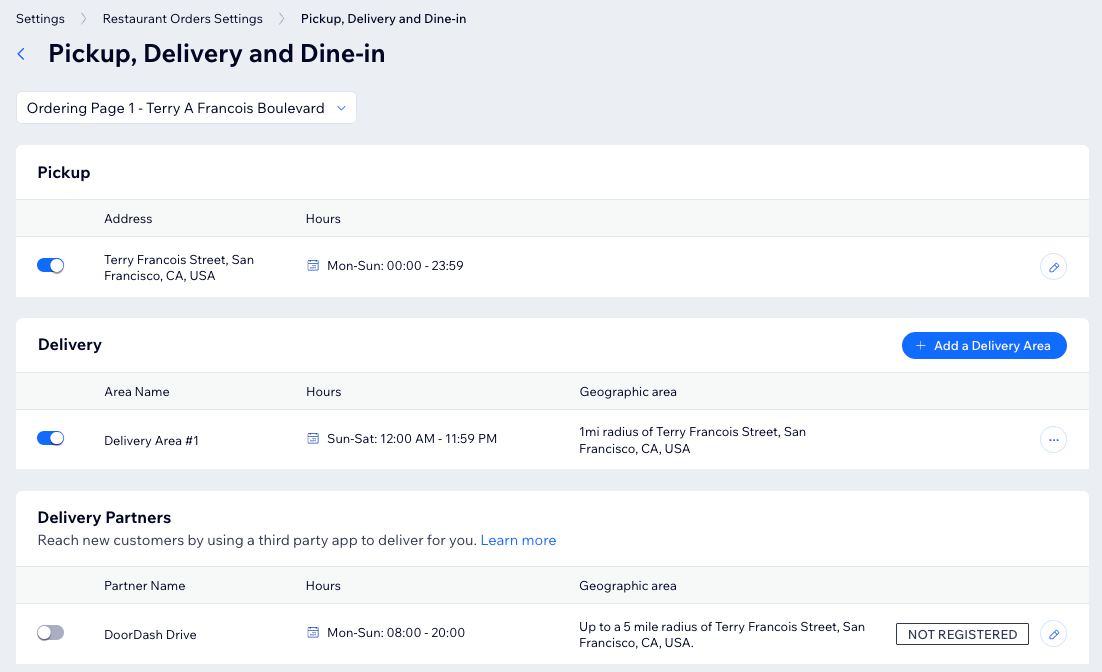
Choose how you want to fulfill your incoming orders - delivery, pickup and / or dine-in. You can specify collection times, delivery areas, minimum orders, and fees. You can also set closures for holidays or full dates, blocking orders or specific fulfillment methods.
Notes:
- At least 1 fulfillment method (pickup, delivery or dine-in) must be turned on for your site to accept orders.
- Enter your business location(s) in the Business Info settings. You can set up multiple restaurant locations, each location can have its own menu, online ordering settings, and and contact details.
To set up your fulfillment preferences:
- Go to Pickup, Delivery and Dine-in in your site's dashboard.
- Select what you want to set up:
Pickup
 .
.
Delivery

Dine-in
 to set up your dine-in options.
 .
.  .
.Default fulfillment method

Closures

Step 4 | Set up tax
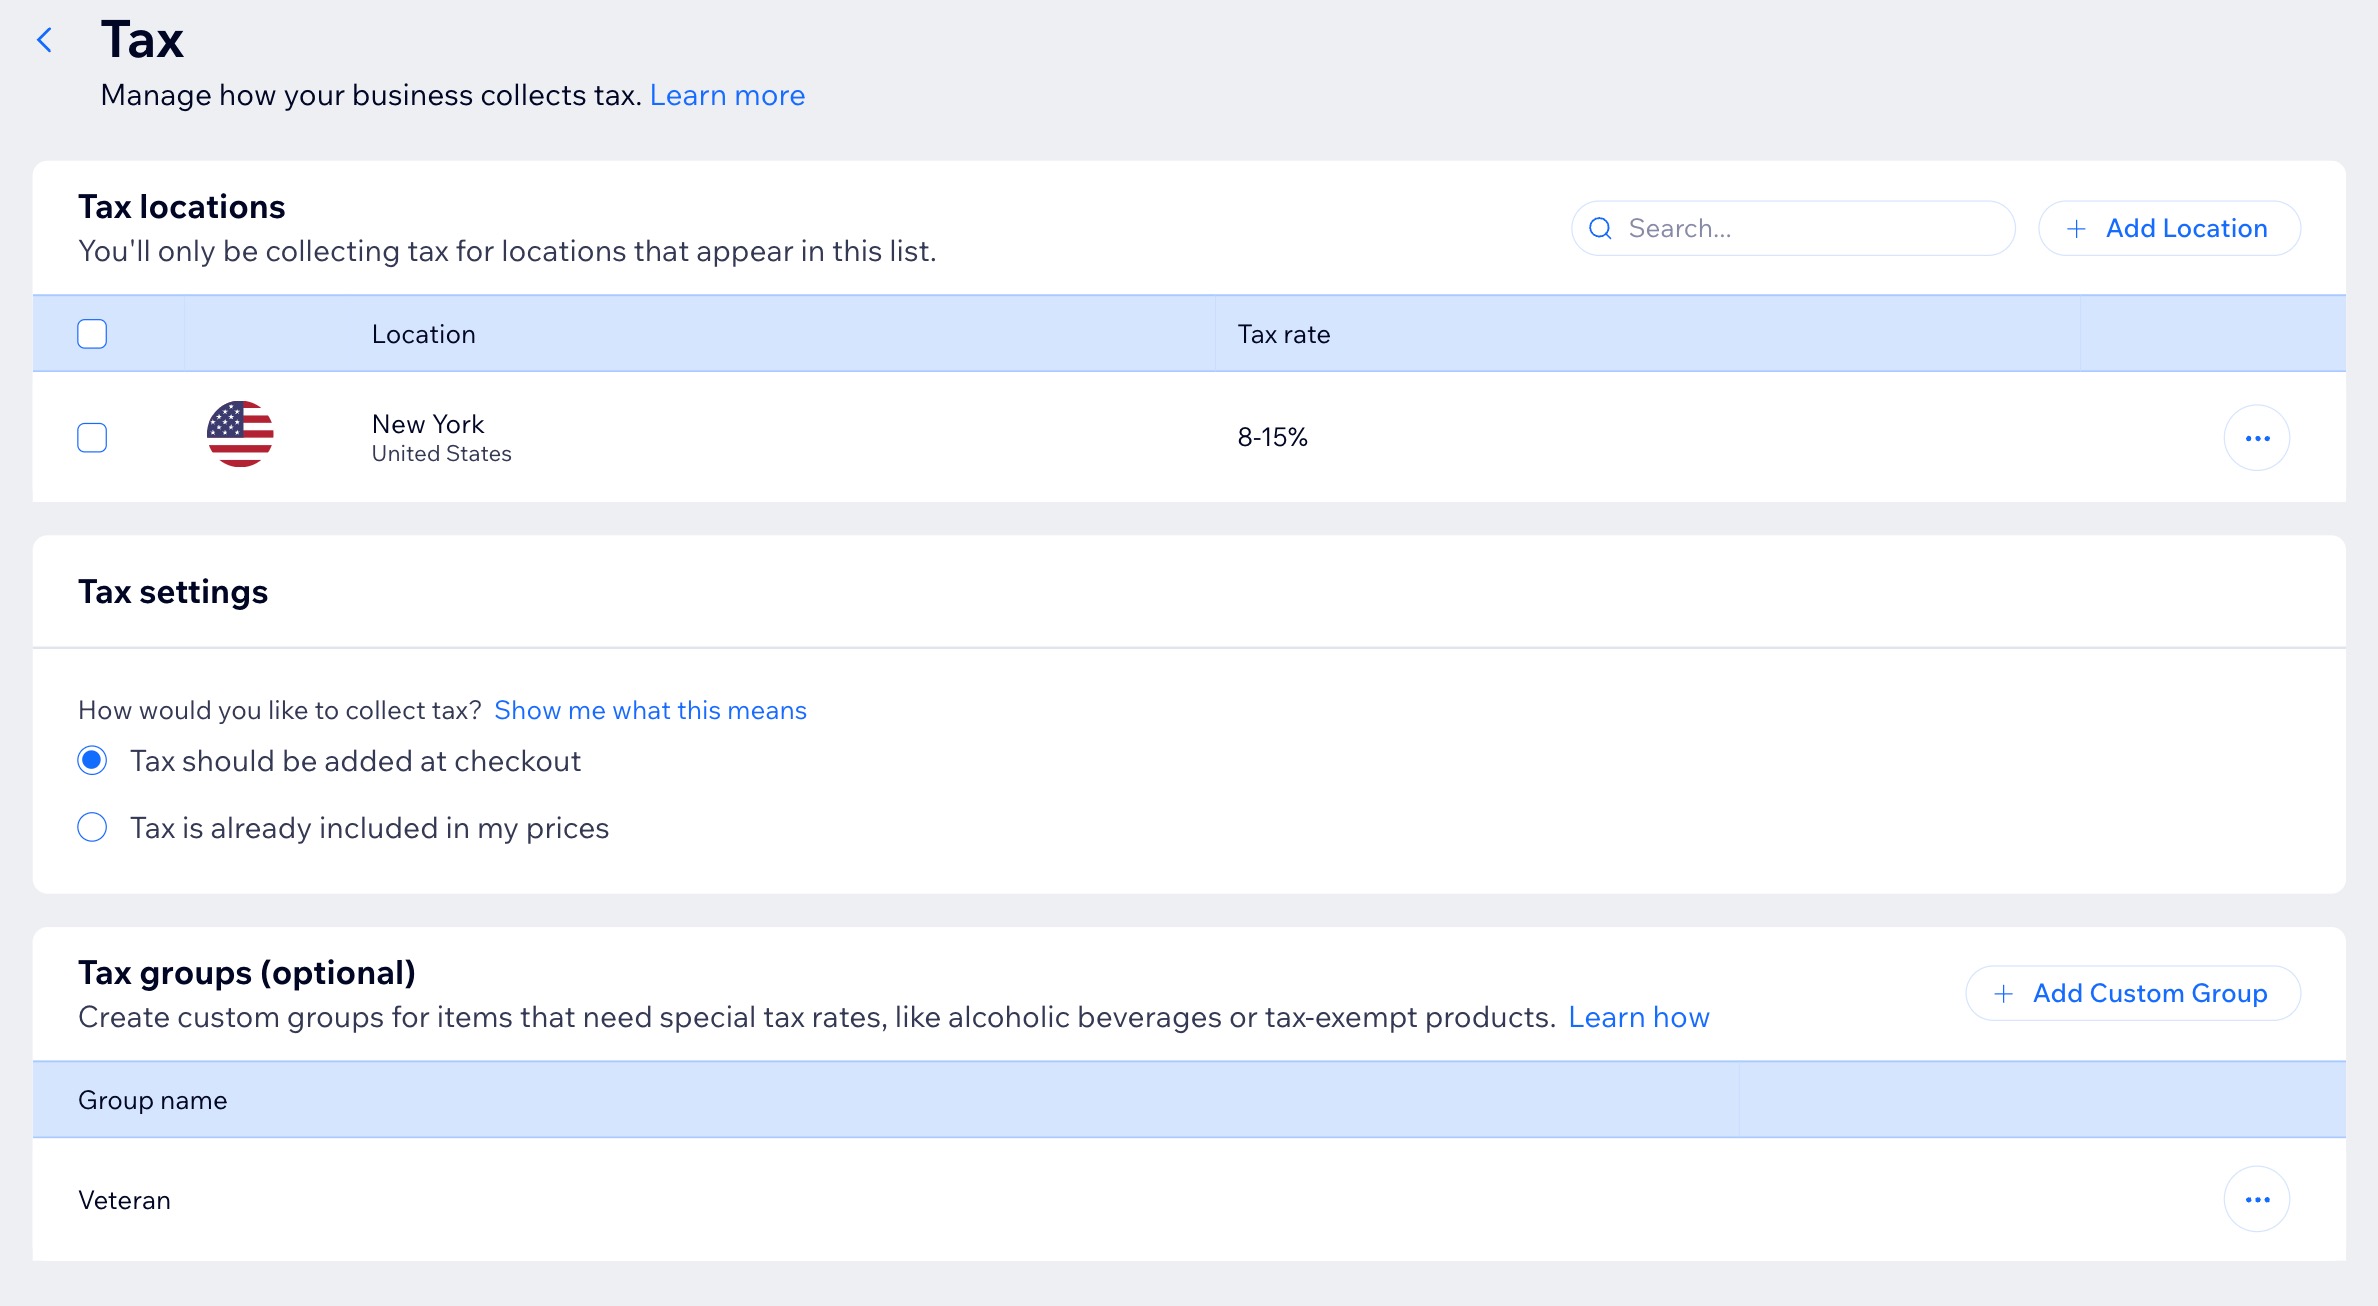
Set up tax collection to comply with your local regulations. You can collect tax for specific locations and create custom groups for items with special tax rates, like alcohol or tax-exempt products.
If you use Wix Stores or Wix Bookings, you can manage tax collection for all your business solutions in one place.
Important:
Different tax rules apply in different locations. Consult with an accountant or your local tax authority for specific information relevant for your business.
To set up tax:
- Go to Restaurant Orders Settings in your site's dashboard.
- Click Tax under Checkout.
- Set up the relevant tax collection details (e.g. tax locations, tax groups).
Note: You can set up tax using the manual method or the automatic tax collection.
Step 5 | Select additional checkout settings
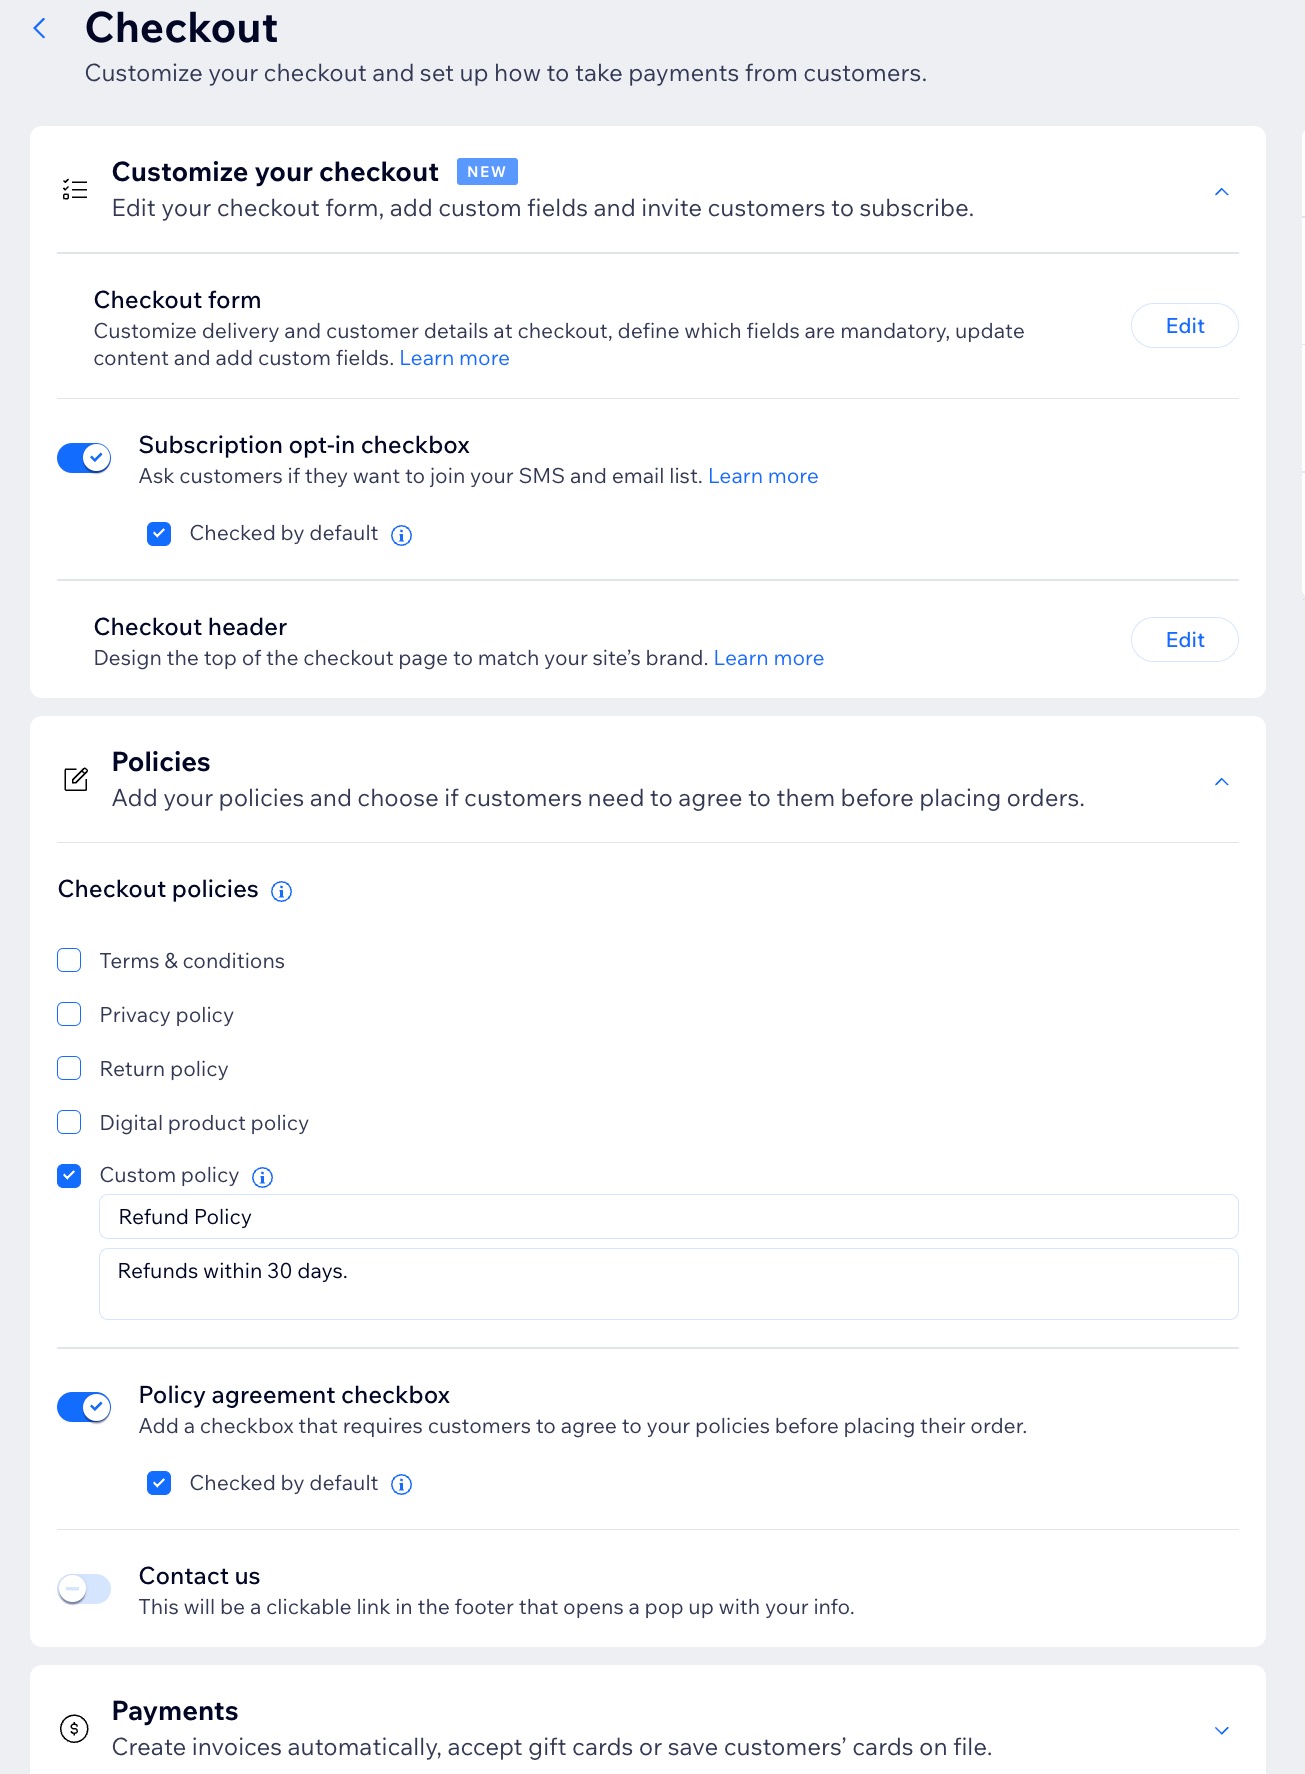
Customize your checkout to improve the ordering experience. Add custom fields to your checkout form, set up your preferred payment methods and enable the option to join your mailing list.
You can require customers to agree to your policies before completing their orders to ensure you're on the same page. Additionally, you can enable gift card payments and generate invoices automatically.
To select additional checkout settings:
- Go to Restaurant Orders Settings in your site's dashboard.
- Click Additional Checkout Settings under Checkout.
- Choose what settings you want to customize:
Customize your checkout
Policies
Payments
Step 6 | (Optional) Add another online ordering page
After setting up your online ordering page, you can create an additional one to manage a different aspect of your business, such as a restaurant and catering service. Each page will be displayed separately on your site, allowing customers to select the service they need.
You can customize each page with its own settings, menus, notice periods - like 30 minutes for regular orders and 2 days for catering - and specific fulfillment methods, hours, and fees.
To add another online ordering page:
- Go to Restaurant Orders Settings in your site's dashboard.
- Click the More actions drop-down and select Add another ordering page.
- Click Continue.
- Start creating your additional ordering page.

FAQs
Click a question below to learn more about setting up Wix Restaurant Orders:
Can I manage how customers add tips for online orders?
Where do customers see the selected policies?
Can I add my logo to the Checkout Page?
How do I set up notifications for incoming orders?
How do I customize notifications I send to customers about their orders?
Why does my site say it’s not accepting orders?
Can I pause or resume accepting online orders?


