- Adding and Customizing Checkout Form Fields
Adding and Customizing Checkout Form Fields
11 min
Add additional fields to the Checkout Page to collect the information you need from your customers. Choose from a wide variety of field types. You can let customers add text, reply to questions, send you a link, and more.
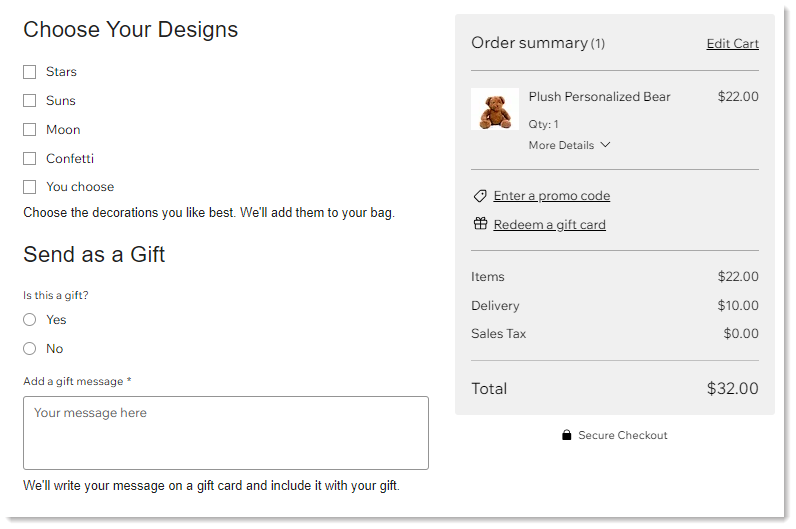
Add and customize any of the following fields:
Short answer text field
Add a short answer field to let customers reply with a comment that's up to 200 characters long. For example, ask customers to enter the name they want engraved on the jewelry box they're purchasing.


Tip: You can add a minimum number of characters or set a maximum that's less than 200.
To add and customize the field:
- Select Short answer.
- Enter a title (e.g. Name).
- (Optional) Enable the Required field toggle to make the field mandatory.
- (Optional) Add text that appears in the field to guide customers:
- Enable the Placeholder text toggle.
- Enter the text (e.g. What name should we add?).
- (Optional) Add a field description:
Tip: This information is displayed under the field.- Enable the Field description toggle.
- Enter a description.
- If the customer is going to input personal identifiable information (e.g. an address or passport number), click the Personal information toggle to enable it.
Note: This adds an additional layer of security. - Limit the number of characters customers can enter:
- Select the Advanced tab.
- Enable the Limit characters toggle.
- Enter the minimum and maximum characters.
- (Optional) Edit the default Field key:
Note: Developers can use this key to reference the form field. The key can only be changed before you save your changes.- Select the Advanced tab.
- Enter a key.
- Click Save.
Long answer text field
Add a long answer field to let customers reply with a comment up to 400 characters long. For example, ask customers to add a note to a gift purchase.
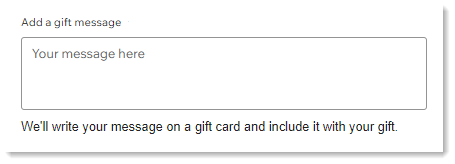

To add and customize the field:
- Select Long answer.
- Enter a title (e.g. Add a gift message).
- (Optional) Click the Required field toggle to make the field mandatory.
- (Optional) Add text that appears in the field to guide customers:
- Enable the Placeholder text toggle.
- Enter the text (e.g. Your message here).
- (Optional) Add a field description:
Tip: This information is displayed under the field.- Enable the Field description toggle.
- Enter a description.
- If the customer is going to input personal identifiable information (e.g. an address or passport number), click the Personal information toggle to enable it.
Note: This adds an additional layer of security. - Limit the number of characters customers can enter:
- Select the Advanced tab.
- Enable the Limit characters toggle.
- Enter the minimum and maximum characters.
- (Optional) Enter a Field key:
Note: Developers can use this key to reference the form field. The key can only be changed before you save your changes.- Select the Advanced tab.
- Enter a key.
- Click Save.
Number field
Add any question that requires a numerical answer. For example, if your country has tax exemption ID numbers, you can ask customers to enter their personal number. Customers will not be able to enter any letters in the field. You can optionally limit the number of digits that customers can enter.

To add and customize the field:
- Select Number.
- Enter a title (e.g. Tax Exemption Number).
- (Optional) Click the Required field toggle to make the field mandatory.
- (Optional) Add text that appears in the field to guide customers:
- Enable the Placeholder text toggle.
- Enter the text (e.g. Enter your number).
- (Optional) Add a field description:
Tip: This information is displayed under the field.- Enable the Field description toggle.
- Enter a description.
- If the customer is going to input personal identifiable information (e.g. an ID number), click the Personal information toggle to enable it.
Note: This adds an additional layer of security. - Set the maximum number of digits that appear after the decimal point:
- Select the Advanced tab.
- Drag the slider to set the number.
- Limit the number of characters customers can enter:
- Select the Advanced tab.
- Click the Set number range toggle to enable it.
- Enter the minimum and maximum numbers allowed.
Tip: You can use this to limit the number of digits customers can enter (e.g. add a minimum of 1000 and a maximum of 9999 to allow customers to only enter 4-digit numbers).
- (Optional) Enter a Field key:
Note: Developers can use this key to reference the form field. The key can only be changed before you save your changes.- Select the Advanced tab.
- Enter a key.
- Click Save.
Link field
Let customers send you a link while checking out. For example, you can request a link to their site.


To add and customize the field:
- Select Link.
- Enter a title (e.g. Site Link).
- (Optional) Click the Required field toggle to make the field mandatory.
- (Optional) Add text that appears in the field to guide customers:
- Enable the Placeholder text toggle.
- Enter the text (e.g. www.mysite.com).
- (Optional) Add a field description:
Tip: This information is displayed under the field.- Enable the Field description toggle.
- Enter a description.
- If the customer is going to input personal identifiable information, enable the Personal information toggle.
Note: This adds an additional layer of security. - (Optional) Enter a Field key:
Note: Developers can use this key to reference the form field. The key can only be changed before you save your changes.- Select the Advanced tab.
- Enter a key.
- Click Save.
Email field
Ask customers to enter an additional email field. For example, if you added a contact person field to the checkout, you can ask customers to enter that person's email.
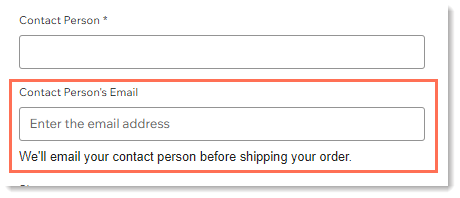
To add and customize the field:
- Select Email.
- Enter a title (e.g. Contact Person's Email).
- (Optional) Enable the Required field toggle to make the field mandatory.
- (Optional) Add text that appears in the field to guide customers:
- Enable the Placeholder text toggle.
- Enter the text (e.g. Enter the email address).
- (Optional) Add a field description:
Tip: This information is displayed under the field.- Enable the Field description toggle.
- Enter a description.
- If the customer is going to input personal identifiable information, enable the Personal information toggle.
Note: This adds an additional layer of security. - (Optional) Enter a Field key:
Note: Developers can use this key to reference the form field. The key can only be changed before you save your changes.- Select the Advanced tab.
- Enter a key.
- Click Save.
Phone field
Ask customers to enter an additional phone field. For example, if you added a contact person field to the checkout, you can ask customers to enter that person's phone number.


To add and customize the field:
- Select Phone.
- Enter a title (e.g. Contact Person's Phone Number).
- (Optional) Enable the Required field toggle to make the field mandatory.
- (Optional) Add text that appears in the field to guide customers:
- Enable the Placeholder text toggle.
- Enter the text (e.g. Enter your phone number).
- (Optional) Add a field description:
Tip: This information is displayed under the field.- Enable the Field description toggle.
- Enter a description.
- If the customer is going to input personal identifiable information, enable the Personal information toggle.
Note: This adds an additional layer of security. - (Optional) Enter a Field key:
Note: Developers can use this key to reference the form field. The key can only be changed before you save your changes.- Select the Advanced tab.
- Enter a key.
- Click Save.
Date picker field
Allow your customers to select a date.

To add and customize the field:
- Select Date picker.
- Enter a title (e.g. What date should we engrave).
- (Optional) Enable the Required field toggle to make the field mandatory.
- (Optional) Add text that appears in the field to guide customers:
- Enable the Placeholder text toggle.
- Enter the text (e.g. Choose a date).
- (Optional) Add a field description:
Tip: This information is displayed under the field.- Enable the Field description toggle.
- Enter a description.
- If the customer is going to input personal identifiable information, enable the Personal information toggle.
Note: This adds an additional layer of security. - (Optional) Customize the date selector:
- Allow only past, only future, or all dates.
- Set what appears as the first day of the week.
- (Optional) Enter a Field key:
Note: Developers can use this key to reference the form field. The key can only be changed before you save your changes.- Select the Advanced tab.
- Enter a key.
- Click Save.
Single choice field
Ask a multiple-choice question to which customers can choose only one answer.
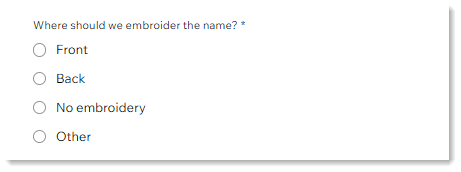
To add and customize the field:
- Select Single choice.
- Enter a title (e.g. Where should we embroider the name?).
- Create the options:
- Enter the first 2 options.
- (Optional) Click Add Option and enter additional options.
Tip: If you have many options, you can click Bulk Edit to enter them all at once without clicking Add Option each time.
- Add an "Other" option:
- Click the Add "Other" toggle.
- (Optional) Edit the option title.
- (Optional) Add placeholder text.

- (Optional) Enable the Required field toggle to make the field mandatory.
- (Optional) Add a field description:
Tip: This information is displayed under the field.- Enable the Field description toggle.
- Enter a description.
- If the customer is going to input personal identifiable information, enable the Personal information toggle.
Note: This adds an additional layer of security. - (Optional) Enter a Field key:
Note: Developers can use this key to reference the form field. The key can only be changed before you save your changes.- Select the Advanced tab.
- Enter a key.
- Click Save.
Multi choice field
Ask a multiple-choice question to which customers can choose multiple options.
Tip: You can add a limit to the number of options customers can select.
Tip: You can add a limit to the number of options customers can select.
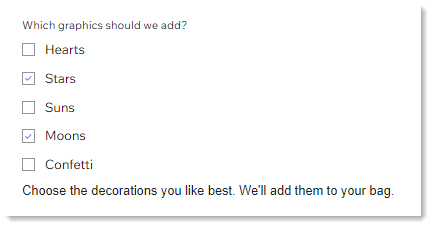
To add and customize the field:
- Select Multi choice.
- Enter a title (e.g. Which graphics should we add?).
- Create the options:
- Enter the first 2 options.
- (Optional) Click Add Option and enter additional options.
Tip: If you have many options, you can click Bulk Edit to enter them all at once without clicking Add Option each time.
- Add an "Other" option:
- Click the Add "Other" toggle.
- (Optional) Edit the option title.
- (Optional) Add placeholder text.

- (Optional) Enable the Required field toggle to make the field mandatory.
- (Optional) Add a field description:
Tip: This information is displayed under the field.- Enable the Field description toggle.
- Enter a description.
- If the customer is going to input personal identifiable information, enable the Personal information toggle.
Note: This adds an additional layer of security. - Limit the number of options customers can select:
- Enable the Limit options toggle.
- Choose an option from the Limit options drop-down.
- Enter the limit number.
- (Optional) Enter a Field key:
Note: Developers can use this key to reference the form field. The key can only be changed before you save your changes.- Select the Advanced tab.
- Enter a key.
- Click Save.
Dropdown field
Ask a question to which customers can choose a single option from a dropdown menu.

To add and customize the field:
- Select Dropdown.
- Enter a title (e.g. Select a thread color).
- Create the options:
- Enter the first 2 options.
- (Optional) Click Add Option and enter additional options.
Tip: If you have many options, you can click Bulk Edit to enter them all at once without clicking Add Option each time.
- (Optional) Add the text or selection customers see before they make a selection:
- Add placeholder text: Click Placeholder and enter the text (e.g. Choose one).
- Add a default selection: Click Option and select an option (e.g. Blue).

- (Optional) Enable the Required field toggle to make the field mandatory.
- (Optional) Add a field description:
Tip: This information is displayed under the field.- Enable the Field description toggle.
- Enter a description.
- If the customer is going to input personal identifiable information, enable the Personal information toggle.
Note: This adds an additional layer of security. - (Optional) Enter a Field key:
Note: Developers can use this key to reference the form field. The key can only be changed before you save your changes.- Select the Advanced tab.
- Enter a key.
- Click Save.
Checkbox field
Add a field that customers can respond to by selecting a checkbox. For example, you can use this type of field to ask if the order is a gift.

You could also use this field to ask customers to agree to a store policy and include a link to a policy page in your site.


To add and customize the field:
- Select Checkbox.
- Enter an internal title.
Note: This title will be visible only in the Wix dashboard. Customers won't see it. - Enter the message customers need to respond to (e.g. Is this a gift?).
- Enable or disable the Checked by default toggle:
- Enabled: The checkbox is selected by default.
- Disabled: The checkbox is not selected by default.
- (Optional) Enable the Required field toggle to make the field mandatory.
- (Optional) Enter a Field key:
Note: Developers can use this key to reference the form field. The key can only be changed before you save your changes.- Select the Advanced tab.
- Enter a key.
- Click Save.
Tips:
- All custom fields appear under the customer details and above the delivery details.
- You can drag custom fields to reorder them.
Did this help?
|


