

Wix Loyalty Program: Adding and Setting Up Your Loyalty Program
14 min
In this article
- Step 1 | Create your loyalty program
- Step 2 | Choose how customers earn points
- Step 3 | Set up loyalty rewards
- (Optional) Step 4 | Activate email automations
- Step 5 | Review your loyalty program
- Step 6 | View your new site pages
- FAQs
Add the Wix Loyalty Program to your site to reward members for their business and loyalty. Award points for actions such as signing up to your newsletter or making a purchase. Members can exchange points for reward coupons that they can use on your site.
Important:
- You can set up your loyalty program for free, but you must upgrade to a plan that includes accepting payments to launch the program.
- Wix Loyalty Program is currently available for Wix Stores, Wix Bookings, Wix Restaurants, Wix Pricing Plans, Wix Events, and Wix Online Programs.
- If you start setting up your Loyalty program from the Wix app, make sure to add the Loyalty pages in the editor to complete the setup.
Step 1 | Create your loyalty program
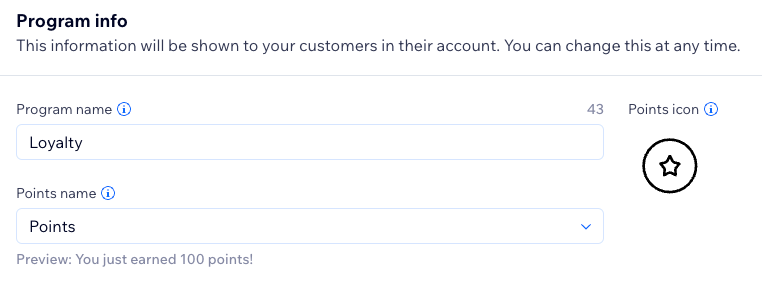
Reflect your business's personality through your loyalty program name. Choose a term and icon to represent the points members will earn.
To create your loyalty program:
Dashboard
Wix app
- Go to Loyalty Program in your site's dashboard.
- Click Start Now.
- Enter your program info:
- Program name: Enter your loyalty program name.
- Points name: Click the drop-down and choose the term you want to use to describe "points" on your site:
- Points: The default "Points" term is used to describe loyalty points.
- Custom name: Enter the name you want to use to describe loyalty points (e.g. "Stars" or "Hearts").
- Points icon: Select a loyalty points icon or upload your own.
- Click Continue to Setup.
Step 2 | Choose how customers earn points
Points are awarded to customers based on various actions. Reward customers for signing up to your site, making an appointment, and more.
Notes:
- Points based on spending are rounded down to the nearest whole number. For example, if you reward 10 points per $1, a spend of $4.99 earns 40 points.
- Loyalty programs on Wix Restaurants sites reward points based on order subtotals. Delivery fees and taxes are not included.
To choose how customers earn points:
Dashboard
Wix app
- Scroll down to the Points section.
- Choose what you want to do:
Add a new way to earn points
Edit how to earn points
Activate or deactivate a way to earn points
Delete a way to earn points
 and click Delete.
Tip:
If you have an upgraded plan, you can set an expiration date for your points.
Limitations in earning points when sending an invoice:
If you have enabled Place a store order in Ways to earn, only invoices that generate an order once paid can earn points for your customers. If you add a custom invoice item to an invoice, it will not earn points because it's not a store product that the earning rule is based on. For such cases, we recommend to manually give points to the customer.
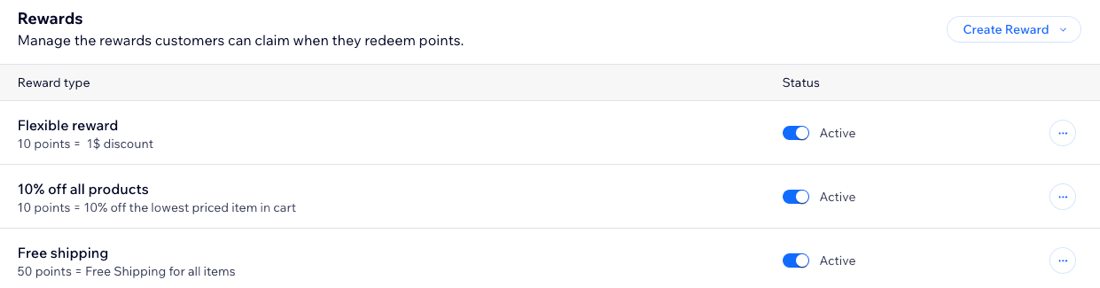
Step 3 | Set up loyalty rewards
Define the rewards customers can redeem their points for. Rewards will be issued in the form of coupons offering discounts, free shipping, special prices, and more.
To set up loyalty rewards:
Dashboard
Wix app
- Scroll down to the Rewards section.
- Click Create Reward.
Tip: Select Create with AI to have the Wix AI Assistant create a reward for you or select Build with Functions to build a custom reward. - Click Set up reward.
- Choose between creating a fixed reward or a flexible reward.
Note: The flexible reward may automatically get activated. If this is the case, hover over this reward type and click Edit to make changes to the reward. - Click Next.
- Edit the details for the reward type:
Fixed reward
Flexible reward
6. Click Save.
7. Repeat for each reward you'd like to add or edit.
Note: Your site can only have one flexible reward, so you can only add it once.
Note: Your site can only have one flexible reward, so you can only add it once.
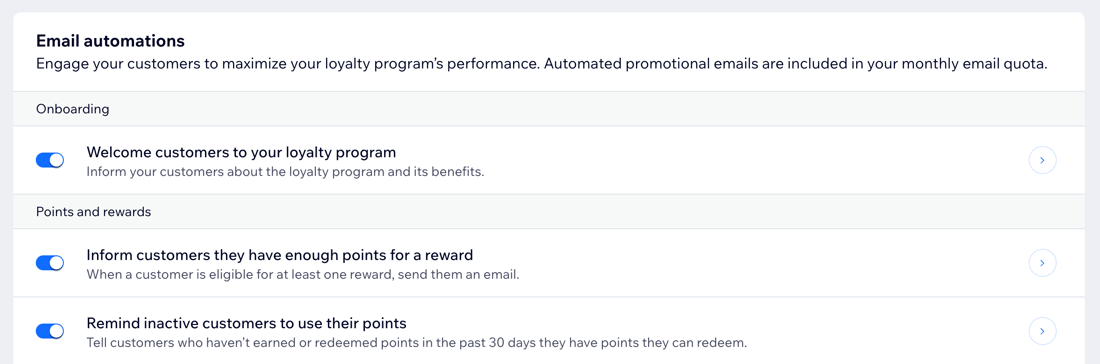
(Optional) Step 4 | Activate email automations
Enabling email automations means customers will automatically receive an email when they earn a reward. Being automatically notified of a new reward is a good way to encourage a customer to return to your site.
The email automations you see may vary depending on which ways to earn you have set up, and if you use points expiration and/or tiers.
Note:
Email notifications are set up through automations that are added for you when you set up your loyalty program. Automated emails are inactive by default, so make sure to activate them first in order to start sending them.
To activate email automations:
Dashboard
Wix app
- Scroll down to the Email automations section.
- Click the toggle next to the relevant automation to choose what you want to do:
- Enabled: Customers will automatically receive an email when they earn a reward.
- Disabled: Customers will not automatically receive an email when they earn a reward.
- (Optional) Edit the email automation.
- Hover over an email and click Edit.
- Customize the automation.
Step 5 | Review your loyalty program
Review the details of your loyalty program before launching it. Check that you're happy with the ways customers can earn points and redeem points.
To review your program:
Dashboard
Wix app
- Review your Program details and click Edit Details to make any changes.
- Review the Points, Rewards, and Email automations sections. Hover over any way to earn, reward, or email and click Edit to make any changes.
- Click Launch Program in the top right.
- Click Launch Program in the pop-up.
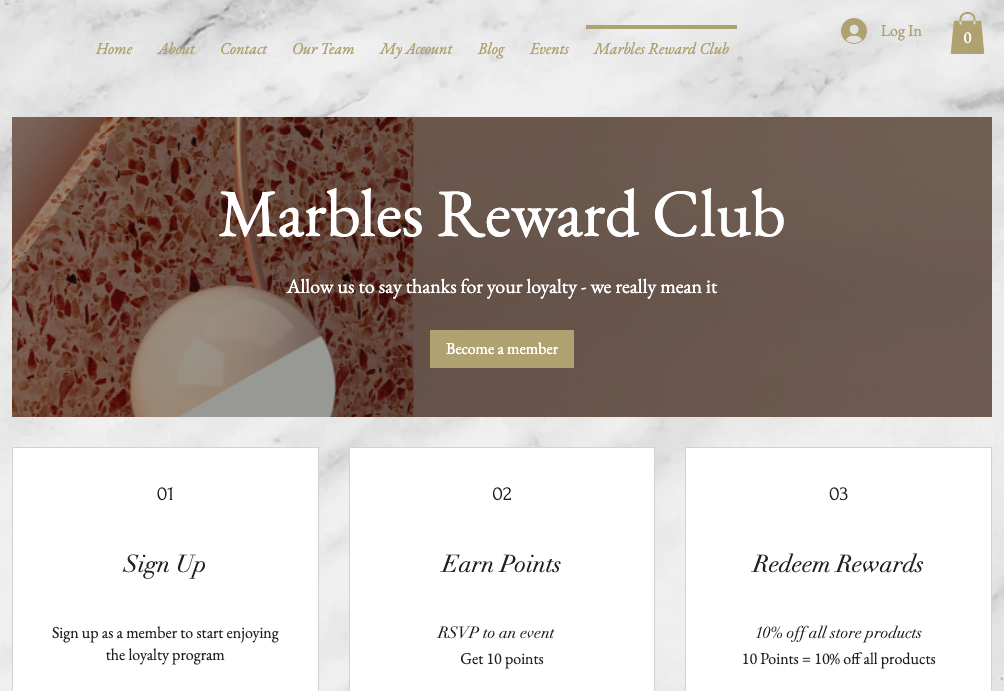
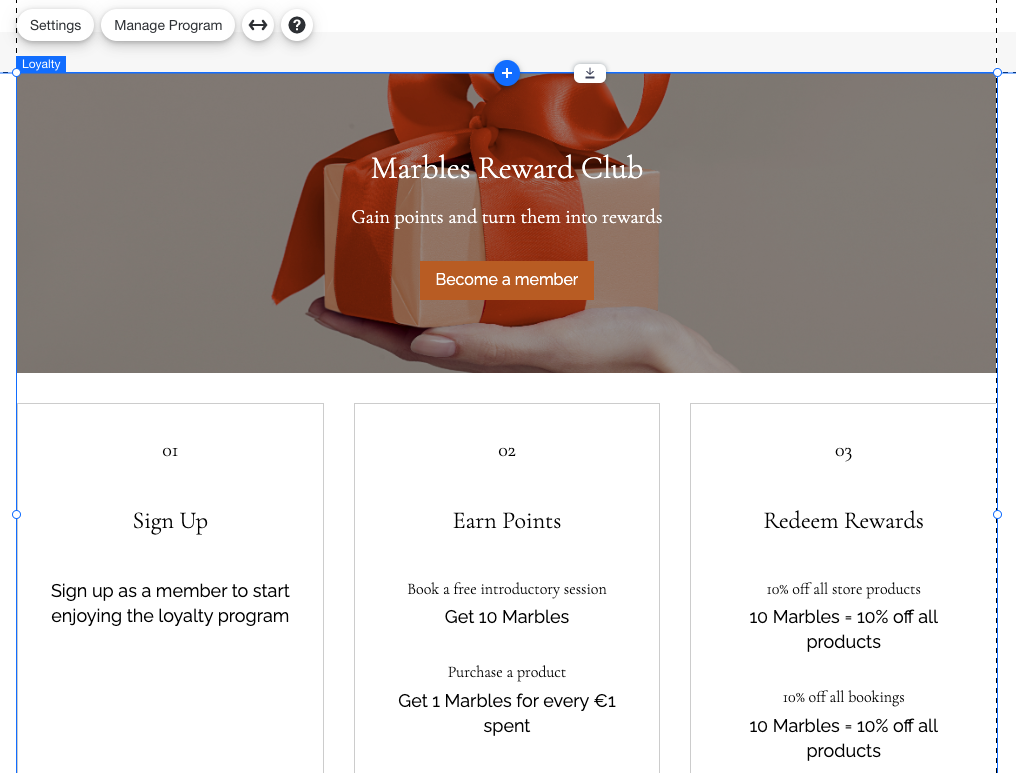
Step 6 | View your new site pages
Setting up a loyalty program automatically adds two new pages to your site. Your new Loyalty Program page shares details of your program with site visitors. Your new My Rewards page is where loyalty program members keep track of their points and rewards.
Note:
- These new pages won't be live and accessible to visitors until you publish your site.
- To view these pages, head over to your editor on a desktop computer.
To view your new site pages:
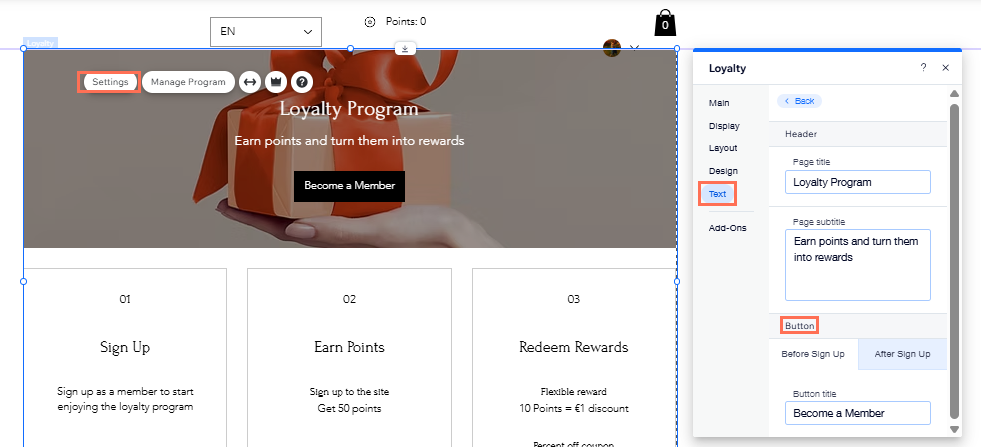
- Click Go to Editor at the top of the screen.
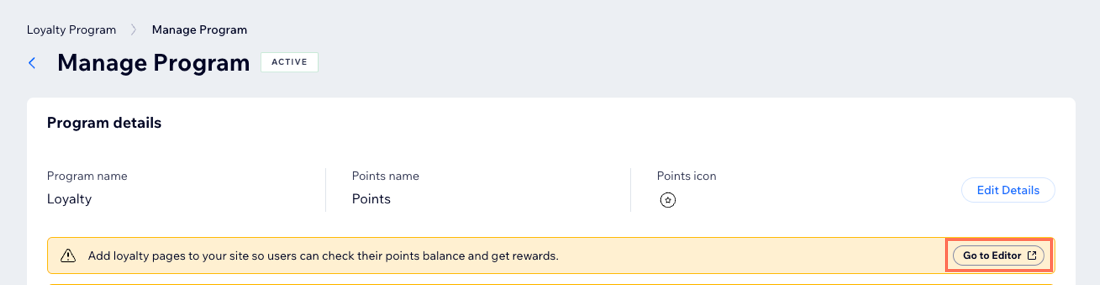
- Navigate to the relevant page in your editor.
Next step:
Customize the Loyalty Program pages that have been added to your site.
FAQs
Click a question to learn more about setting up your loyalty program.
What's the difference between a fixed and flexible reward?
Can customers pay with loyalty points when they get to my site's checkout?
When are points given to a customer?
What’s the fastest way to access the Loyalty page?
Why is my live site displaying the wrong currency?
Why does my Loyalty page look distorted or have cut-off button text on mobile?
Why isn’t my coupon being applied as intended in the Loyalty program?
Is it possible to automatically assign the points for past orders before the Loyalty program started?
