Wix Functions: Creating a Custom Loyalty Program Reward
6 min
In this article
- Creating a loyalty rewards function
- FAQs
Before you begin:
- This article refers to Wix Functions. Functions allow you to incorporate custom logic into Wix apps (e.g. Wix Loyalty Program) using a no-code builder. Learn more about Wix Functions.
- Make sure you have set up your loyalty program and added the loyalty checkout widget to your site before building a custom rewards function.
Enhance your loyalty program by building custom rewards with Wix Functions. Functions allows you to set up personalized points-to-discount conversion rates for loyalty members who meet specific criteria.
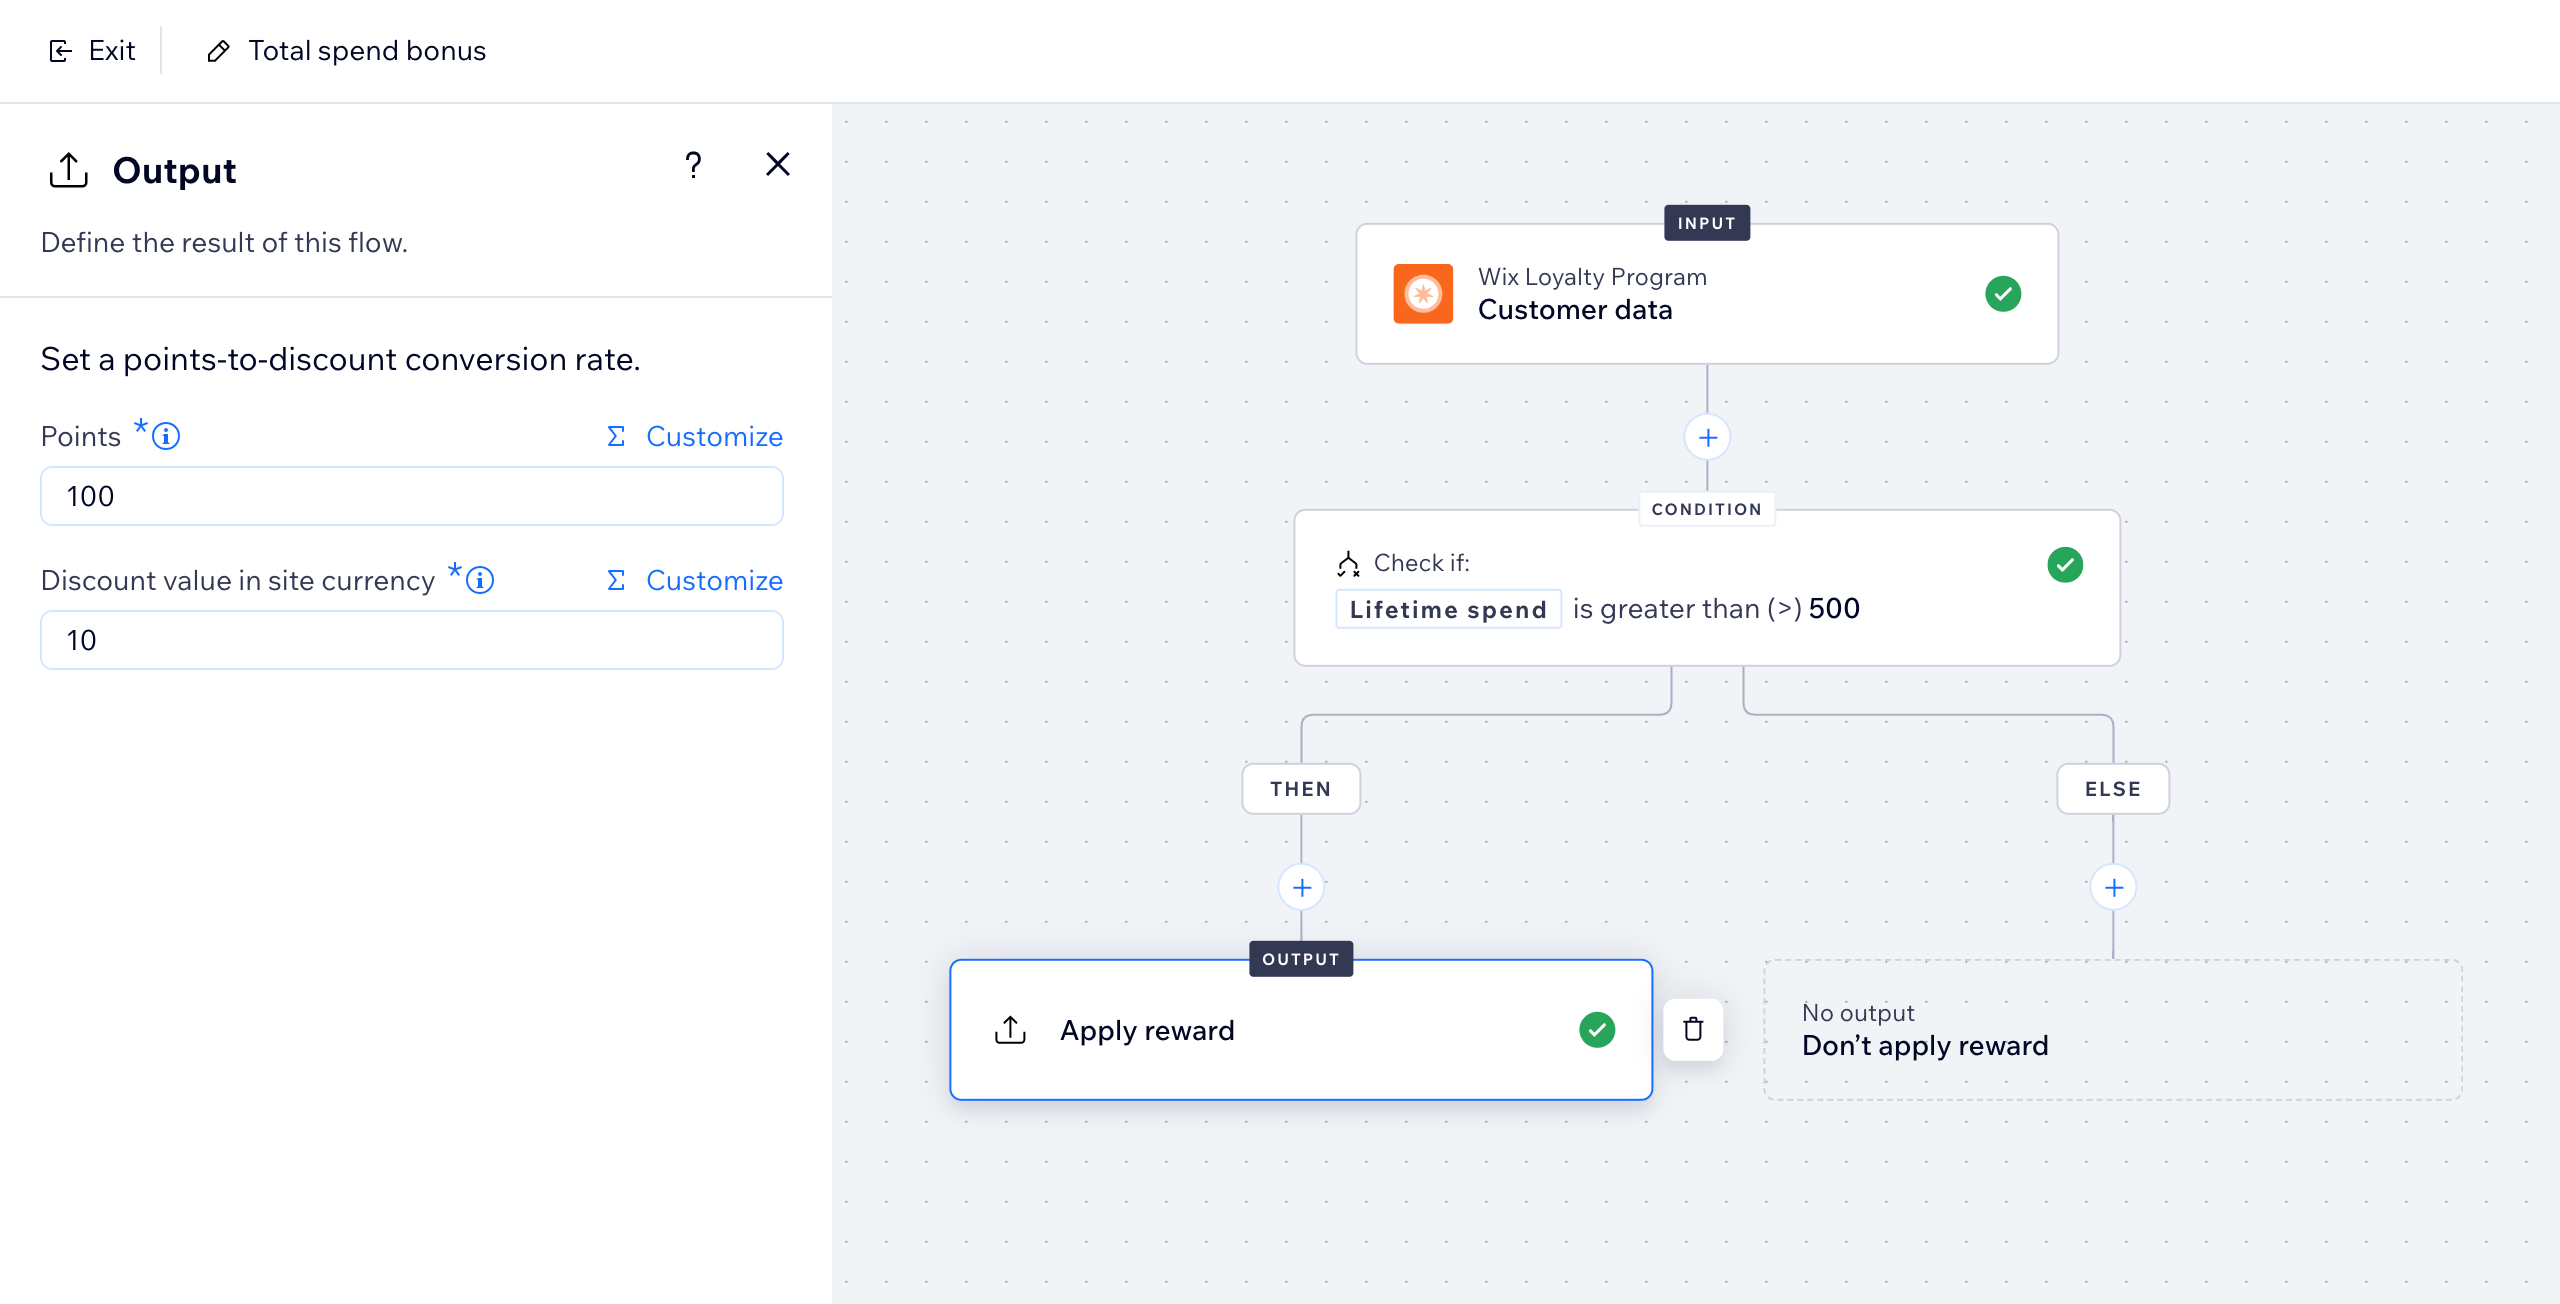
For example, create a 'Total spend bonus' reward that allows members who have spent at least $500 on your site to convert 100 loyalty points into a $10 discount on their next purchase. You can update the values to meet your business needs.
Creating a loyalty rewards function
Start by picking a template, or build a function from scratch. The Wix Loyalty Program templates include:
- Frequent buyer perk: Allow members who made at least '2' orders in the last 30 days to convert their loyalty points into a discount.
- Total spend bonus: Allow members who have spent at least '500' (in the site's currency) on your site to convert their loyalty points into a discount.
Note:
In the function builder, you can adjust the values of the templates so they match your business needs. For example, change '2' orders to '5' orders, or decrease '500' total spend to '250'.
To create a loyalty rewards function:
- Go to Loyalty Program in your site's dashboard.
- Click Manage Program at the top right.
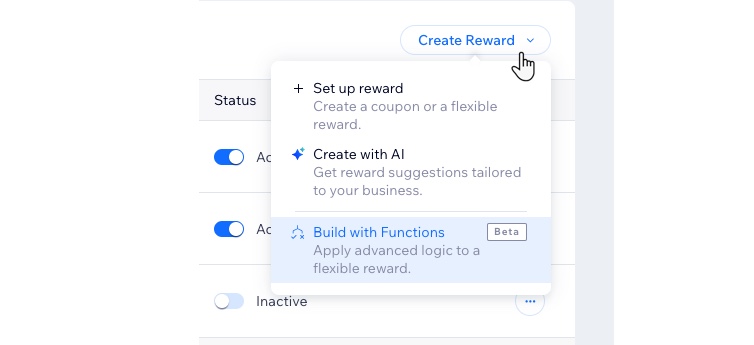
- Scroll down to Rewards and click the Create Reward drop-down.
- Select Build with Functions.
- Choose how to create your function:
- Use a function template: Click Use Template next to the relevant template.
- Create your own function: Click Start from Scratch at the bottom left to build your own custom reward.
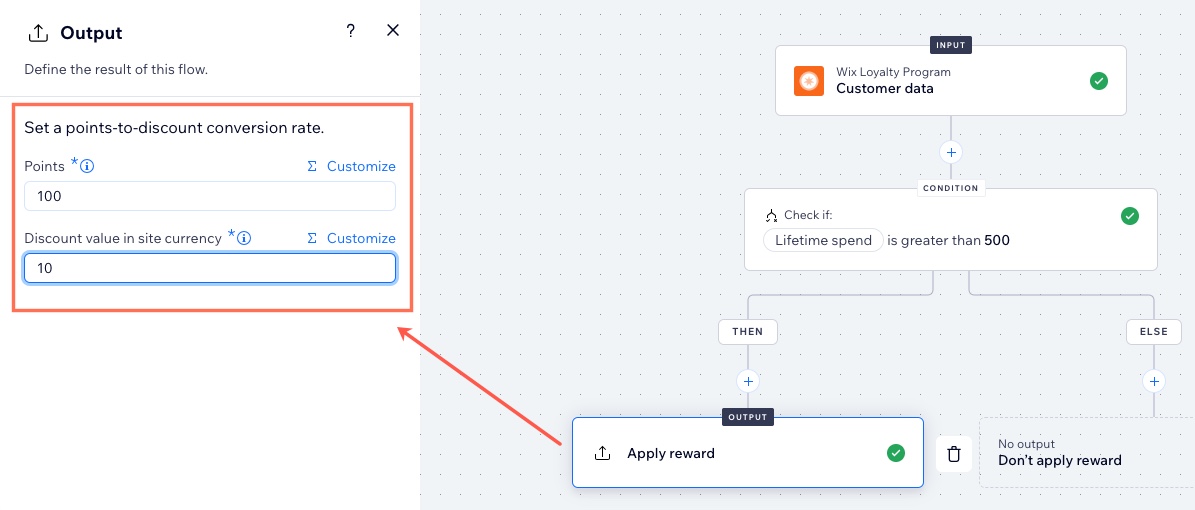
- (In the Functions Builder) Click the Output to choose how the award is applied.
Tip: The output is the result you want to occur at the end of the function flow. - Set a points-to-discount conversion rate.
- Points: Set the number of points for the conversion rate (e.g., 20 points = $2 discount).
- Discount value in site currency: Set how much the points are worth when converting them into a discount at checkout (e.g., 20 points = $2 discount).
Tip:
You can also click Customize above a field to build more complex logic into the output or condition.
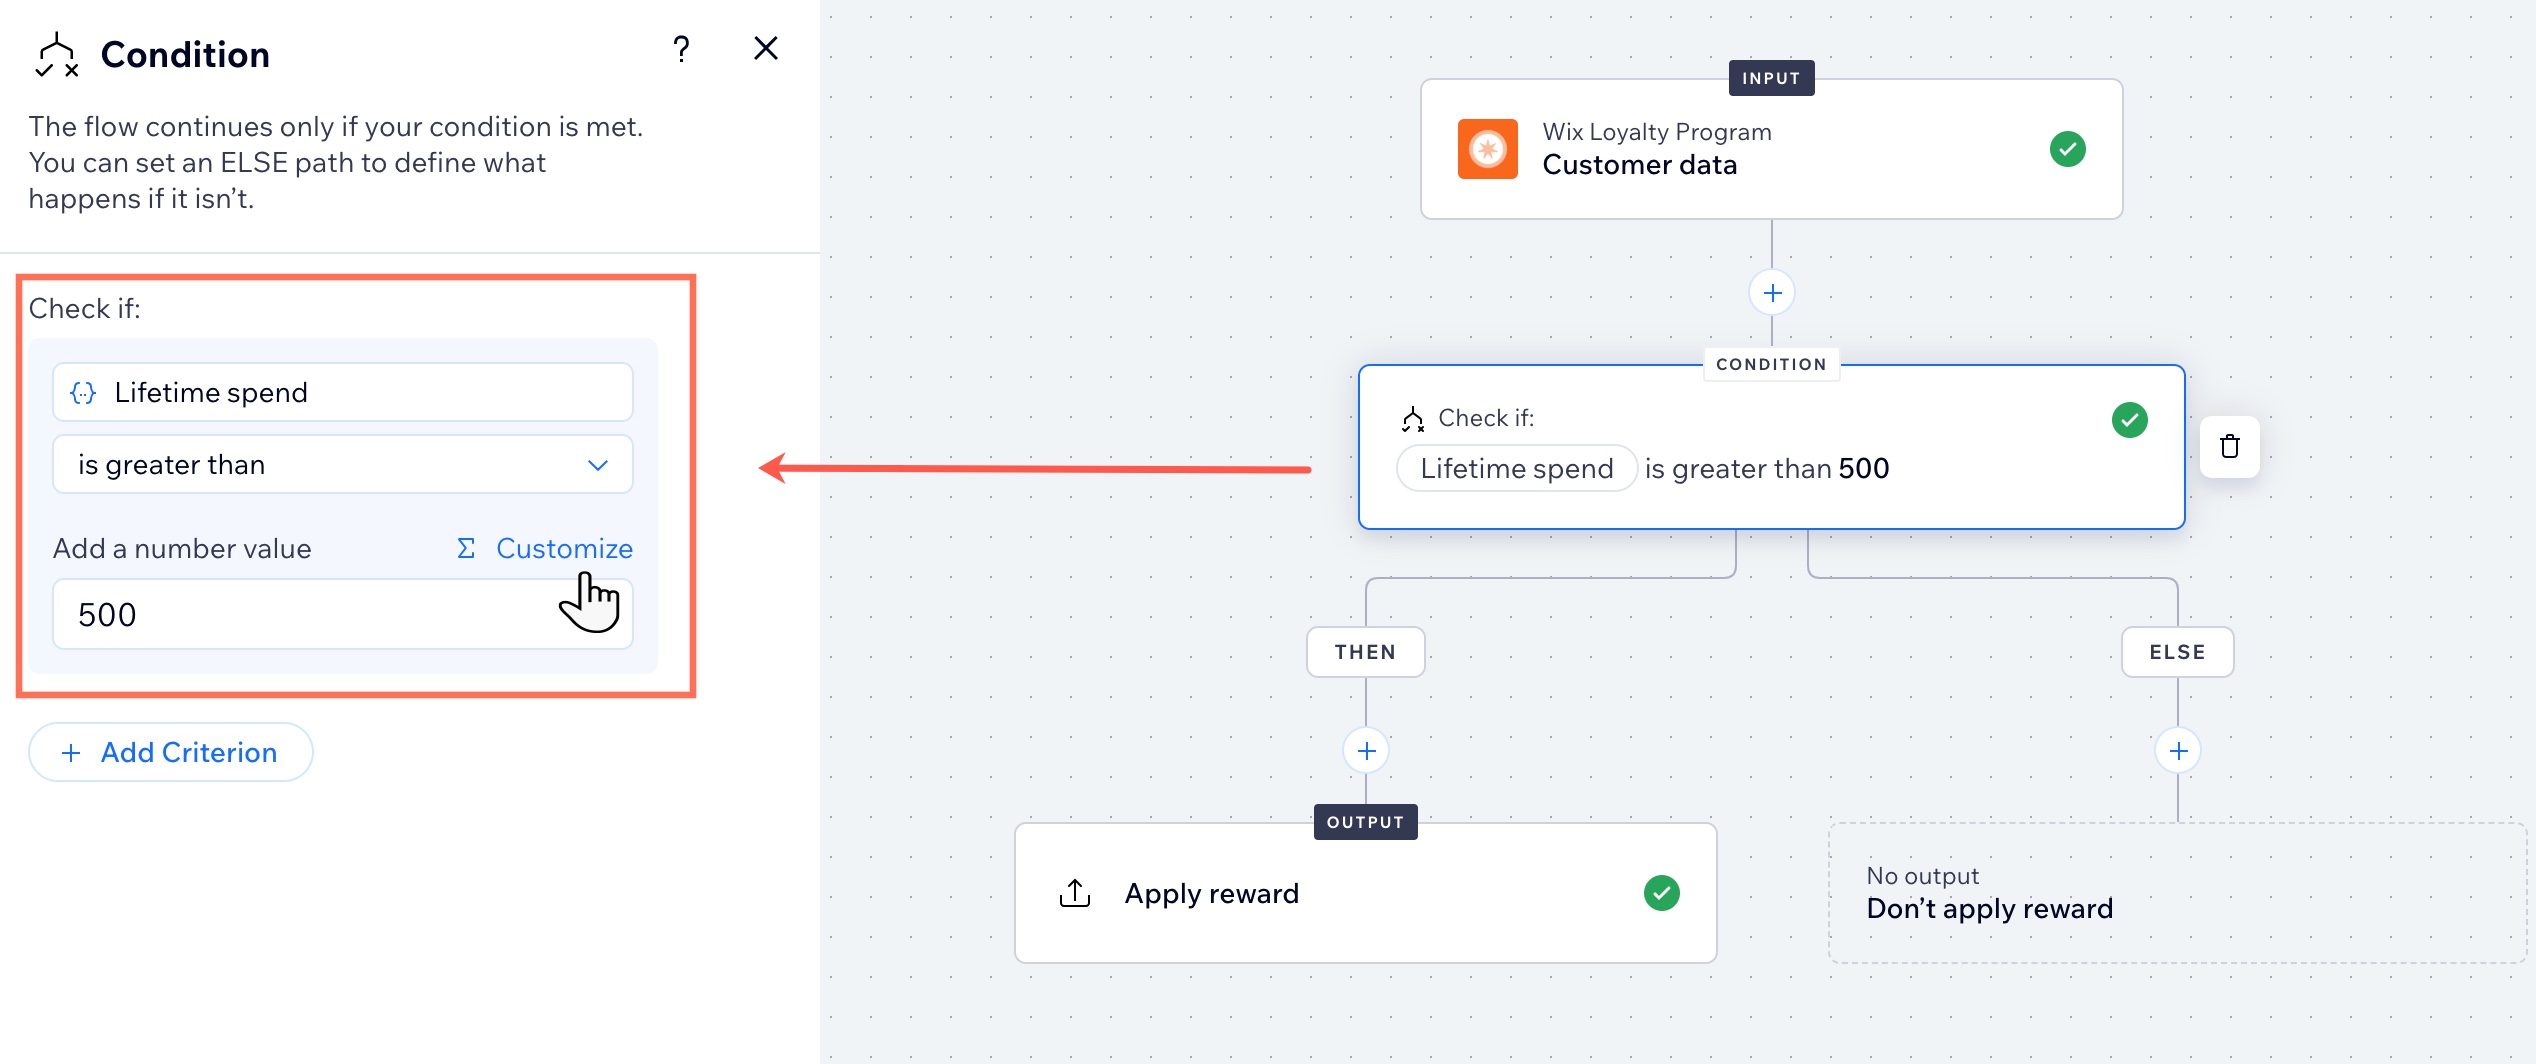
- (Optional) If you are using a template, you can click the existing Condition step to update it to match your needs. For example, if you're using the 'Total spend bonus' template, you might want to change the total spend required for members to be eligible for the reward.
- Name the new reward you're creating:
- Click the More Actions icon
 at the top right.
 - Select Function configuration.
- Enter a reward name and description.
Tip: Loyalty members will see this name on the main Loyalty page as well as the My Rewards page. - Click Save.
- Click the More Actions icon
- Click Activate at the top right.
What's next?
Once your function is activated, loyalty program members who have met the relevant criteria can exchange loyalty points for a discount. The amount of points / discount depends on what you entered as the output.
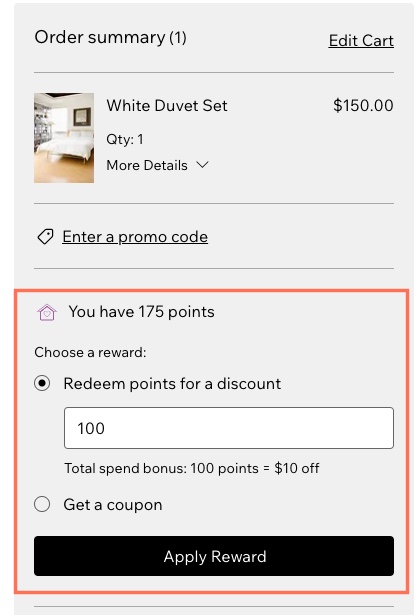
In the below image, the 'Total spend bonus' reward was set as '100 points' in exchange for a '$10' discount.
FAQs
Click a question below to learn more about building custom rewards for your loyalty program.
What is a function?
Where can my program members view the custom reward?
Can I add other conditions and actions to a function template?
How do I view the custom rewards I built with Wix Functions?
What is the difference between Wix Functions and Wix Automations?


