

Wix Restaurants: Manually Creating an Order
7 min
In this article
- Step 1 | Select the location
- Step 2 | Set up the order
- Step 3 | (Optional) Manage tips, fees and discounts
- Step 4 | Create the order
- Step 5 | Charge the customer
- FAQs
Imagine a customer calls in to place an order, or someone walks in to order something special. With just a few clicks, you can add these orders to your list—keeping everything organized and up to date.
Whether you run a single restaurant or multiple locations, you can assign orders to the right place and track them. Add items from your menu or create custom ones on the spot, so every order fits exactly what your customer needs.
Before you begin:
If your restaurant has multiple locations, make sure you to set each one up by adding the location, assigning individual menus, and setting up online ordering.
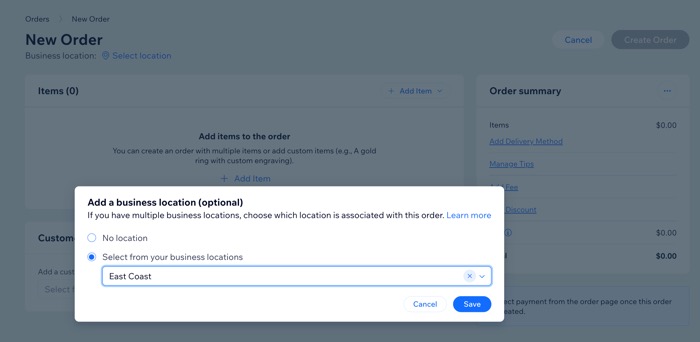
Step 1 | Select the location
Before you start creating an order and adding items, make sure to choose whether to assign it to a specific restaurant location.
To select the location:
- Go to Restaurant Orders Settings in your site's dashboard.
- Click Manage Orders at the top right.
- Click + Add new order.
- Click Select location next to Business location.
- Choose one of the following options:
- No location: Select this if the order isn’t related to a specific business location.
- Select from your business locations: Assign the order to one of your predefined locations.
- Click Save.
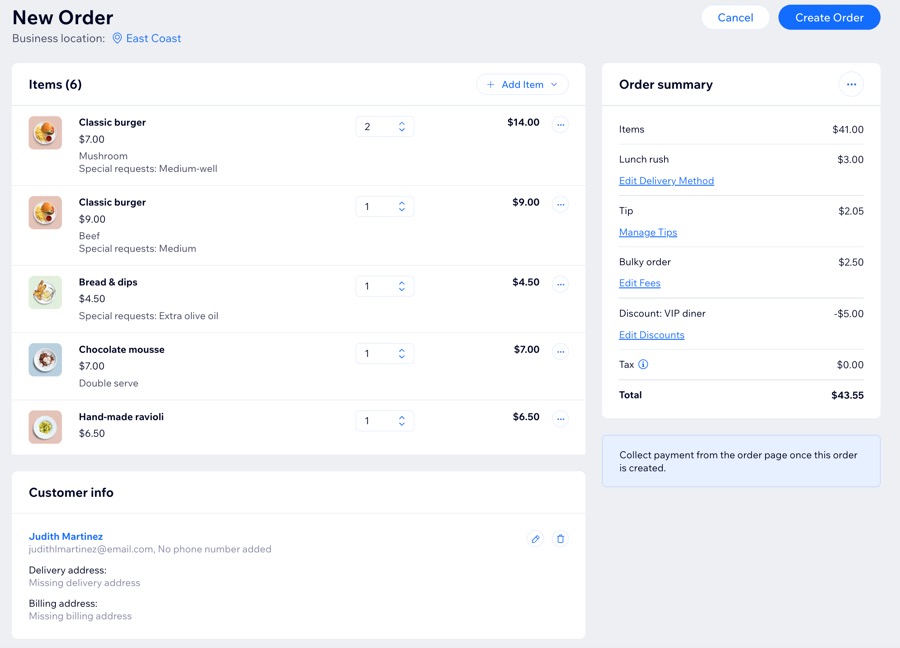
Step 2 | Set up the order
Start adding products to the manual order. Choose items from your existing menu or create custom items, specifically for this order. You can also attach a customer and select a delivery or pickup option.
Click an option below to learn how to set up the order.
Add items to the order

Add a customer to the order
 to view or edit the customer's details.
Select a delivery method

Tip:
You can also take phone orders and assign DoorDash Drive for delivery after creating the manual order and collecting payment.This option is available only for your default restaurant location.
Step 3 | (Optional) Manage tips, fees and discounts
Manage tips, fees, and discounts for the order as needed to reflect any extra charges, customer tips, or special offers.
Click an option below to learn how to adjust these details.
Manage tips

Add a fee

Add a discount

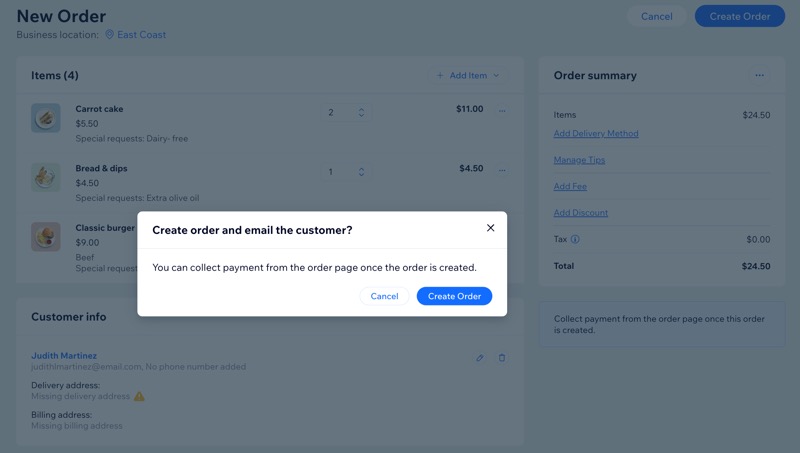
Step 4 | Create the order
Once you've double-checked the details, click Create Order. Then, click Create Order again to confirm.
The new order will instantly appear in the Orders tab of your site's dashboard under the Accepted column, marked with a 'Manual Order' badge for easy identification.
Note:
Orders without a delivery time or with only custom items won’t appear in the Status or Calendar views, but will still show in the Orders view.
Step 5 | Charge the customer
Finalizing payment arrangements is crucial, especially since creating a manual order doesn't automatically generate a payment request. Instead, you can choose from the following options:
FAQs
Click a question below to learn more.
Can I assign DoorDash Drive for delivery of an order placed over the phone?
 .
.
How can I send an order confirmation email to the customer?
Can I send a manual order to my thermal printer?
