

Wix Chat: Customizing Your Chat Settings
14 min
In this article
- Scheduled chat hours
- Changing your chat status
- Adding a pre-chat form
- Adding FAQ buttons to your chat box
- Adding the WhatsApp channel to your chat box
- Changing your chat box username
- Enabling members chat
- Changing your email notifications
- Changing the language of your chat box
- FAQs
Important:
Wix Chat is no longer available to install on new sites. Wix Smart Chat is replacing it as the new AI and manual chat solution. Learn more about Wix Smart Chat.
Update the Wix Chat settings in your dashboard to control how and when you're chatting to site visitors. Set your online and offline chat hours, customize your chat preferences and give members the ability to chat to each other. You can also start off your visitors' chat experience by providing a pre-chat form to collect information or FAQs to provide information.
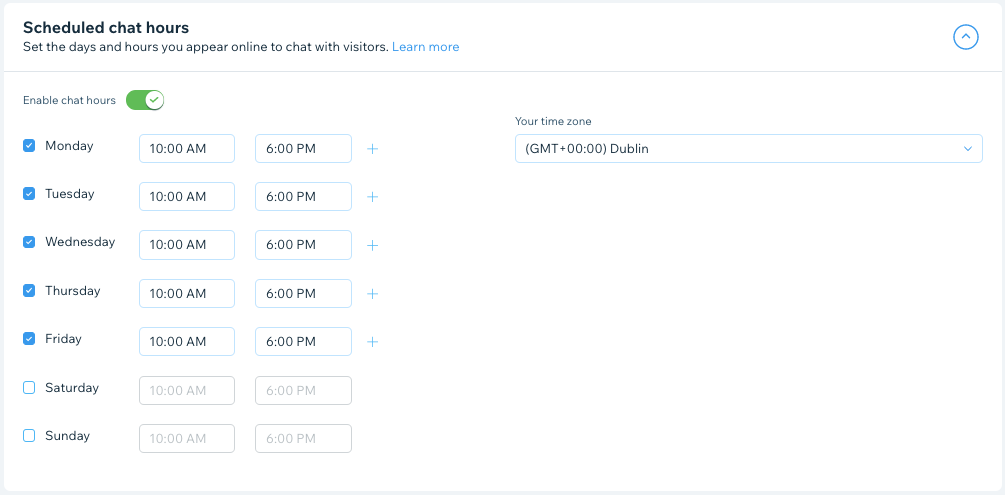
Scheduled chat hours
You can schedule your chat availability in advance from your site's dashboard. Your chat will automatically go online during these hours so that visitors can chat with you. This means you can respond to your visitors in real time on the days, times and in the time zone you choose.
To set your scheduled chat hours:
- Go to Chat Settings in your site's dashboard.
- Click the Enable chat hours toggle to choose your chat hours preference:
- Enabled: You'll automatically become available to chat between the hours specified:
- Select the days you want to be available for chat.
- Edit the start time and end time for each day.
Tip: Click the Add icon to add another time range. - Click the Your time zone drop-down and select your time zone.
- Disabled: You have no pre-set chat hours - chat will be available all the time, unless you manually make yourself unavailable (see Changing your chat status below).
- Enabled: You'll automatically become available to chat between the hours specified:
Send a chat message at the right time to your site visitors:
Greet new visitors, reply to a chat message, or customize your own chat auto-reply. Learn how to create Wix Chat automations.
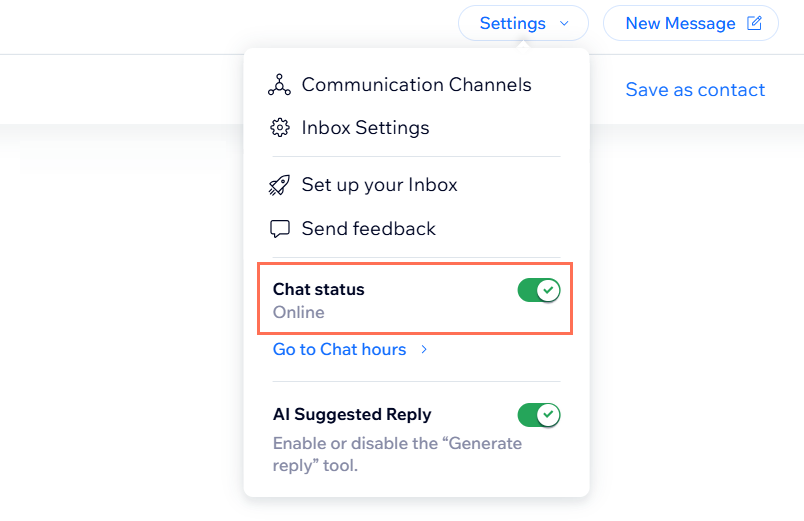
Changing your chat status
If you're in a hurry, you can quickly toggle your chat availability on and off via your dashboard or the Wix app.
To change your chat status:
Dashboard
Wix app
- Go to Inbox in your site's dashboard.
- Click the Settings drop-down at the top right.
- Click the Chat status toggle to update the chat status on your site:
- Enabled: Your chat status shows that you are online and available to chat.
- Disabled: Your chat status shows that you are offline.
Tip:
You can also add FAQ buttons to your chat box to answer the most common questions about your business, even if you're offline.
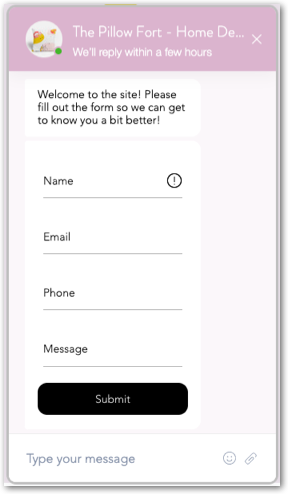
Adding a pre-chat form
A pre-chat form is a customizable form that gathers upfront information about site visitors in the chat box. Choose the information you want to collect such as name, email and phone number. Once a visitor fills out the form, the information is sent to your inbox and contact list so you never miss a lead. You can also choose different settings for when you're online and offline.
Tips:
- When updating the pre-chat form settings from the dashboard, a live preview at the right shows what your form will look like when it is live in the chat box. Currently, the design of this form cannot be customized.
- If the person who filled out the form is new to the site, the pre-chat form creates a new contact in your Contacts.
To add a pre-chat form:
- Go to Chat Settings in your site's dashboard.
- Scroll down to Pre-Chat Form and select the relevant checkboxes under Choose form fields to choose which fields display on the form. You can select name, email, phone number and message.
Note: The email field is mandatory and cannot be disabled. - Click the Set offline form drop-down and edit the form's messaging for when you're offline and away from chat:
Note: The pre-chat form still appears when you're offline and visitors fill it out before the message goes through.- When do visitors see the form?: Choose when the pre-chat form appears to site visitors:
- Once they open the chat: The pre-chat form appears in the chat box as soon as site visitors click the 'Wix Chat' icon.
Note: If you select the Make the form mandatory checkbox, site visitors can't send a chat message until they've filled out the pre-chat form. - After they send a message: The pre-chat form appears after site visitors send an initial chat message.
- Never: The pre-chat form doesn't appear in the chat box.
Note: Visitors who don't fill out a pre-chat form won't be converted to leads in your contacts. Instead they'll show up as 'Visitor ##'.
- Once they open the chat: The pre-chat form appears in the chat box as soon as site visitors click the 'Wix Chat' icon.
- Intro message: Edit the offline message that appears above the pre-chat form (e.g. 'Please fill out this form and we'll get back to you as soon as possible').
- Success message: Edit the offline message that appears after visitors submit the form.
- When do visitors see the form?: Choose when the pre-chat form appears to site visitors:
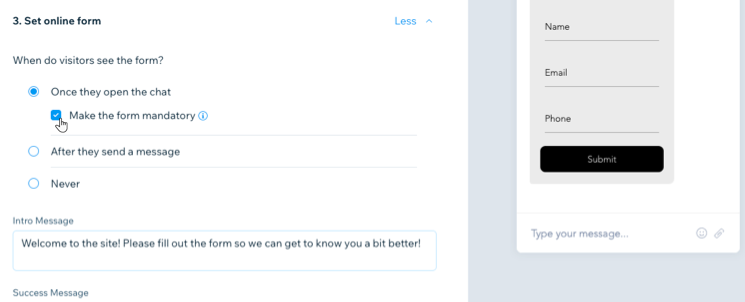
- Click the Set online form drop-down and edit the form's settings to manage visitors' interactions with the form when you're online and available to chat. Choose what you want to edit:
- When do visitors see the form?: Choose when the pre-chat form appears to site visitors:
- Once they open the chat: The pre-chat form appears in the chat box as soon as site visitors click the 'Wix Chat' icon.
Note: If you select the Make the form mandatory checkbox, site visitors can't send a chat message until they've filled out the pre-chat form. - After they send a message: The pre-chat form appears after site visitors send an initial chat message.
- Never: The pre-chat form doesn't appear in the chat box.
Note: Visitors who don't fill out a pre-chat form won't be converted to leads in your contacts. Instead they'll show up as 'Visitor ##'.
- Once they open the chat: The pre-chat form appears in the chat box as soon as site visitors click the 'Wix Chat' icon.
- Intro message: Edit the online message that appears above the pre-chat form (e.g. 'I'm ready to help! What's your question?').
- Success message: Edit the online message that appears once site visitors have submitted the pre-chat form.
- When do visitors see the form?: Choose when the pre-chat form appears to site visitors:
Trouble with your pre-chat form?
Try out the pre-chat form troubleshooting steps here.
Adding FAQ buttons to your chat box
Add frequently asked questions (FAQs) to your chat box and help customers instantly find answers to their questions even if you're not online. Create up to five FAQ buttons or, if you've added Wix FAQ to your site, add your existing FAQs to Wix Chat.
To add FAQ buttons to your chat box:
- Go to Chat Settings in your site's dashboard.
- Scroll down to FAQ buttons and click Get Started.
- Click the Show FAQs in this site's chat toggle to enable it.
- (Optional) Click the Intro message checkbox and add a message to explain how to use the FAQ buttons (e.g. 'Click a question to instantly get an answer').
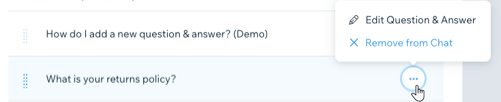
- Click + Add a Question.
- Choose what you want to do:
Create a new question
 to remove a question or edit it.
Add an existing question from your site FAQs
Note:
Questions and answers in FAQ buttons display as plain text. Even if you've customized your FAQ app in the Editor, the question still appears as plain text in Wix Chat. Learn more about adding Chat FAQs as plain text.
Adding the WhatsApp channel to your chat box
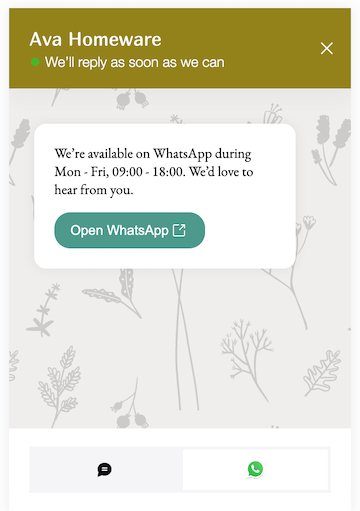
Add the WhatsApp channel to your Wix Chat chat box to allow visitors to choose whether to chat to you via your site's chat or a WhatsApp account. This flexibility encourages your visitors to get in touch and makes it more convenient for them to maintain the conversation.
Important:
When you add WhatsApp to your chat box, messages go directly to the WhatsApp account attached to the phone number you provided during setup. Visitors messaging you can view the name, phone number and profile image of this WhatsApp account.
To add the WhatsApp channel:
- Go to the Channels tab in your Chat Settings.
- Enable the toggle next to WhatsApp to let visitors contact you via WhatsApp in your chat box.
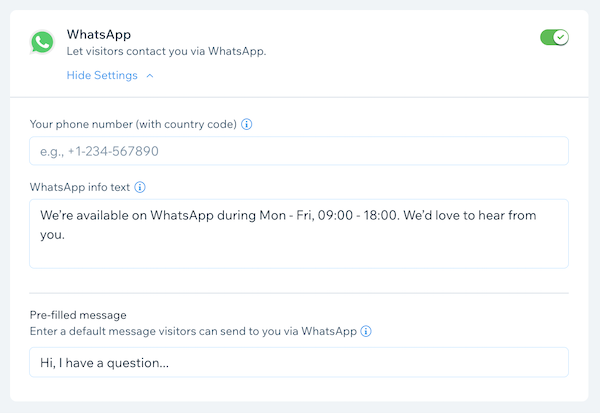
Note: Click Get Started if this is your first time setting up chat channels. - Enter your phone number in the Your phone number (with country code) field. This phone number should be the one linked to the WhatsApp account you'd like to use.
Note: Make sure you enter your phone number in full international format: a plus sign (+) followed by the country code, city code and local phone number (e.g. +1 408 XXX XXXX). Remember to remove any leading 0s. - (Optional) Enter an info message (e.g. availability hours) in the WhatsApp info text field. This message appears in your chat box when visitors select 'WhatsApp' as their preferred chat method.
- (Optional) Enter a default message in the Pre-filled message field. Visitors can edit or change this message before they send it to you.
- Click Save Changes at the top right.
Looking for more channels?
Messenger and phone call will be added as additional chat channels soon. Click Set Email Reminder next to the relevant channel in the Channels tab to get notified when it becomes available.
Changing your chat box username
Your chat box username is how your name appears in the chat box on your site as you chat with visitors. If you're looking for a more personal touch for your business, choose to have messages coming from the name of a team member. For more professionalism choose your business name.
To change your chat box username:
- Go to Chat Settings in your site's dashboard.
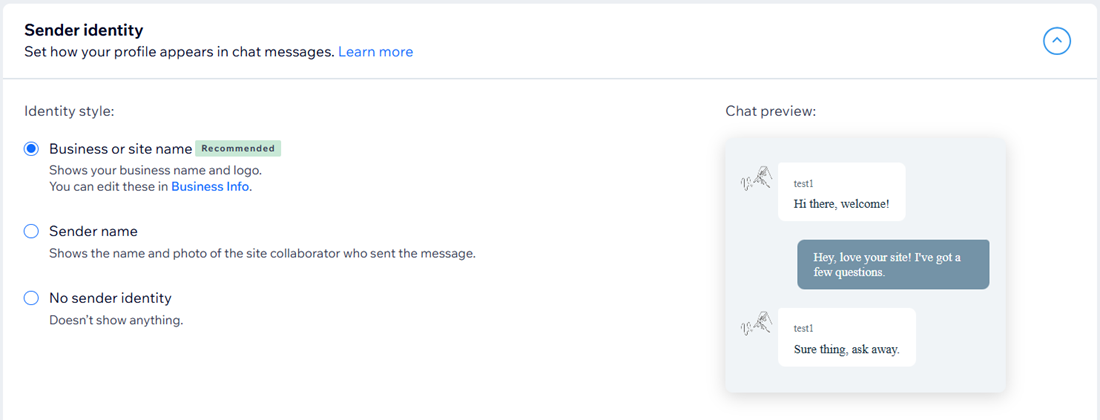
- Scroll down to the Sender identity section.
- Choose your chat box username by selecting an option:
- Business or site name: Your business name and logo appear next to your chat messages. This is the default setting.
Note: When you select this option, your name and profile image (defined in your Account Settings) won't appear next to messages. - Sender name: The name and profile image depends on your Profile & Team Settings. If you have collaborators working on your site, the name and image of the relevant collaborator appears when they chat with a site visitor.
- No sender identity: No name or image appears next to your chat messages.
- Business or site name: Your business name and logo appear next to your chat messages. This is the default setting.
Tip:
If you have collaborators working on your site, you can add them to your site team so they can set up and use their own chat box usernames. Learn more about setting up team profiles.
Enabling members chat
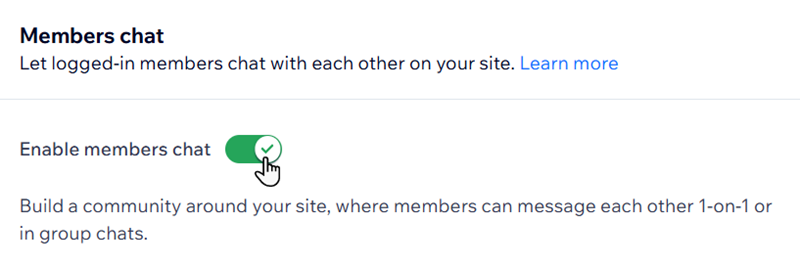
Add members chat to build a community around your site. Members chat is an additional Wix Chat feature that allows your logged-in site members to chat with each other in addition to chatting with you (the business). Once enabled, your members can see their private chats as well as create group chats.
Important:
Members chat is only available if you have a members area installed and a social app (Wix Blog, Wix Forum) that allows members to select the 'Join a Community' checkbox when registering for your site. Learn more about member profiles.

To enable members chat:
- Go to Chat Settings in your site's dashboard.
- Scroll down to the Members Chat section.
- Click the Enable members chat toggle to enable it.
Note:
If you are unable to click the Enable members chat toggle, you need to first set up your site for communities.
Changing your email notifications
Choose whether you want to be notified by email every time a user sends a message, when they send a pre-chat form, or both.
Note:
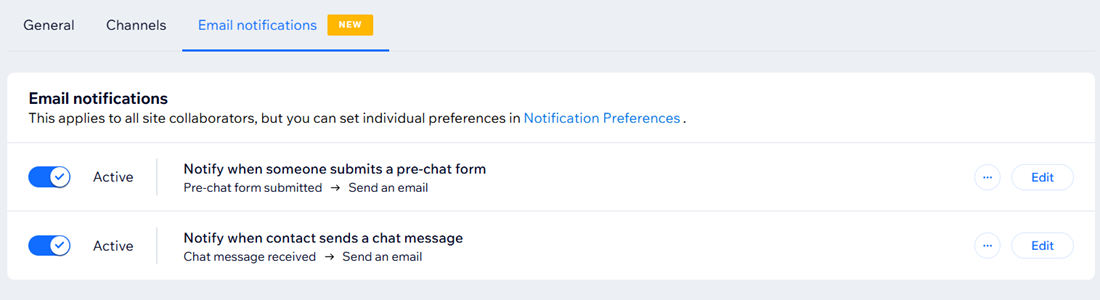
This applies to all site collaborators, but you can set individual preferences in your notification preferences.
To change your email notifications:
- Go to the Email notifications tab in your Chat Settings.
- Enable the relevant toggles to set your email notifications for Wix Chat:
- Notify when someone submits a pre-chat form: Receive an email whenever someone submits the pre-chat form.
- Notify when contact sends a chat message: Receive an email whenever someone sends a chat message.
- (Optional) Click Edit next to the relevant setting to make changes to the trigger and action used in the email notification automation.
Changing the language of your chat box
Chat with your site visitors in any language. The default language of your chat box is the same as your site's language.
Important:
Changing the site language affects your entire site, including the chat box.
Tip:
Learn how to use Wix Multilingual to translate your chat into different languages.
To change the language of your chat box:
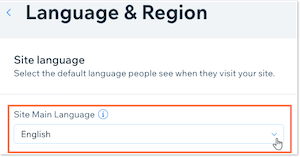
- Go to Language & Region in your site's dashboard.
- Click the Site Main Language drop-down under Site Language and select the language you want to use.
- Click Save.
Next steps:
Reflect your business's personality by designing your site's chat box.
FAQs
Here are some common questions about customizing your Wix Chat settings:
Why does my pre-chat form not appear to visitors on chat?

Can I set up an autoreply for when visitors leave a message?
What should I do if the wrong language is appearing on my chat widget?
Are pre-chat form submissions recorded in the Forms and Submissions tab in my dashboard?
Is it possible to add additional fields to the pre-chat form, or customize the design of the form?
Should I make the pre-chat form mandatory, or keep it optional?
