The Wix app enables you to create new appointment services from your mobile device, while you're on the go.
Appointments are services that clients can book whenever a time slot is available. For example, a hairdresser may be available from 9 AM until 7 PM and clients can book any time that isn't already taken.
Step 1 | Create an appointment in the Wix app
Create a new service and choose 'Appointment' to get started.
- Go to your site in the Wix app.
- Tap Manage
 at the bottom.
 - Tap Booking Services, or tap Catalog and select Booking Services.
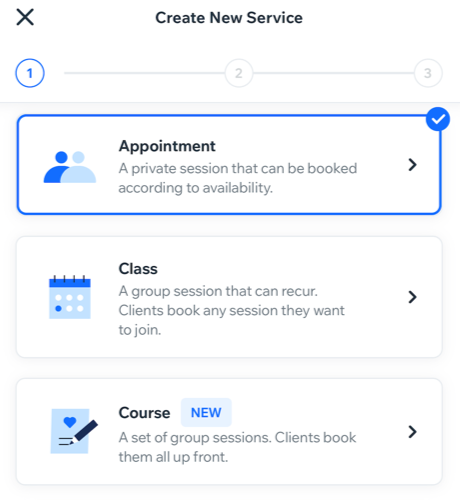
- Tap + Create New Service at the bottom.
- Tap Appointment.
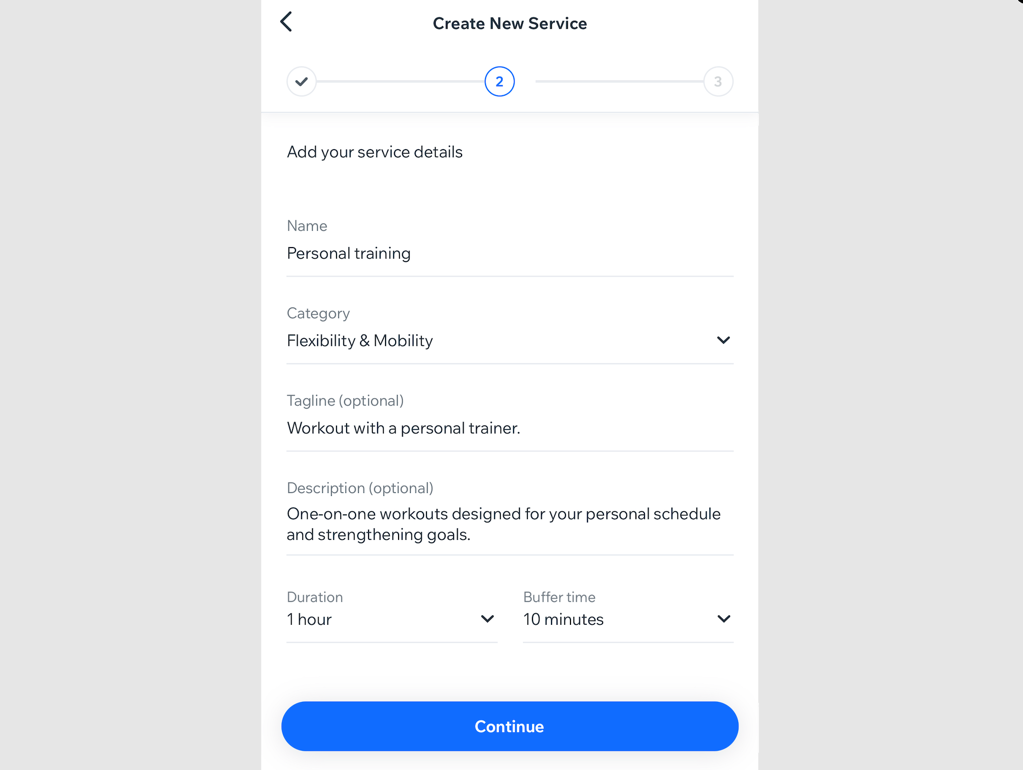
Step 2 | Fill out your service details
Add information about what clients can expect from the appointment. Include a detailed description to give clients a clearer idea of what you offer. You can also set the duration of your appointment and add any buffer time you may need before the next appointment.
To fill out your service details:
- Add your service details:
- Name: Enter a name for the appointment.
- Category: Select a category from the drop-down menu (if you created categories).
- Tagline (optional): Enter a tagline that will appear below the service name on your app.
- Description (optional): Enter a description that will appear on the service page of your app.
- Duration: Select how long your session lasts from the drop-down menu.
- Buffer time: Select the amount of time you want between sessions to create a short break before the next one begins.
Note: Duration and buffer time affect your appointment availability. Learn more about what effects appointment availability.
- Tap Continue.
Step 3 | Set your price and payment details
Make your pricing clear and easy to understand. Choose how clients can pay for appointments, per session, with a plan, or both. You can choose to set a fixed price, offer a customized price, or provide the service for free.
To set your price and payment details per session:
Choose how you want your clients to pay for the service:
Let your clients pay for their appointment based on the price you set.
- Tap Per session.
- Tap the Price type drop-down and select how you want to charge your client per session:
- Fixed price: You charge a set price for the appointment:
- Tap Amount and enter the price.
- Choose how clients pay from the Payment preferences drop-down:
- Entire amount online: Only accept online payments for the appointment.
- Entire amount in person: Only accept in-person payments (before or after the appointment).
- Entire amount either online or in person: Allow clients to choose whether they pay online or in person.
- Online deposit and the rest in person: Accept an online deposit for the appointment and have clients pay the rest in person. Add the deposit amount that clients need to pay online.
- Free: Offer the service free of charge. Great for introductory appointments with clients.
- Varied Prices: Go to your Wix account on desktop to add varied prices to your appointments. You can charge different rates for appointments depending on the staff member, client type, service type and more.
- Custom price: Enter a short description of your pricing to display on your site. Clients aren't charged online when booking custom-priced services. Learn more about getting paid offline or in person.
2. Tap Create service.
Clients can buy a membership or package and use it to book a session.
- Tap With a plan.
- Tap Connect Pricing Plans to connect to an existing plan.
Note: If you do not have any pricing plans connected, tap + Create new plan to connect a Package or Membership. - Enable the toggle next to the relevant plans or tap + Create new plan.
- Tap Done.
- Tap Create Service.
Per session or with a plan
Let your clients choose how to pay for the appointment. They can pay per session or with a pricing plan they've purchased.
- Tap Per session or with a plan.
- Follow the steps from the Per session and With a plan section above.
- Tap Create Service.
Step 4 | Edit or add additional service details
Finalize your service details by adding pricing plans, selecting your service location, and assigning staff members. Decide whether to show the appointment on your service list or keep it hidden until you're ready to take bookings. Make your service visible right after creating it to maximize exposure and attract clients quickly.
To edit or add additional service details:
- Choose what you want to edit or add:
Tap Add Image and select an image that clients see when booking appointments.
Edit any of your existing appointment details, like its name, category or duration.
Edit how you want clients to be able to pay for the session and edit any payment details.
Display where you offer the appointment, for example, at your business location(s) or the client’s place. You can also add the option to meet online with a video link.
- Tap Locations.
- Choose where your clients receive this service:
- Business location: Tap the Choose locations drop-down and select the checkboxes next to the location(s) you provide this service.
Note: You can add a new business location on your desktop. - Custom location: Enter a description of the location in the field (e.g. online meeting).
- Client's place: The client will add their location once they book their appointment.
- Video conferencing: Enable the toggle to offer this service online.
Note: Make changes or set up video conferencing on your desktop..
- Tap Save.

Make sure your staff and clients have the resources they need for the best experience.
- Tap Resources.
- Tap the checkboxes next to the relevant resources.
Note: You can create new resources on your desktop. - Tap Save.
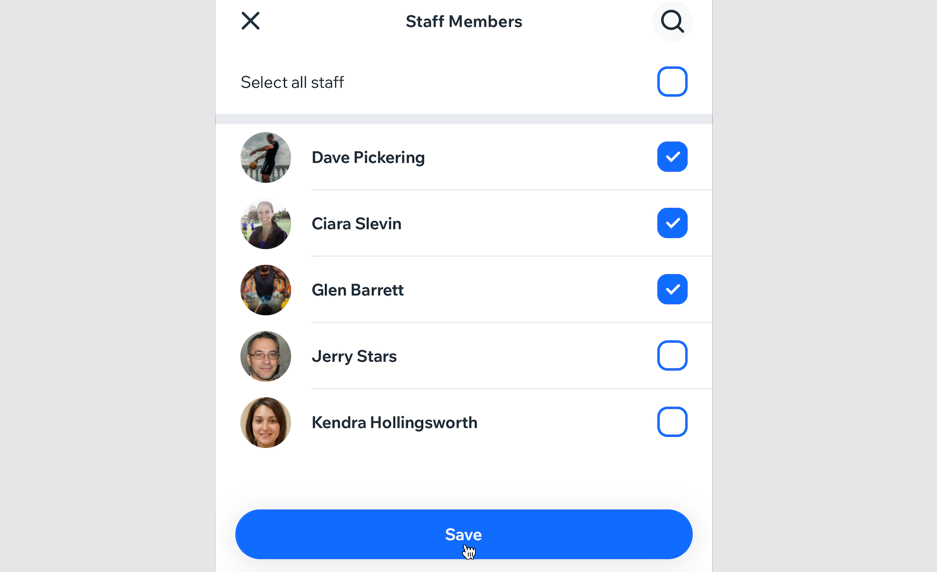
- Tap Staff Members.
- Tap the checkboxes to select the staff members who are available for this service.
- Tap Save.
Add a cover image that clients see at the top of your service page. You can also add a gallery to display your service anywhere on your service page.
- Tap Images.
- Choose what you want to edit:
- Cover image: Tap Add Image and select an image for the background of your service's header
- Gallery: Tap the Add icon
 and select the photos you want to add to a gallery for your service page. Then, tap Next.
- Tap Save.
Add a booking policy or make the appointment view-only if you want clients to contact you for a consultation before booking.
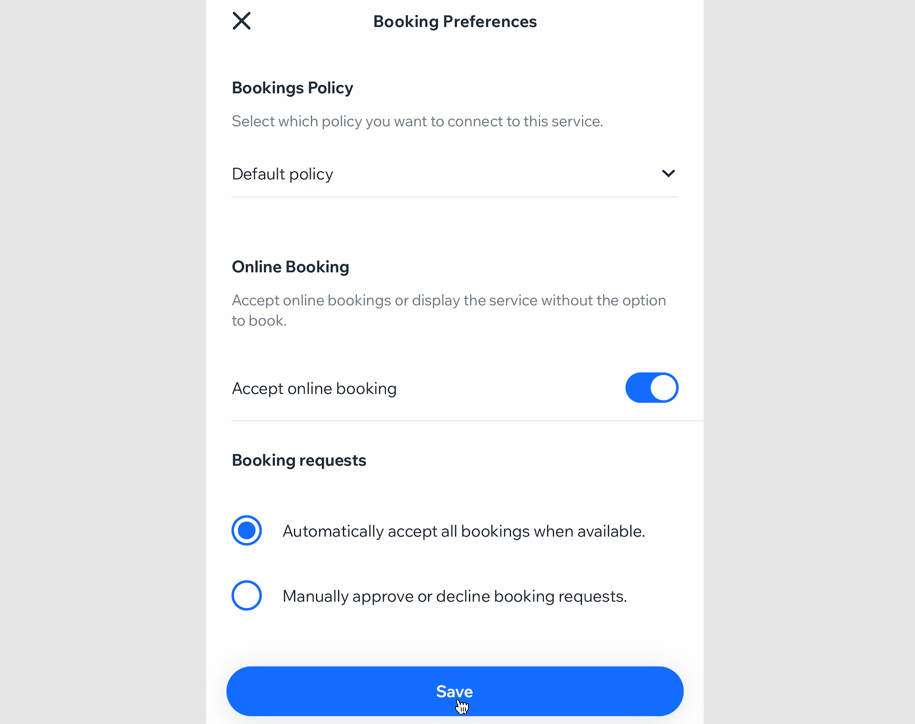
- Tap Booking Preferences.
- Choose your what you want to update:
- Booking policy: Tap the drop-down and select a policy for your appointment. Learn more about creating new policies from your Wix app.
- Online booking: Tap the Accept online bookings toggle to decide whether clients can book the service online:
- Enabled: Clients can book this service online. Under Booking requests, choose whether bookings are accepted automatically or require your approval.
Note: This is only available if the appointment is not connected to a membership plan or package. - Disabled: Make the appointment view-only.
- Tap Save.
2. Tap the
Visibility icon

at the top when you're ready to show the appointment on your site.
3. Tap Done.
FAQs
Click a question below to learn more about appointments on the Wix app and member apps.
How can I share my service?
You can share your service right after creating it. Tap the
More Actions icon

on the top right of the Create Service page. Then tap
Share service. Learn more about
promoting your service on the Wix app.
How do I show or hide services on the Wix app?
You can show or hide services from the Wix app by going to the relevant service form and selecting the show/hide option.
- Go to your site in the Wix app.
- Tap Manage
 at the bottom.
 - Tap Booking Services, or tap Catalog and select Booking Services.
- Tap the More Actions icon
 next to the relevant service.
 - Tap Hide from your site.
How can I delete a service I no longer offer?
- Go to your site in the Wix app.
- Tap Manage
 at the bottom.
 - Tap Booking Services, or tap Catalog and select Booking Services.
- Tap the More Actions icon
 next to the relevant service.
 - Tap Delete service.
- Tap the I understand that deleted items can't be recovered checkbox.
- Tap Yes, Delete.
How can I duplicate a service?
- Go to your site in the Wix app.
- Tap Manage
 at the bottom.
 - Tap Booking Services, or tap Catalog and select Booking Services.
- Tap the More Actions icon
 next to the relevant service.
 - Tap Duplicate.
Note: The duplicated service will be called "Copy of {service name}". You can tap the service to make any edits.
How do I quickly find a service on the Services tab in the Wix app?
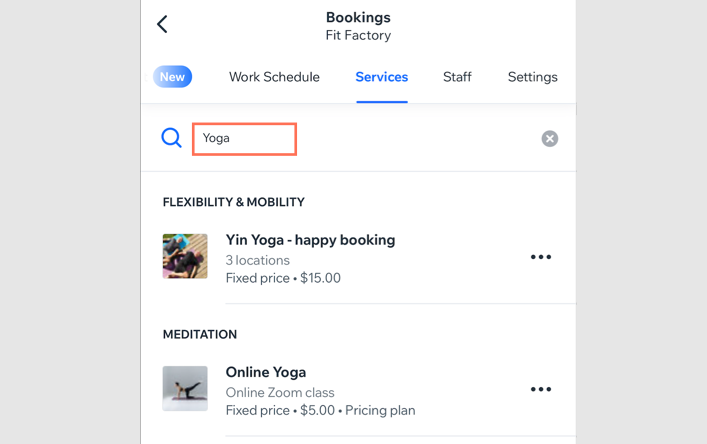
Use the search bar at the top of the screen to quickly find the service you are looking for.
Can I create a multi-day appointment on the Wix app?
Yes, to create a multi-day appointment:
- Follow the steps in the section above to create an appointment.
- In Step 2, tap the Duration drop-down and select the session duration to cover multiple days (up to 99 hours).
Tips:
- Make sure to edit the hours for the staff providing this service so they are available 24 hours a day on the relevant days.
- To run a similar service in future that starts on another date, simply duplicate the event you created and set a new start date.
 at the bottom.

 at the top when you're ready to show the appointment on your site.
  at the top when you're ready to show the appointment on your site.


 and select the photos you want to add to a gallery for your service page. Then, tap Next.
 on the top right of the Create Service page. Then tap Share service. Learn more about
  at the bottom.