

Wix Bookings: Managing Multiple Video Conferencing Links
7 min
In this article
- Setting up your own VC accounts
- Setting up your staff VC accounts
- Staff managing their own VC accounts
- Managing your VC links
- Removing VC links from your automated emails
Run multiple online video sessions for your services with Wix Bookings. When you first add video conferencing (VC) to a service, connect either a Google Meet, Zoom account or a custom link (like Google Hangouts or Skype). This account becomes your default video conferencing option until you add more VC accounts.
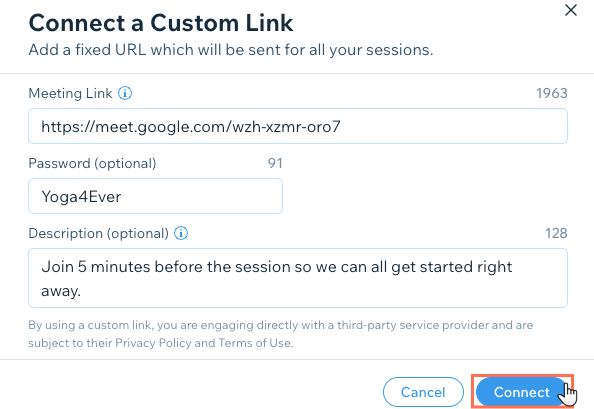
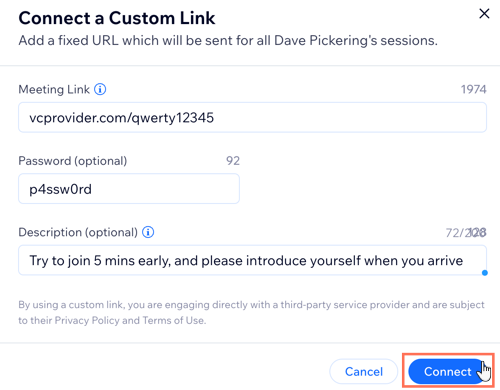
Link your services to any VC provider by using a custom link. Enter the URL, password, and any other needed information when prompted to connect your VC provider.
Important:
- Upgrade your site to use video conferencing.
- All services use the same default video conferencing link, or a staff member’s link if assigned. You can’t set a different video conferencing link for each service.
- The benefits, call hours and participant limits for video conferencing depend on the provider you use (Google Meet, Zoom, GoToMeeting, etc.) and are not controlled by Wix.
Setting up your own VC accounts
You can set up your default VC account within any of your services in the Booking Services tab or in the Staff tab.
Tip:
If you have multiple Wix sites, you can set a different default VC account for each site.
To setup your default VC account:
- Go to Booking Services in your site's dashboard.
Note: Skip to step 4 below to set up your VC account from your Staff in your site's dashboard. - Click on a service.
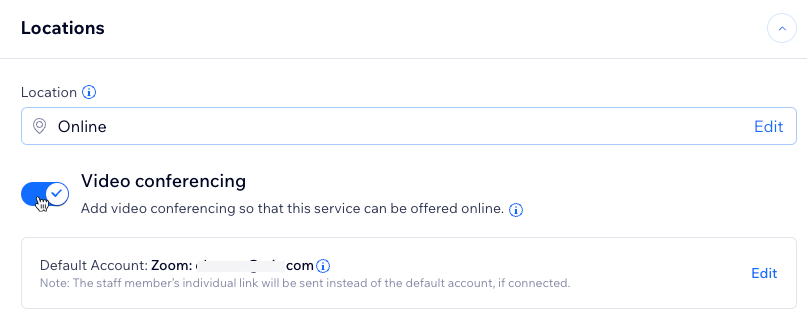
- Scroll down to the Locations section.
- Click the Add button in the Video Conferencing section (or Edit in the Staff Tab).
- Choose your preferred type of VC connection:
- Google Meet:
- Click Continue.
- Sign in to your Google Meet account and follow the on-screen instructions.
- When ready, click Got it on the
- Zoom:
- Click Continue.
- Click Continue to proceed.
- Sign in to your Zoom account and follow the on-screen instructions.
- Custom Link: Fill in the required fields for the Custom Link connection to set up another provider other than Zoom, such as Google Hangouts or Skype. When ready, click Connect.
- Google Meet:
Important:
If you disconnect your main VC account, VC links no longer appear for any sessions, even if your staff have their own individual VC accounts.
Setting up your staff VC accounts
Your business can then offer multiple online services at the same time. If a staff member is assigned to a specific service, then their VC account will be used instead of the main VC account for this service.
Tip:
Your staff can manually add or remove the Zoom links from any of their sessions at any time. This is useful for last-minute changes to services, where an online service becomes an in-person one, and vice versa.
To set up your staff VC accounts:
- Go to Staff in your site's dashboard.
- Hover over the relevant staff member profile and click Edit.
- Click Add Individual Account next to Video conferencing account under Staff settings.
- Choose the relevant video conferencing account and click Continue.
Staff managing their own VC accounts
Your staff members can add and manage their own VC links using their staff accounts on your site. Share the steps below with your staff members, so they can set up and manage their own VC links themselves.
Important:
You must connect a default video conferencing account before your staff can add their own VC links.
For staff to set up their own VC account:
- Go to Booking Calendar in your site's dashboard.
- Click the Manage dropdown at the top and select Set personal video conferencing.
- Choose the relevant video conferencing account and click Continue.
Managing your VC links
VC links for appointments and classes depend on the specific session and staff member details.
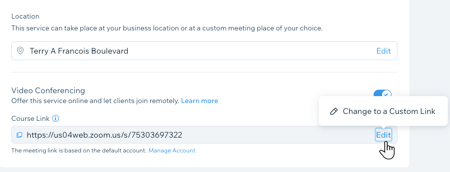
Courses use your site's default VC link for all sessions unless a custom VC link is added in the calendar. You must first save and create at least one session for the service to create a VC link.
Note:
Editing a VC link updates all past and future sessions of the course. You must manually notify clients that still have an old link.
Choose what you want to do:
Create a VC link

Update an existing VC link
 .
.
Restore an original VC link

Remove a custom VC link
 in the Video Conferencing section of their staff profile.
Note:
You can also add a VC link to any session that was previously offline.
Removing VC links from your automated emails
You have complete control over how your clients access VC links. You can remove VC links from your booking confirmation emails.
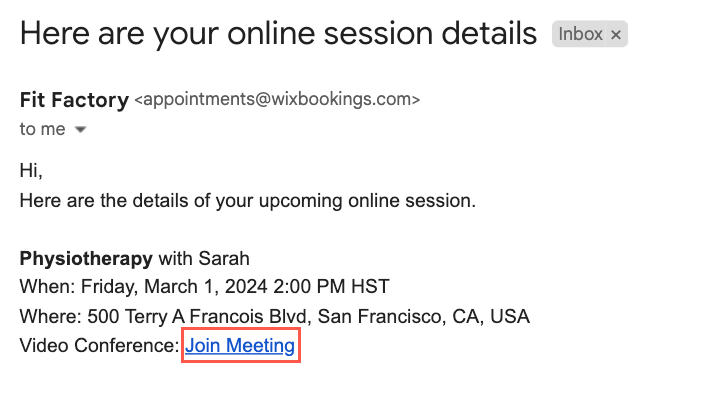
To remove VC links from automated emails:
- Go to Booking Settings in your site's dashboard.
- Click Emails & SMS notifications.
- Click Edit next to Send clients an email confirmation when they book under Notifications you send.
- Scroll down to Create an email and click Edit under the preview image.
- Select each of the elements in the Join Online section and click the Delete icon
 .
.
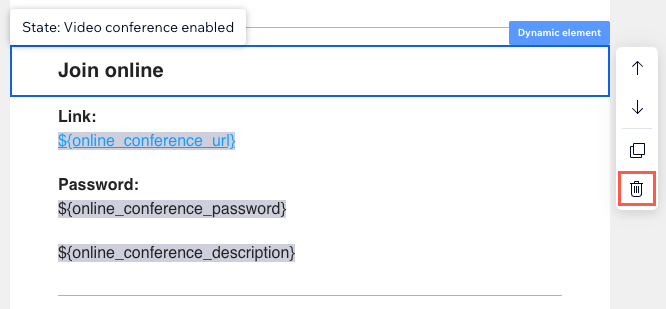
- Click Save & Continue after you delete the entire 'Join Online' video conference section.
- Repeat steps 1-6 for all relevant email automations that include your VC links, including:
- Remind clients about upcoming sessions
- Notify clients of changes to their booked appointment or class
- Notify clients when there's a change to their course
- Let clients know that their appointment request has been approved
Tip: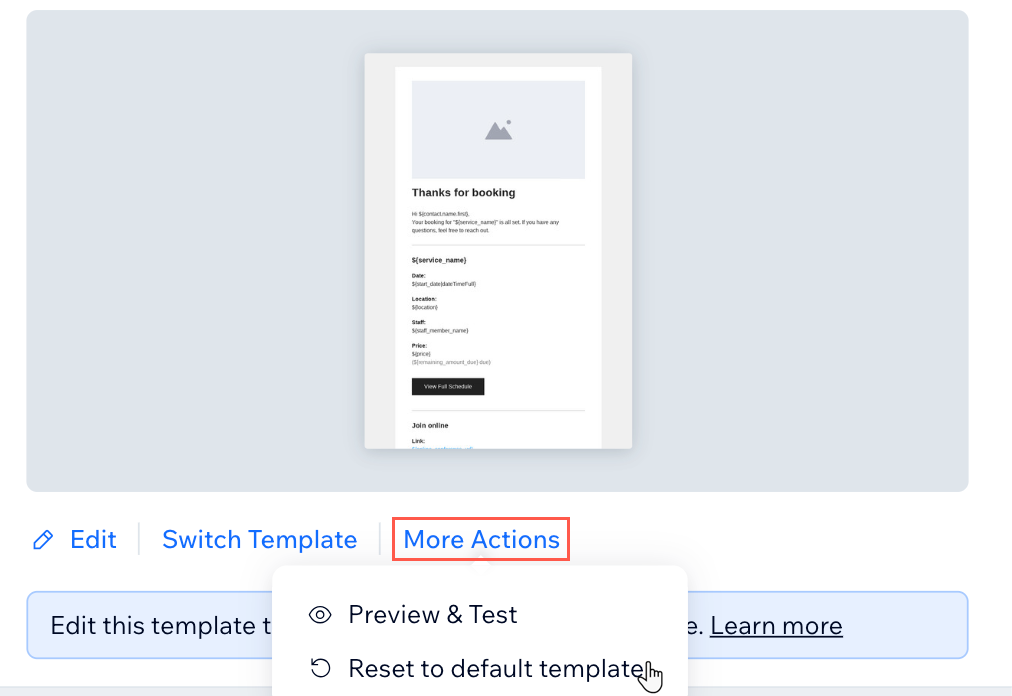
To display your VC links again after removing them, click More Actions under the email preview and click Reset to default template.
