

Wix Vibe: About the Wix Vibe Editor
14 min
In this article
- About the top bar
- Using the chat panel
- Using the Site tab
- Demo mode
- Edit mode
- Using the Dashboard tab
- Using the Code tab
- Interactive AI assistance in the Code tab
- Using split view in the Code tab
- FAQs
After you generate your site, the Wix Vibe Editor lets you refine and customize every detail. Use conversational prompts in the chat panel to make quick changes or dive into manual editing for full control. The editor’s intuitive interface combines AI-powered tools with familiar editing features, so you can update your site’s design, content, and functionality all in one place.
Ready to get started?
About the top bar
The top bar in the Wix Vibe Editor helps you manage your site and access important tools quickly.
From left to right, the top bar includes:
- Wix Vibe: Click the Wix Vibe drop-down to go to your dashboard, view your live site, create a new site, see all your sites, switch to dark mode, access account settings, find help resources, or upgrade your site.
- Site name: Click your site name to rename your site as it appears in your Wix account.
- Autosave: The Autosave icon
 shows your work is being saved automatically. If saving fails, the icon changes and the editor tries again. If it cannot save, you’ll see a notification and won’t be able to create a version, test site, or publish until saving resumes.
Tip: If you lose internet connection, a message in the stage lets you know you're offline. - View version history: Click the View version history icon
 to preview or revert to previous versions of your site.
 - Chat panel: Click the Chat panel icon
 to expand or collapse the chat panel on the left.
 - Site, Dashboard, and Code tabs: Use these tabs to switch between the main site editor (Site tab), your site management tools (Dashboard tab), and your project’s code files (Code tab).
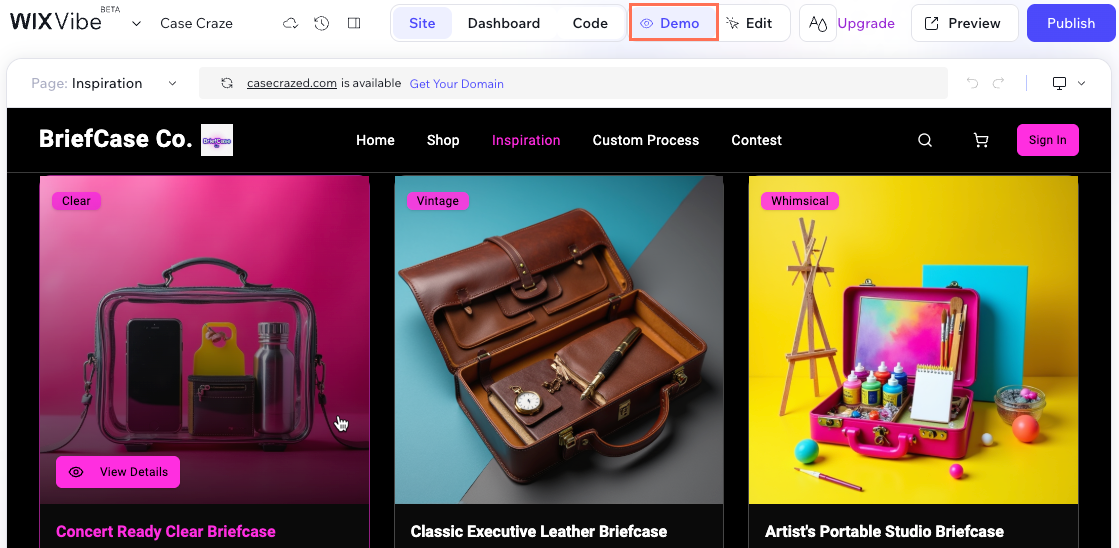
- Demo: (Site tab only) Click Demo to preview your site functionality in demo mode on the stage.
- Edit: (Site tab only) Click Edit to switch to edit mode and directly edit your site elements on the stage.
- Style: (Site tab only) Click Style to adjust your site’s theme, colors and typography.
- Upgrade: Click to upgrade your site plan and unlock more features.
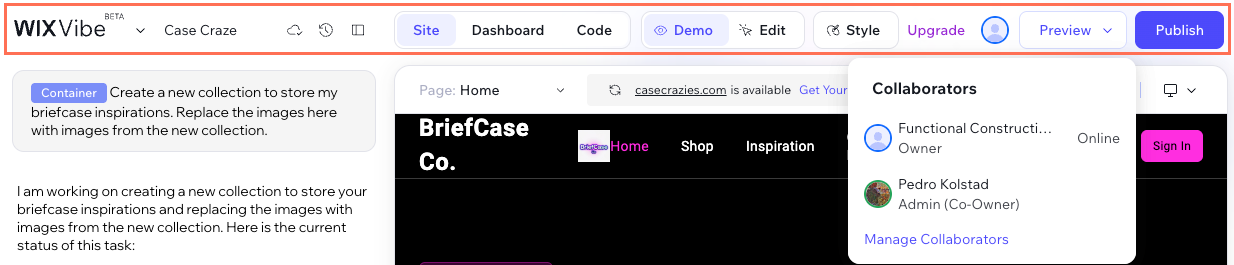
- Collaborators: See avatars when other people edit the site with you. Click to manage your site's collaborators or invite new ones.
- Preview: Preview your site as visitors will see it before publishing. You can also verify your site's functionality by running automated AI tests to catch and fix issues instantly.
- Publish: Publish your current version to your free Wix domain or a connected custom domain.
Using the chat panel
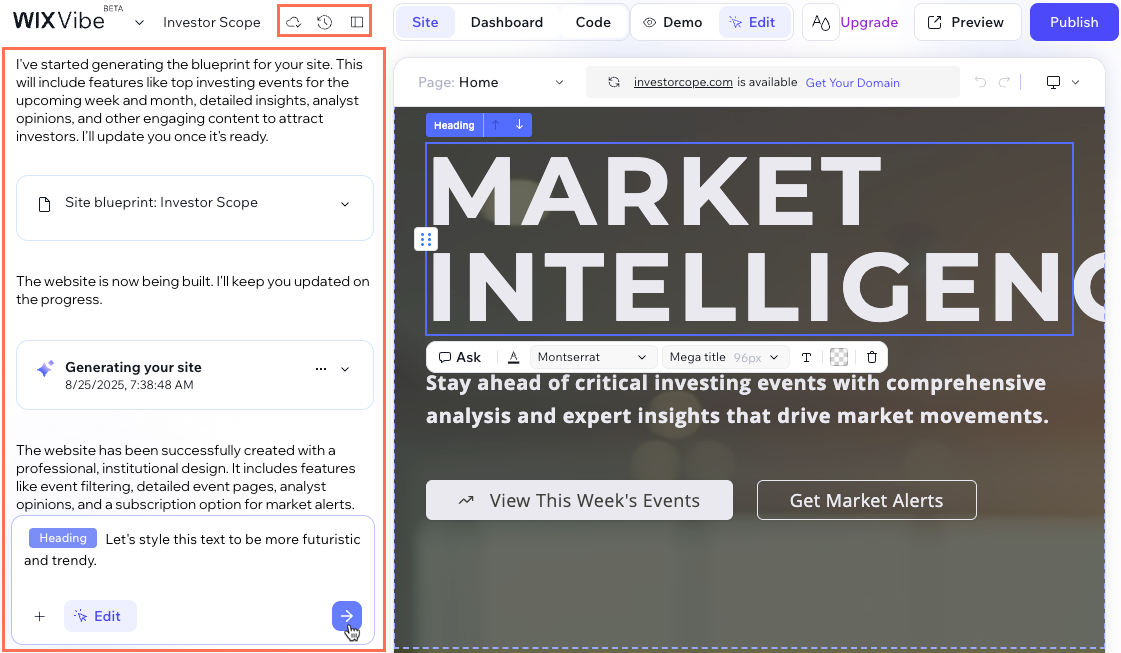
The chat panel on the left lets you interact directly with AI to update your site. It shows a timeline of all your past requests and the changes made, so you can easily track your progress. If collaborators are in the editor with you, AI changes update the same site for everyone. They see the updated content within seconds, without refreshing.
In the chat panel, you can:
- Preview and restore versions: Scroll through saved versions with timestamps. Click the More Actions icon
 on any version to preview it on the stage or restore it.
 - Reply after timeline events: Hover over an event in the timeline and click the Reply icon
 to ask AI to make changes relevant to the event.
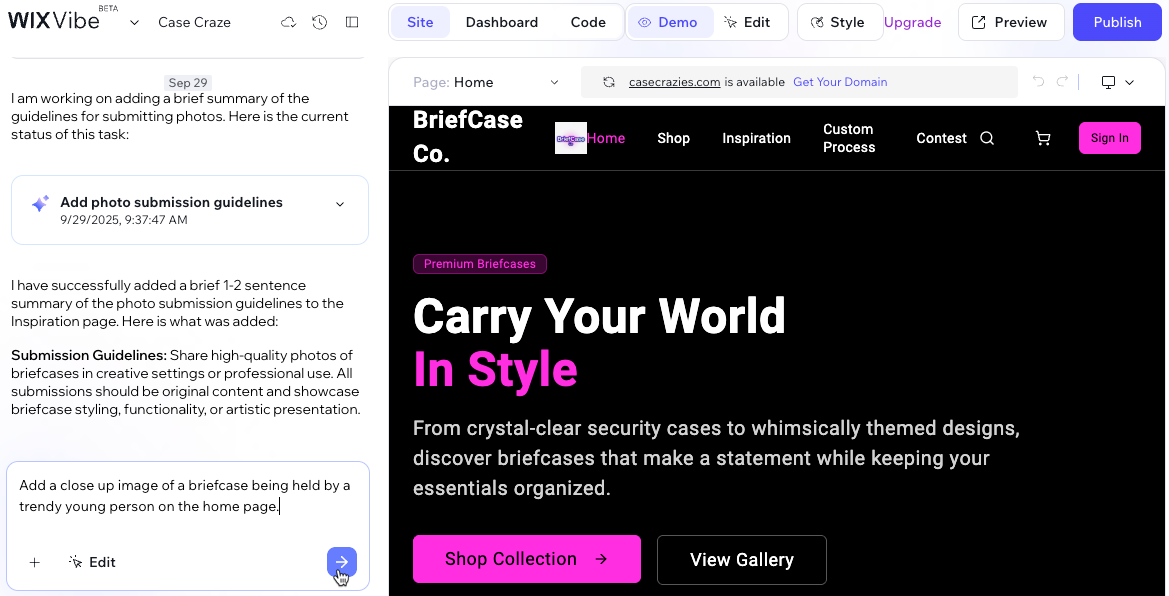
 - Chat with AI: Type your requests to ask AI for specific edits or new features. Press Shift + Enter on your keyboard if you need to start a new line. Click the Send icon
 once you're ready to send your message to AI.
 - Attach files: Click the Plus icon
 to upload images, documents, or other file types that can provide references or content for your site.
 - Edit manually: Click Edit to switch to edit mode and select elements on the stage. Then, use the floating panel or chat to customize the element.
Tip: You can also select Edit at the top of the stage to switch to edit mode. - Mention specific elements: Type the '@' sign to view a list of page elements and specify which one you want to update.
- Talk to AI: Click the Microphone icon
 to speak your instructions, which the AI transcribes for you. Make sure to allow your browser to use your mic to use this feature.
Using the Site tab
The Site tab is your main workspace, where you can view and edit the current version of your site in the stage.
At the top of your editor, click Demo or Edit to switch between modes. To update your site's overall colors and typography, click the Site Theme icon  . These theme changes apply across your entire site.
. These theme changes apply across your entire site.At the top of the stage, you can:
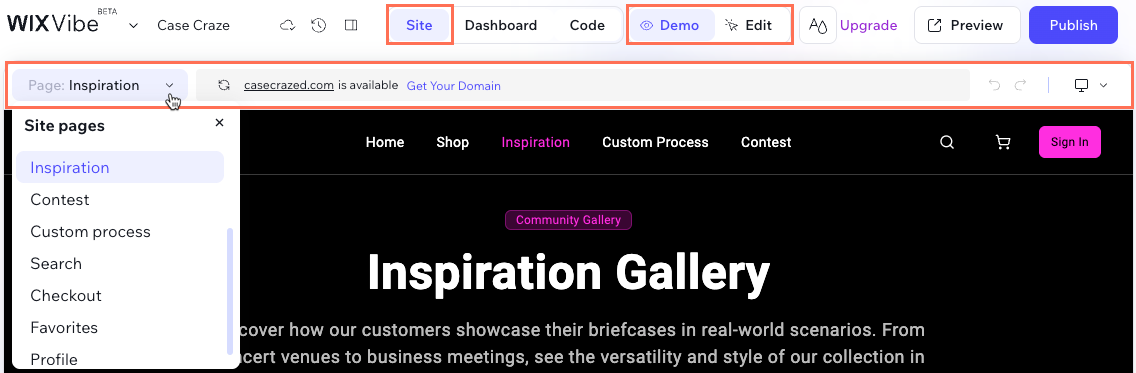
- Click the Page drop-down to switch to other site pages.
- View the stage browser bar where you can refresh the stage, connect a domain, or view the domain name you've already connected to your site.
- Click the Undo icon
 or Redo icon
  to undo or redo your last edits.
 - Click the Device icon
 to preview and edit how your site looks on desktop, tablet, or mobile. Most changes apply only to the selected device. However, some changes, like color, affect all devices unless the AI has set a different value for a specific screen size.
Demo mode
By default, the Wix Vibe Editor opens in demo mode, letting you interact with a preview of your site on the stage. This is a great way to test your site’s functionality and see what you may want to improve.
You can edit your site in demo mode by asking AI to make changes. Use the chat box on the left panel to tell AI exactly what you want to adjust. You can also attach images or use ‘@’ to specify the elements you want to update. Ask AI to create components, effects, text, buttons, media, forms, lists, and more.
For example, you can use the following prompts to make changes you can't make manually in edit mode:
- "Add a background image or gradient"
- "Edit the button's hover style"
- "Apply an entrance animation"
- "Replace this icon with a different shape"
- “Add a contact form to the home page”
When you want to manually edit elements like text, buttons, or images, use edit mode to update any part of your site. Click Edit at the top of the editor or in the chat box to switch to edit mode. Then, select the elements you want to customize to edit them.
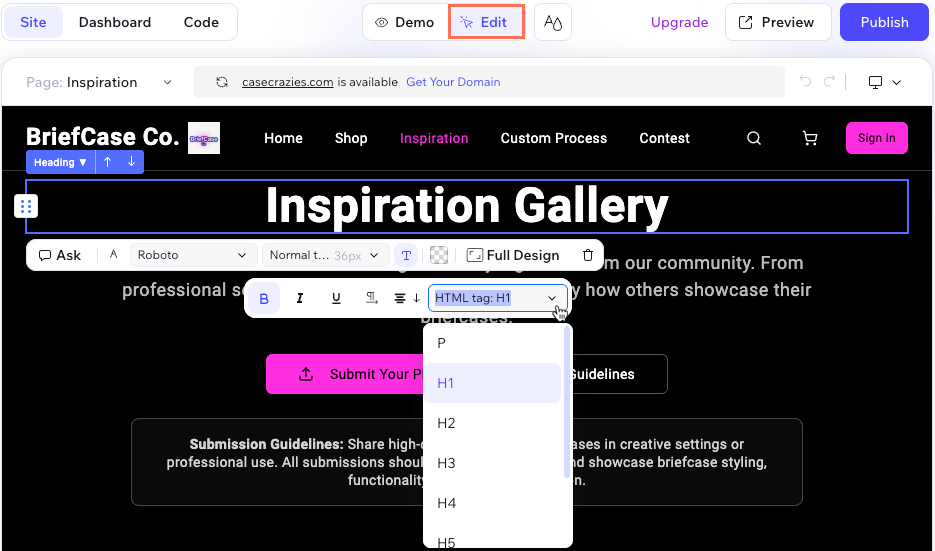
Edit mode
Edit mode gives you hands-on control to update any element on your site. After you click Edit to switch to edit mode, you can select elements such as text, buttons, or images directly on the stage and make manual changes.
When you select an element, a floating toolbar appears with editing options specific to that element. If you need to select a different overlapping element, click the Triangle icon  next to the element name to view and select from the available layers.
next to the element name to view and select from the available layers.For example, when editing text, you can:
- Click Ask to write instructions for AI to change the text.
- Click Open CMS if the text comes from a CMS collection. Then update the text in the connected collection item.
- Change the font family and size.
- Adjust formatting like bold, italics, underline, alignment, and text style (e.g. paragraph, heading).
- Select theme colors or add custom colors.
- Edit the element's opacity.
- Move the element by clicking the arrows or dragging and dropping it into place.
- Click Full Design to fine-tune specific design settings such as the HTML tag, indentation, or applying a shadow.
- Delete the element.
In edit mode, you can also add new sections directly on the stage. Hover between existing sections to reveal the + Add Section button. Then use AI to generate a section that matches your site's design.
Learn more about customizing your Wix Vibe site.
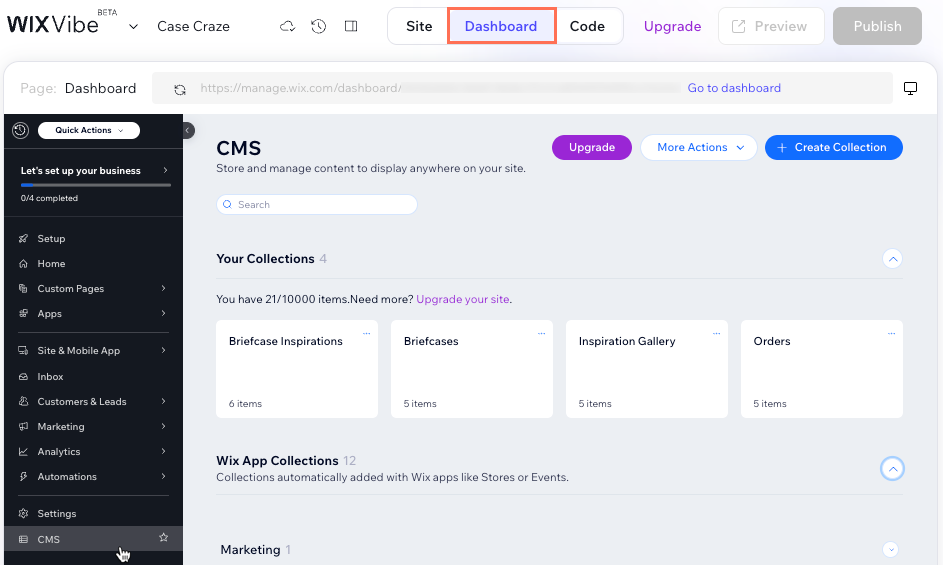
Using the Dashboard tab
The Dashboard tab gives you access to your site’s key management tools. Use it to keep your site organized and connect with your audience.
In the dashboard, you can:
- Manage CMS collections that connect to your site.
- Set up and track marketing campaigns.
- View site analytics to better understand your visitors.
- Create automations to save time on routine tasks.
- Manage messages from customers & leads in your inbox.
- Send pay links to accept payments directly from the dashboard.
Tip:
Click Go to dashboard in the stage browser bar to open the full dashboard in a new tab.
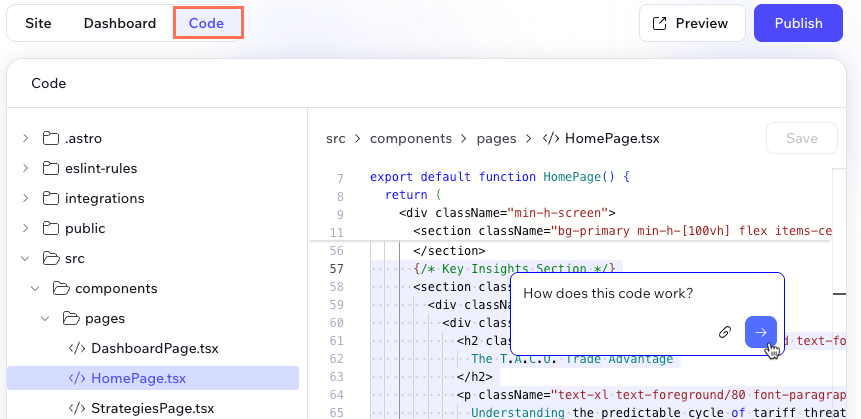
Using the Code tab
The Code tab in Wix Vibe lets you explore and directly edit the code behind your project, unlocking new flexibility for custom functionality and troubleshooting. Whether you want to refine your site’s behavior, add logic, or get hands-on with your project’s files, the Code tab gives you an integrated development environment right inside your editor.
Important:
We cannot provide support for custom code or external code snippets that were not created or tested by Wix. If you are experiencing an issue with your code or require assistance, please contact the developer or code provider directly.
In the Code tab, you can:
- Browse every file in your site’s codebase, including those in the src folder, layout and page files, and extension folders for app integrations.
- Select and edit code directly in the editor. Make your changes, then click Save to batch save all modified files at once.
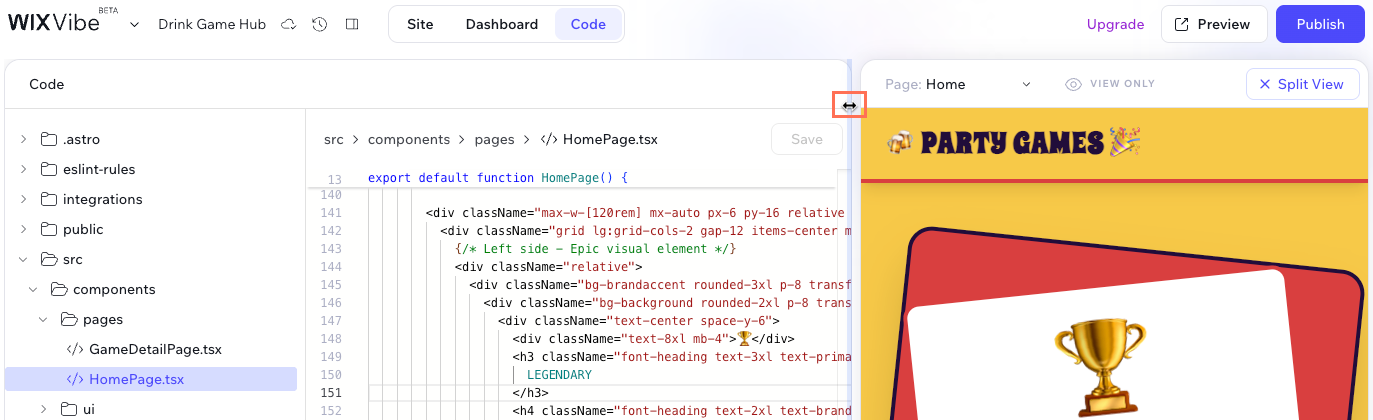
- Click Split View to see your code and a live site preview side by side. This opens a resizable preview next to your code editor, helping you test and refine site updates faster.
- Create a new version each time you save, making it easy to roll back or review changes using Version history.
- Use intelligent navigation tools to move quickly through your project (like pressing Ctrl and clicking a function name to jump to its definition).
- See which files have unsaved changes by the number displayed on the Save button.
- Work more efficiently with a built-in linter that flags issues or suggests improvements as you code.
- Use dark mode for improved readability during longer editing sessions.
Tips:
- For best results, make changes only within files in the src folder. Editing other files can cause issues or unexpected site behavior.
- Learn more technical details about editing your site's code.
Interactive AI assistance in the Code tab
You can get help with your code at any time using the floating chat in the Code tab. Highlight a section of code or right-click anywhere in a file to open the chat.
Use the chat to:
- Request specific code changes or fixes within your site
- Ask for explanations of complex code
- Get suggestions or troubleshooting help from AI
All conversations in the Code tab’s floating chat integrate with your main Wix Vibe agent conversation for full context.
Using split view in the Code tab
Split view lets you edit your site’s code and preview the results side by side. This makes it easy to test changes and update your site more efficiently.
To use split view:
- Go to your editor.
- Click Code at the top.
- Click Split View at the top right of the stage.
- (Optional) Drag the dividers between the panels to resize them as needed.
- Edit your code in the Code panel.
- Click Save.

FAQs
Click below for answers to common questions about the Wix Vibe Editor.
What file types can I attach to chat in Wix Vibe?
Can I add animations to elements on my site?
Can I manually edit multiple elements at once?
What are the daily usage limits in Wix Vibe?
Does restoring my site to an earlier version restore CMS collection content?
Can the Wix Vibe Editor appear in dark mode?
Can I create sites from my mobile device?
What is 'Split View' in the Code tab?
Can I use GitHub with Wix Vibe?
Can I automatically refresh the layout of a section?
