The
Wix Vibe Editor lets you refine and customize every part of your site. Use AI powered prompts or take hands on control. Update layouts, text, images, and buttons to match your brand and style.
Customizing your site using the chat panel
The chat panel lets you describe changes you want to make to your site. You can use it to update multiple areas or make site-wide edits in both demo and edit mode.
To customize your site using the chat panel:
- Go to your editor.
- Click the Chat panel icon
 to expand or collapse the chat panel.
 - Type your request in the chat box (e.g., “Change all button colors to green” or “Add a contact form to my homepage”). Press Shift + Enter if you need to start a new line without sending your message.
- Press Enter or click the Send icon
 to submit your request.
Customizing your site using 'Ask' in the toolbar
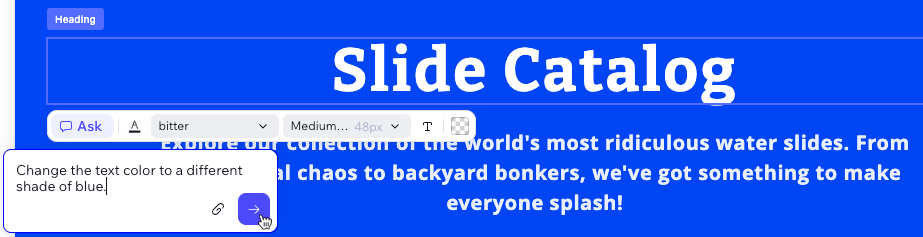
When you’re in edit mode, you can select any element on your site and click Ask in the floating toolbar to make AI-powered changes to that specific element.
To customize your site using the 'Ask' feature:
- Go to your editor.
- Click Edit at the top of your editor to switch to edit mode.
- Click the element you want to change (such as text, an image, or a button).
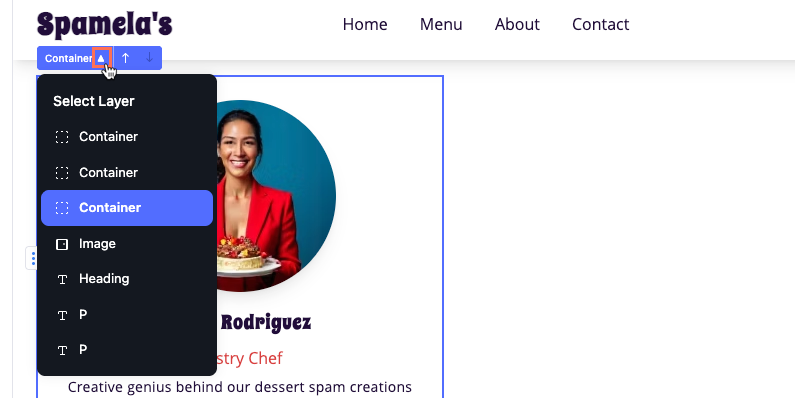
Tip: If elements are overlapping, click the Triangle icon  next to the element name and select an element from another layer.
 - Click Ask in the floating toolbar.
- Type your instruction (e.g., “Align text to center” or “Make this button larger”) in the chat bubble.
Tip: Click the Attachment icon  to upload images that can provide references or content for your site.
 - Press Enter or click the Send icon to submit your request.
Customizing your site manually
Make detailed changes to each part of your site using the manual editing tools in edit mode. Update individual elements, rearrange them, or add new sections between existing ones. After you click an element, use the settings in the floating toolbar to update styles, text, colors, and more. You can drag and drop elements to move them within sections or click their arrows to reorder them.
To customize your site manually:
- Go to your editor.
- Click Edit at the top of your editor or in the chat box to switch to edit mode.
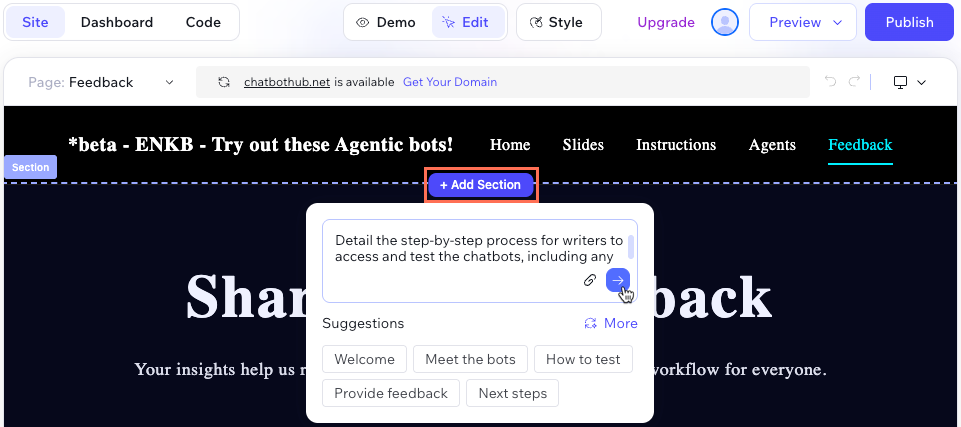
- (Optional) Add a new section between existing sections:
- Hover between two existing sections on the stage and click + Add Section.
- (Optional) Click a prompt suggestions to add it to the field.
Tip: Click More to see additional suggestions. - Enter or edit the text in the field to describe the section you want to add.
Tip: Click the Attachments icon  to add an image for AI to reference.
 - Press Enter on your keyboard or click the Send icon
 .
.
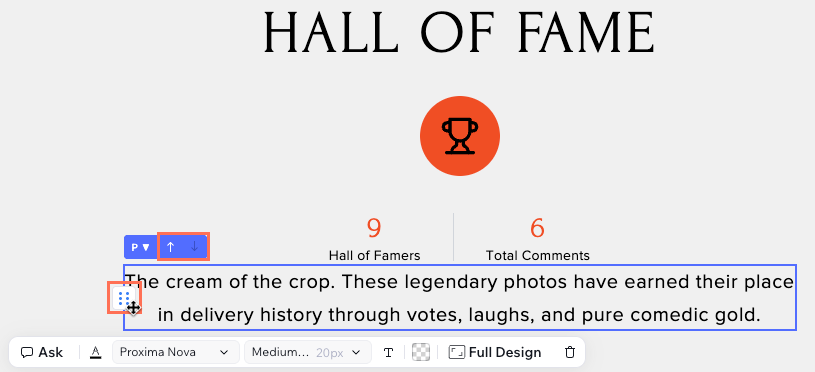
- (Optional) Rearrange elements:
- Click to select the element you want to move.
Tip: The Reorder icon  appears if it's possible to manually rearrange the element. If the icon doesn't display, use the chat box to request to rearrange the elements instead.
 - Click the relevant arrow or click and drag the Reorder icon to move elements.
- Select the element you want to customize:
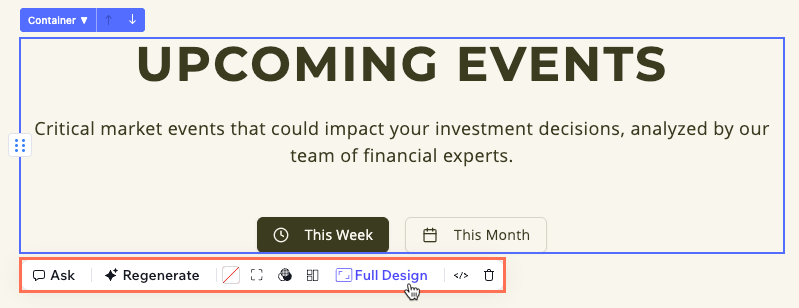
Customize the container or section using the following options:
- Open CMS: (If the container or section includes dynamic elements) Click to open the CMS collection where the connected content is stored. This is helpful when the container combines more than one part, such as an icon and text or a price and currency symbol, and you cannot edit the text directly on the stage.
Note: In some layouts, AI may build a container that behaves like a button or a text block. If you see a green label on the container and cannot edit the text on the stage, click Open CMS or use the AI chat to update the content. - Regenerate: Automatically generate new layout and style options for the section or container while keeping your existing content.
Note: This option is only available for sections and containers with at least 2 inner elements. - Background color: Choose a background color and adjust its opacity.
- Appearance: Edit the corner radius and border.
- Effect: Edit the effects, including the opacity, shadow, and blend mode.
- Layout: Edit the alignment, padding and spacing.
- Full Design: Use the floating panel to adjust the appearance, effects, and layout settings.
- Find this element in code: Switch to the Code tab and view the element in your site's code.
- Delete: Remove the container or section completely.
 Note:
Note: The available options vary depending on the container or section.
Customize the button using the following options:
- Open CMS: (Dynamic buttons only) Click to open the CMS collection the button connects to and update the content or other data.
Note: If you see a Live Data label, you cannot edit the content from the stage. Some button labels come from built in logic, such as 'Add to cart' or 'Out of stock'. You cannot edit these labels on the stage even if there is no Live data label. Ask the AI chat to update the label everywhere it appears. - Background color: Choose a background color for your button and adjust its opacity.
- Text color: Change the color of the button text using the palette or by entering a hex code.
- Font family: Choose a font for the button's text.
- Text style: Choose the style which determines the size of the text.
- Text formatting: Set the button's text formatting to be bold, italic, or underline. You can also set the text direction and alignment.
- Appearance: Edit the button's corner radius and border.
- Effect: Edit the button's opacity and shadow.
- Layout: Edit the button's alignment, padding, and spacing.
- Full Design: Use the floating panel to adjust the formatting, appearance, effects, and layout.
- Find this element in code: Switch to the Code tab and view the element in your site's code.
- Delete: Remove the button completely.

Customize the text using the following options:
- Open CMS: (Dynamic text only) Click to open the CMS collection where the text is stored. Then update the content or other collection data. If a green label shows the collection and field name, you can usually click the text itself to edit it. If that does not work, Click Open CMS or use the AI chat to update the text at its source.
- Text color: Change the color of the text using the palette or by entering a hex code.
- Font family: Select the font family used by the text.
- Text style: Choose the style which determines the size of the text.
- Text formatting: Set the text formatting to be bold, italic, or underline. You can also set the text direction, alignment and HTML tag (e.g. P, H1, H2).
- Opacity: Drag the slider to adjust the text transparency.
- Full Design: Use the floating panel to adjust the text formatting and layout.
- Find this element in code: Switch to the Code tab and view the element in your site's code.
- Delete: Remove the text element completely.
Tip: To edit the text, click it and start typing.
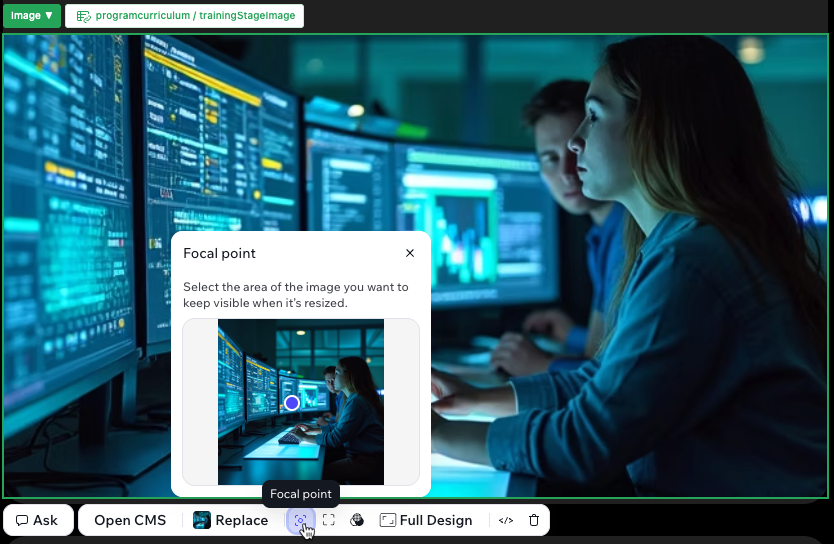
Customize the image using the following options:
- Open CMS: (Dynamic images only) Click to open the CMS collection where the image is stored. You can then update the image or other collection data.
- Replace: Replace the selected image with another image.
Tip: If the image has a Live data label, the image comes from a dynamic source such as a CMS collection. Go to the relevant source or ask the AI chat if you need to replace the image. Learn more about editing dynamic content in Wix Vibe. - Focal point: Select the area of the image you want to keep visible when it's resized.
- Appearance: Edit the image's border and corner radius.
- Effect: Edit the image's opacity and shadow.
- Full Design: Use the floating panel to adjust the appearance, effects, and layout.
- Find this element in code: Switch to the Code tab and view the element in your site's code.
- Delete: Remove the image completely.
Customize the input element using the following options:
- Background color: Choose a background color for your input and adjust its opacity.
- Text color: Change the color of the input text using the palette or by entering a hex code.
- Font family: Choose a font for the input's text.
- Text style: Choose the style which determines the size of the text.
- Text formatting: Set the input's text formatting to be bold, italic, or underline. You can also set the text direction and alignment.
- Appearance: Edit the input's corner radius and border.
- Effect: Edit the input's opacity and shadow.
- Layout: Edit the input's alignment, padding, and spacing.
- Full Design: Use the floating panel to adjust the text formatting, appearance, effects, and layout.
- Find this element in code: Switch to the Code tab and view the element in your site's code.
- Delete: Remove the button completely.
Note: You cannot edit the placeholder text from the stage. If you need to change the placeholder, ask the AI chat to update the input or its code.
Customize the shape using the following options:
- Fill color: Set the color that fills the shape.
- Appearance: Edit the stroke color, opacity and width.
- Effect: Edit the opacity and shadow.
- Full Design: Use the floating panel to adjust the opacity and shadow.
- Find this element in code: Switch to the Code tab and view the element in your site's code.
- Delete: Remove the container or section completely.
FAQs
Click a question below to learn more.
Can I manually edit multiple elements at once?
It’s not possible to manually select and edit multiple elements at the same time in
edit mode. If you want to update several elements across your site, try these options:
- Ask AI in the chat boxes: Type your request (for example, “Change all buttons to blue and update all headings to use Arial font”). The AI will make these changes across your site.
- Use the site theme panel: Apply style changes (such as fonts or colors) to your entire site at once. Learn more about changing the site theme.
What is demo mode, and how do I use it?
Demo mode is the default view in the Wix Vibe Editor. It shows a preview of your site on the stage, so you can see how your site functions and decide what you want to improve before making manual changes.
In demo mode, you can update your site by chatting directly with the AI. Type your requests in the chat panel on the left, such as "Replace the logo with a new image" or "Add a testimonials section to the About page." You can also attach files or use '@' to mention specific elements you want to update. Wix Vibe makes these changes for you, helping you add new features or adjust your site's design and content.
For example, you can use the following prompts to make changes you can't make manually in edit mode:
- "Add a background image or gradient"
- "Edit the button's hover style"
- "Apply an entrance animation"
- "Replace this icon with a different shape"
- “Add a contact form to the home page”
When you're ready for hands-on editing, click Edit at the top or the editor or in the chat box to switch to edit mode. This lets you click and customize elements manually, such as text, buttons, or images. You can always click Demo at the top to switch back to demo mode and test your site's functionality.
Can I add animations to elements on my site?
Yes, you can add animations to any elements, such a big title, or on multiple elements such as all of your site buttons. Just use the chat inside the Vibe editor to describe the effect you want.
For example, ask the chat to make an image fade in when someone scrolls, add a hover effect to a button, or create a looping animation for your logo. The chat can help you apply many types of animations, such as entrance effects, hover states, or animations that repeat automatically.
What file types can I attach to chat in Wix Vibe?
You can attach up to 5 image files at a time when sending messages through chat with Wix Vibe. Upload any of the following file types: jpg, jpeg, or png.
Note: Other file types (such as pdf, doc, gif, or video files) are not supported in Wix Vibe chat at this time.
What are the daily usage limits in Wix Vibe?
- Site AI credits: Each specific site has a daily limit for AI chat interactions (6 for free sites, 50 for upgraded sites). This resets daily.
- Account-wide limit: There is a general daily limit on AI generation that applies to your entire account. For example, if you generate a high volume of sites in one day, this limit may pause your ability to create new sites until the next day.
Can I undo changes made in the chat?
Can I change the elements on different pages?
Absolutely! You can click the Page drop-down at the top of the stage to switch between pages. You can then edit the elements on that page as needed. You can also go to demo mode and click links on your site to navigate to other pages and edit the content.
Can I undo and redo manual edits I made?
Yes, click the
Undo icon

or
Redo icon

to undo or redo your last edits.
Can the Wix Vibe Editor appear in dark mode?
Yes, you can change how the Wix Vibe Editor looks while you work. This setting only affects the editor and does not impact how your published site appears to visitors.
To change the editor’s appearance:
- In your editor, click the Wix Vibe drop-down at the top left.
- Click Editor Appearance and choose the relevant option:
- Light: The editor appears in the default light mode.
- Dark: The editor switches to dark mode, making it easier on your eyes in low-light environments.
- Device settings: The editor automatically matches your device’s light or dark mode preference.
Does restoring my site to an earlier version restore CMS collection content?
No. CMS collection data is backed up separately from your main site versions. Restoring an earlier site version does not restore your CMS collections. To manage or restore previous collection data, use the collection backup tools directly.
Can I create sites from my mobile device?
Can I use GitHub with Wix Vibe?
Can I automatically refresh the layout of a section?
Yes. You can use the Regenerate option to instantly update the layout and style of sections and containers with at least 2 inner elements. This lets you explore new looks while keeping your original content and proper theme connections. To do this, select the container or section in edit mode and click Regenerate in the floating toolbar.


 to upload images, documents, or other file types.
 to speak and have your message transcribed automatically.