

Wix Restaurants: Preparing Your Menus for Online Ordering
9 min
In this article
- Adding item modifiers
- Managing items tax
- Limiting menu availability
- Limiting section and item availability
- FAQs
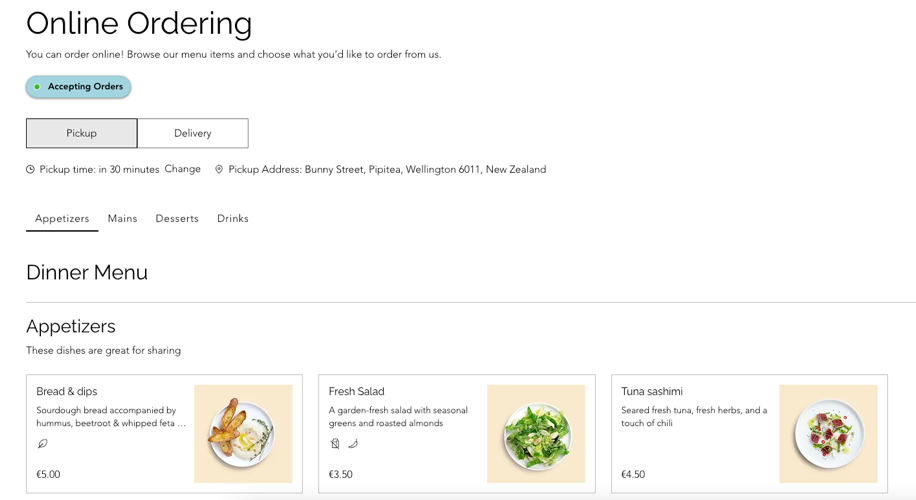
Make your restaurant’s menus suitable for online ordering by allowing customers to place orders and customize their selections. This includes adding item modifiers and setting tax rules for each item.
You can also schedule when menus are available online and control visibility for specific sections or items to keep your menu accurate and manageable.
Adding item modifiers
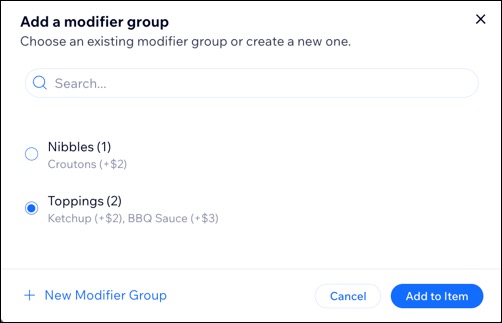
Add a modifier groups to customizable items, such as a "Toppings" group for pizza or a "Fillings" group for sandwiches. You can set options as complimentary or for an extra charge. Once created, you can apply a modifier group to any menu item without needing to recreate it.
To add item modifiers:
- Go to Menus in your site's dashboard.
- Create a new menu or click Manage next to the relevant existing menu.
- Hover over the relevant existing menu item and click Edit.
- Click the Modifiers tab.
- Click + New Modifier Group.
- Choose an existing modifier group or create a new one.
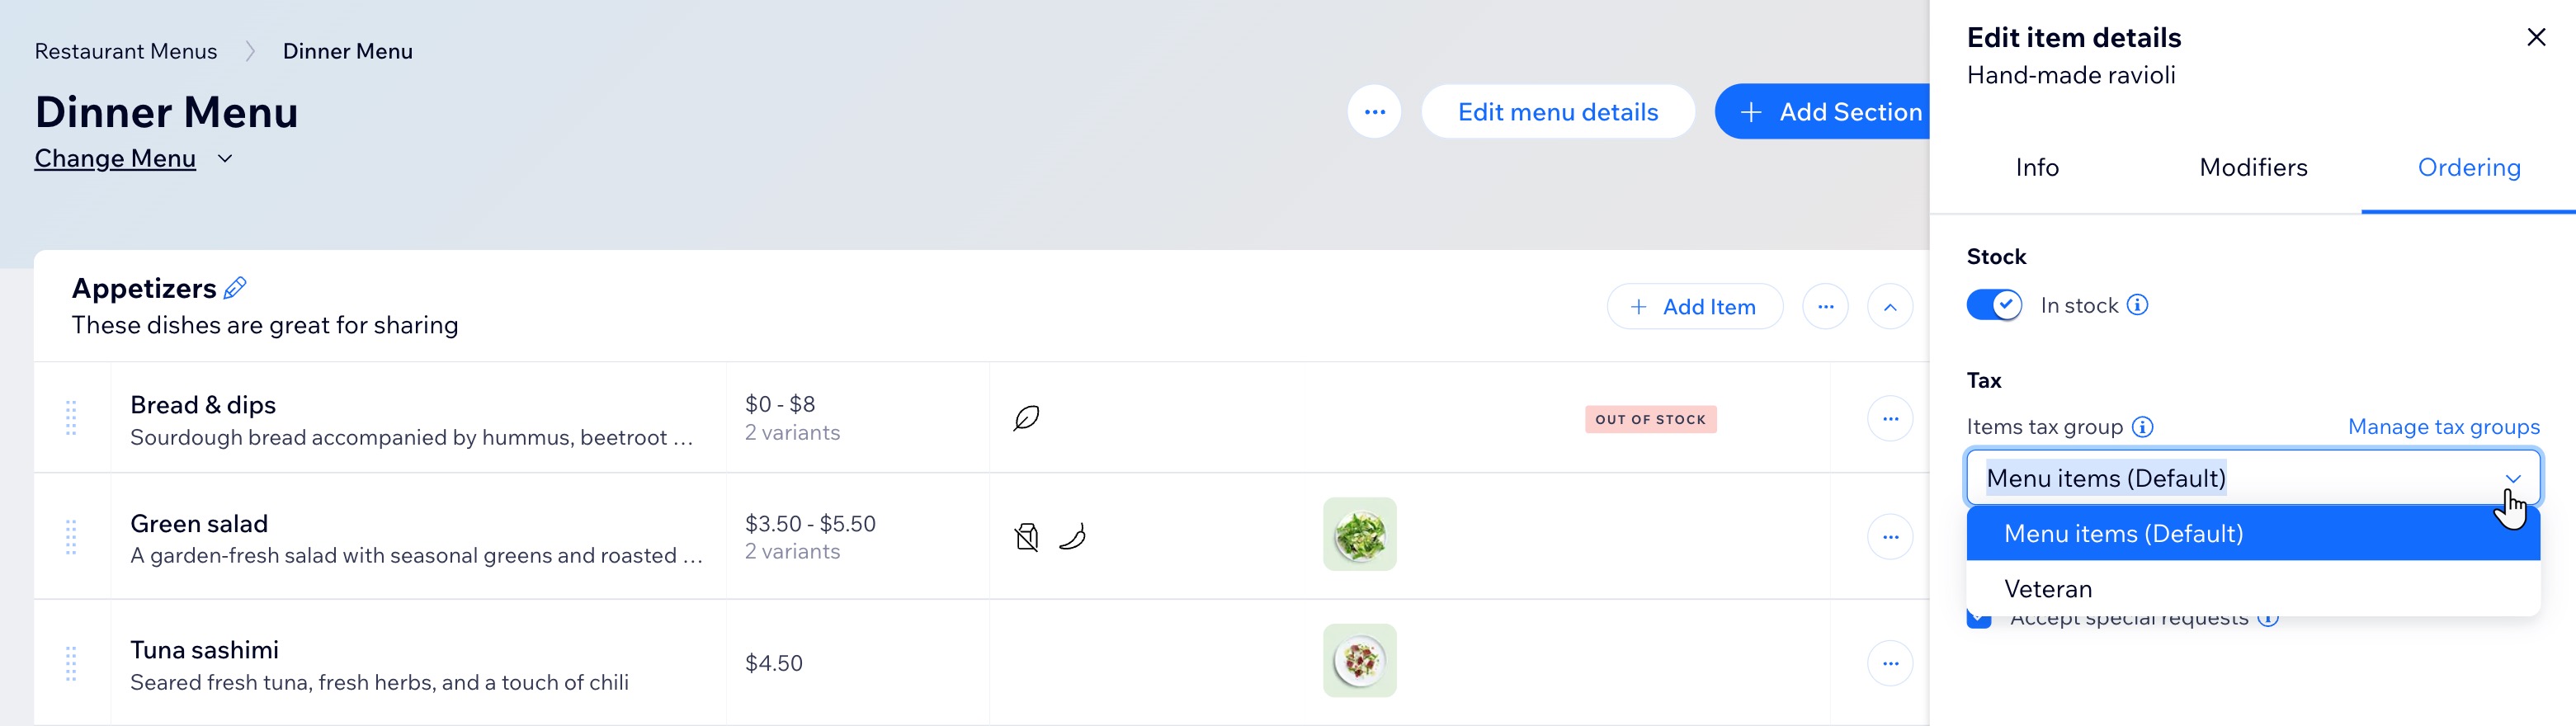
Managing items tax
When you set up tax collection for your business, you can set the same rate for all your items, or create groups for items taxed at different rates. Then, you can select which tax group a specific restaurant item belongs to.
For example, if the sales tax in your location is 10%, but alcohol is taxed at 15%, set up a tax group for alcohol and assign a 15% tax rate override.
Before you begin:
- Set up tax groups using the manual method.
- Set up tax groups using Avalara automatic tax.
To assign a restaurant item to a tax group:
- Go to Menus (New) in your site's dashboard.
- Create a new menu or click Manage next to the relevant existing menu.
- Click the Ordering tab.
- Click the Items tax group drop-down and select the relevant group.
Limiting menu availability
By default, your menu is available based on your Pickup & Delivery settings, so customers can only place orders during those times.
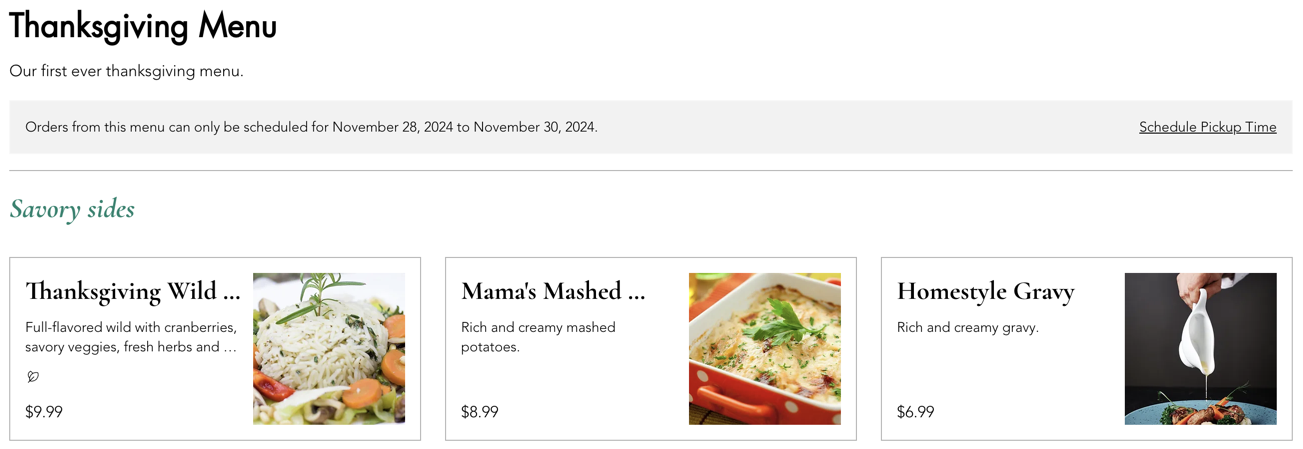
If you're offering a special menu that's only available at certain times, you can limit its online availability to specific weekdays, times or special dates. For example, offer a breakfast menu that's only available in the morning, or take holiday orders for December 20–24.
Tip:
The menu’s availability times refer to when orders are received, not when they're placed. For instance, customers can order a Sunday brunch menu on Tuesday if they schedule pickup/delivery for Sunday morning.
To limit the availability of a menu:
- Go to Menus (New) in your site's dashboard.
- Click Edit Menu Details next to the relevant menu.
- Click the Ordering tab.
- Select the Include on Online Ordering page checkbox to display the menu on your ordering page.
Tip: Deselect this option to remove the menu from your ordering page. - Decide when your menu should be available for ordering under Menu Availability:
During business hours

Certain weekdays and times
 next to Available hours.
  to add more than one timeframe (e.g. Monday 9 AM - 12 PM and 2 PM - 8 PM).
Specific dates

Note:
Menus that you set as draft do not appear on your live site.
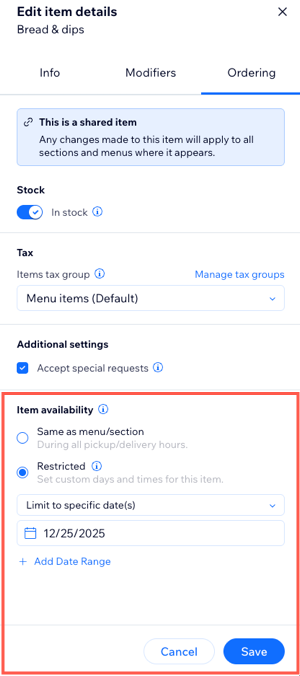
Limiting section and item availability
You can manage how and when sections and items appear on your online menu, whether you want certain items available during specific service periods or entire sections shown only on selected dates.
To limit the availability of a section / item:
- Go to Menus in your site's dashboard.
- Click Manage next to the relevant menu.
- Choose when to set your section or item availability:
Section
 next to the relevant section name.
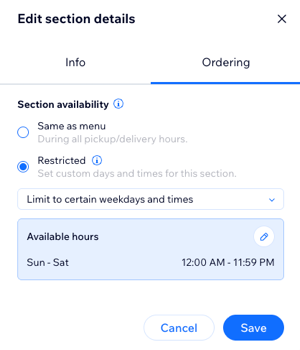
Item
FAQs
Click a question below to learn more about preparing your menus for online ordering.
When menus are unavailable, can customers still see them on my site?
How can I open on a holiday if it falls on a day my business is usually closed?
Can I set different hours for my menus?
How do orders come through?
Can I add fees?
How do I change the order of menus on my online ordering page?
I have multiple restaurant locations. Can I show different menus for each one on my site?
What's next?
Add automatic discounts, discount coupons and percentage coupons to your site to entice customers to place an order.
