

Setting Up Tax Groups Using Manual Tax Calculation
6 min
In this article
- Step 1 | Determine which items have special tax rates
- Step 2 | Create a tax group
- Step 3 | Assign your groups tax rates
- Step 4 | Add items to the group
- FAQs
Important:
This tax solution is currently available for Wix Stores, Wix Bookings, and Wix Restaurants Orders (New). Using a different app? Click an option below:
Make sure you're compliant with tax regulations for items that are taxed at a rate special rates. Create groups of products or menu items so you can give them a different rate
Step 1 | Determine which items have special tax rates
Each tax location has a general sales tax rate, but may tax certain items lower or higher. Additionally, some goods may be tax exempt.
For example, the general tax rate in a country is 10% but car seats are taxed at 5%. To account for these differences, a merchant in this location would need to create a car seat tax group, enter the correct tax rate (5%) in each location, and add their car seat products to the tax group.
Important:
Special tax rates vary by country and can vary by state, province, etc. These tax rates also change over time. We suggest you consult with an accountant or with your local tax authority to find out if any of your items are taxed at a special rate.
Step 2 | Create a tax group
You create a tax group by giving it a name and saving it. Make sure to give the group a name that makes it easy for you to identify. Customers do not see this name.
Note:
Tax groups are not currently available with Wix Bookings.
To create a tax group:
- Go to Tax in your site's dashboard.
- Scroll down to Tax groups.
- Click +Add Custom Group.
- Enter a group name (e.g. Car Seats) and click Add.
Step 3 | Assign your groups tax rates
Now that you have your tax group, you can assign it a rate in each of your tax locations.
For example, if you need to collect tax in England and Scotland, but only England has a special rate for your tax group, you'll enter the special rate in England and the regular rate in Scotland.
Alternatively, if England and Scotland both have different special tax rates, you can add the tax group to England and assign the relevant rate (e.g. 5%). Then, select Scotland, add the tax group there, and add the relevant tax rate (e.g. 8%).
Important:
When you create a new tax group, it's added to each location and given a default rate of 0%. Make sure you enter the appropriate rate for each location.
To assign tax rates:
- Go to Tax in your site's dashboard.
- Select a location.
- Enter the tax rate for the group you created (e.g. Car Seats).
- Click Save.
- Select every other location and enter a rate for this group.
Note: If you don't enter a rate, the items in the tax group are taxed at 0%.
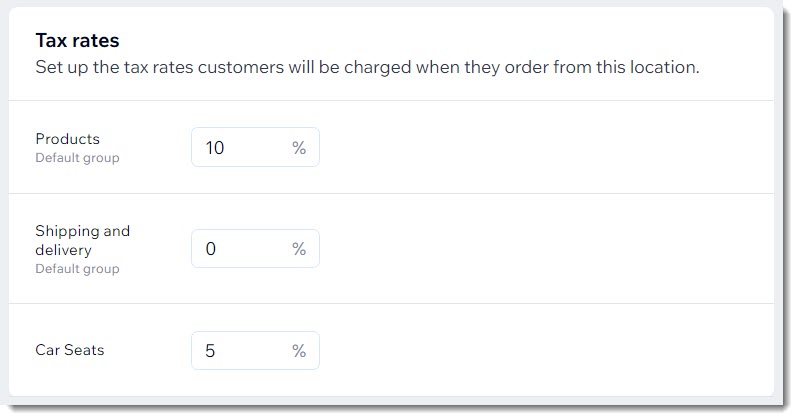
After setup, you may see something like the example image below. The default tax rate in this location is set at 10%. In addition, there's a tax group for car seats at a tax rate of 5%.
Step 4 | Add items to the group
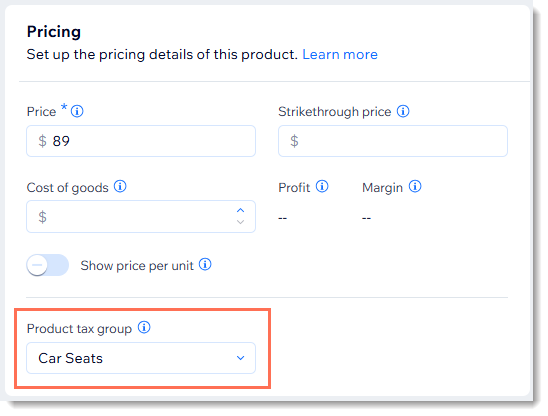
Now that your tax groups are set up, you can assign items to your groups. For example, if you created a tax group for children's clothing, you can add all the relevant children's clothing products you sell to that group.
To assign items to your tax group:
Choose the items you want to add to a tax group:
Add store products to a group

Add restaurant menu items to a group


FAQs
Click a question below to learn more about tax groups.
What happens when I create a new item after setting up tax groups?
Can I create tax groups with Avalara automatic tax calculation?
What happens when I remove a tax group?

What happens if I don’t add a rate for a group in some locations?
What do customers see at checkout when they purchase items taxed at a different rate?
