

Wix Restaurants: Setting Up Your Menu
15 min
In this article
- Step 1 | Set up your menu
- Step 2 | Set up your menu sections
- Step 3 | Add and customize your menu items
- FAQs
Set up your Wix Restaurants menu to create a seamless online ordering experience for your customers. Begin by naming your menu and adding a clear description to give customers an idea of what to expect.
Once your menu is set up, you can customize individual items. For example, you can offer salads with or without chicken, in different sizes, and at various prices. You can also add labels like "Spicy" or "Gluten-Free" to help your customers.
You can schedule the availability of specific menu sections or individual menu items on certain days or at specific times. All menu sections and items appear by default in your online ordering menu.
Using menus for online ordering?
To set up online ordering with the menus app, you'll need the Wix Restaurants Orders app.
Step 1 | Set up your menu
The Wix Restaurants Menus app comes with a default menu, complete with sections and menu items. Customize this menu to make it your own or add a new one.
You can upload photos of your menu(s), and AI will automatically extract and organize the text into a user-friendly online format. This simplifies setup, saving you time and eliminating manual data entry.
To set up your menu:
Dashboard
Wix app
- Go to Menus in your site's dashboard.
- Select the relevant option:
Create new menu
Edit an existing menu
Import from file

3. Select or deselect the Mark as a draft checkbox.
Tip: When a menu is marked as a draft, it won't show in your editor or your live site.
Tip: When a menu is marked as a draft, it won't show in your editor or your live site.
4. Click Save.
Step 2 | Set up your menu sections
Next, organize your menu into sections, such as Appetizers, Main Course, Desserts, and Beverages, to make it easier for customers to navigate. You can schedule the availability of specific menu sections to appear in your online ordering menu.
Tip:
Before adding menu items, it's a good idea to decide which sections you need and add them to your menu.
To set up your menu sections:
Dashboard
Wix app
- Go to Menus in your site's dashboard.
- Click Manage next to the relevant menu.
- Select an option:
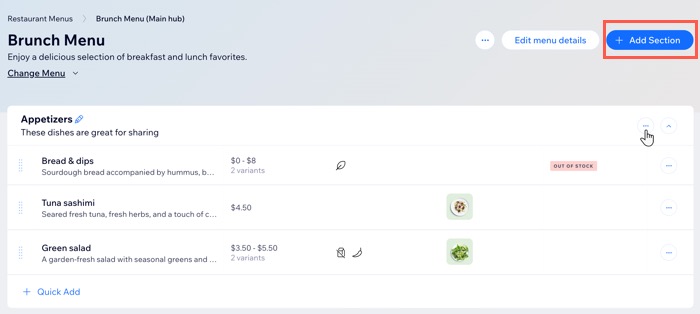
Add a new section
 next to Available hours.
Edit an existing section
 icon next to the relevant section.
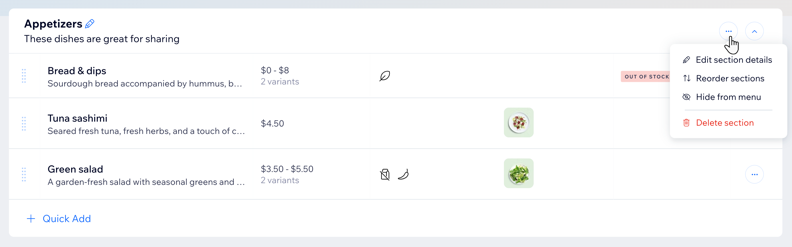
Step 3 | Add and customize your menu items
Now it’s time to add the dishes that make your menu unique. If you used AI to import your menu, review each item and make sure everything looks just right. You can also set when menu items are available, such as specific days or times, so customers see the right options in your online ordering menu.
Add multiple images for each dish, update item descriptions, and use labels like Vegan, Gluten-Free, or Extra Hot to help customers find what they’re looking for.
Note:
You must enter a name and price for each menu item. If you prefer, you can hide prices from your live site.
To add and customize menu items:
Dashboard
Wix app
- Go to Menus in your site's dashboard.
- Click Manage next to the relevant menu.
- Choose what you want to do:
- Add item: Click + Quick Add under to the relevant section to add a new item. Enter the name of the menu item and click the checkmark. Then, hover over the item and click Edit.
- Edit item: Hover over an existing item and click Edit.
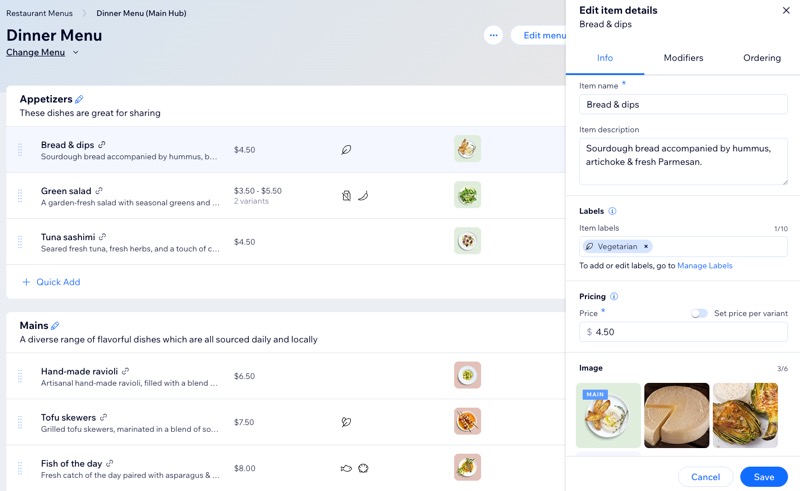
- Click the Info tab to add your Item details:
- Enter the name of the menu item (e.g. Caesar Salad).
- (Optional) Enter a brief item description.
- (Optional) Add labels (e.g. Vegan, Gluten Free) to the menu item.
Tip: Click + Add New Label to create a new one. - Enter the base price of the menu item.
Tip: The currency is based on your business info settings. - (Optional) Add price variants:
- Click the Set price per variant toggle to enable it.
- Enter the variant name and select it from the list of existing variants or select +Add New Variant to add a new one.
- Enter the price of each variant.
- (Optional) Click + Add Price Variant (e.g. Small and Large) to add more price variants.
- Add images or replace the default image.
- Click the Show on menu toggle under Item visibility to set the item to display on your menu.
- Enable the Featured item toggle to highlight the item on your menu and ordering pages.
- Click the Modifiers tab to add modifiers to your item.
- Click the Ordering tab and set up your item using the following options:
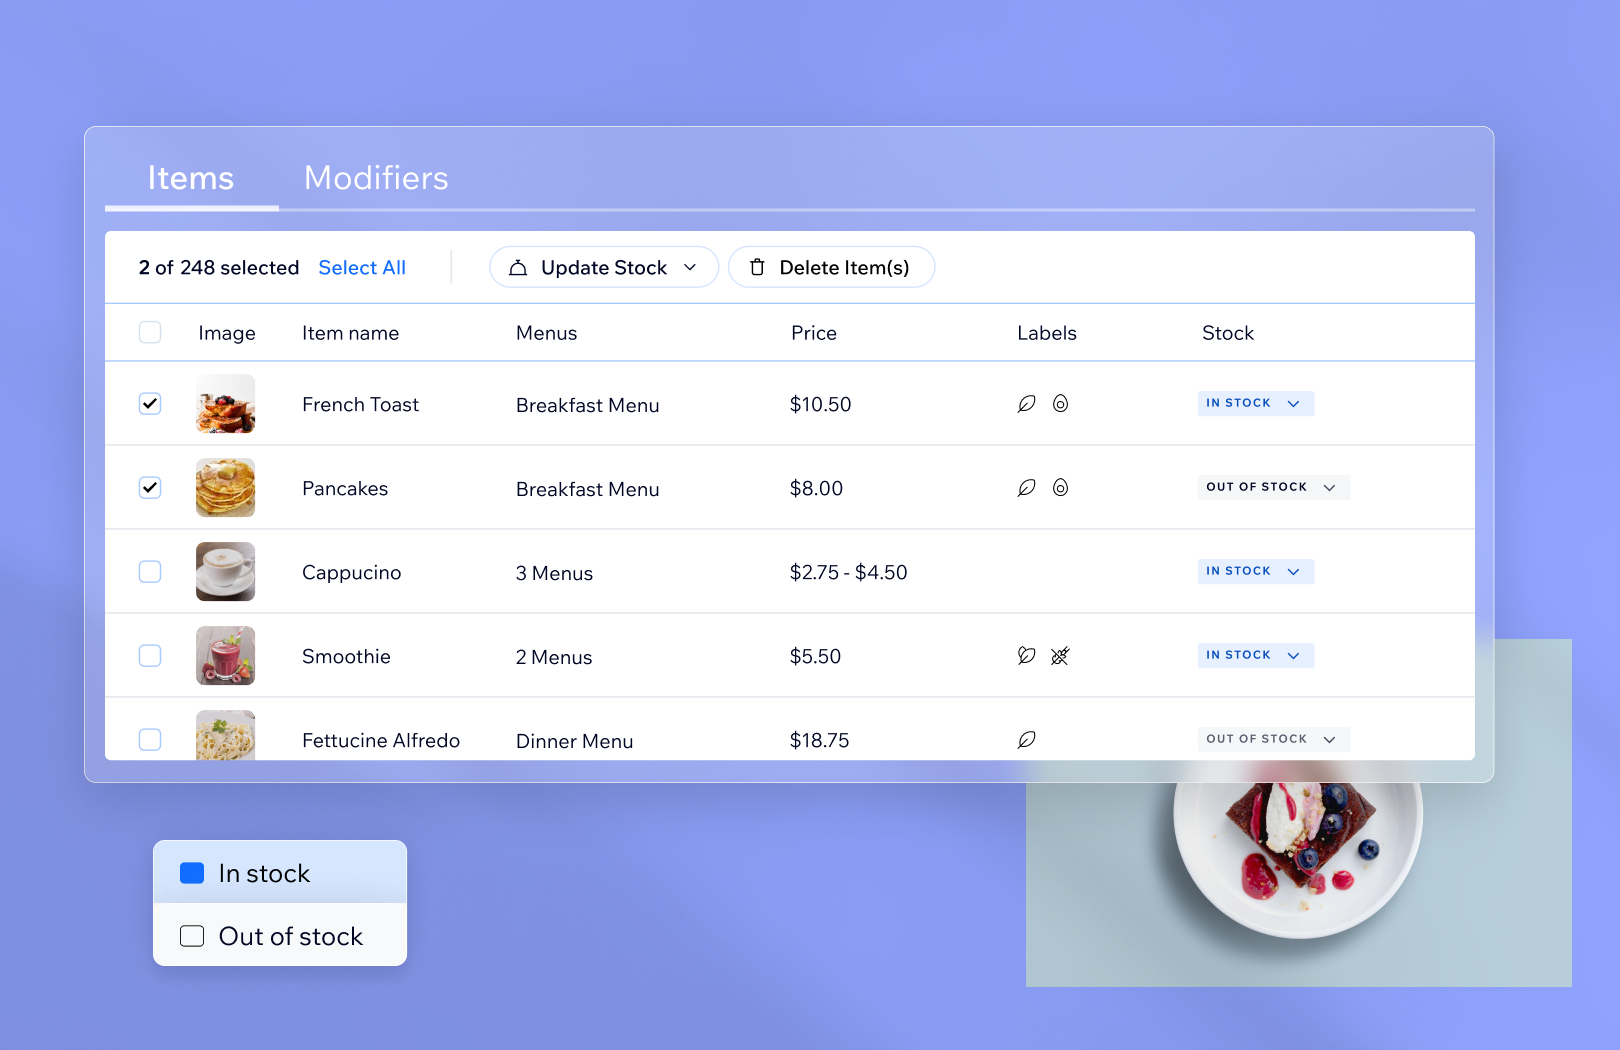
- Stock: Click the toggle to show this item as in or out of stock.
- In stock: Customers can order this item.
- Out of stock: The item appears grayed out to customers and can't be ordered.
Note: Out-of-stock items remain visible to customers but cannot be ordered.
- Tax: Select the relevant items tax group from the drop-down. Click Manage tax groups to set up or change tax groups for your menu items.
Tip: If you haven't set up tax, click Open Tax Settings to add a tax location. - Customer notes: Select the checkbox next to Let customers add a note to this item to let customers add a note for this item, such as allergies or item requests.
- Text shown inside the field: Enter the placeholder text that appears inside the note field. You can enter up to 120 characters.
- Item availability: Choose when this item is available for ordering:
- Same as menu/section: The item is available during all pickup or delivery hours set for the menu or section.
- Restricted: Set custom days and times for when the item can be ordered. Click the drop-down and choose an option:
- Limit to certain weekdays and times:
- Click Edit next to Available hours to choose which days and times customers can order this item.
- Select the checkboxes for the relevant days and set the available timeframes.
Note: You can only select days and times with available pickup or delivery, as customers can't receive orders without a fulfillment method. - Click the Add icon
 to add more than one timeframe (e.g. Monday 9 AM - 12 PM and 2 PM - 8 PM).
 - Click Apply to save changes.
- Limit to specific date(s):
- Select the start date.
- (If relevant) Click + Add Date Range to set an end date.
- Limit to certain weekdays and times:
- Stock: Click the toggle to show this item as in or out of stock.
- Click Save.
Have multiple restaurant locations?
Add menus to each location and automatically display them on your site based on where customers are browsing.
FAQs
Click a question below to learn more about the Wix Restaurants Menus app.
What menu file types can I import?
How can I move an item to a different section or menu?
Can I reorder my menus?

Can I reorder the sections on my menu?
Can I edit my menu item labels?
 next to any menu item.
Can I hide a menu?
Can I delete a menu or parts of a menu?
How can I translate my menus?
How do I manage items on my menu, including duplicating or deleting them?

