

Wix Restaurants: Creating Automatic Discounts
4 min
In this article
- Creating automatic discounts
- Manually turning discounts on and off
- FAQs
Important
This article is about the new Wix Online Orders app.
Create automatic discounts so customers can get price reductions without having to enter a coupon code. When a customer orders items that qualify for discounts, the discounts are applied automatically. You can create automatic discounts for any or all menu items, specific menus, or specific menu sections.
Tip:
To keep things simple for both you and your customers, it's best not to create more than one automatic discount that applies to the same menu item, menu section, or menu.
Creating automatic discounts
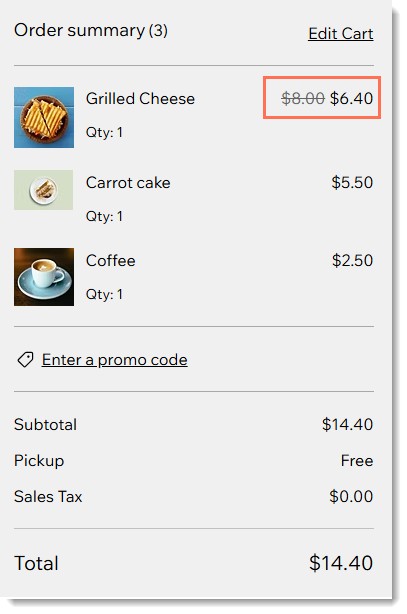
Create an automatic discount and decide what it applies to. Customers see the discount nane in the Side Cart and Cart page.
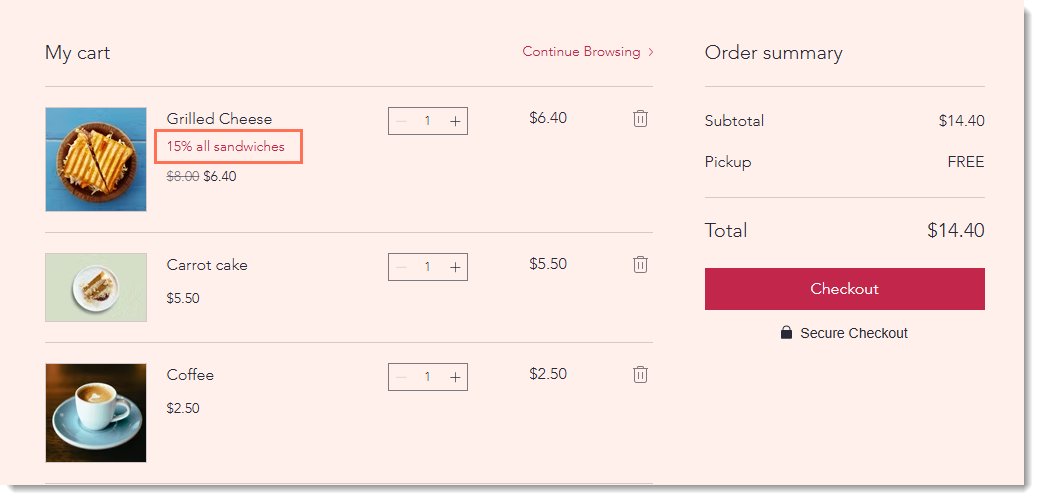
The price reduction also appears in the order summary on the Checkout page.
To create automatic discounts:
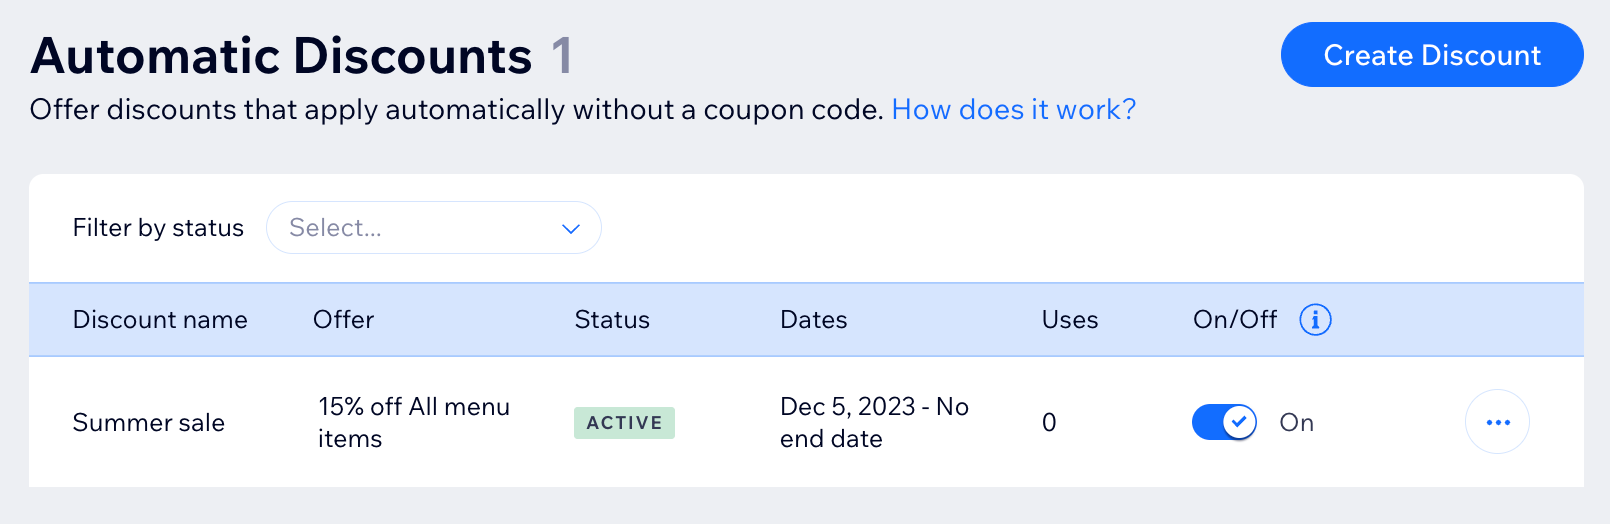
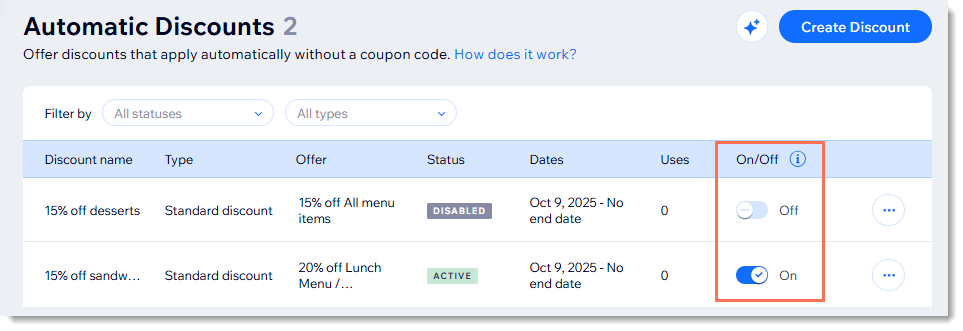
- Go to Automatic Discounts in your site's dashboard.
- Click Create Discount.
- Select Standard discount and click Continue.
- Enter the discount name.
Tip: Customers see this name. - Select the type of discount from the What is the discount? drop-down and enter the required details.
Note: If you offer an Amount off discount (e.g. $10 off), it's applied to every relevant item in an order. - (Optional) Set minimum requirements for the discount to apply:
- Minimum quantity (e.g. order 3 dishes get $10 off):
- Select the Minimum quantity of items checkbox.
- Enter the number of items.
- Minimum amount (e.g. spend $50 on salads and get $10 off):
- Select the Minimum order subtotal checkbox.
- Enter the minimum amount.
- Minimum quantity (e.g. order 3 dishes get $10 off):
- Select what the discount applies to:
- All menu items: The discount applies to each item that a customer orders.
- Specific menus: Select one or more menus.
- Specific sections: Select one or more sections.
- Specific menu items: Select one or more menu items.
- Select the date and time when the discount starts.
- (Optional) Select the dates when the discount ends:
Note: By default, the discount starts immediately and doesn't have an end.- Select the Set an end date and time checkbox.
- Select the date and time when the discount ends.
- Click Save.
Manually turning discounts on and off
When you create automatic discounts, you set a start time and optionally set an end time. You can override these times by manually turning a discount on or off at any time.
Just go to Automatic Discounts in your site's dashboard and click the toggle next to the relevant discount.
FAQs
Click a question below to learn more about automatic discounts.
How can I edit, duplicate, or delete an automatic discount I created?
 next to the relevant discount
What are the best ways to let customers know about my discounts?
Does limiting the number of discounted items per order stop customers from ordering multiple times?
How do "amount off" discounts ($10 off) apply to a group of items?
If I set a minimum quantity or subtotal, what counts towards the minimum?
What happens if more than one automatic discount applies to an order?
What time zone is used to set when a discount begins and ends?
What limitations are there to quantity discounts?
