

Wix Harmony Editor: Editing and Customizing Images
10 min
In this article
- Cropping an image
- Resizing and rotating an image
- Designing an image
- Editing an image with Wix Photo Studio
- Adding a link to an image
- Customizing an image's settings
- FAQs
This article refers to the new Wix Harmony Editor, released in January 2026. If you're unsure whether you’re using the Wix Harmony Editor or the Wix Editor, view more information here.
Images help share your message visually and create a memorable experience. The editor tools and Wix Photo Studio let you shape and customize each image to match your brand and site layout.
Show off your images just the way you want - crop and resize them, play with filters to edit their look and feel, and choose what happens when visitors click them.
Tip:
Great images don't just fill space, they add personality and focus to your site. Try unique animations to make your pages feel dynamic and alive.
Cropping an image
Crop your image so that only the part you want is displayed on your site. You can manually crop an image or use ratios.
Note:
While you can crop most types of images, it is not possible to crop GIFs.
To crop an image:
- Go to your editor.
- Click the relevant image on your page.
- Choose how you want to crop your image:
Crop an image manually
 on the action bar.
Crop an image using ratios
 or Landscape
  orientation to change the ratio options.
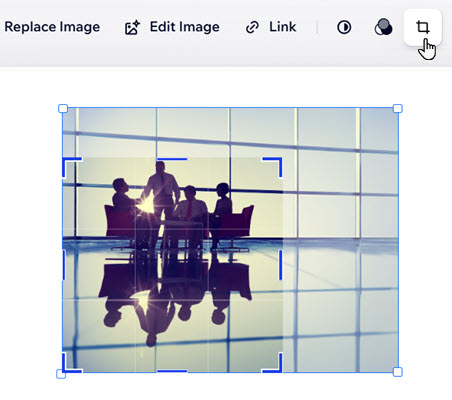
Resizing and rotating an image
Adjust your image size and orientation to fit perfectly with your page’s design.
To resize or rotate an image:
- Go to your editor.
- Click the relevant image on your page.
- Choose what to do:
Resize an image
Rotate an image
 next to the image.
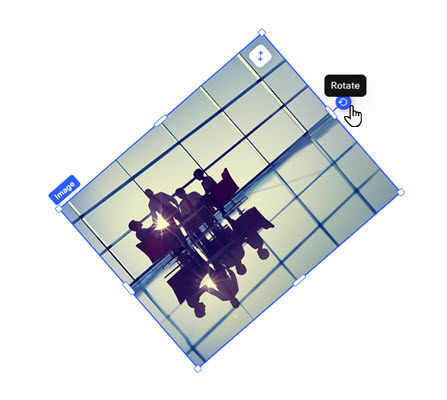
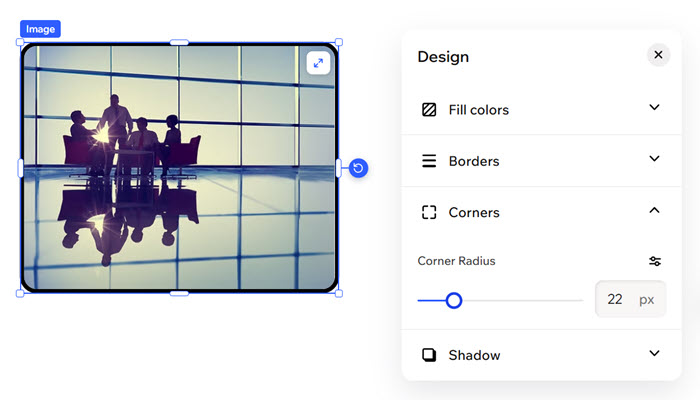
Designing an image
Enhance your image’s appearance to match your site’s style. Add borders, adjust corners, or choose a shadow effect so every image feels intentional and unique.
To design an image:
- Go to your editor.
- Click the relevant image on the page.
- Click the All design options icon
 in the action bar.
 - Design the image:
- Borders
 : Define the borders of your image so it stands out, choosing a color, width and style. Click the Edit all borders icon
  to design them all at once.
 - Corners
 : Make the corners of your image more square or round by dragging the slider under Radius. Click the Edit individual corners icon to design each corner separately.
 - Shadow
 : Apply inner and outer shadow to give the image an interesting 3D effect, setting the position, blurriness, color and more.
- Borders
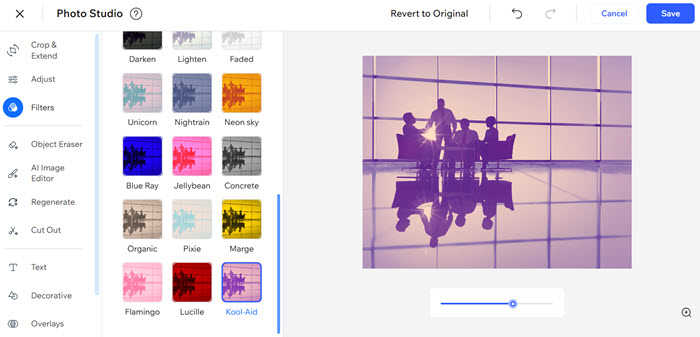
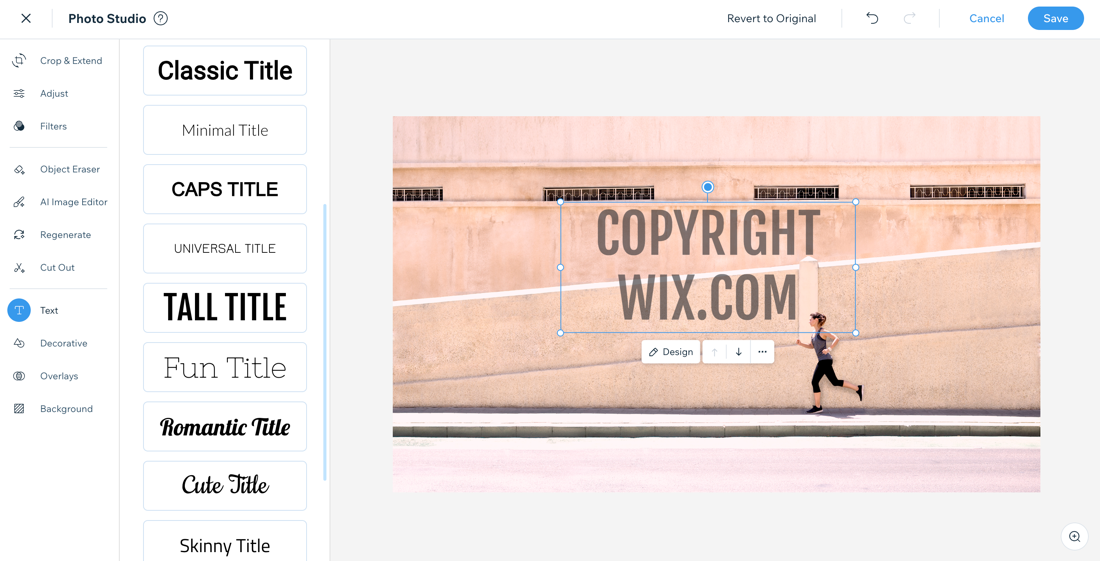
Editing an image with Wix Photo Studio
Use the Wix Photo Studio to create beautiful images without leaving the editor. The Photo Studio allows you to customize images that you've already uploaded and saves the newly edited version to the Media Manager.
There are a variety of editing options available, such as filters, rotation, and overlays, so you can revamp any image on the spot.
Tip:
You can also edit images directly from the Media Manager by clicking Crop & Edit under the thumbnail image.
To edit an image:
- Go to your editor.
- Click the relevant image on the page.
- Choose what to do:
- Apply a filter: Click the Filters icon
 on the action bar to choose from tons of stunning traditional filters like Sepia and Blur, or our unique filters such as Kennedy and Orca to add vibrant, visual appeal.
 - Adjust the image: Click the Adjust icon
 on the action bar to tweak your image and improve the quality with tools like brightness, contrast, and exposure.
 - Go to the Photo Studio: Click Edit Image to use the available options in Wix Photo Studio.
- Apply a filter: Click the Filters icon
- Click Save.
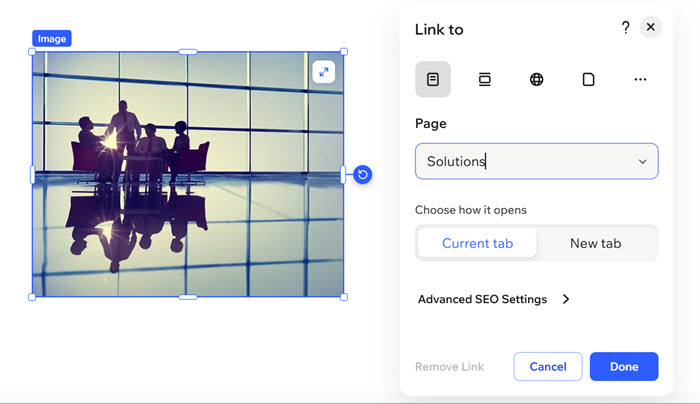
Adding a link to an image
Make your images interactive by linking them to another page, website, document, or popup. A clickable image guides visitors where you want them to go with ease.
To add a link to an image:
- Go to your editor.
- Click the relevant image on your page.
- Click the Link icon
 on the action bar.
 - Select the link type and enter the details.
- Enter the link details.
- Click Done.
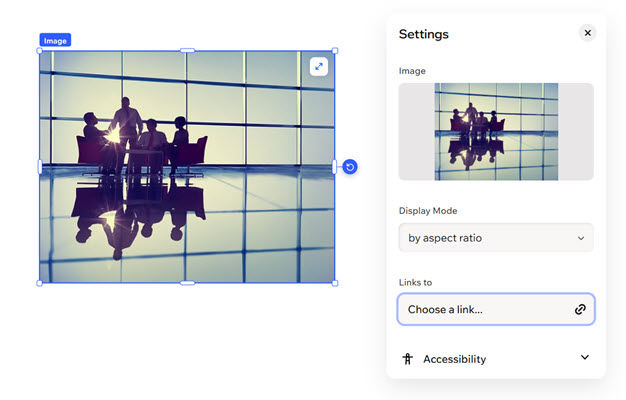
Customizing an image's settings
Fine-tune how your images appear and behave on your site. Control whether an image is decorative, set its display mode, add alt text for accessibility, or manage what happens when someone clicks it.
- Go to your editor.
- Click the relevant image on your page.
- Click the Settings icon
 on the action bar.
 - Choose what to customize:
- Display Mode: Choose how the image fits on the page: fill, fit, by aspect ratio.
- Links to: Choose what this image should link to (e.g. a site page, email, document).
- Accessibility: Click the dropdown and customize the following:
- Alt text: Enter a short description of the image to make it accessible to your visitors and help search engines (such as Google) understand it. Learn more about preparing images for accessibility.
- Set as decorative: Enable the toggle if the image does not contain important information for screen readers and it's only meant to decorate the page.
Note:
Currently, it is not possible to add alt text to images / galleries in bulk. If you would like to see this feature, you can vote for it here.
FAQs
Click a question below to learn more editing and customizing images:
How do I add a watermark?
How do I set my images to open in a popup when clicked?
 on the action bar.
 and click Popup.
Will any changes I make to my image be reflected in the Media Manager?
I am having issues with my images, are there any troubleshooting steps I can try?
How do I delete an image?
