Wix Harmony Editor: Adding and Customizing an Animation
4 min
In this article
- Adding animation to an element
- Customizing an animation
- Adding animations to your mobile site
This article refers to the new Wix Harmony Editor, released in January 2026. If you're unsure whether you’re using the Wix Harmony Editor or the Wix Editor, view more information here.
Bring your site to life with animations that add movement and excitement to your design. Choose from options like entrance, scroll, loop, and mouse effects, based on when you want the animation to appear.
Customize each animation to create the exact look you want, adjusting settings like distance, duration, and delay to match your vision. All mobile animations are designed for smaller screens, so your site looks impressive on any device.
Did you know?
You can apply different animations and effects to the same element.
Adding animation to an element
Add movement and energy to your site by applying animations to your elements. Choose from a variety of effects to bring each part of your page to life and create an experience your visitors will remember.
To add animation:
- Go to your editor.
- Click the relevant element.
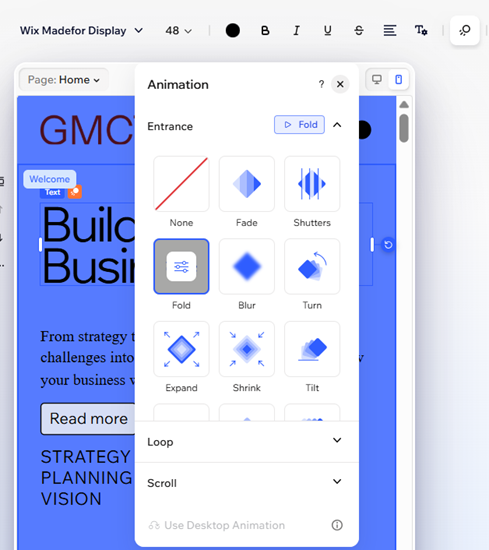
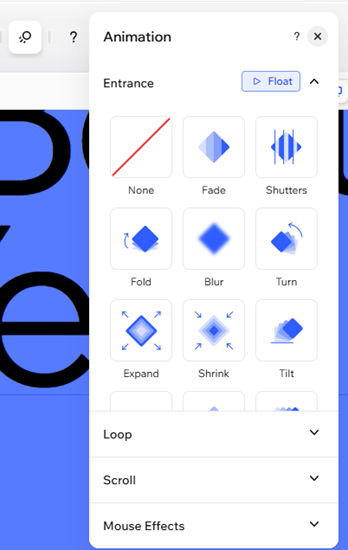
- Click the Animation icon
 on the action bar.
 - Select an animation from the available options.
- Entrance: The animation introduces an element to the screen – it only plays once, when the element first appears.
- Loop: The animation plays in a continuous loop.
- Scroll: The animation plays when a visitor gets closer to the element while scrolling up and down the page.
- Mouse Effects: The animation starts moving when the visitor's cursor hovers over the element.
Note:
Elements in your header will animate only once, during the first visit to the page.
Customizing an animation
Once you’ve added an animation to an element, personalize it to match your site’s look and feel. Adjust options like power, direction, and delay to create the exact effect you want and make your visitors feel engaged.
Note:
The available customization options depend on the animation you choose.
To customize the animation:
- Go to your editor.
- Select the relevant element.
- Click the Animation icon on the action bar.
- (If you haven't already) Select an animation from the available options.
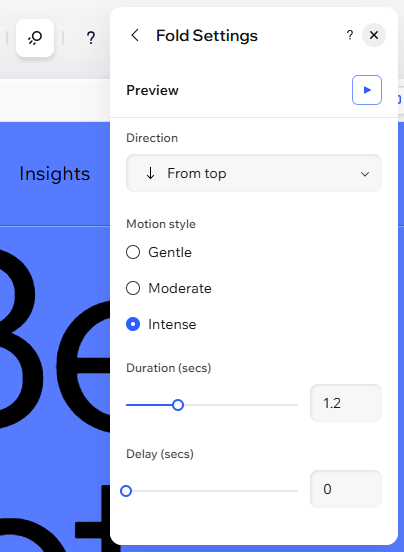
- Click Customize to adjust your chosen animation:
- Power: Click the drop-down to select how powerful the animation is when it plays.
- Direction: Select what direction the animation enters from (e.g. clockwise, from the right).
- Distance: Use the slider to change the distance between the effect's start and end point.
- Duration: Use the slider to adjust how long you want the animation to play for.
- Delay: Use the slider to increase or decrease the delay between the page loading and the animation beginning.
- Velocity: Drag the slider to change the speed of the effect – the lower the number, the faster the effect.
- Movement axis: Decide if the element moves horizontally, vertically or on both axes.
- Animation type: Choose from in, out or continuous animation type when scrolling.
- Pivot: Choose the reference point from which the element starts moving.
- Motion style: Select the intensity of the motion, such as gentle or moderate.
Adding animations to your mobile site
You can add animations to your mobile site, just like on desktop, so visitors enjoy an engaging experience on any device. Mobile animations are specially designed for smaller screens and resolutions, so everything fits perfectly without extra effort.
Note:
Animations you add on desktop will also appear on your mobile site, but you can choose a different animation for mobile (or disable it) without changing the animation on desktop.
To add animation on mobile:
- Go to your editor.
- Click the Mobile icon
 in the top right corner of the page.
 - Click the relevant element.
- Click the Animation icon
 on the action bar.
 - Select an animation from the available options.