Wix Media: Using the Wix Photo Studio Tools
15 min
In this article
- Crop and Extend
- Adjust
- Filters
- Object Eraser
- AI Image Editor
- Regenerate
- Cut Out
- Text
- Decorative
- Overlays
- Background
Important:
Not all Photo Studio Tools are available to all users yet.
With the Wix Photo Studio, you can completely transform your images and tell a new story.
Get creative and overhaul your image in minutes. With our abundance of filters, enhancement tools, cropping and decorative options, you can alter the mood and context of any image.
Which images can I edit?
About our AI features:
- All AI features (AI Extend, Object Eraser, AI Image Editor, and Regenerate Image) are currently in Beta.
- You can generate a maximum of 1000 images total using the AI tools.
- If a prompt violates Wix's AI Terms of Service, the image will not be generated.
Crop and Extend
Crop your image to display just the section you want. Then resize it to your liking. Choose from predefined or custom sizes and angles, and create mirror images using the Flip tool.
Additionally, you can use the AI Extend option to extend your image in any direction and AI will fill in the details for you.
To crop or extend an image:
- Access the Photo Studio.
- Click Crop & Extend on the left.
- Choose to crop or extend your image using the options available.
Crop
 or landscape
  orientation to change the ratio options.
AI Extend
Adjust
Tweak your images with our selection of image adjustment tools, including Brightness, Color Saturation and Exposure. Play with the adjustment tools to achieve the perfect finish.
To adjust an image:
- Access the Photo Studio.
- Click Adjust on the left.
- (Optional) Auto Enhance: Click the toggle below the image to automatically improve the image.
- Adjust your image by dragging the slider next to the relevant option:
- Brightness: Increase to remove the shadowy areas in your image, and decrease to dim better lit areas.
- Contrast: Increase to expand the range between the darkest and lightest parts of your image, and decrease to give your image a flatter, matte finish.
- Highlights: Increase to brighten the light areas of the image, and decrease to darken the light areas of the image.
- Shadows: Increase to brighten the dark areas of the image, and decrease to deepen the dark areas of the image.
- Color Saturation: Increase to add vibrancy to each color in your image, and decrease to lean colors towards gray.
- Temperature: Increase to make your image appear warmer, and decrease to make your image appear cooler.
- Exposure: Increase to add more light to your images, and decrease to reduce the amount of light in the image.
- Sharpness: Increase to make details pop, and decrease to make the image soft or fuzzy.
- Vignette: Increase to fade the image to a black background, decrease to fade the image to a white background.
- Grain: Increase to add a grainy texture effect to your image.
- Tint: Click the color box to choose a tint color, then drag the slider to change the strength of the tint.
- Click Save.
Tip:
You can quickly improve an image's quality (resolution and colors) all at once. To do so, go to your editor and click an image. Then, click the AI Tools icon  and select Optimize image.
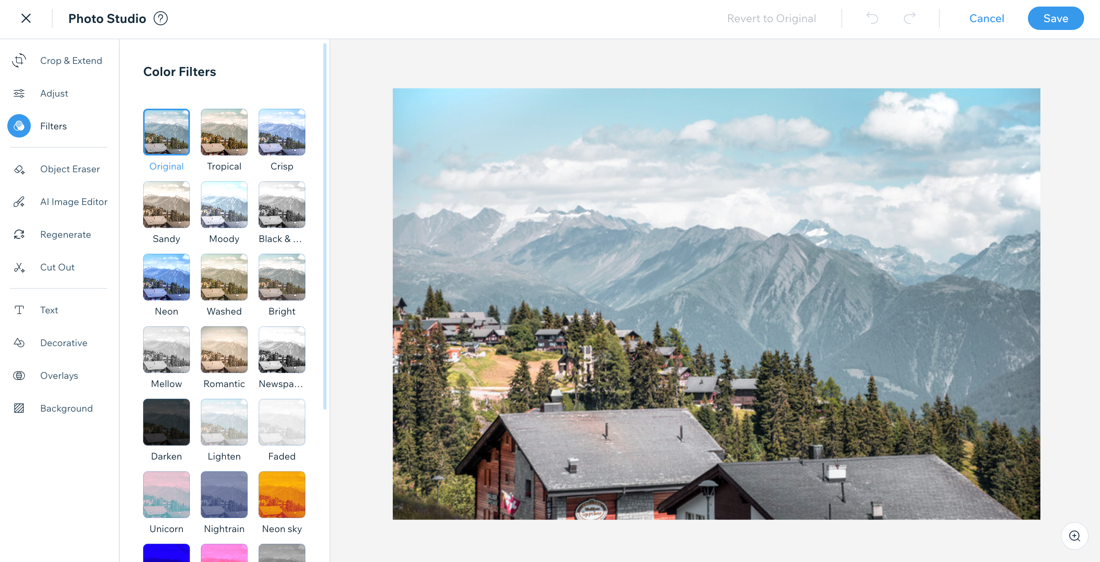
and select Optimize image.Filters
Transform your images with professional filters. You can use the same filter on all of your images to keep a consistent theme throughout your site. Or use different filters to enhance specific images so that they really stand out.
To apply filters to an image:
- Access the Photo Studio.
- Click Filters on the left.
- Click any filter to apply it to your image. Drag the slider below your image to adjust the strength of the filter.
- Click Save.
Object Eraser
Remove unwanted objects from an image with the eraser tool to refine your site's media. Make the brush size bigger to cover large areas, or shrink it to remove finer details as needed.
To erase an object from an image:
- Access the Photo Studio.
- Click Object Eraser on the left.
- (Optional) Drag the slider to make the brush bigger or smaller.
- Brush over the object you want to erase.
- Click Erase Objects.
- Click Save to save the image to your Media Manager.
Tip:
If you are editing an image with a transparent background, you may need to remove the image background a second time after you have cut out the desired section of your image. You can remove this background using the Cut Out feature.
AI Image Editor
Use this AI tool to create unique images in the style you want. Brush over an area you'd like to change, and enter a prompt to replace the original content with AI-generated media. For example, replace a dull sky over mountains with a fiery sunset and create stand out imagery for your site.
To edit a photo using AI:
- Access the Photo Studio.
- Click AI Image Editor on the left.
- (Optional) Drag the slider to make the brush bigger or smaller.
- Brush over the area you want to replace.
- Enter your prompt in the field.
- Click Edit Image.
- Click Save to save the image to your Media Manager.

Tip:
You can undo any changes made to the image by clicking Undo  or return to the original image by clicking Revert to Original.
or return to the original image by clicking Revert to Original.Regenerate
Use AI to regenerate existing images, so you don't have to search for similar images yourself. Select an image and have AI analyze it to create a prompt. Then, use the prompt and choose a style to generate a new image.
- Access the Photo Studio.
- Click Regenerate on the left.
- Click Analyze Image.
- (Optional) Edit the prompt yourself or click Regenerate prompt to let AI update the prompt for you.
- (Optional) Choose a style for the new image.
- Click Regenerate Image.
- Once you're satisfied with the image, click Save at the top right.
Want to edit the image further?
Once you save the regenerated image you can edit it further. Go to your editor and click the image. Click Edit Image or go to the Photo Studio and select it from your Site Files. Make the necessary edits and click Save.
Cut Out
Remove the background of any image, so you can reuse the image in different contexts. While cutting out the background, use the available tools to refine the edges of the image. You can then choose to leave the background of the image as transparent, or replace it with a color, texture, or another image.
To cut out an image:
- Access the Photo Studio.
- Click Cut Out on the left.
- Click Auto Cut Out.
- Click Refine Cut Out and edit the image using the following options:
- Restore: Restore parts of the cut-out that you removed.
- Erase: Edit the image to remove parts of the cut-out.
- Fix Edges: Select the brush size, stroke and opacity to make more accurate edits.
- Click Apply.
- (Optional) Click the square next to Background Color to add a background to the image.
- Click Save to save the new image in your Media Manager.
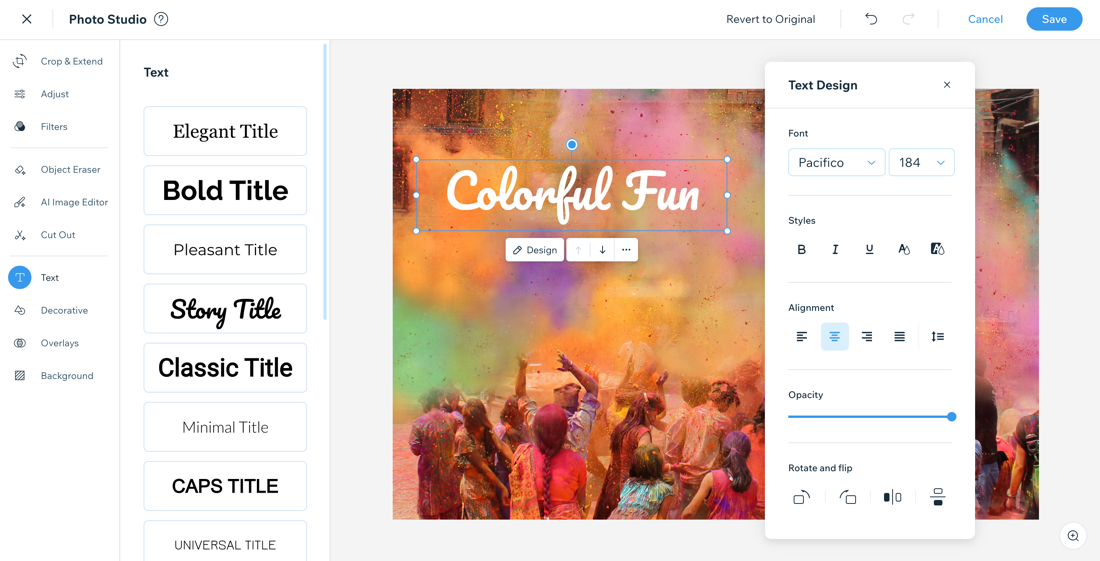
Text
Add text boxes to your images, customize them using the formatting options, and then add the image with the text directly onto your site. This is a great way to add captions, inspirational quotes, or even watermarks to your images.
To add text to an image:
- Access the Photo Studio.
- Click Text on the left.
- Click a text style to add it to your image.
- Click Design.
- Customize your text using the options:
- Font: Click the relevant drop-down menu to change your font and font size.
- Styles: Format your text using the options: Bold, Italic or Underline and choose your text color.
- Alignment: Choose your text alignment: Left, Center, Right or Justify and adjust your line spacing.
- Opacity: Increase or decrease the transparency of your text.
- Rotate and flip: Change your text orientation: Rotate left
 , Rotate right
  , Flip horizontally
  or Flip vertically
  .
.
- Click Save.
Did you know?
- If you have multiple text boxes on an image, you can use the Move Forward / Move Backward arrows to move your text forward and backward through the text layers.
- Duplicate text (including its formatting, size etc.) by clicking the More Actions icon
 and selecting Duplicate.
Decorative
Add decorative elements to your images to decorate and personalize your images. Enhance your personal branding, highlight a promotion, or add a touch of creativity to make the visual stand out.
To add decorative elements to an image:
- Access the Photo Studio.
- Click Decorative on the left.
- Choose what to do:
- Upload an image: Click + Add Elements or the + button to add your own image from the Media Manager.
- Select an element from a category: Choose from basic shapes, icons, and vector art.
Tip: Click See More to select a media file from the Media Manager.
- Select the new element and click Design.
- Customize the element using the following options:
- Color: Choose a color for a basic shape.
- Opacity: Increase or decrease the transparency of the element.
- Rotate and flip: Change the orientation: Rotate left , Rotate right , Flip horizontally or Flip vertically .
- Click Save.
Overlays
Overlay a wide range of subtle visual effects onto your image. Like filters, these overlays can change the tone and feeling of your image. Drag the overlay to your preferred location and adjust its size using the drag handles.
To add an overlay to an image:
- Access the Photo Studio.
- Click Overlays on the left.
- Select the new overlay element and click Design.
- Customize your overlay using the following options:
- Opacity: Increase or decrease the intensity of the overlay.
- Rotate and flip: Choose how to position the overlay: Rotate left , Rotate right , Flip horizontally or Flip vertically .
- Click Save to save the image to your Media Manager.
Background
After cutting out your image, you can replace the background. Choose from a range of colors, textures, stages and animations to make your image pop.
To add a background to an image:
- Access the Photo Studio.
- Click Background on the left.
- Click a background to add it to your image.
Tip: Click See More next to a category to view more of that type of background. - (Optional) Customize your background:
- Hover over your image in the Photo Studio and click anywhere within the blue frame.
- Click Design.
- Customize your background using the following options:
- Opacity: Increase or decrease the transparency of your background.
- Rotate and flip: Rotate your background: Rotate left , Rotate right , Flip horizontally or Flip vertically .
- Refine Cut Out: Refine the edges of the image.
- Click Save to save the image to your Media Manager.