Book appointments for your walk-in clients and accept payment using the Wix app as a point of sale on your mobile device. You can charge for multiple appointments as well as Wix Stores products in the same order.
You can collect payments in several ways, including cash, card reader, manual card entry, and Tap to Pay (available in the US and UK only).
Step 1 | Add items to the cart
Start by booking the first appointment and adding it to the cart. Once that's done, you can proceed to checkout or you can choose to book additional services, add store products, or add a custom charge.
To add items to the cart:
- Go to your site in the Wix app.
- Tap Manage
 at the bottom.
 - Tap Getting Paid and select Point of Sale.
- Select what you want to add to the cart:
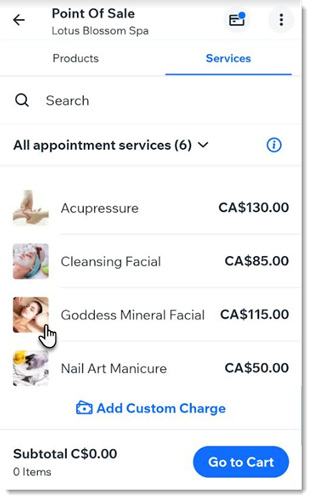
Add Wix Bookings services
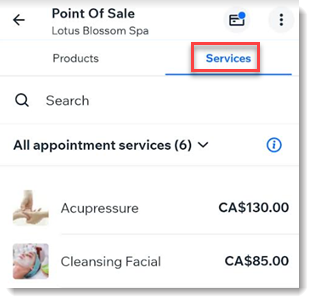
- (If you also use Wix Stores) Tap Services.
- Tap to select the relevant service.
- Add the appointment details.
- (Optional) Tap the service price to edit it.
Tip: This is great for offering custom or discounted pricing for services if your clients book multiple services at once. You can also add a discount to the whole order (see below). - (Optional) Tap the Notify client with an email checkbox to send a booking confirmation via email.
- Tap Add to Cart.
- (Optional) Book additional sessions.
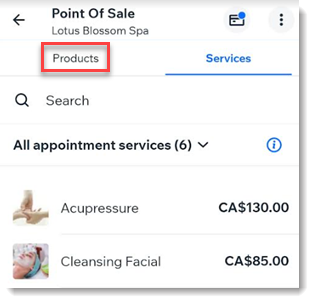
- Tap the Products tab.
- Locate the products you want to add to cart using any of these methods:
- Enter a search term.
- Scan the product's barcode.
Note: To work your SKU must be the barcode number. - Tap All Products to search within a category.
- Scroll through your products.
- Tap to select the products and variants you want to sell.
- Tap Go to Cart.
- Add a custom amount to the sale:
- Tap Add Custom Charge.
- Enter the amount, including cents.
- (Optional) Tap Add Note and enter information about the sale.
Tip: Notes can only be viewed by customers on invoices. - Tap Apply.
- Tap Go to Cart.
Step 2 | (Optional) Add a discount or redeem a coupon
You can offer customers a price reduction in two ways. If you hae previously
created coupons, you can allow customers to redeem a coupon at checkout. Alternatively, you can manually enter any discount percentage you choose and apply it to the sale.
To add a discount or coupon:
Let a customer redeem a coupon
- Tap Redeem a Coupon.
- Enter the code or tap Choose from the coupon list and select it.
- Tap Done.
- Tap Apply.
- Tap Add a Discount.
- Select a discount option:
- Percentage discount: Tap %, enter the percentage, and tap Apply.
- Price discount: Tap $, enter the amount and tap Apply.
Step 3 | Add a customer
Assign an existing customer to the sale or add a new one.
To add a customer:
- Tap the More Actions icon
 at the top right.
 - Select Add Customer.
- Add an existing customer or add a new one:
- Select an existing customer.
- Tap + Add New Contact to enter the new customer's details, then tap Save.
Step 4 | Process payment
Now you can proceed to checkout and select how you want to be paid.
To collect payment for the order:
- Tap Charge.
- Choose the relevant payment method:
- Tap Cash.
- Select an option:
- Enter the amount you received and tap Accept Cash.
- Select a preset cash amount.
- Give your customer the change.
Tip: The amount appears on the screen. - (Optional) Tap Add a note at the top right to record details about the sale.
Note: The note can be up to 100 characters long. - (Optional) Tap Save.
- Choose the relevant receipt option:
- Send a receipt:
- Tap Send Receipt.
- Select how you send the receipt:
- Print receipt: Tap Print receipt. If you have not set up your thermal printer, learn how to set up receipt printing for Mobile POS.
- Email receipt: Tap Email Receipt, make sure the customer details are correct, and tap Send Receipt.
- Text receipt: Tap Text Receipt, enter the phone number, including country code, and tap Text Receipt. (US & Canada only)
- Do not send a receipt: Tap No Receipt.
Accept credit/debit card payment using a
card reader via Wix Payments.
- Tap Card.
- If prompted, select Bluetooth card reader.
- Let the customer swipe, insert, or tap their credit card.
- (Optional) Tap Add a note at the top right to record details about the sale.
Note: The note can be up to 100 characters long. - (Optional) Tap Save.
- Choose the relevant receipt option:
- Send a receipt:
- Tap Send Receipt.
- Select how you send the receipt:
- Print receipt: Tap Print receipt. If you have not set up your thermal printer, learn how to set up receipt printing for Mobile POS.
- Email receipt: Tap Email Receipt, make sure the customer details are correct, and tap Send Receipt.
- Text receipt: Tap Text Receipt, enter the phone number, including country code, and tap Text Receipt. (US & Canada only)
- Do not send a receipt: Tap No Receipt.
Important:
- Tap Manual card entry.
- Tap Go to Checkout.
- Enter all the credit card details and tap Next.
- Enter the customer's zip code / postal code.
- Tap Confirm & Pay.
- (Optional) Tap Add a note at the top right to record details about the sale.
Note: The note can be up to 100 characters long. - (Optional) Tap Save.
- Choose the relevant receipt option:
- Send a receipt:
- Tap Send Receipt.
- Select how you send the receipt:
- Print receipt: Tap Print receipt. If you have not set up your thermal printer, learn how to set up receipt printing for Mobile POS.
- Email receipt: Tap Email Receipt, make sure the customer details are correct, and tap Send Receipt.
- Text receipt: Tap Text Receipt, enter the phone number, including country code, and tap Text Receipt. (US & Canada only)
- Do not send a receipt: Tap No Receipt.
(US and UK only) Accept Tap to Pay
After
setting up Tap to Pay, you can use your phone as a card reader.
To accept payment using Tap to Pay:
- Select Card.
- If prompted, tap to select the relevant Tip amount, or tap No Tip.
Note: Learn more about tipping in the Wix app. - If prompted, select Tap to Pay.
- Let the customer tap their credit card on your mobile device.
- (Optional) Tap Add a note at the top right to record details about the sale.
Note: The note can be up to 100 characters long. - (Optional) Tap Save.
- Choose the relevant receipt option:
- Send a receipt:
- Tap Send Receipt.
- Select how you send the receipt:
- Print receipt: Tap Print receipt. If you have not set up your thermal printer, learn how to set up receipt printing for Mobile POS.
- Email receipt: Tap Email Receipt, make sure the customer details are correct, and tap Send Receipt.
- Text receipt: Tap Text Receipt, enter the phone number, including country code, and tap Text Receipt. (US & Canada only)
- Do not send a receipt: Tap No Receipt.
Create a pay link for unpaid orders and send it to your client via email or as a QR code. This allows customers to pay online using any of your payment methods.
To accept payment using pay links:
- Tap Charge with pay link.
- Set up your pay link:
- Link name and price: Enter a name for the link and the amount to charge your client.
- (Optional) Add details:
- Description: Include a short description for the payment (e.g. Order #10023 payment).
- Set an expiration date: Enable the toggle and select when the link expires.
- Change the contact: Tap the client’s name to remove them. Tap + Add Contact to select or create a new one.
- Tap Preview and Share.
- Choose how to send your link:
- Copy Link: Copy the link to your clipboard and send it directly to your client.
- Show QR Code: Generate a QR code your client can scan (take a screenshot to share it).
- Send: Email the link to your client.
- Share via: Use your phone's native sharing options (e.g. WhatsApp, Messenger).
- Charge in Person: Accept payments directly from your client in person.
Tip: If the price of the sale is worth more than the value of the card, customers can pay for the remaining cost using any other payment method.
To accept gift card payment:
- Tap Gift card.
- Enter your customer's gift card code or scan their physical gift card and tap Apply.
Tip: Your customer's remaining balance appears at the top. - Tap Complete Sale.
- (Optional) Tap Add a note at the top right to record details about the sale.
Note: The note can be up to 100 characters long. - (Optional) Tap Save.
- Choose the relevant receipt option:
- Send a receipt:
- Tap Send Receipt.
- Select how you send the receipt:
- Print receipt: Tap Print receipt. If you have not set up your thermal printer, learn how to set up receipt printing for Mobile POS.
- Email receipt: Tap Email Receipt, make sure the customer details are correct, and tap Send Receipt.
- Text receipt: Tap Text Receipt, enter the phone number, including country code, and tap Text Receipt. (US & Canada only)
- Do not send a receipt: Tap No Receipt.
Using split payments, customers can pay using more than one payment method (e.g. they can pay using 2 credit cards or a combination of cash and credit card).
To process split payments:
- Tap Split Payment.
- Enter the first payment amount.
- Tap Continue.
- Select a payment method (e.g. cash) and complete the first part of the payment.
- Tap Continue.
Tip: You can also tap the More Actions icon  and then Mark as Partially Paid to collect the 2nd payment later.
 - (Optional) Edit the second payment amount.
Tip: You can split the balance owed further. - Tap Continue.
- Select a payment method (e.g. card) and complete the payment.
- Tap Continue.
- (Optional) Tap Add a note at the top right to record details about the sale.
Note: The note can be up to 100 characters long. - (Optional) Tap Save.
- Choose the relevant receipt option:
- Send a receipt:
- Tap Send Receipt.
- Select how you send the receipt:
- Print receipt: Tap Print receipt. If you have not set up your thermal printer, learn how to set up receipt printing for Mobile POS.
- Email receipt: Tap Email Receipt, make sure the customer details are correct, and tap Send Receipt.
- Text receipt: Tap Text Receipt, enter the phone number, including country code, and tap Text Receipt. (US & Canada only)
- Do not send a receipt: Tap No Receipt.
Save order and charge later
With this option, you can create an unpaid order which is added to the Orders tab. When you're ready, you can accept payment on mobile, from the Wix dashboard, or at a POS Register.
To save your order, simply tap Save order and charge later.
FAQs
Click below to learn more about booking services and accepting payments in the Wix app.
What payment method do I need to connect to be able to process card payments?
What types of services can I book and collect payment for?
How can I use a mobile POS to collect payment for appointments, classes, and courses that were already booked?
How can I remove items I added to the cart?
You can tap an item to remove it or change the quantity. If you want to remove all items from the cart, tap the
More Actions icon

and then
Clear Cart.
How can I send (or resend) my client a receipt at a later date?
You can send (or resend) a receipt later from the Orders tab.
- Tap Manage at the bottom.
- Select Orders.
- Select the relevant order.
- Tap the More Actions icon
 at the top right.
 - Selecting Email receipt.
Can I customize receipts?
Are there other Mobile POS options available for Wix Bookings?
You can also charge clients for services using a point of sale in the following ways: