


- Using the Wix Email Marketing Campaign Editor
Using the Wix Email Marketing Campaign Editor
In this article
- Adding and editing elements in your campaign
- Moving, cropping, duplicating and deleting elements
- Customizing the theme, backgrounds, and text direction
Learn how to use your email campaign editor to create the most engaging newsletters. Select elements in your campaign to edit them. From the side bar on the left, you can add elements, choose a theme, change the backgrounds and more.
Tips:
- Preview and test your email campaign to make sure it is perfect before you send it.
- Upgrade email marketing to remove Wix branding, send more emails per month and more.
Adding and editing elements in your campaign
Select the existing elements of your email campaign on the right of your campaign editor to customize them. Then edit the elements on the left where you can also add several types of new elements to your campaign.
To add or edit elements:
- Select the element you want to edit or click Add and choose an element.
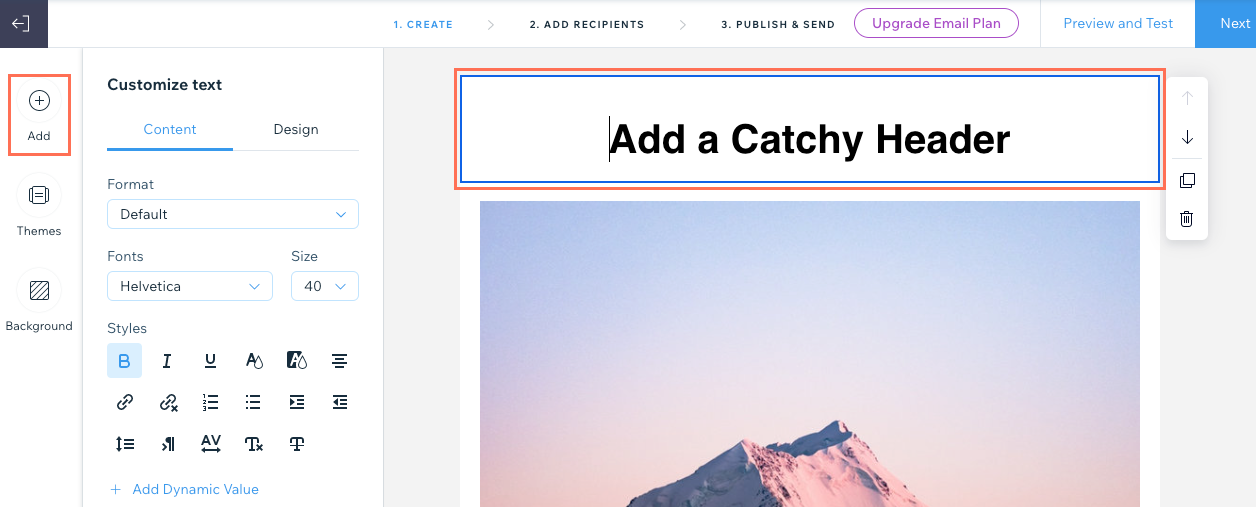
- Customize the element to your liking. Click below to learn how to customize each element:
Text
Add or edit text to tell people what you want them to know.
- Enter the text you want to display in the element on the right.
Tip: If you want to format specific text only, instead of all the text in the element, use your cursor to highlight the relevant text. - Click the relevant tab on the left to edit the Content or Design:
- Content: Use the available options to edit the format, font, size, style or add dynamic values.
- Design: Use the available options to edit the background fill color, layout, border width and color, or the padding of the element.

- Click Apply.
To add text copied from an external source:
- Highlight the relevant text to be copied from the original source.
- Press Ctrl + C (on Mac press Command + C).
- Double-click the text box in your email campaign, then click where you want the text to be pasted and press Ctrl + Shift + V (on Mac press Command + Shift + V).
Image
Browse the Free Wix collections or add your own eye-catching images.
- (If adding a new image element) Select the image you want to add and click Add to Page. You can choose an option on the left to upload your own media or explore other media sources.
- Select the relevant option:
- Change Image: Replace the selected image with a different one.
- Edit: Use the Wix Photo Studio tools to enhance and improve the image.
- Add a link: Enable the toggle and enter the URL you want to link the image to.
- Design: Use the sliders to adjust the padding around the image.

- Click Apply.
Note: Images you add automatically resize to a 700 pixel width. Smaller images keep their original size.
Button
Add a call-to-action that sends people where you want them to go.
- Click the relevant tab on the left to edit the Content or Design:
- Content: Edit the following details:
- Button text: Enter the text that displays on the button.
- What does it connect to?: Choose what happens when viewers click the button:
- Regular URL: A new tab opens with the address you enter in the Enter a URL field.
- Document: A document downloads to the browser. Click Choose File, select the relevant document and click Add to Page.
- Standalone form: A custom form you can use to collect info or feedback opens in a new tab. Select the form you want to use or click + Create Form to create a new form.
- Design: Customize the font, text color, fill color, border width and color, corner shape, alignment, and padding.

- Content: Edit the following details:
- Click Apply.
Divider
Add a decorative line to break up the sections in your email.
- Select the divider you want to use under the Format tab.

- Click the Design tab and set the divider color and padding.
- Click Apply.
HTML
Embed HTML code to include additional elements in your email.
- Enter your HTML code in the provided field.
Note: This component does not support Javascript as well as some HTML tags and attributes. Unsupported code will be removed. Learn more about adding HTML to your email campaign. - Click Apply.
Columns
Display your content in columns to break up the layout.
- Under Number of columns, select the total columns you want to use.
- Under Choose a preset layout, select the layout you want to use and click Customize.
- Choose the Columns ratio (%) you want to use.

- (Optional) Click the Stack columns on mobile toggle to choose how the columns appear on mobile:
- Enabled: On mobile, the columns are displayed at full width and ordered from top to bottom.
- Disabled: On mobile, the columns display next to each other as they do on desktop.
- Under Padding, set the padding of the entire column element.
- Under Column spacing, set the horizontal and vertical spacing between the columns.
- Click Apply.
- Click the relevant images, text, and buttons from the columns on the right to edit them.
Tip: Check how your columns appear on mobile by clicking
Preview and Test at the top right. Then select the Mobile icon
 at the top.
at the top.
Logo
Help people recognize your brand by adding your own logo. When you add a logo to your campaign, it is automatically added to all your future campaigns.
Tips:
- This option adds your logo to the top of your email campaign only. To add your logo in a different location, use the "Image" element instead.
- Click Get a Logo to use the Wix Logo Maker to design your own professional logo.
- Add your logo:
- Click Change Image and select the image you want to use for your logo.
Tip: Click + Upload Media if you need to upload your logo. - Click Add to Page.
- Click Change Image and select the image you want to use for your logo.
- (Optional) Click Edit to use the Wix Photo Studio tools to modify the image.
- (Optional) Click the Add a link toggle to link your logo, then enter the URL you want to link it to.
- Click the Design tab and customize the design:
- Size: Select the size of your logo: Small, Medium, or Large.
- Alignment: Choose how you want the logo to align: Left, Center, or Right.
- Show background: Click the toggle to add a background color and select a background layout option.
- Padding: Use the sliders to set the element's padding.

- Click Apply.
Video
Lively up your campaign with your own video or choose one from YouTube.
- Choose an option:
- My video uploads: Upload your own video:
- Click Choose File and select the video you want to add.
Tip: Click + Upload Media if you need to upload the video. - Click Add to Page.
- Click Choose File and select the video you want to add.
- YouTube: Show a video from YouTube. Enter the video URL in the field.
Note: When adding your own video from YouTube, make sure the video settings in YouTube are set to Public and the Allow Embedding box is checked.
- My video uploads: Upload your own video:
- Click Apply.
Notes:
- Clicking a video in an email campaign via email opens the video in a new browser window.
- If you're using Wix Video, you can create email campaigns directly from your Video Library.
Subscribe
Add a subscription form to grow your mailing list.
- Edit the information in the Content tab:
- Title: Enter the title that displays at the top of the subscribe element.
- Button text: Enter the text that displays on the "Subscribe" button.
- Placeholder text: Enter the text that appears in the field before viewers enter their email (e.g. "Add your email...").
- Success message: Enter the message subscribers see when they've been successfully added to your contacts.
- Error message: Enter the error message subscribers see if the email address they entered is not in the correct format (e.g. "example@email.com").
- Require consent: (Recommended) Enable the toggle to add a checkbox that subscribers must select before subscribing. Learn more about requiring consent for your subscribe form.

- Click the Design tab.
- Under Text, set the font and color of the text.
- Under Button, set the font, text color, fill color, border width, and border color.
- Click Apply.
Tip: Learn how to
create a privacy policy for subscribers to agree to when you require consent.
Link
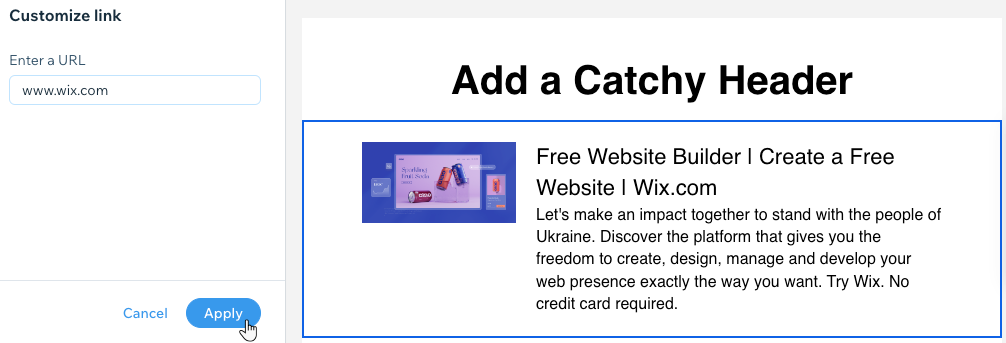
Add a link that shows a preview of a webpage, including the page's title, description and image.
- Enter the URL of the link in the field.
- Click Apply.
Music
Let your fans listen to, share, and buy your music. You must
add Wix Music to your site to see this option.
- Click the drop-down and select the playlist you want to display.
- Choose a theme: Light or Dark.
Social
Connect your campaign to all your social channels so people can easily follow you.
- Choose what you want to display from the Content tab:
- Title: Enter the title that displays at the top of the social element.
- Social Media: Enable the toggle next to each social network you want to include. Then enter the URLs of your profiles for each social network.

- Click the Design tab and edit the font text color and icon size.
- Click Apply.
Footer
Customize the footer of your email to show your address, phone number, social networks and more.
- Enable the toggle next to each element you want to display on the footer:
- Show Wix branding: A Wix branding banner appears at the bottom of the footer. Upgrade to an email marketing plan to remove Wix branding from emails.
- Show address: Enter your street address in the field.
- Show phone number: Enter your phone number in the field.
- Add social share: Enter the text you want to appear above the social share icons. Then click the checkmark next to each social sharing option you want to display.
- Add a link to your site: Include a link to your site. Enter the link text and the URL you want the text to link to.
- Invite mobile members: Add a link to your members app and grow your mobile community. Enter the invitation text and link text.
- Click Apply.
Note:
The option to unsubscribe will be added to the bottom of your email campaign. The unsubscribe text is written in the language of your Wix account. To change the language,
change your account language. If you change the language, the unsubscribe text changes for future campaigns only. All past campaigns still show the original language.
Moving, cropping, duplicating and deleting elements
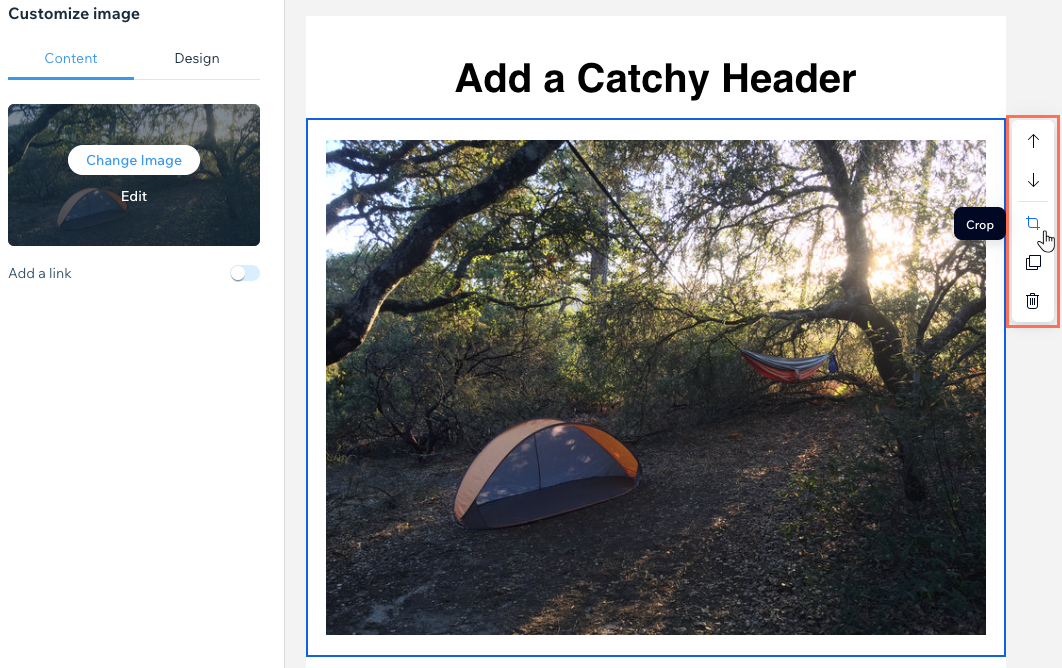
After selecting an element on your email campaign, use the toolbar on the right to manage the element. You can reorder, duplicate and delete most types of elements. You can also crop images so they fit your email campaign perfectly.
Show me how
- Select the relevant element in your email campaign.
- Choose an option from the toolbar on the right:
- Move up / down: Select the relevant arrow to move the element up or down.
- Crop: Go to the Photo Studio to crop or your image or edit it using the available tools.
- Duplicate: Create a copy of the element.
- Delete: Click Confirm Delete to permanently remove the element.
Customizing the theme, backgrounds, and text direction
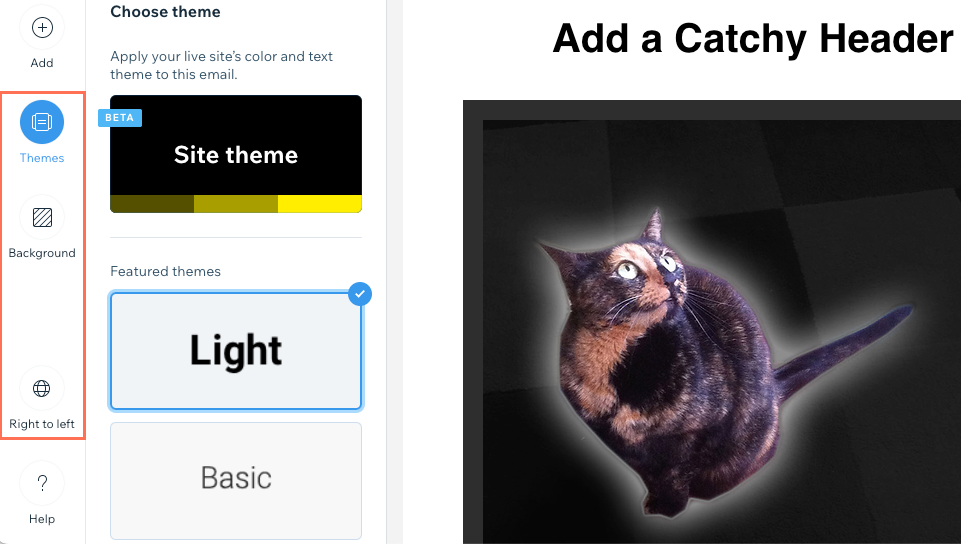
Change the template's color and text theme, customize the inner and outer backgrounds, or switch to a right to left text direction.
Click an option below to learn more:
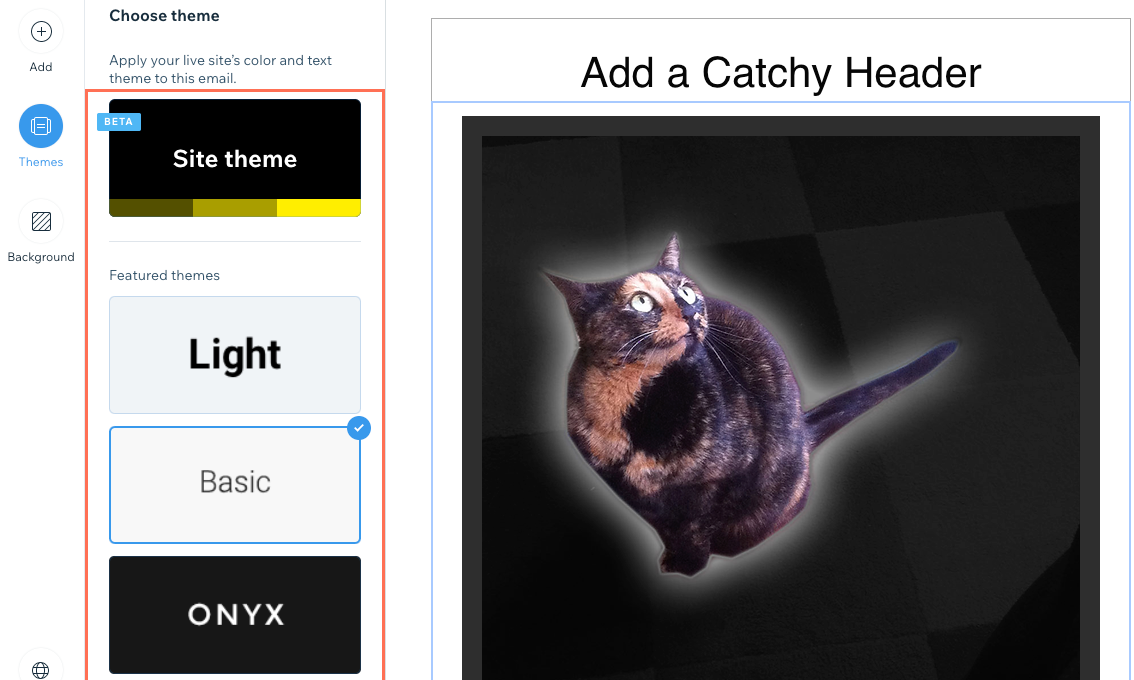
Themes
Choose a theme for your campaign to change the template's color and text in one click.
- Click Themes on the left.
- Choose a theme to change the template's general color and text formatting.
Background
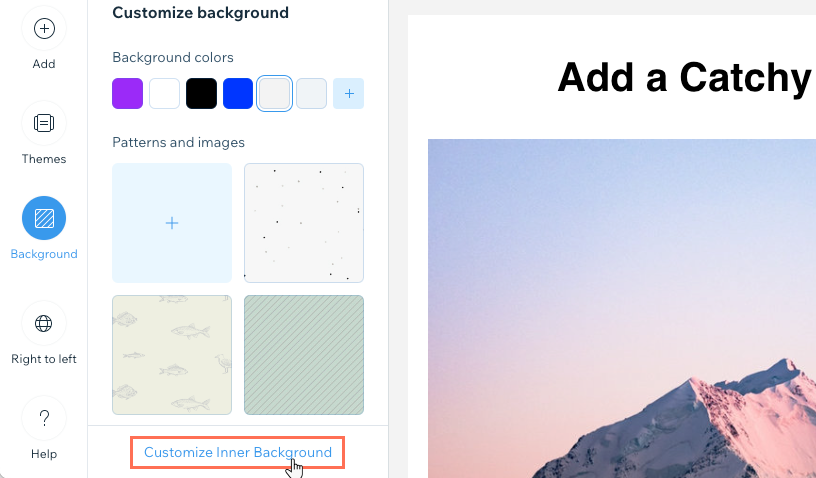
- Click Background on the left.
- Choose what you want to edit:
- Outer background: Choose whether to show background colors or patterns and images in the outer background:
- Background colors: Select the relevant color or click the Pick Color icon
 to choose a custom color.
 - Patterns and images: Select the relevant pattern / image or click the Add icon to choose another pattern or image. Then click the Settings icon
 to choose the color behind the image or to have the image repeat itself across the background.
Note: The recommended image size for outer backgrounds is 1920 x 1090 pixels. We recommend using background images for decorative purposes only, as the entire image may not be visible when viewing in an email client.
- Background colors: Select the relevant color or click the Pick Color icon
- Inner background: Customize the background of the middle portion of your email campaign, which is 700 pixels wide. Click Customize Inner Background at the bottom and customize the background color, border width and border color.
- Outer background: Choose whether to show background colors or patterns and images in the outer background:
Right to left
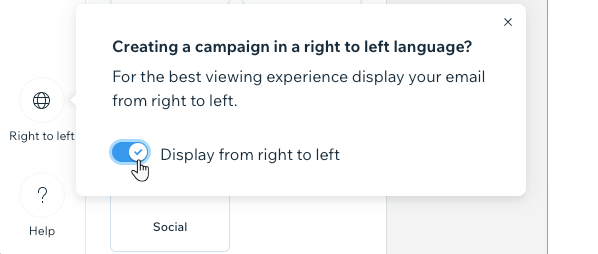
If you're writing in a left to right language, you can display your campaign in the same direction.
- Click Right to left at the bottom left.
- Click the toggle to display from right to left.
Did this help?
|
