

Email Marketing: Using Personalized Content in Your Campaigns
In this article
- Adding personalized content to your campaign's text
- Adding personalized content to your campaign's subject line
- FAQs
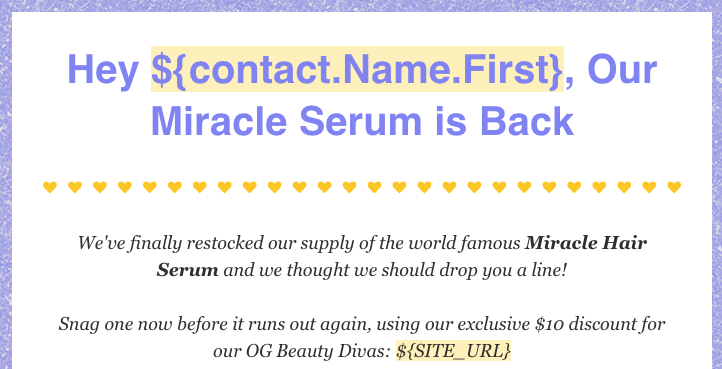
Personalize your email campaigns by using dynamic values. Dynamic values are placeholders in your email that will insert your recipient's personalized information, like a first or last name. Adding this personal touch to a campaign significantly increases interest in your email.
Use personalized content in both the campaign's text and subject line to best engage your recipients. You can also add fallback text so your recipient won't see a blank space if the data is not available.
Note:
Personalized content doesn't appear in
test email campaigns. Your recipients will still see them when you send the campaign.
Adding personalized content to your campaign's text
You can include personalized content in any of your email campaign's text elements. Add your recipient's name, email address and/or your site's URL to make the content personal and exciting to read.
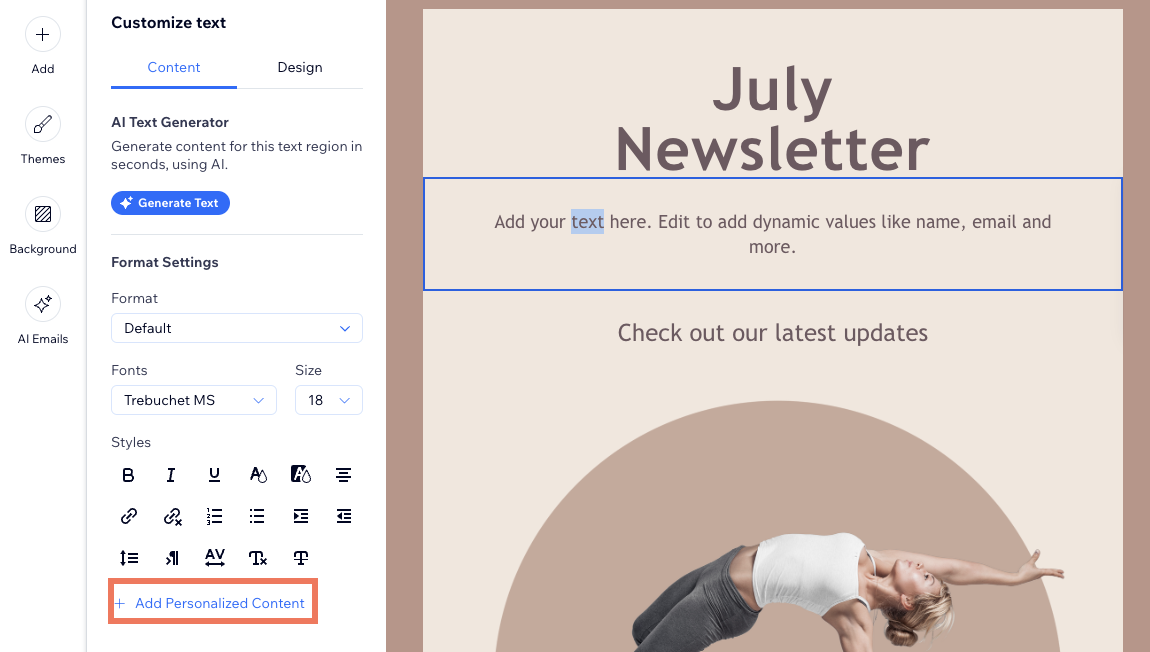
To add personalized content to your campaign text:
- Go to Email Marketing in your site's dashboard.
- Click Edit next to an existing campaign, select a template, or create a new one.
- Click any text element or add a new one.
- Click where you want to add the dynamic value.
- Click + Add Personalized Content under Styles.
- Select the value from the drop-down (e.g. contact last name, contact birthday, etc.)
- (Optional) Write a fallback text in the text box.
Adding personalized content to your campaign's subject line
When you're ready to send your campaign, draw your recipients' attention to your email by including their details in the subject line or preview text.
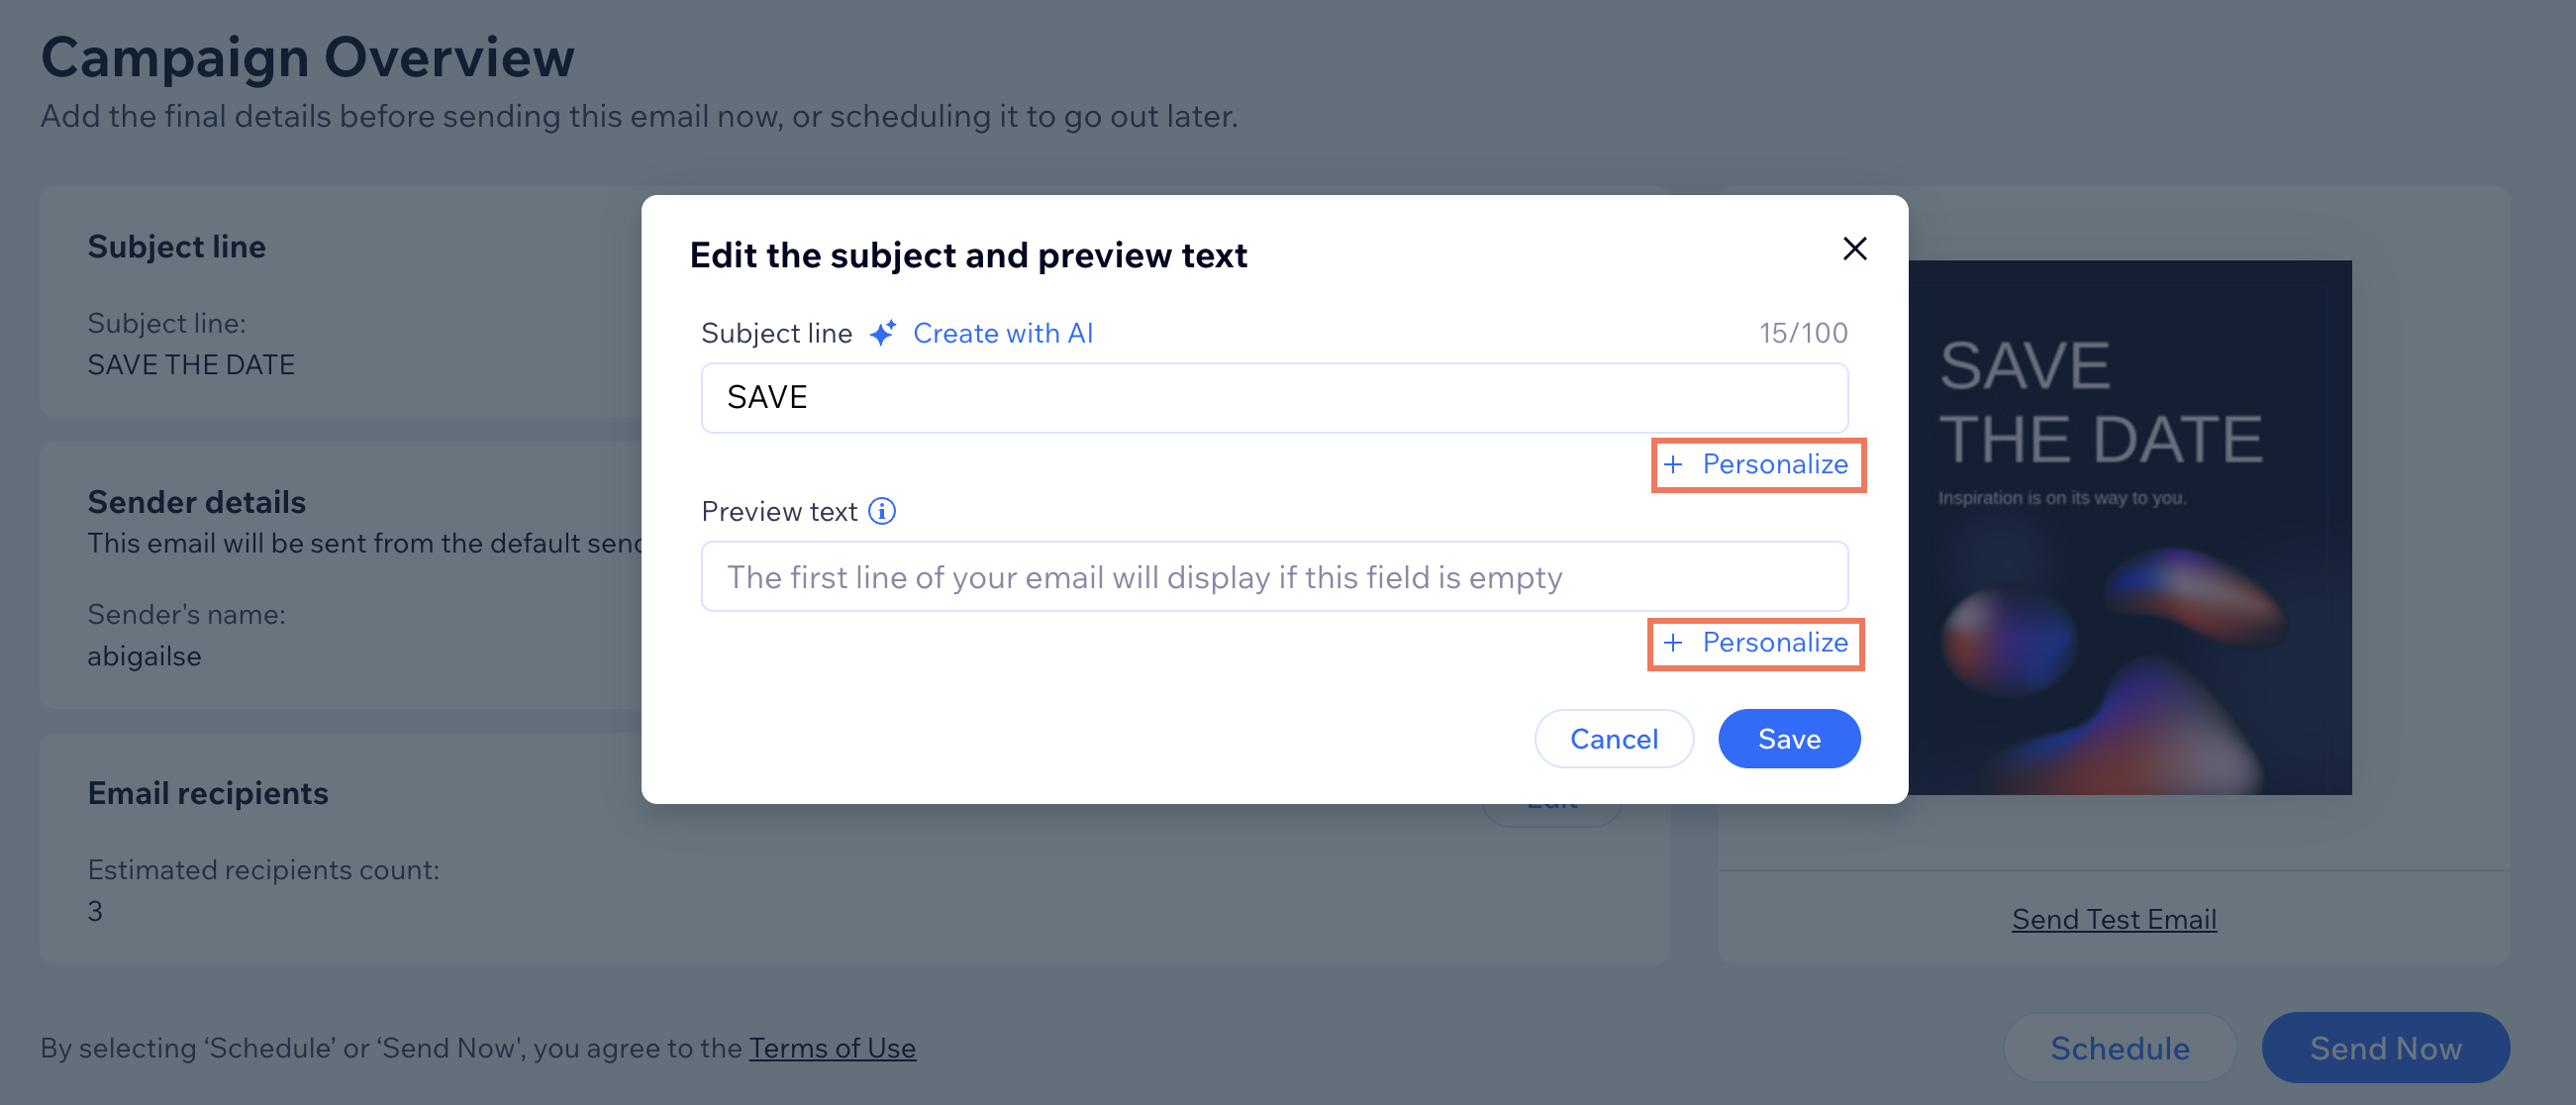
To add personalized content to the subject line or preview text:
- Go to Email Marketing in your site's dashboard.
- Click Edit next to an existing campaign, select a template, or create a new one.
- When you're done editing, click Next.
- Add at least one recipient and click Next.
- Click Edit next to Subject line.
- Click where you want to add the dynamic value.
- Click + Personalize under the subject line and/or preview text.
- Select the value from the drop-down (e.g. contact last name, contact birthday, etc.)
- (Optional) Write a fallback text in the text box.
FAQs
Click a question to learn more about using dynamic values.
What is an example of using personalized content in an email?
What is fallback text?
Can I add personalized content to emails using the mobile app?
Why are the personalized content fields in my emails not displaying correctly?
Why aren't the placeholders for my personalized content translated when my email is not in English?