Wix Bookings: Managing the Participant List for a Course
8 min
In this article
- Adding participants to a course
- Removing participants from a course
- Collecting a payment from participants
- Managing client attendance
- Viewing custom booking form responses
- Contacting your course participants
- Emailing course participants
Wix Bookings allows you to manage the participant list for your courses efficiently. You can keep track of who has paid, contact participants by email or message notification, update contact details, and add or remove clients. This helps you stay organized and ensures smooth communication with your participants. For example, if you run a yoga studio, you can easily update attendees about schedule changes or send reminders about upcoming sessions.
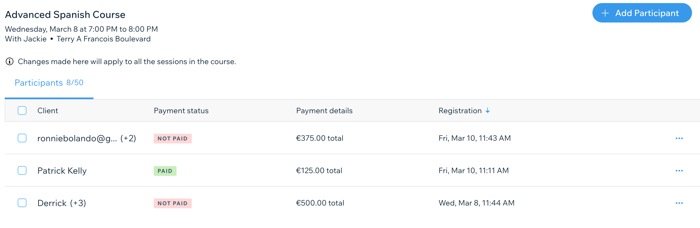
Adding participants to a course
You can add a new participant to your course or edit an existing booking to update the number of people registered. Add existing contacts or create new ones, and choose how you want each participant to pay.
To add a participant to a course:
- Go to Booking Calendar in your site's dashboard.
- Click the relevant course in your calendar.
- Click Manage next to the number of participants.
- Click + Add Participant.
- Click the Name field.
- Select who you want to add:
- An existing client: Type the name of your client or select them from the list.
- A new client: Click + Add Contact, enter the participant's details and click Save.
- Enter the total number of participants for the booking under Group of.
Note: You can only edit this number before the service is marked "Paid". - Choose an option under How do you want to charge your client?:
- Charge with an invoice: Email an invoice to the client to get paid online.
- Collect payment later: Charge the client for each course session using the Manage Participants or the Orders dashboard.
- Mark as paid: Mark the session as 'Paid'. This option is useful for clients who pay in person.
- (Optional) Select the Send confirmation email to participant checkbox.
- Choose a saving option:
- Save & Add Another: Save the participant and start adding another one.
- Save: Save the participant and return to the participants list.

Removing participants from a course
If clients can no longer attend the course for any reason, you can remove them to open up spaces for others.
Cancellation and no-show fees:
For courses, you can apply a one-time cancellation fee to remove a client from the entire course. It's not possible to remove a client from just one session; you must cancel the entire booking since all course sessions are reserved together. Read more about cancellation and no-show fees.
To remove a participant from a course:
- Go to Booking Calendar in your site's dashboard.
- Click the relevant course in your calendar.
- Click Manage next to the number of participants.
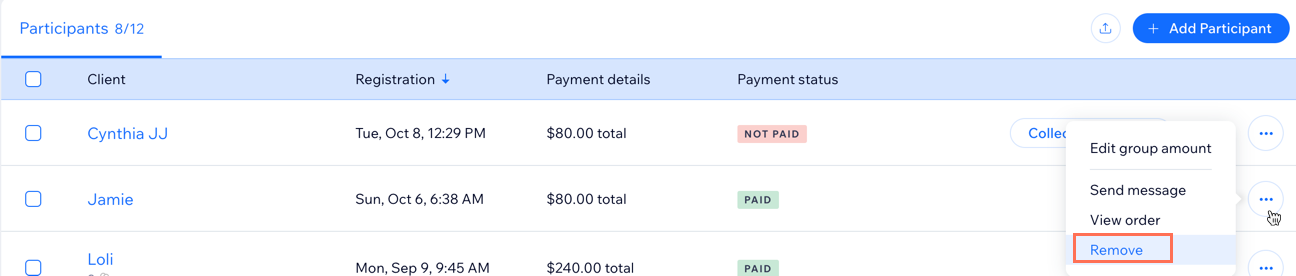
- Click the More Actions icon
 next to the participant you want to remove.
 - Click Remove.
- Depending on the type of order, follow the steps below:
Orders without cancellation or no-show fees
Orders with cancellation and no-show fees
Need to issue a refund?
You can issue a refund through the Orders page in your site's dashboard.
Collecting a payment from participants
Collect a payment by completing the checkout for unpaid or partially paid classes. The options you see depend on the payment settings you choose when creating the course service, as well as the payment providers you add.
To collect a payment:
- Go to Booking Calendar in your site's dashboard.
- Click the relevant course in your calendar.
- Click Manage next to the number of participants.
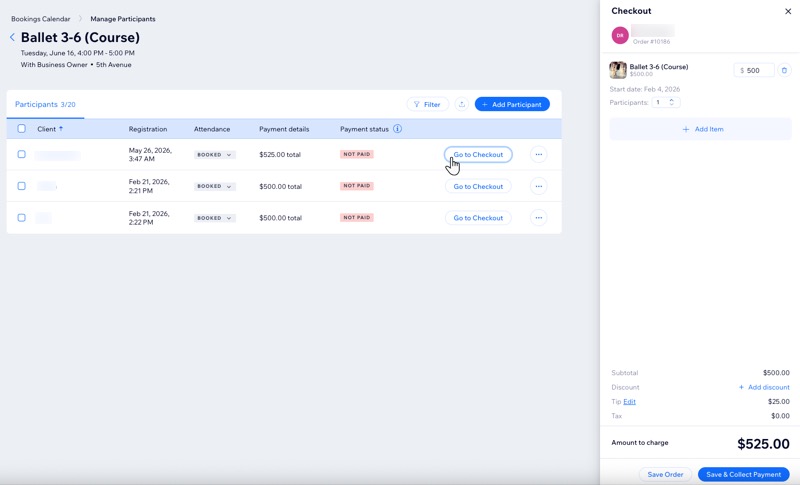
- Click Go to Checkout next to the relevant participant.
- (Optional) Add new details to the participants cart:
- Add an item: Click + Add Item, then click the relevant tab and choose what you want to add:
- Appointment: Select the relevant service to add an appointment or schedule multi-service appointments.
- Class: Select the relevant class session.
- Course: Select the relevant course session.
- Product: Select the relevant product(s).
- Custom charge: Add a custom item that is not in your catalogue.
- Enter the item name in the What are you charging for? field.
- (Optional) Enter Additional info (e.g. engraving, special request).
- Add the Price.
- Add a discount: Click + Add discount:
- Enter the Discount reason.
- Enter the Amount.
- (Optional) Click + Add Another Discount to add an additional discount.
- Add a tip: Click + Add tip.
- Select an amount or add a Custom amount.
Note: Select No Tip if you don't want to add a tip. - (Optional) Click Manage tip distribution to redistribute the tips among your staff.
- Select an amount or add a Custom amount.
- Add an item: Click + Add Item, then click the relevant tab and choose what you want to add:
- Click Apply.
- Click Save & Collect Payment and choose how you want to collect the payment from your participant.
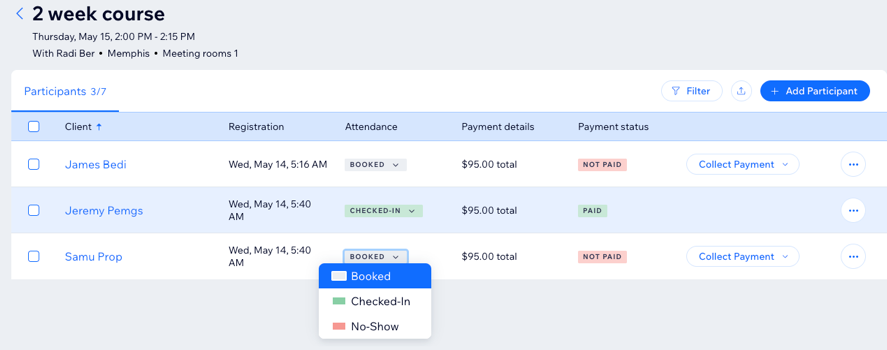
Managing client attendance
Manage attendance for your courses using the booking calendar in your site's dashboard. You can mark participants as checked-in or no-show.
To manage client attendance:
- Go to Booking Calendar in your site's dashboard.
- Click the relevant course in your calendar.
- Click Manage next to the number of participants.
- Select the checkbox(es) next to the clients you want mark attendance for.
Tip: Select the checkbox at the top of the list to select all participants. - In the Attendance column, click the Booked drop-down next to the relevant client.
- Choose the relevant option:
- Checked-In: The participant booked and came in for the session.
- No-Show: The participant booked the session but didn't show up. If relevant, you can click notify the client with an email and personal message.
Viewing custom booking form responses
If you add custom questions to the form clients fill out when they book a service, you can view their responses from the participants list. Simply click the relevant client to see what they answered.
Learn more about viewing booking form responses.
Contacting your course participants
Update your members about changes to an upcoming session or anything else they need to prepare beforehand.
To contact your course participants:
- Go to Booking Calendar in your site's dashboard.
- Click the relevant course in your calendar.
- Click Manage.
- Click the More Actions icon
 next to the relevant client.
 - Click Send message.
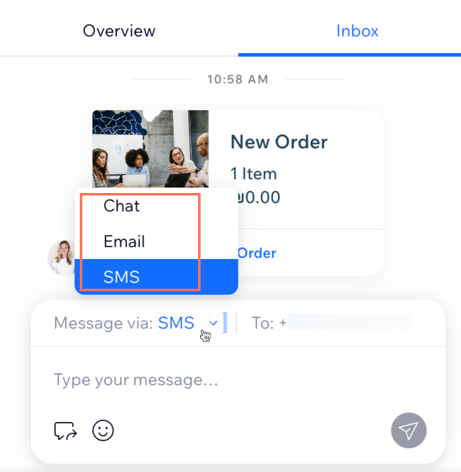
- Click the Message via drop-down and choose what type of message you want to send:
- Chat: Send your client a chat message through your site. They can only see these messages when they log in to your site.
- Email: Send your client an email using the address they provide when they sign up for your services.
- SMS: Send your client an SMS message. You can only send an SMS via your business phone number.
- Enter your message.
- (Optional) Click the relevant icon to add Saved Replies
 , Payment Requests
  , Emojis
  , Attachments
  and more. Learn more about replying to messages in Wix Inbox.
 - Click the Send icon
 .
.
Emailing course participants
You can send important updates via email to specific clients or to all participants in the course using the participants list.
Notes: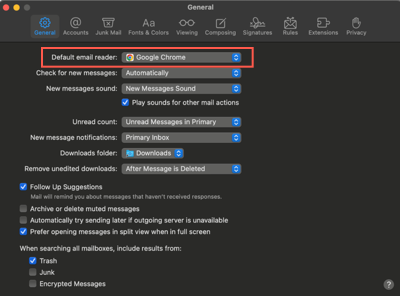
- If you use Outlook as your mail client, remove spaces between the semicolons separating the participants' emails. This helps guarantee the emails are sent correctly.
- You must have a default mail client set up on your computer to use this option.
To email contacts on your participants list:
- Go to Booking Calendar in your site's dashboard.
- Click the relevant course in your calendar.
- Click Manage next to the number of participants.
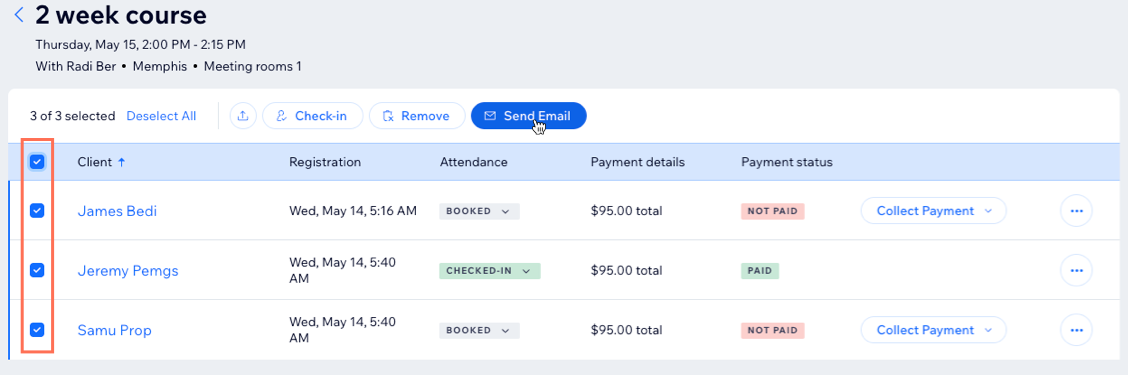
- Select the checkbox next to the relevant client(s), or select the Client checkbox at the top to email everyone.
- Click Send Email.
- Create the message in your mail client and send it.