

Customizing Your SEO Settings
18 min
In this article
- Accessing your SEO settings
- Customizing your SEO basics settings
- Customizing your social share settings
- Customizing URL structures for Products and Blog Posts pages
- Customizing your structured data markup
- Customizing your additional meta tags
- Resetting your default SEO settings
- Editing the SEO settings of individual pages
- Overriding SEO settings for individual pages
- Bulk editing the SEO settings of individual pages
Your SEO settings are your go-to place to save time by applying the same SEO logic to many pages at the same time. Instead of editing each page's individual settings, you can customize the settings that apply to entire sections of your site. This way, you can create a systematic SEO strategy much more quickly.
Wix automatically creates default SEO settings for all the pages of your site according to their type (e.g. Products, Main pages). These settings are based on common SEO best practices and include basic meta tags and other advanced settings that you can customize to your needs.
Accessing your SEO settings
You can customize your SEO settings by accessing them in your site's SEO & GEO dashboard.
To access your settings:
- Go to SEO & GEO in your site's dashboard..
- Scroll down to Tools and settings.
- Click SEO Settings.
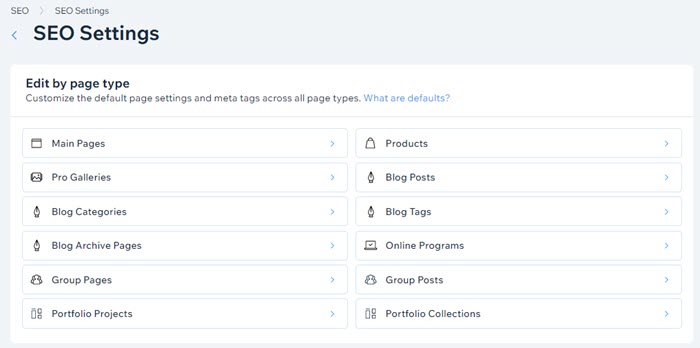
- Select the page type that you want to edit.
Note: You will only see options for the pages that are part of your site. For example, if you added Wix Stores to your site, you'll see an option to customize settings for Products.
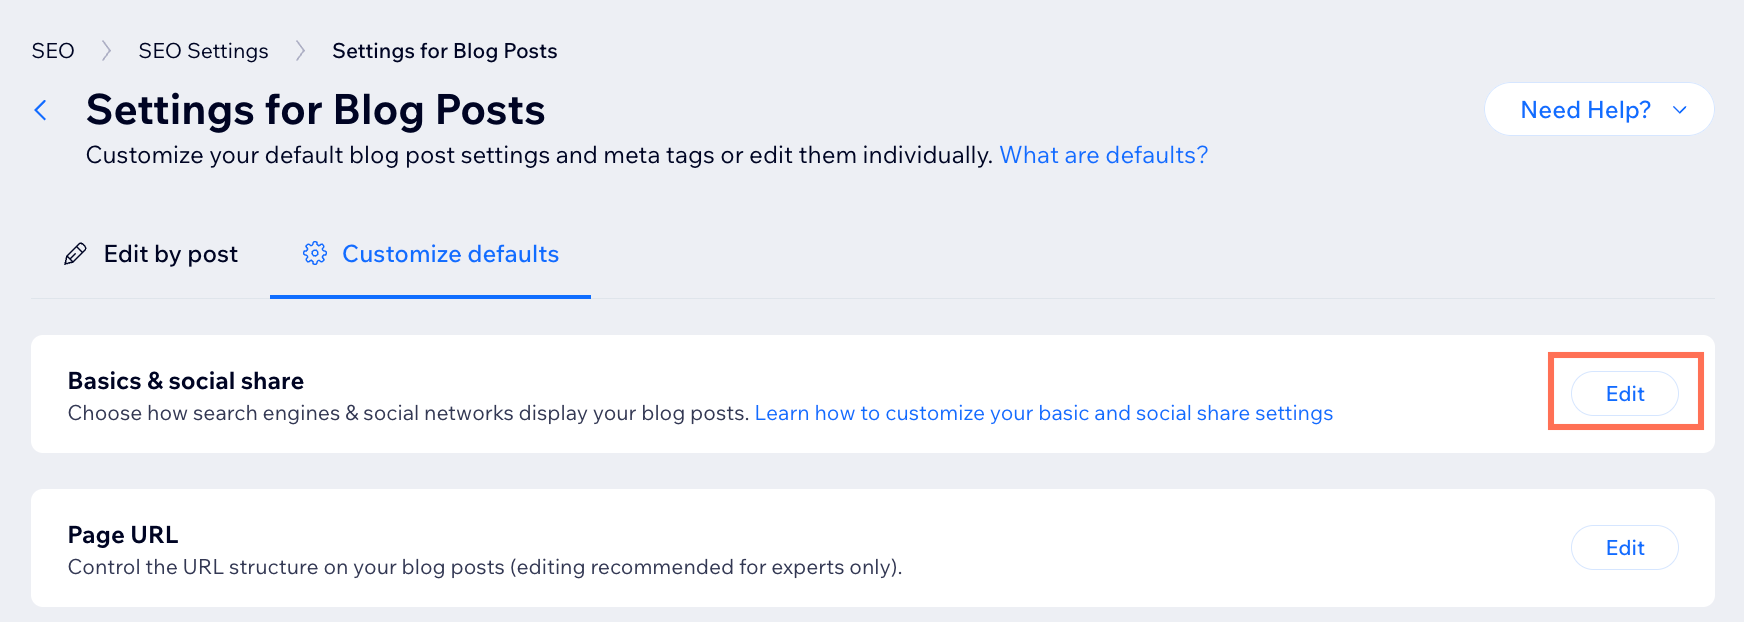
- Click the Customize defaults tab.
- Click Edit next to the relevant SEO settings to view or edit them.
Customizing your SEO basics settings
You can customize the title tag and meta description of your pages and let search engines index them in the SEO basics settings. Use static text to apply the same title and description to every page, or use variables to create rules with different values for each section or page of your site.
To edit your SEO basics settings:
- Go to SEO & GEO in your site's dashboard.
- Scroll down to Tools and settings.
- Click SEO Settings.
- Select the page type that you want to edit.
Note: You will only see options for the pages that are part of your site. For example, if you added Wix Stores to your site, you'll see an option to customize settings for Products. - Click Edit next to Basics & social share.
- Customize the SEO basics settings:
Title tag
Meta description
Let search engines index your page(s)
7. Click Save.
Note:
Many page types show a Page URL field to show the URL slug structure of the pages. Hover over the Info icon  to learn more about the specific page type's URL.
to learn more about the specific page type's URL. Customizing your social share settings
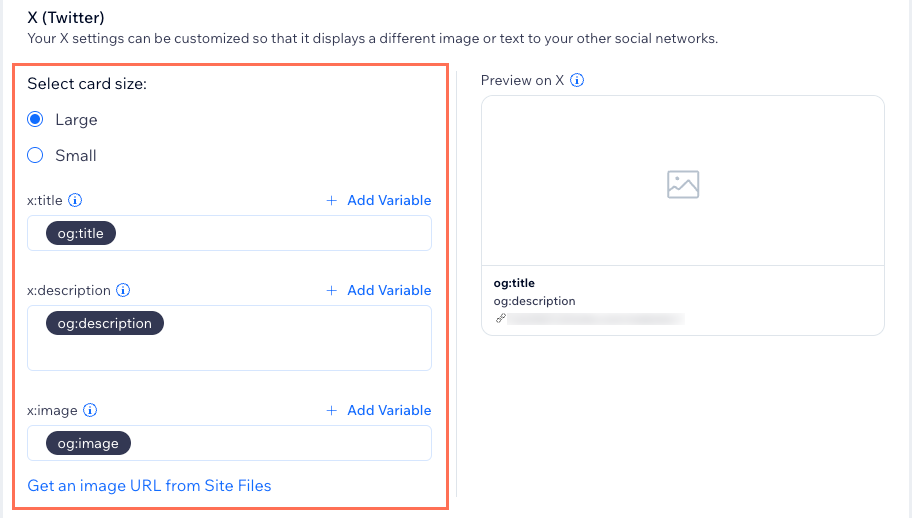
Customize the way your pages appear on social networks like Facebook, Instagram, and X (Twitter). You can edit the social share settings to use the same rules for the title, description, and image that appear when someone shares your page. You can also use separate X (Twitter) settings to display a different title, description, and image for pages that you share on X (Twitter).
To customize your social share settings:
- Go to SEO & GEO in your site's dashboard.
- Scroll down to Tools and settings.
- Click SEO Settings.
- Select the page type that you want to edit.
Note: You will only see options for the pages that are part of your site. For example, if you added Wix Stores to your site, you'll see an option to customize settings for Products. - Click Edit next to Basics & social share.
- Scroll down to Social share and customize the relevant settings:
Social share
 and select Copy URL.
 X (Twitter)
Customizing URL structures for Products and Blog Posts pages
If you have Wix Stores or Wix Blog on your site, you can customize the URL structures of your Products and Posts pages. This helps search engines better understand the content. Learn more about customizing your page's URL structure.
Tip:
Search engines recommend using a simple structure that is easily understandable to your site visitors. Learn more about URL slug structure best practices from Google.
To customize URL structures for a Products or Blog Posts page:
- Go to SEO & GEO in your site's dashboard.
- Scroll down to Tools and settings.
- Click SEO Settings.
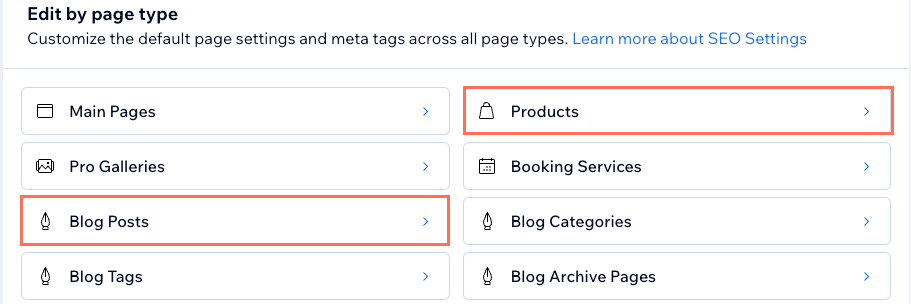
- Select Products or Blog Posts under Edit by page type customize the relevant URLs.
- Click Edit next to Page URL.
- Click the URL structure field and edit the URL. Click + Add Variable to add a dynamic value to the URL structure.
Note: Your URL structure must include at least one variable.
- Choose if you want Wix to create automatic redirects for your pages.
- Leave the Automatically redirect all traffic checkbox selected to automatically redirect people and search engines to the new URL if they visit the old URL.
- Deselect the Automatically redirect all traffic checkbox if you want to manually add a group redirect in the URL Redirect Manager after saving.
- Click Save.
- (Optional) Click View all in CSV format to download a file with all your URL redirects.
- Click Confirm Changes.
Customizing your structured data markup
Structured data markup gives search engines detailed information about your page. Adding structured data markup to your site's page can help improve your website's search results and ranking. Search engines like Google can also use markup to create rich results like article previews, product previews, and FAQs for your page's search results. Learn more about adding structured data markup to your site's pages.
Tip:
When you add a business name and location to your site, Wix automatically creates a Local Business markup for your homepage to improve your search ranking.
Important:
- You can have up to 5 markups per SEO setting (including the preset markup).
- Structured data markup is an advanced topic. Wix Customer Care cannot help with any changes to your site's structured data. If you have problems with structured data for your site, check out our structured data troubleshooting help article.
- Need help from an SEO expert? You can hire an SEO professional from the Wix Marketplace.
To edit your structured data markup:
- Go to SEO & GEO in your site's dashboard.
- Scroll down to Tools and settings.
- Click SEO Settings.
- Select the relevant page type under Edit by page type.
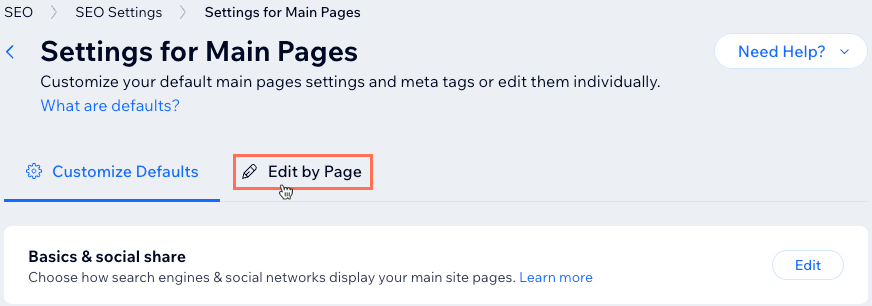
- Click Edit next to Structured data markup.
Note: If you selected Main Pages in step 4 above, click Edit by Page at the top and click the relevant page. Then click the Advanced tab in the panel on the right and click Structured data markup. - Choose what you want to do:
Preview, edit or switch a preset markup

Include or exclude a preset markup
 to exclude or include the markup.
Create a new custom markup

Edit or remove a custom markup
 to delete the custom markup.
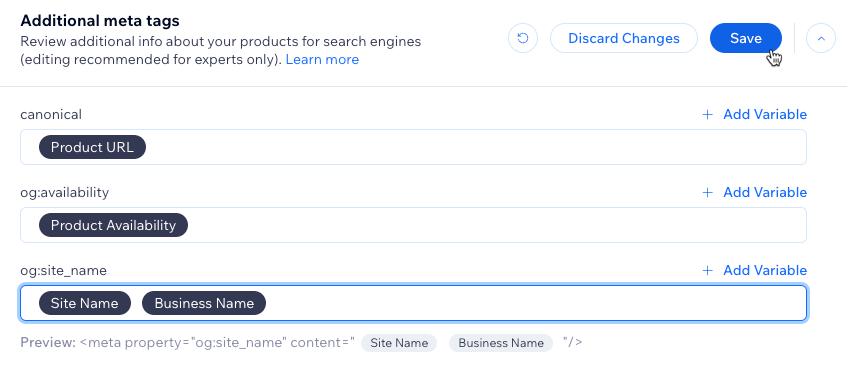
Customizing your additional meta tags
Meta tags are snippets of code that describe your page to search engines and social networks. They are not visible on your site but they do exist in the page code. By default, Wix adds meta tags to your pages based on common SEO best practices.
You can update any of the default meta tags used in your site's code. If needed, you can create your own additional tags to give search engines more details. For example, you can create additional meta tags to create snippets for your site’s search results.
To customize additional meta tags:
- Go to SEO & GEO in your site's dashboard.
- Scroll down to Tools and settings.
- Click SEO Settings.
- Select the relevant page type under Edit by page type.
- Click Additional meta tags.
- Edit or add a meta tag:
- Edit: Click the relevant meta tag field to edit the tag. Click + Add Variable to add dynamic values to your meta tags. A preview of displays below the field to show how it appears in your site's code.
- Add: Click + Add New Tag at the bottom and write a new tag in HTML format. Click + Add Variable to add dynamic values to your meta tags. When finished, click the Apply icon
 .
.
When adding new tags:
- You can add up to 10 tags, but can't add a meta tag that already exists.
- You can only use the following tag types: <meta> and <link>.
- If you want to add a tag that is not supported you can use the custom code section.
- The new tags are visible in your editor's SEO page panels.

- Click Save.
Click below to learn more about:
Default meta tags for all pages
Additional default meta tags for Wix Blog posts
Additional default meta tags for Wix Stores product pages
Resetting your default SEO settings
Your default SEO settings are based on SEO best practices. You can restore the default settings if you made changes and want to revert back.
To restore your default SEO settings:
- Go to SEO & GEO in your site's dashboard.
- Scroll down to Tools and settings.
- Click SEO Settings.
- Select the relevant page type under Edit by page type.
- Click the setting that includes the default(s) you want to restore.
- Choose what you want to do:
Reset a single field to its default

Reset the entire section to its default
 at the top of the section.
Editing the SEO settings of individual pages
View and edit the SEO settings for specific types of pages from the Edit by page type tab. This is a great place to review your page's URL slug, edit several meta tags at once, or quickly check whether a page can be indexed by search engines.
You can edit individual page SEO settings for the following page types:
- Main pages
- Wix Stores products
- Wix Events pages
- Wix Blog posts
- Wix Portfolio projects and collections
- Online Programs
To edit SEO settings for individual pages:
- Go to SEO & GEO in your site's dashboard.
- Scroll down to Tools and settings.
- Click SEO Settings.
- Select the relevant page type under Edit by page type.
- Select the Edit by Page tab at the top.
Note: The tab name depends on the type of page (e.g. Edit by Product, Edit by Post).
- Click the relevant page.
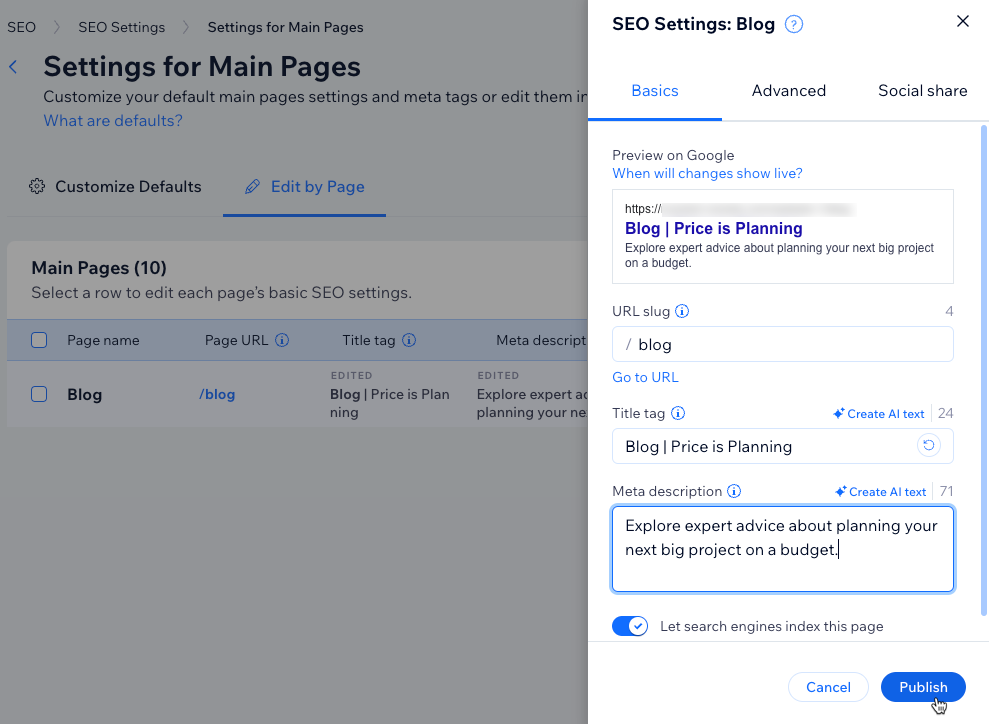
Tip: The Indexable column shows a checkmark if the page is able to be indexed by search engines. - Click the relevant tab on the right to edit its SEO settings:
- Basics: Edit your URL slug ending, title tag, meta description, and allow search engines to index this page. To change the URL slug structure of this page, go to its SEO settings in the editor.
- Advanced: Edit your structured data markup, robots meta tag, and additional tags.
- Social share: Upload your social share image, og:title, og:description and Twitter settings. Learn more about customizing your social share settings.
- Click Publish.
Overriding SEO settings for individual pages
Your SEO Settings apply the same settings to multiple pages according to their type (e.g. Product Pages, Site Pages, etc). You can always override the pattern and exclude certain pages if you need them to follow different rules.
You can override the SEO Settings for specific Wix app pages only:
You can override:
- Product Pages
- Site Pages
- Event Pages
- Blog Post Pages
- Blog Category Pages
You cannot override:
- Pro Gallery Expand Mode
- Blog Tags
- Challenges
To override SEO settings for individual pages:
Wix Editor
Studio Editor
- Go to your editor.
- Click Pages & Menu
 on the left side of the editor.
 - Click the More Actions icon
 next to the relevant page.
 - Click SEO basics.
- Edit the page's SEO Basics settings to override the SEO Setting.
Tip:
To restore any field to its default, click the Reset to Default icon  beside it. Be sure to publish your site to save the setting.
beside it. Be sure to publish your site to save the setting. Bulk editing the SEO settings of individual pages
You can change the indexable statuses and restore default SEO settings for several main pages or blog posts at once.
Important:
- Bulk editing is currently available for your site's main pages and blog posts only. We're working on adding more page types soon.
- Several factors affect how long it takes search engines to recrawl your pages and get the updated SEO details. After updating your SEO, you can try and speed up the recrawling process by manually submitting the page URLs to search engines.
To bulk edit SEO settings for your pages:
- Go to SEO & GEO in your site's dashboard.
- Scroll down to Tools and settings.
- Click SEO Settings.
- Select the relevant page type under Edit by page type.
- Select the Edit by Page tab at the top.
Note: The tab name depends on the type of page (e.g. Edit by Product, Edit by Post). - Click the checkboxes next to the relevant pages.
Tip: Click the checkbox next to Page name at the top of the list to select all the pages.
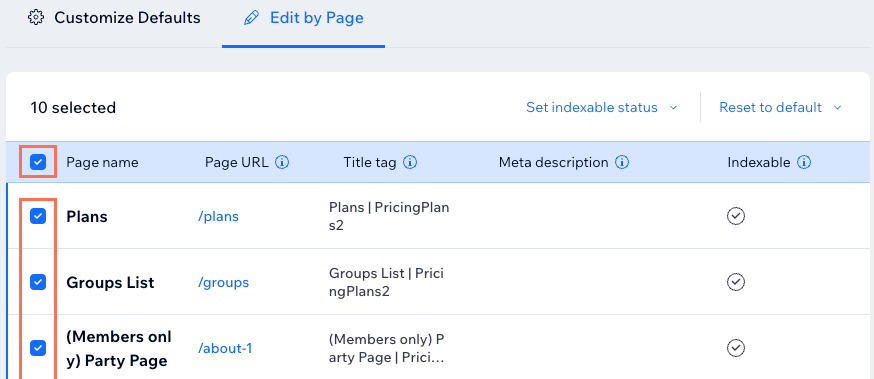
- Choose what you want to do:
Set indexable status

Reset to default
Want to learn more?
You can read about Wix's great SEO features and how to use them in the Complete Wix SEO Guide.
