

CMS: Displaying Your Events in a Dynamic List Page
17 min
In this article
- Step 1 | Add a dynamic list page for your events
- Step 2 | (Optional) Modify the URL slug structure
- Step 3 | Customize your new dynamic list page
- Step 4 | (Optional) Manage the dataset settings
- Step 5 | (Optional) Add 'Load More' or navigational buttons
- Step 6 | (Optional) Let visitors filter items
- FAQs
Use a dynamic list page with the CMS (Content Management System) to display a customizable list of your events.
With this method, we recommend also creating a dynamic item page you can link from your dynamic list page. This way, visitors can click an event from your dynamic list page and go to the event's dedicated version of your dynamic item page.
Before you begin:
- Add Wix Events to your site and publish your events.
- Add the CMS to your site if you haven't already.
- Enable Wix app collections so you can use Wix Events with the CMS.
Step 1 | Add a dynamic list page for your events
Access the CMS Wix App Collections in your editor and find the Events collection. Then create a dynamic list page from this collection.
Wix Editor
Studio Editor
- Go to your editor.
- Click CMS
 on the left of the editor.
 - Click Wix App Collections on the left.
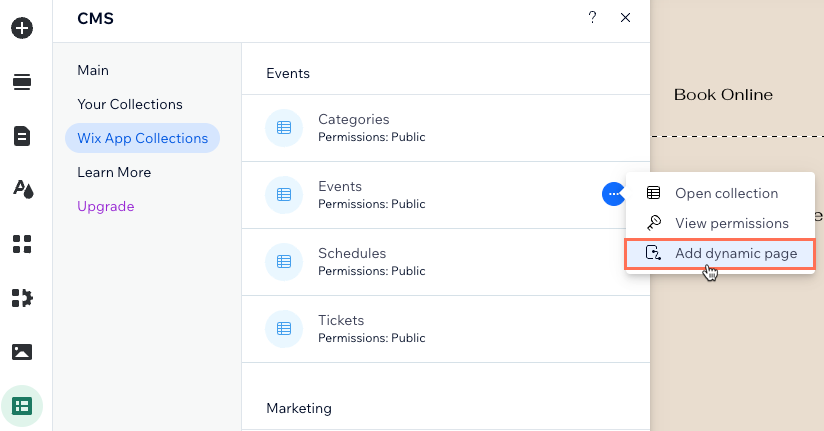
- Scroll down to the Events collections.
- Hover over Events, click the More Actions icon
 and select Add dynamic page.
- Click List page.
- Click Add to Site.
Step 2 | (Optional) Modify the URL slug structure
The URL slug structure determines the URL used for your dynamic list page. It also helps visitors and search engines understand what the page is about. If needed, you can modify this URL slug structure in the SEO tab of the page settings.
Make sure to use a URL slug structure that is not already in use by another page on your site. Learn more about creating unique dynamic page URLs.
Wix Editor
Studio Editor
If you're using the Wix Editor, the events part of your URL slug is already used by a page that displays your upcoming and past events. This is why the CMS adds -1 or -2 after events, to give this new dynamic item page a unique URL. You can change this URL slug to a new structure that is not already used by your live site.
To edit your dynamic list page's URL slug structure:
- Go to your editor.
- Click Pages & Menu
 on the left side of the editor.
 - Click Dynamic Pages.
- Hover over the Events (List) page under EVENTS/EVENTS COLLECTION and click the More Actions icon
 on the right.
 - Click SEO.
- Click the URL slug structure field.
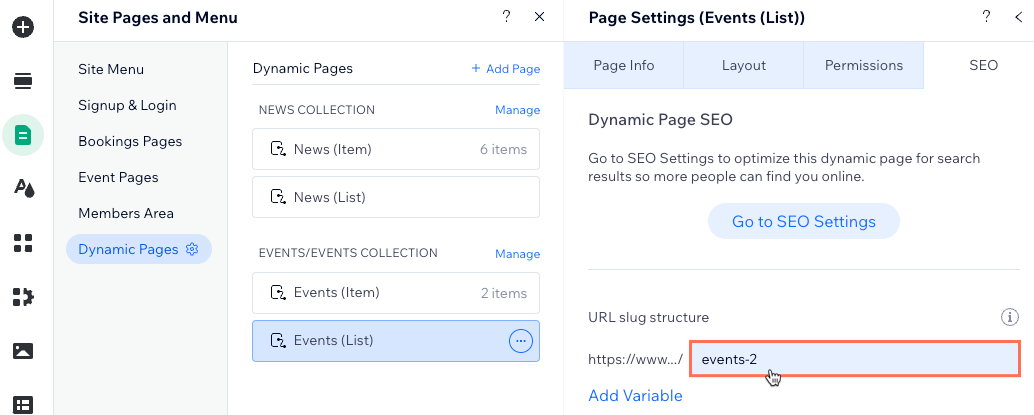
- Customize the URL slug structure and press Enter on your keyboard. For example, you could change events-2 to all-events.
Step 3 | Customize your new dynamic list page
You now have a dynamic list page with a repeater that includes text, buttons, and an image in each container. Each of the repeater's containers displays a different item (event) from your collection.
Connect each part of the elements to the relevant collection fields to ensure they display the info you want them to. We recommend connecting the button to the Event Details & Registration page, or your own custom dynamic item page, if you created one.
You can provide more info about each item by attaching more supported elements to the repeater. Then connect these elements to your collection fields in the dataset where you manage all the CMS connections.
Important:
If you previously connected an element to the 'About (Rich Text)' collection field, make sure to remove this connection as it is being deprecated. Wix Events has released a new 'About the event (optional)' field where you can add rich media to showcase details about your events. This new field appears as the 'Long description (Rich Content)' collection field when you connect a rich content element to it.
See step 5 below to learn how to add a rich content element and connect it to your 'Long description (Rich Content)' collection field.
To customize your new dynamic list page:
Wix Editor
Studio Editor
- Go to your editor.
- Go to your Events (List) page.
- (Optional) Add elements to your repeater (e.g. buttons, text, images) or remove elements you do not need. You can adjust the size of the repeater so it can contain all the elements.
- Click the repeater element and select the Connect to CMS icon
 .
. - Under Connections, connect each element in which you want to display dynamic content from your events. The options vary depending on the type of element you connect:
Image

Text

Button

Rich content
 on the left side of your editor.
6. Adjust the size, location, and design of the elements on your page to your liking.
7. Click Preview to test your dynamic list page.
8. Click Publish when you're ready to make the changes go live.
Step 4 | (Optional) Manage the dataset settings
In your dataset settings, you can choose the maximum number of events that can display per load. You can also add filters to include only certain events, or add sorts to control the order in which the events display.
Wix Editor
Studio Editor
- Go to the repeater's connected dataset settings:
- Click the repeater.
- Click the Connect to CMS icon .
- Click Dataset Settings in the Connect Repeater panel on the right.
- (Optional) Click the permission type next to Permissions to edit your collection's permissions & privacy settings. Collection permissions define who can access the collection content on your live site.
- Edit the Items per load field to adjust the maximum events that can initially load in the repeater. This is also the maximum events that can load per page in a connected pagination bar or per click in 'Load More' or 'Next/Previous' page buttons.
Note: This field does not apply to tables. If using a table to display your items, limit the number of items displayed by clicking the table's Layout icon , then setting a custom table height and enabling pagination.
 - (Optional) Click + Add Filter to only show specific events in the repeater.
- (Optional) Click + Add new sort to choose the order in which the events appear in the repeater.
- Click Preview to test your dynamic list page.
- Click Publish if you are ready to make the changes go live.
Step 5 | (Optional) Add 'Load More' or navigational buttons
You can add a 'Load More' button to improve your page's loading performance. Your dataset's Items per load field determines how many events initially load in the repeater, and how many additional items can load after visitors click the 'Load More' button.
To create a 'Load More' button, add a button and change its text to "Load More". Connect the button to the same dataset that connects to your repeater or gallery. Then select the Load more dataset action from the Click action connects to drop-down.
Add navigational buttons to let clients click to view the next/previous page of events displayed or add a pagination bar for cycling through a set number of products at a time.
Step 6 | (Optional) Let visitors filter items
Give visitors ways to filter the events that appear on your dynamic list page with input elements. Choose from any of the following input elements that allow filtering: Radio Buttons, Checkboxes, Dropdown, Selection Tags, or Slider (Range Sliders only).
Learn how to set up input elements that allow visitors to filter collection content.
FAQs
Click below for answers to common questions about using dynamic list pages to display events.
How do visitors get to my dynamic list page?
Why can't I attach some elements to the repeater?
Can I see how a pre-connected repeater works before setting up my own?
