

Wix Stores: Creating a Physical Product
9 min
In this article
- Step 1 | Add a product image, GIF, or video
- Step 2 | Enter the basic product info
- Step 3 | (Optional) Add info sections
- Step 4 | Add pricing information
- Step 5 | (Optional) Allow customers to add custom text
- Step 6 | (Optional) Add product options
- Step 7 | Set inventory options & shipping weight
- Step 8 | (Optional) Allow customers to pre-order products
- Step 9 | (Optional) Create product subscriptions
- Step 10 | Save your changes
Start building your online store by creating the products you want to sell.
Wix Stores gives you the flexibility to sell both physical products (like posters), as well as digital, downloadable products (such as ebooks, audio files, or images). This article will walk you through how to create physical products.
Step 1 | Add a product image, GIF, or video
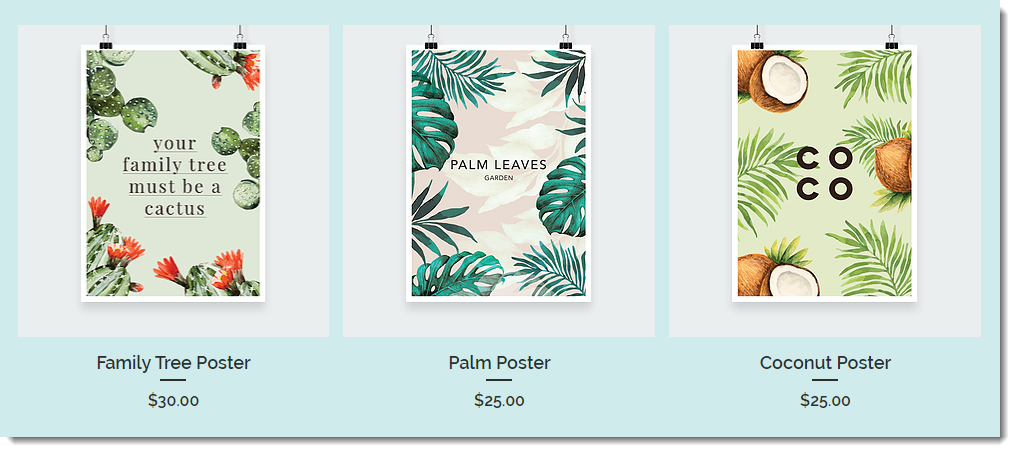
Displaying multiple, high-quality product images, GIFs, or videos for each product is one of the best ways to increase sales. Learn more about creating and displaying effective product media.
The product images, GIFs, or videos you add appear in the product gallery and on the product page.
To add product media:
- Go to Products in your site's dashboard.
- Click +New Product.
- Select Physical product.
- Select an option:
- Click Add Images to add images or GIFs.
- Click Add Videos to add a video.
- Click Upload Media to add images, GIFs, or videos and select the relevant media.
- Click Add to Page.
Step 2 | Enter the basic product info
Add the basic product details, such as the product name and description.
To enter the basic product information:
- Enter the product name (max. 80 characters).
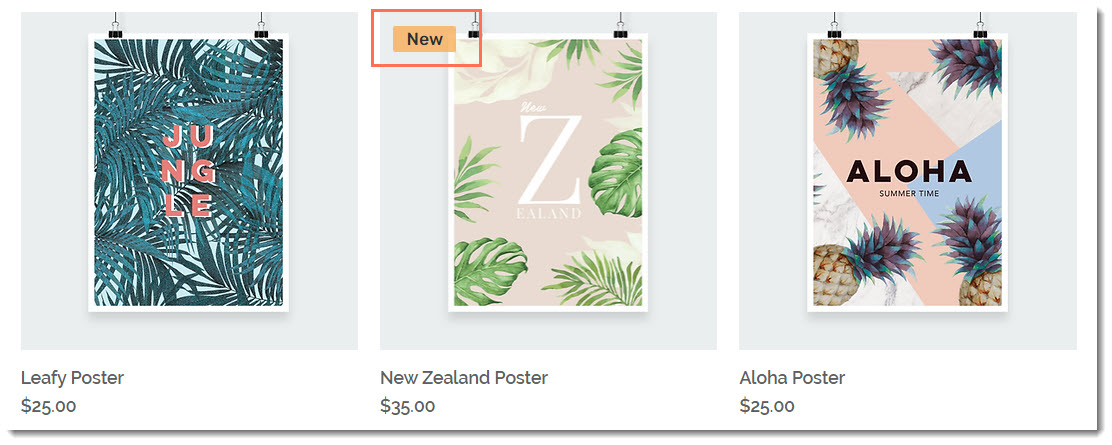
- (Optional) Add a ribbon by typing the ribbon name (e.g. New).
Notes:- You can also select ribbons you previously created. This lets you manage your ribbons as a group. Learn more about ribbons.
- Ribbons appear in the product gallery.
- Enter a description of the product in the Description field. (maximum 8000 characters, including HTML tags)
Tips:
- Click Generate AI Text to get help composing an effective product description.
- When copying and pasting a description from another source, paste the text by pressing Shift +Ctrl + V on your keyboard. This removes any formatting to make sure the text displays correctly.
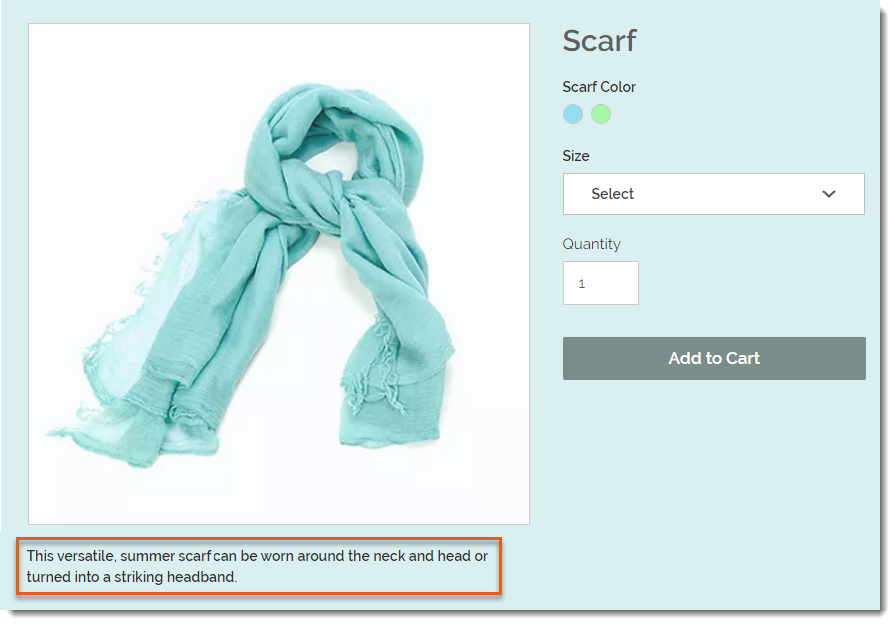
Step 3 | (Optional) Add info sections
You can add helpful product information that customers can view on the Product Page.
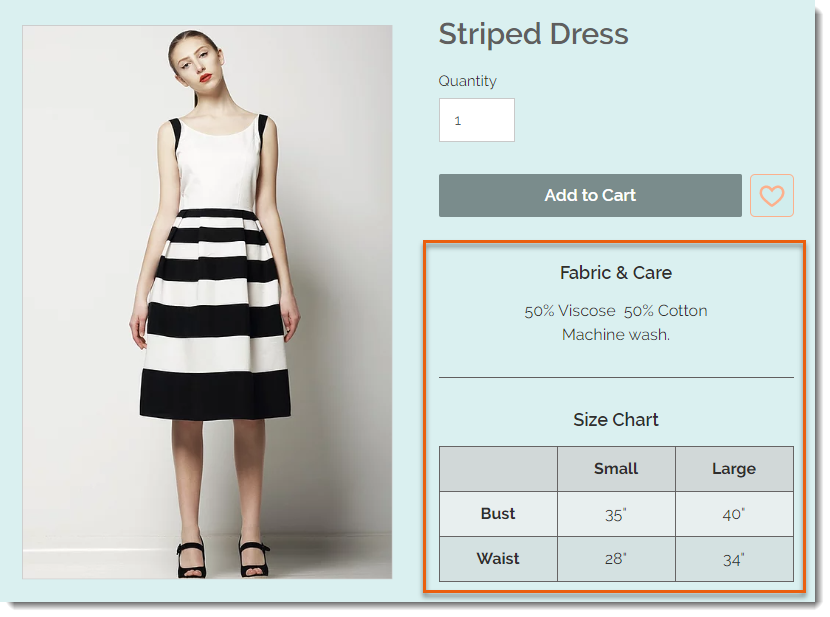
To add an info section:
- Click +Add an Info Section.

- Enter the info section title.
- Select an option:
- Add text: Enter the relevant information and use the text editing toolbar to format the text.
- Add a table: Click the Table icon
 to add a table and enter the table contents.
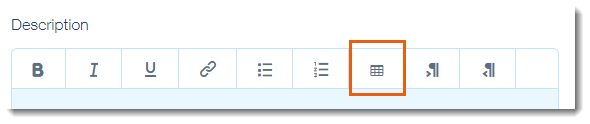
- Click OK.
Step 4 | Add pricing information
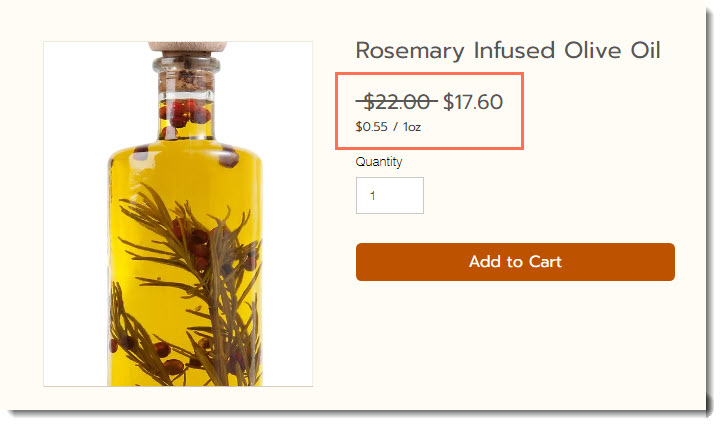
In the pricing section, you can enter the product price and add a sale price. For products sold by weight, you can enter a price per unit (e.g. $0.55 / 1 oz.) to help customers compare prices.
To track your profit and margins, enter a cost of goods. The profit and margins are then automatically calculated for you and appear in analytics reports.
To add pricing information:
- Enter the product's base price.
Tip: If you create product options, you'll be able to price them differently by adding a price increase or decrease to this price. - (Optional) Add a sale to the product:
- Enable the On sale toggle.
- Select an option:
- Click the price icon and enter the amount of the discount (e.g. $10 off).

- Click the percentage icon and enter the discount percentage (e.g. 10% off).

- Enter the sale price directly in the Sale Price field (e.g. enter a $50 discount price).
- Click the price icon and enter the amount of the discount (e.g. $10 off).
- Display a price per unit for this product (e.g. $5 / lb).
- Enable the Show price per unit toggle.
- Under Total product quantity in units, select the relevant type of unit (e.g. ounces) from the drop-down.

- Under Total product quantity in units, enter the total product quantity in units (e.g. if you are selling a 5 ounce jar, enter "5").
- Under Base units, enter the unit you want to measure by (e.g. enter 1 ounce to display a price per ounce).
- (Optional) Enter the cost of goods (e.g. $10).
Notes:- Cost of goods is the amount it costs for you to make or buy the product. After you enter the cost of goods, the profit and margin are calculated automatically.
- The cost is not displayed to customers.
- You can also track the cost of good for each product variant.
Step 5 | (Optional) Allow customers to add custom text
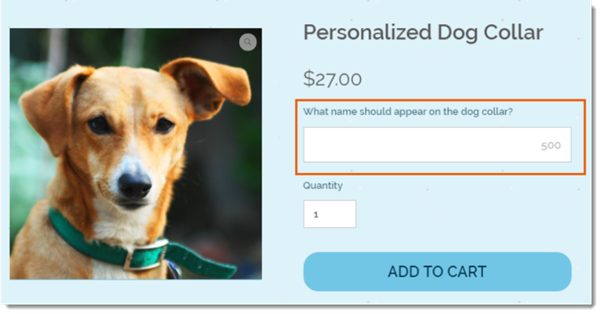
You can add a custom text field to collect info from customers.
To add a custom text field:
- Click Add Custom Text Field.
- Enter the field title (e.g. What name do you want to appear on the dog collar?).
- Enter the maximum number of characters the customer can enter.
- (Optional) Select the Mandatory field checkbox so that customers cannot buy the product without entering custom text.
- (Optional) Click +Add Another to add an additional custom text field.
Step 6 | (Optional) Add product options
You can sell a product in different colors, sizes, styles etc. by creating product options.
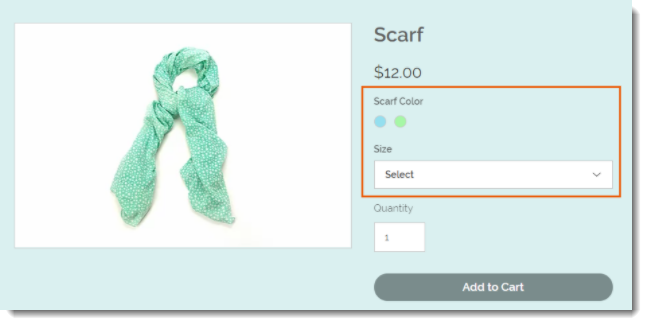
To get started, click +Add Options and enter the option details.
Step 7 | Set inventory options & shipping weight
Wix Stores offers 2 ways to manage inventory:
- Tracking inventory: Track how many of a specific product you have in stock. When you make a sale, the inventory amount is automatically updated.
- In Stock / Out of Stock: You can manually set products as "In Stock" or "Out of Stock" status. When you run out of a product, you manually change the status to "Out of Stock".
Note:
After you create product options, you can manage inventory per variant.
To manage inventory:
- Select an inventory option:
- Do not track inventory:
- Click the Track Inventory toggle to disable it.
- From the Status drop-down, select the product's current inventory status.
- (Optional) Enter an SKU.
- (Optional) Enter a shipping weight.
Note: Make sure to enter a weight if you offer shipping by weight.
- Track inventory
- Enable the Track Inventory toggle.
- Enter the amount of the product available in the Inventory field.
- (Optional) Enter an SKU.
- (Optional) Enter a weight.
Note: Make sure to enter a weight if you offer shipping by weight.
- Do not track inventory:
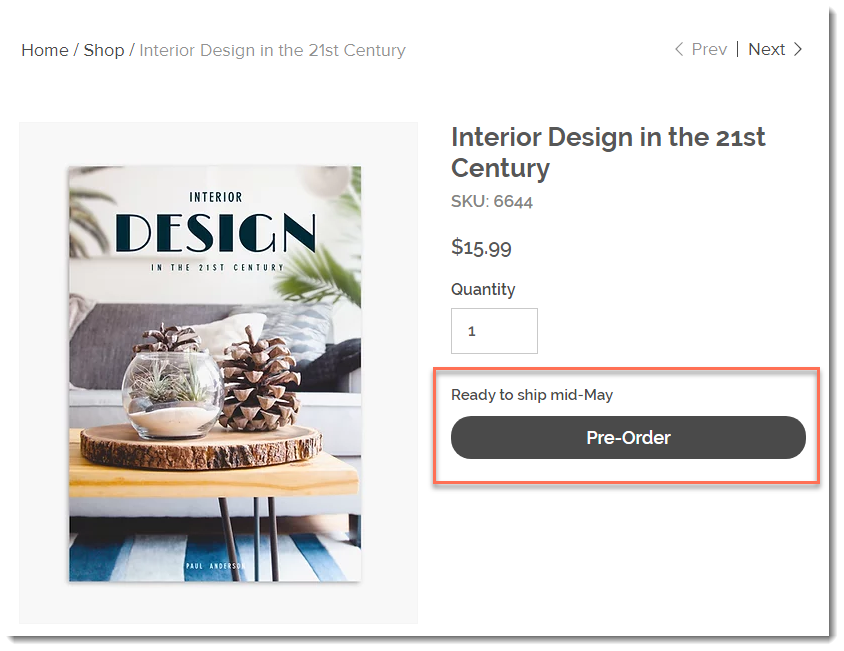
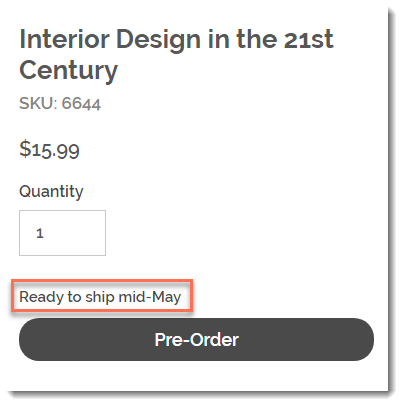
Step 8 | (Optional) Allow customers to pre-order products
Let customers pre-order new products or ones that are temporarily out-of-stock. When you enable pre-order, the "Add to Cart" button automatically changes to "Pre-Order" when stock levels drop to zero.
To enable pre-ordering:
- Click the Pre-order toggle to enable it.
- Enter a short pre-order message.
Note: It's recommended to add a message about when the product should be available (e.g. Ready to ship by mid-May). The note appears above the pre-order button.
- (Optional) Limit the number of possible pre-orders:
- Click Limit to.
- Enter the maximum number of pre-orders you can accept.
Limiting pre-orders:
- Set a limit if you think you might get more pre-orders than you can handle.
- To be able to set a limit, you must track specific inventory amounts.
- If the product has variants, the limit is per variant. This means that if you limit to 10, and your product comes in 2 colors and 2 sizes, each of the 4 variants is limited to 10.
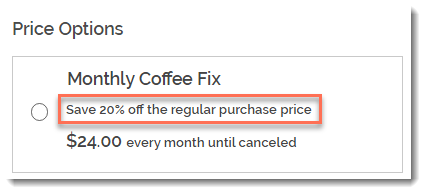
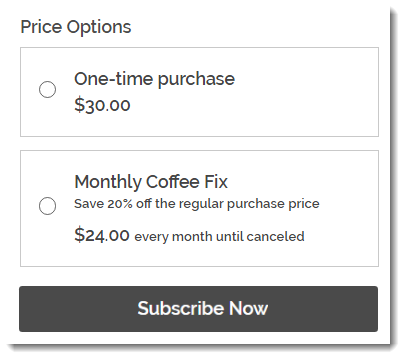
Step 9 | (Optional) Create product subscriptions
Create a product subscription option to let customers receive regular deliveries of your product.
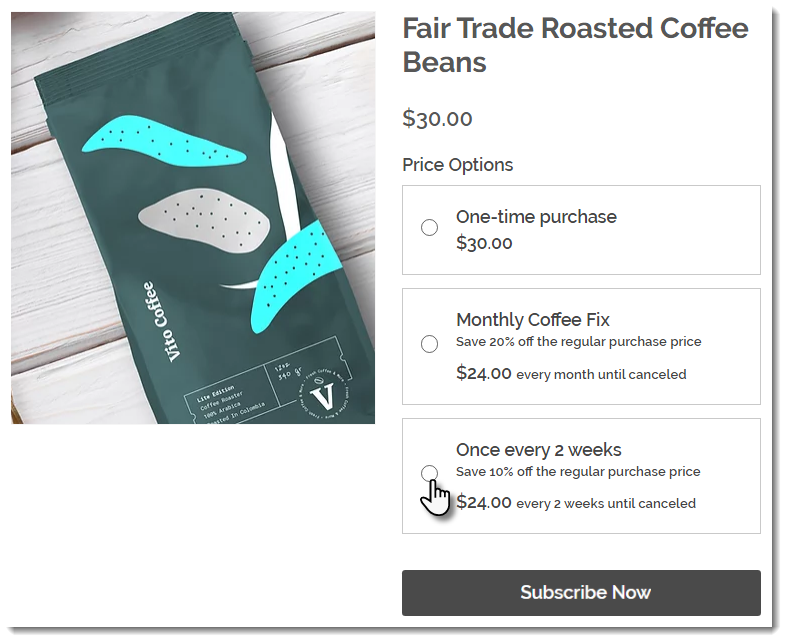
To create a product subscription:
- Click +Create a Subscription.
- Enter a subscription option name (appears on the Product Page).
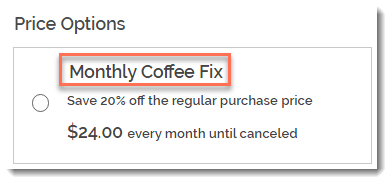
- (Optional) Enter a tagline.
Tip: The tagline appears on the Product Page.
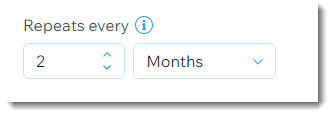
- Select how often a new order is created (e.g. once every 2 months):
- Use the up and down arrows to select a number.
- Select a time unit (day, month, or year).
- Click the Expires after drop-down and choose when the subscription ends:
- Preset option: Click to select one of the available options.
- Create a custom expiration time: Click Custom and enter the number of billing cycles before the subscription expires.
- (Optional) Offer a discount off the regular price:
- Select the discount type (price or percentage).
- Enter the discount amount.
Tip: Alternatively, you can enter the price in the Price field.
- Click Apply.
- (Optional) Click +New Subscription to create an additional subscription option (max. 6 subscription options).
- (Optional) Click and drag the subscription options (if there are more than one) to reorder them.
- Select how you offer this product:
- By subscription only: Clients can't make a one-time purchase.
- By subscription and for one-time purchase: Clients can choose between a one-time purchase or a subscription.
Step 10 | Save your changes
Click Save to save your changes. Your product is now displayed in your online store.
What's next?
- Learn how to hide any products you're not yet ready to display.
- Add the product you created to a category.
- Create a free promo video.
