

Wix Hotels by HotelRunner: Managing Your Site Languages
7 min
In this article
- Adding Wix Multilingual
- Setting up Wix Multilingual
- Manually editing translated site text
- Frequently asked questions (FAQs)
Offering your site in multiple languages helps you connect with global visitors, build trust, and increase bookings. Use Wix Multilingual to provide a seamless experience for every guest.
Important:
- This article refers to the latest version of Wix Hotels by HotelRunner. For the previous version, click here.
- Once you set your site’s main language, you can’t change it later. Vote for this feature here.
- Before translating, review our list of translatable content.
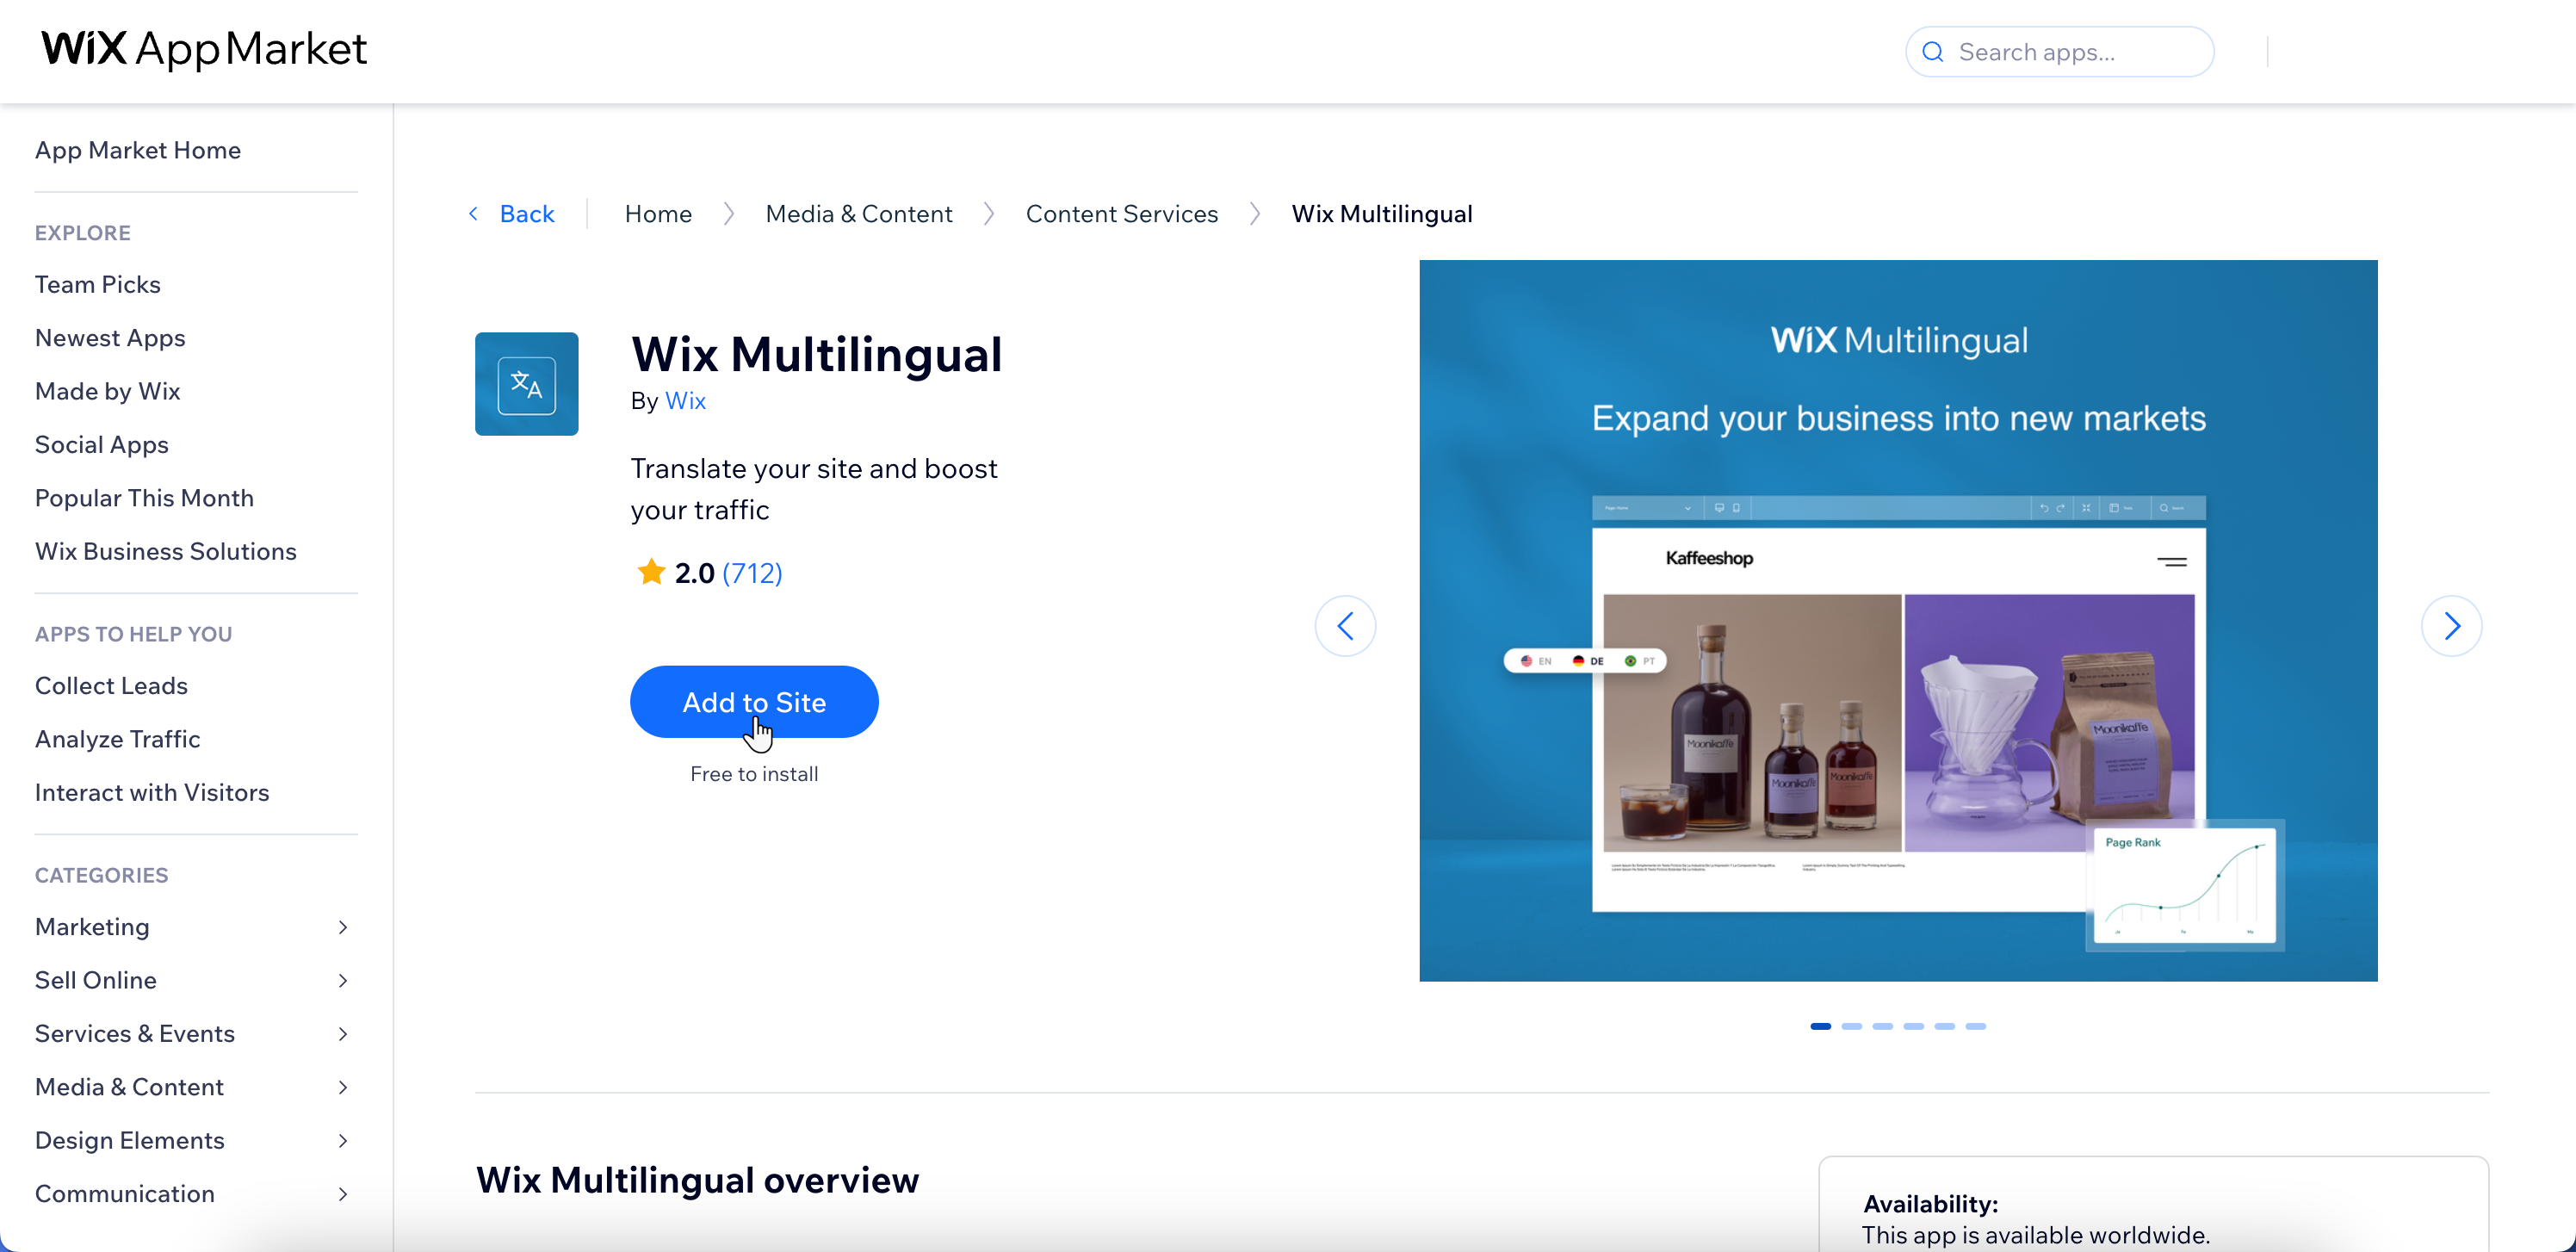
Adding Wix Multilingual
Add Wix Multilingual to set up your site in multiple languages.
Dashboard
Wix Editor
Studio Editor
- Go to the Wix App Market in your site's dashboard.
- Type 'Wix Multilingual' in the search box.
- Select Wix Multilingual.
- Click Add to Site.
Setting up Wix Multilingual
Define your site's main language and add additional ones. Choose to make the secondary language visible immediately or hide it until you complete the translation.
Dashboard
Wix Editor
Studio Editor
- Go to Multilingual in your site's dashboard.
- Click Start Now.
- Click Confirm Main Language to confirm, or change your site's main language.
Note: Your main language is the default language visitors see. You can’t change it later. - Select a flag to represent the language on your site.
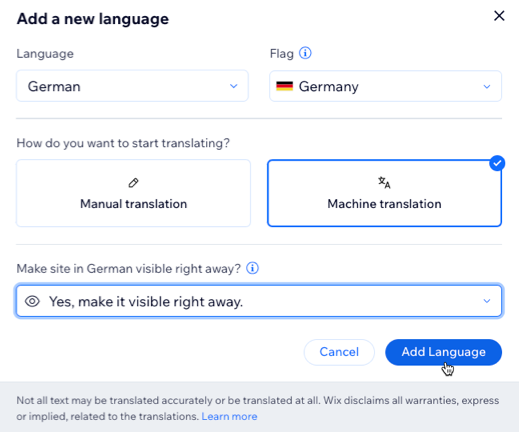
- Click + Add Language to add your secondary language:
- Choose the language you want to add.
Tip: You can always add more languages later. - Choose a flag to display on your site.
- Choose how to start translating your site's content:
- Manual translation: Enter your own translations using the translation manager.
- Machine translation: Your site's content is automatically translated. You can review and edit the translation before publishing.
Note: You get 5,000 word credits for free. To translate more content, click Get more word credits and choose a package.
- Choose whether to make the secondary language visible:
- Yes, make it visible right away: Visitors will see the language once it’s published.
- No, keep it hidden for now: Keep it hidden until it's ready.
- Click Add Language.
- Choose the language you want to add.
- Repeat step 5 to add more languages.
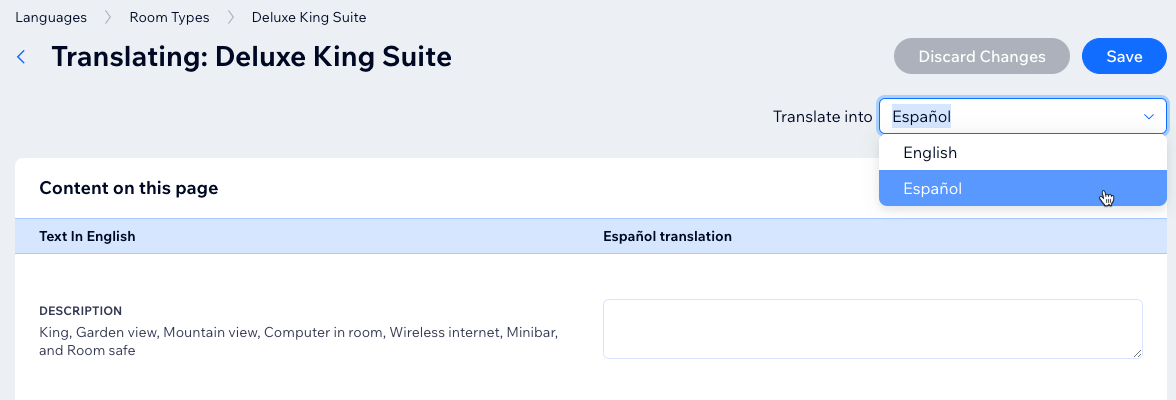
Manually editing translated site text
Translate key areas of your site, like room types and email templates, from the Languages tab under Property Settings. Accurate translations enhance the visitor experience and help increase bookings from different markets.
Important:
- Avoid editing or deleting placeholder code text, for example: {store_name} or %{count}. These codes ensure dynamic information like room names or booking numbers display correctly.
- Some elements, such as room titles or descriptions, may require manual translation.
To edit the site text in a language:
- Go to Languages in your site's Hotels dashboard.
- Scroll down to the Translate your content section.
- Click Translate next to a section (e.g. Room Types, Email Templates, Property Settings).
- Hover over an item and click Translate.
- Choose the language you want to edit from the Translate into drop-down at the top right.
- Edit the translation.
- Click Save.
Frequently asked questions (FAQs)
Click a question below to learn more.
How do I set up a 301 redirect for multilingual sites?
Can I add different dialects of the same language?
Can I show different currencies based on my site's languages?
Can I send emails in the visitor's language?
Can I adjust the SEO settings per language?
Can I invite other people to help translate my site's content?
Can I change the name of a room type?
